
In this article, we are going to discuss inventory management on Shopify and how to show in-stock quantity for the products with and without variants on any page. Besides that, we will explain how to hide out of stock variants and set up Shopify back in stock notifications.
Table of Contents:
How to show quantity in stock
How to show quantity in stock for products with variants
How to hide out of stock product variants
How to set up Shopify back in stock notification
Product inventory management helps online merchants to monitor the quantity of each product available at their webstore at the moment of time. It is specifically useful for companies selling various types of different products as it helps to avoid offering or selling more items than you actually have in stock. Another advantage is that tracking the inventory, an online store owner is always aware when more products should be ordered or manufactured.
The Shopify stock counter can be added to any page but the most common place is either a product or a collection page. To enable this feature, you need to edit your liquid theme code. Read on to get all the info you need.

Contact us and get a free audit of your Shopify store!
Improve your website with BelVG
Request free website health checkHow to show quantity in stock
To display information about the number of products available for sale, you need to follow these steps:
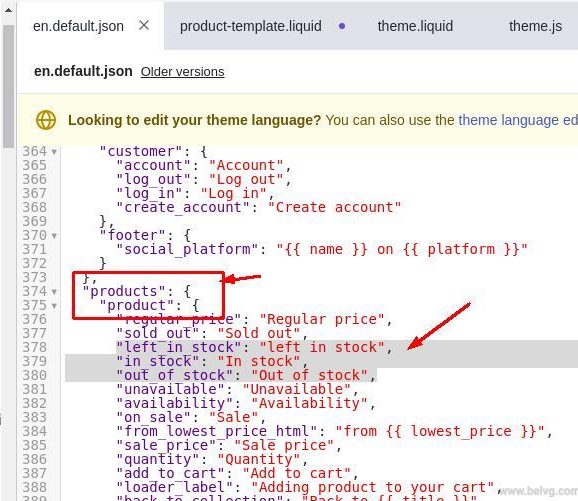
1. First, you need to add a translation for the new text content. It can be done in Locales > en.default.json. There, you should place the translation in the product object as you see on the screenshot below.
|
1 2 3 |
"left_in_stock": "left in stock", "in_stock": "In stock", "out_of_stock": "Out of stock", |
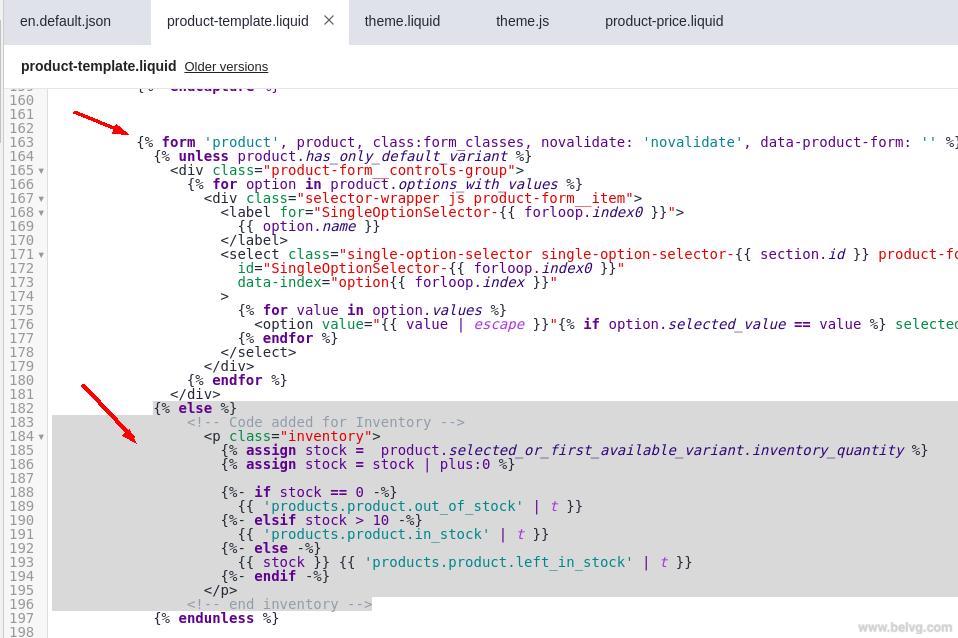
2. After that, you need to open Sections > product-template.liquid and add the condition of the {% else %} form in which we place the code that displays whether a product is available in stock or not. You can find an example screenshot below.
|
1 2 3 4 5 6 7 8 9 10 11 12 13 14 15 |
{% else %} <!-- Code added for Inventory --> <p class="inventory"> {% assign stock = product.selected_or_first_available_variant.inventory_quantity %} {% assign stock = stock | plus:0 %} {%- if stock == 0 -%} {{ 'products.product.out_of_stock' | t }} {%- elsif stock > 10 -%} {{ 'products.product.in_stock' | t }} {%- else -%} {{ stock }} {{ 'products.product.left_in_stock' | t }} {%- endif -%} </p> <!-- end inventory → |
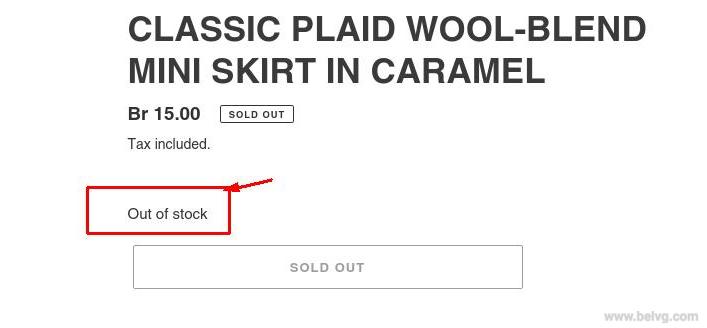
3. Depending on the product’s quantity, the user will see different information.
Here is what you get if the product has run out of stock:

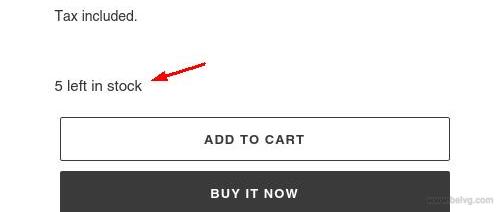
If the product quantity is from 1 to 10, the result will look like this:

If the product quantity is more than 10, on frontend it will show that it is available in stock without specifying the number of items left.

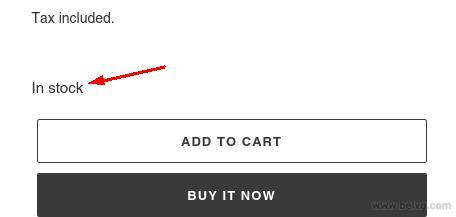
How to show quantity in stock for products with variants
Let’s say your products are available in different colors, sizes or materials. Then, you need to have a different stock counter for each product variant.
In case you have not added product variants yet, you can learn how to do it in another Shopify article on our blog.
You can expand the code to cover different variants, following these steps:
1. First, you need to proceed to Theme > theme.liquid and in the “theme” object specify the translation to use it in JS as you see here:
|
1 2 3 |
leftInStock: {{ 'products.product.left_in_stock' | t | json }}, inStock: {{ 'products.product.in_stock' | t | json }}, outOfStock: {{ 'products.product.out_of_stock' | t | json }}, |
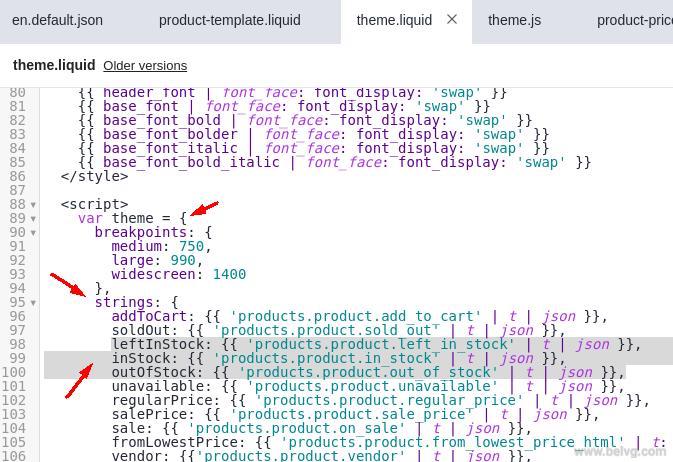
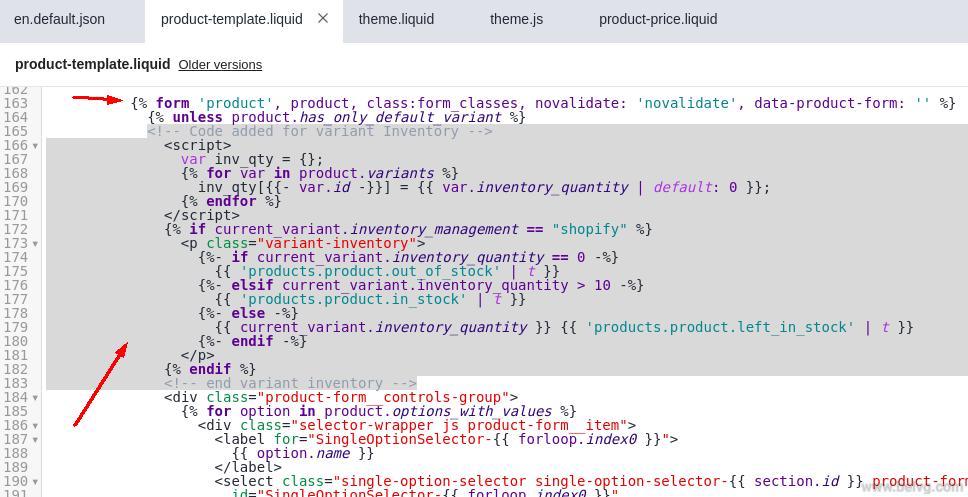
2. Then, you need to open Sections > product-template.liquid and add a condition to show the availability of a product variant:
|
1 2 3 4 5 6 7 8 9 10 11 12 13 14 15 16 17 18 19 |
<!-- Code added for variant Inventory --> <script> var inv_qty = {}; {% for var in product.variants %} inv_qty[{{- var.id -}}] = {{ var.inventory_quantity | default: 0 }}; {% endfor %} </script> {% if current_variant.inventory_management == "shopify" %} <p class="variant-inventory"> {%- if current_variant.inventory_quantity == 0 -%} {{ 'products.product.out_of_stock' | t }} {%- elsif current_variant.inventory_quantity > 10 -%} {{ 'products.product.in_stock' | t }} {%- else -%} {{ current_variant.inventory_quantity }} {{ 'products.product.left_in_stock' | t }} {%- endif -%} </p> {% endif %} <!-- end variant inventory --> |
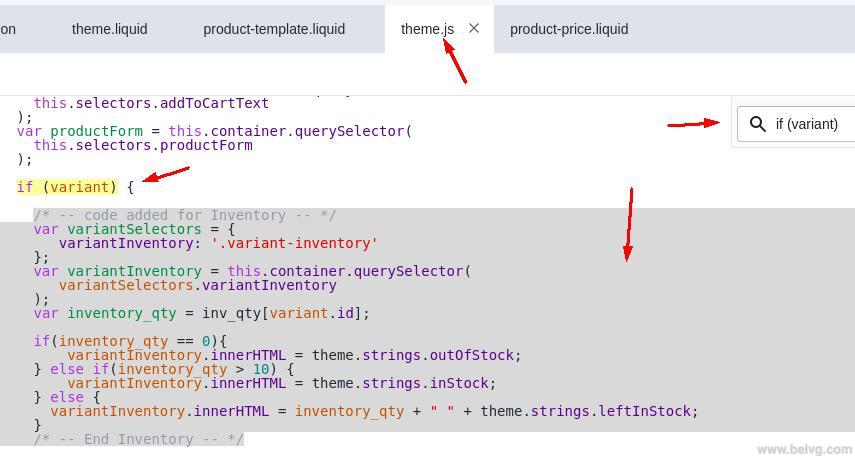
3. The next step is to go to Assets > theme.js and use the “CTRL + F” hotkeys search to find “if(variant)”. You need to place the following code there as you see on the screenshot below. It is responsible for changing displayed information about the product availability when switching variants:
|
1 2 3 4 5 6 7 8 9 10 11 12 13 14 15 16 17 18 |
/* -- code added for Inventory -- */ var variantSelectors = { variantInventory: '.variant-inventory' }; var variantInventory = this.container.querySelector( variantSelectors.variantInventory ); var inventory_qty = inv_qty[variant.id]; if(inventory_qty == 0){ variantInventory.innerHTML = theme.strings.outOfStock; } else if(inventory_qty > 10) { variantInventory.innerHTML = theme.strings.inStock; } else { variantInventory.innerHTML = inventory_qty + " " + theme.strings.leftInStock; } /* -- End Inventory -- */ |
4. To test whether the function works properly, you can set a different quantity for each product variant:
![]()
After that, you need to check the frontend:
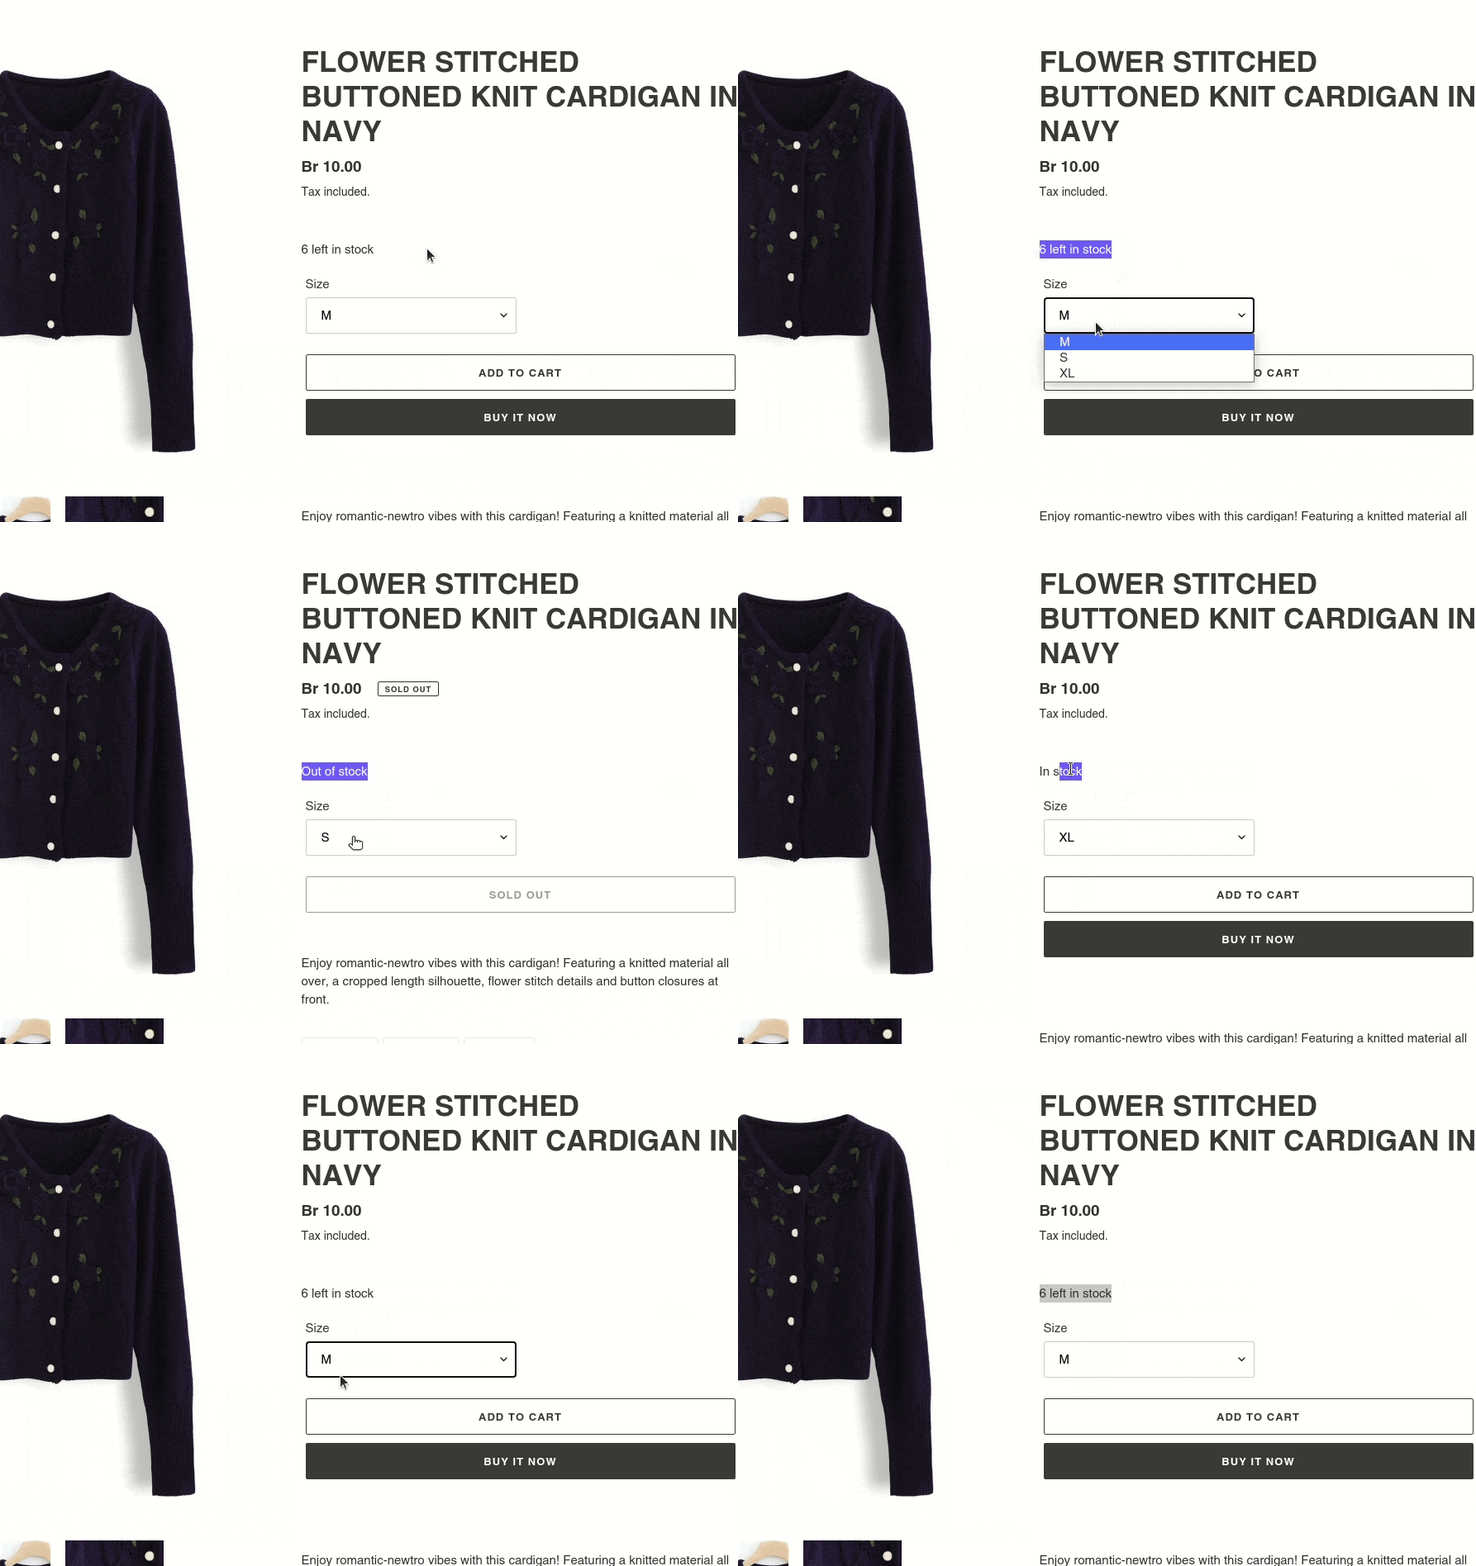
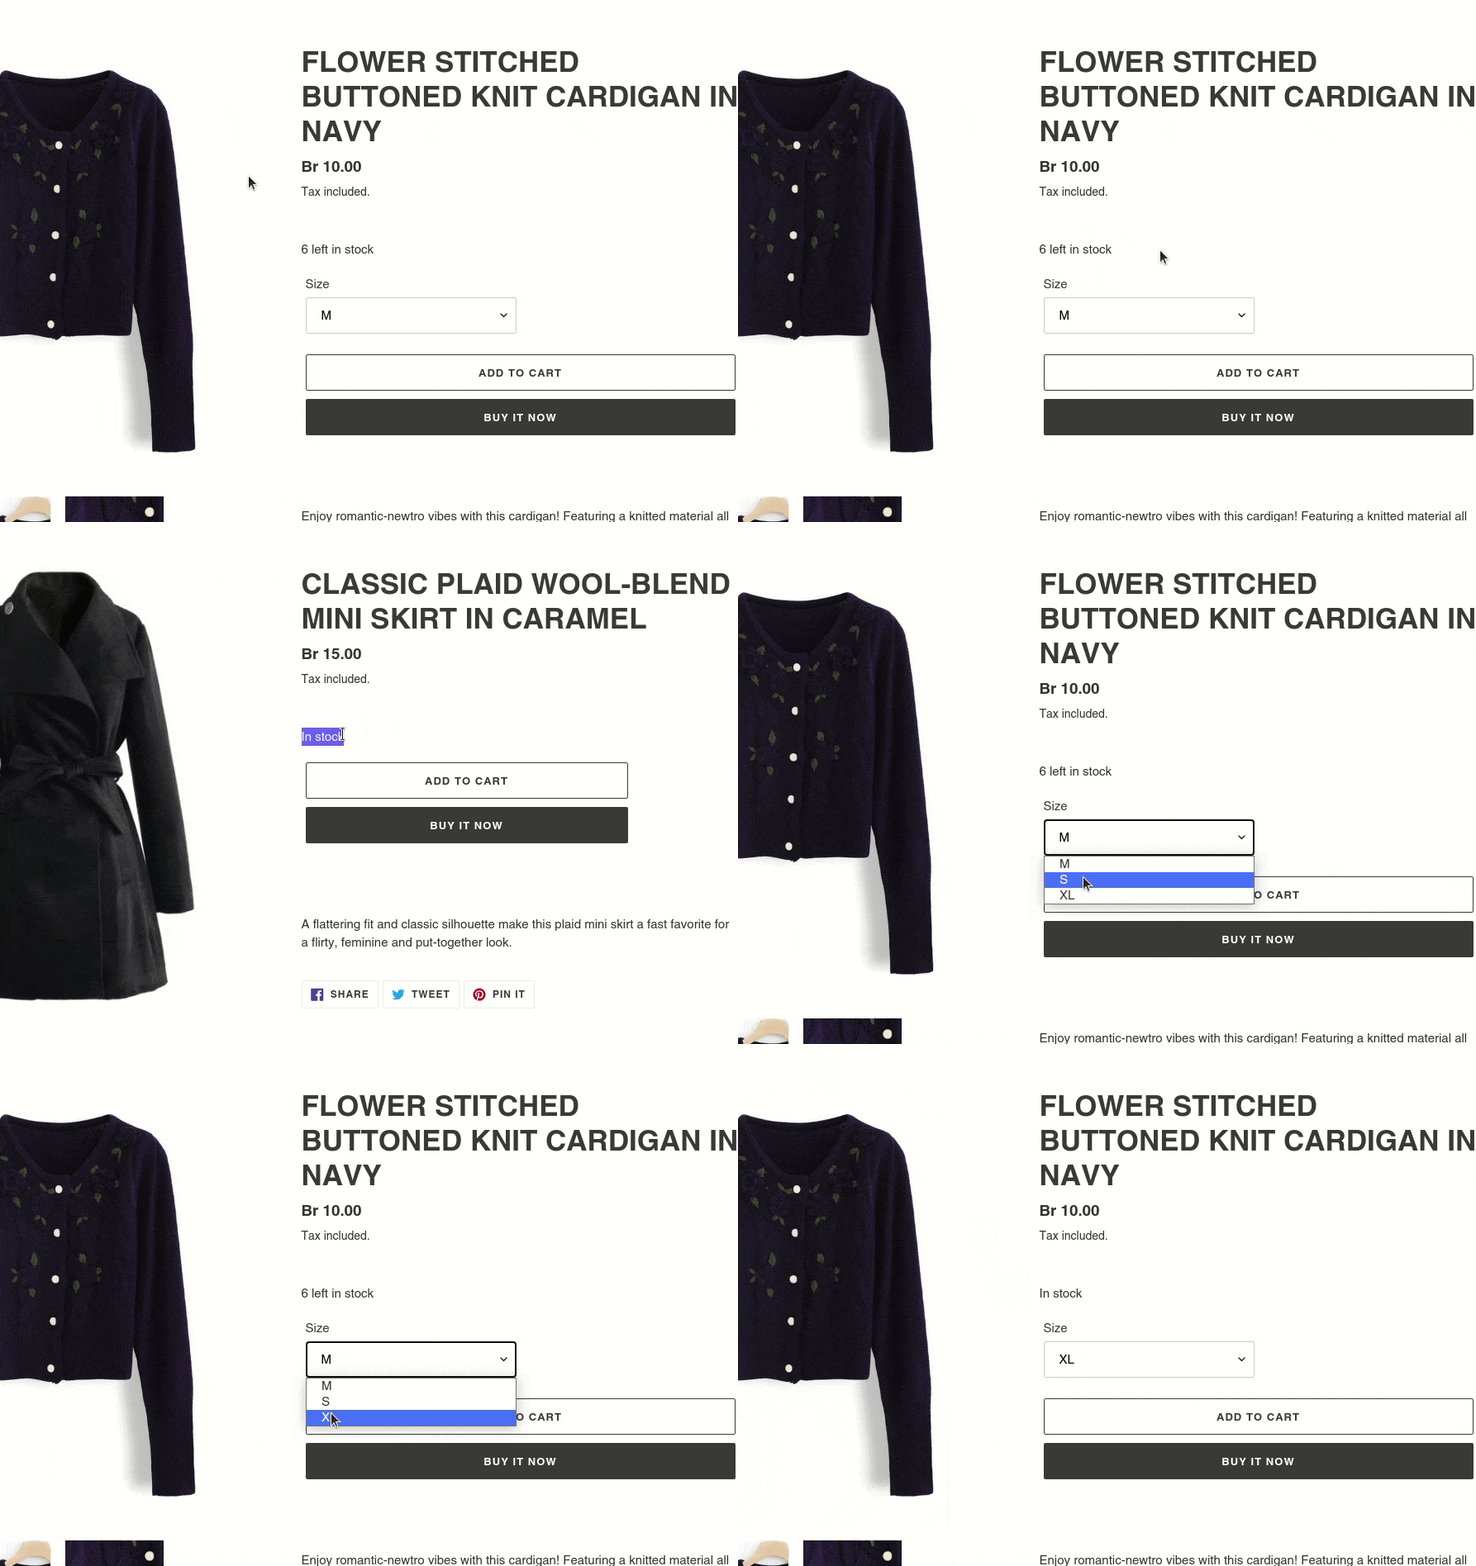
After all the above steps have been performed, we can check the whole code and how displaying product availability works for products with and without variants.

Need a custom Shopify theme?
Our designers and developers are looking forward to your project!
Contact usHow to hide out of stock product variants
Let’s discuss what you need to do in case you want to hide the out of stock product variants on pages. First, you need to follow this link and choose a required piece of code depending on the theme you are using. In this article, we’ve chosen the Debut theme as an example so we use the following code:
|
1 2 3 4 5 6 7 8 9 10 11 12 13 14 15 16 17 18 19 20 21 22 23 24 25 26 27 28 29 30 31 32 33 34 |
document.addEventListener('DOMContentLoaded', () => { const productJson = [...document.querySelectorAll('[id^=ProductJson-')]; if (productJson.length > 0) { productJson.forEach((product) => { const sectionId = product.id.replace("ProductJson-", "shopify-section-"); const productVariants = JSON.parse(product.innerHTML); const unavailableVariants = []; productVariants.variants.forEach((variant) => { if (variant.available === false) { unavailableVariants.push(variant); } }); const variantOptions = [...document.querySelectorAll('#' + sectionId + ' .single-option-selector option')] const observer = new MutationObserver((mutation) => { unavailableVariants.forEach((item) => { variantOptions.forEach((option) => { if (option.value === item.title) option.remove(); }); }); observer.disconnect(); }); if (unavailableVariants.length > 0 && productVariants.options.length === 1) { const addToCartForm = document.querySelector('form[ action="/cart/add"]'); if (window.MutationObserver && addToCartForm.length) { if (typeof observer === 'object' && typeof observer.disconnect === 'function') { observer.disconnect(); } const config = { childList: true, subtree: true }; observer.observe(addToCartForm, config); } } }); } }); |
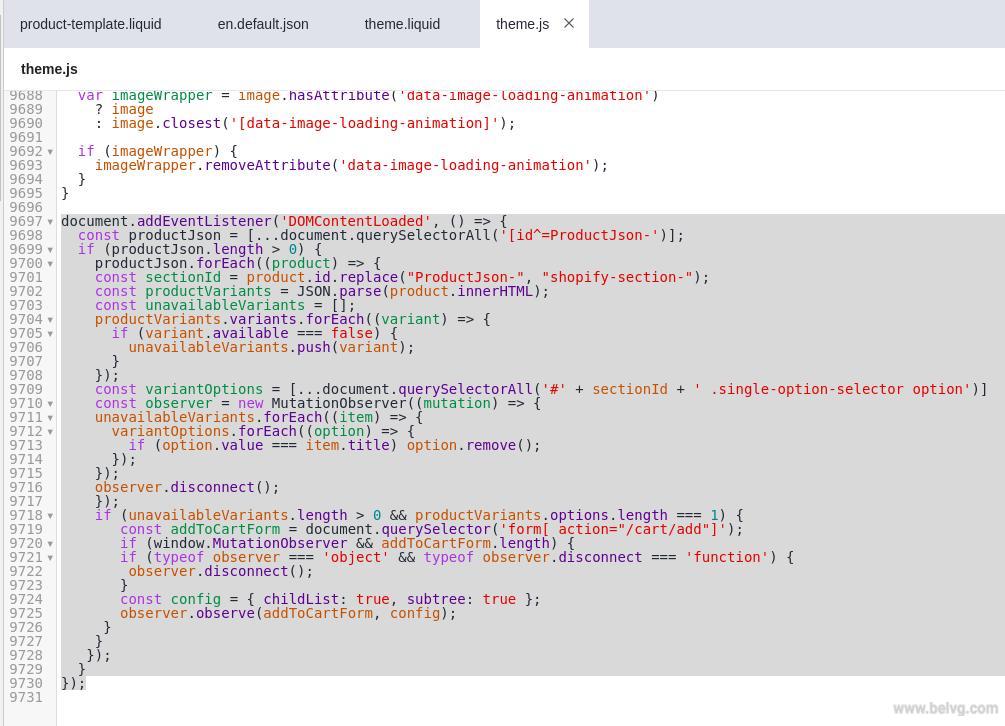
The correct piece of code should pasted at the end of theme.js as you see on the following screenshot:
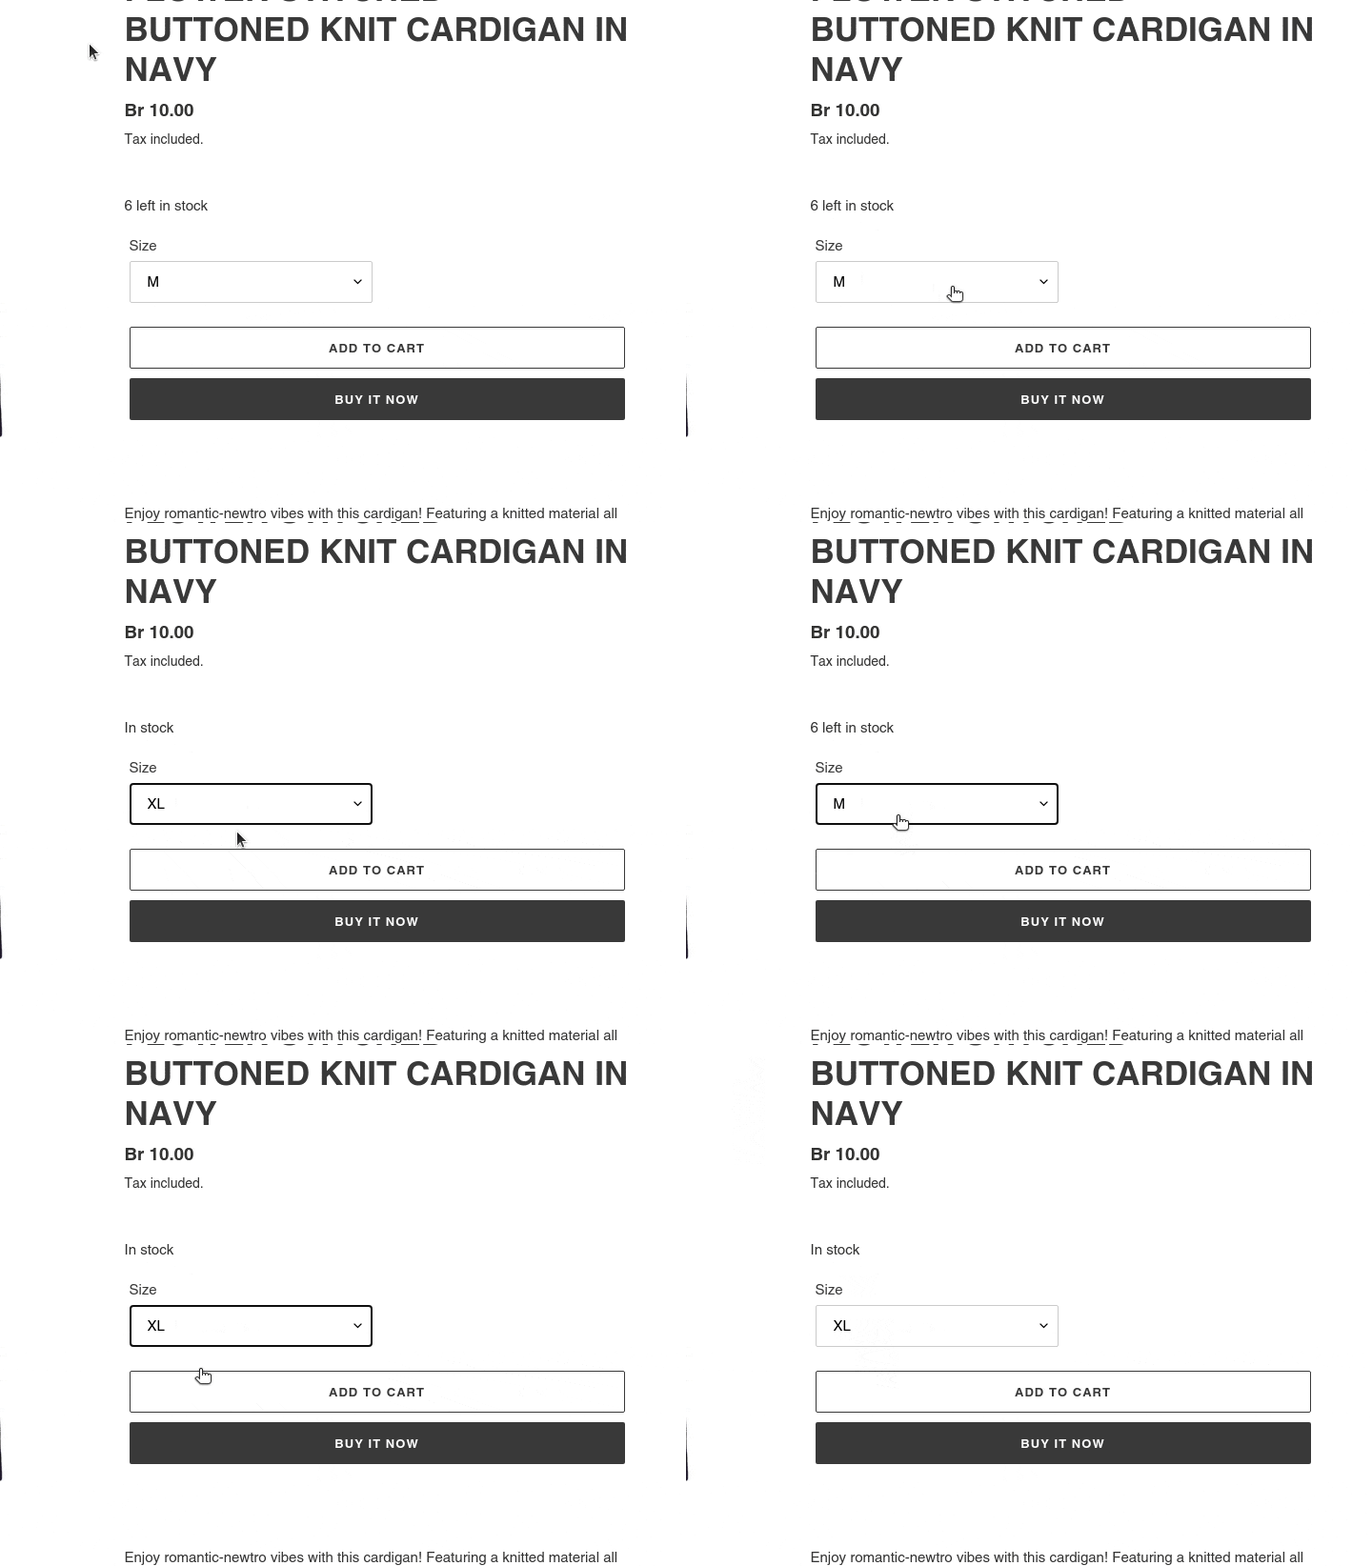
After you have added the code, you can test whether hiding sold-out product variants works correctly.
How to set up Shopify back in stock notification
If you want to give your customers an opportunity to wait for the desired product and get notified once it is available, you need to create a form that will notify you as a store owner that a certain customer is interested in a certain product.
1. For convenience, let’s create a form snippet. You need to go to Sections > product-template.liquid and insert the following line after the form:
|
1 |
{% include 'back-in-stock-notification' %} |
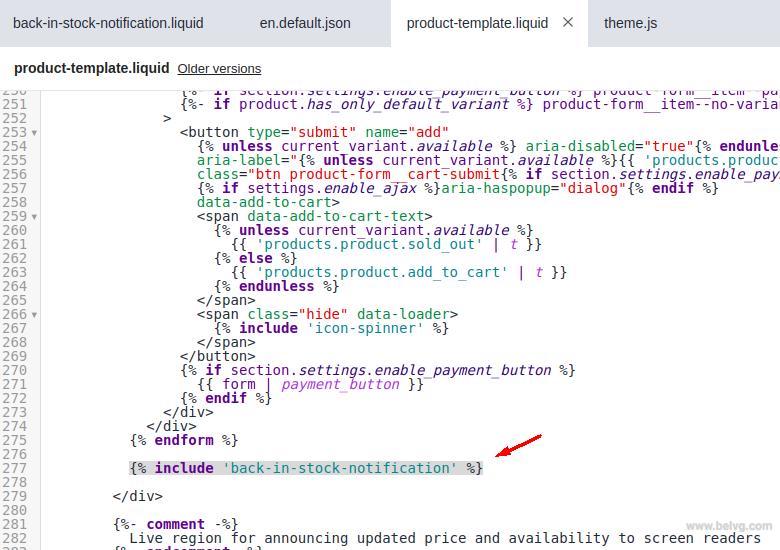
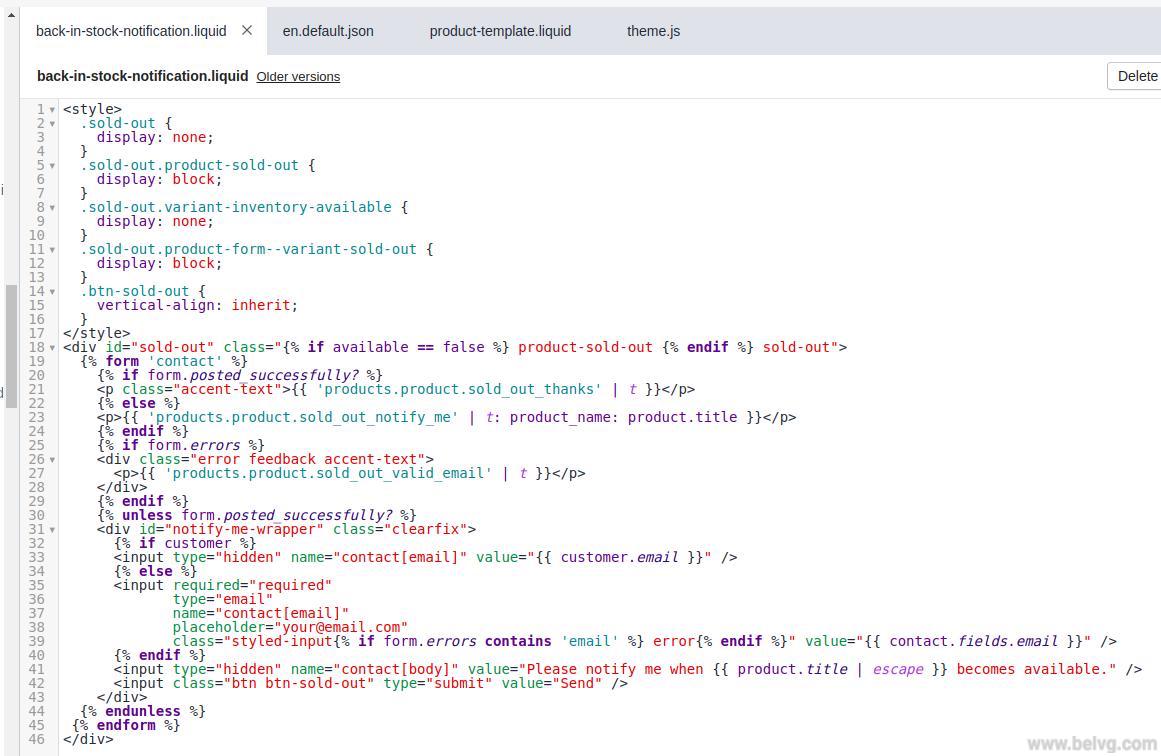
2.Then, you should open the Snippets folder and add a new back-in-stock-notification.liquid snippet. You need to copy and paste there a piece of code that you can see below. There are styles that are responsible for hiding and showing the form.
|
1 2 3 4 5 6 7 8 9 10 11 12 13 14 15 16 17 18 19 20 21 22 23 24 25 26 27 28 29 30 31 32 33 34 35 36 37 38 39 40 41 42 43 44 45 46 |
<style> .sold-out { display: none; } .sold-out.product-sold-out { display: block; } .sold-out.variant-inventory-available { display: none; } .sold-out.product-form--variant-sold-out { display: block; } .btn-sold-out { vertical-align: inherit; } </style> <div id="sold-out" class="{% if available == false %} product-sold-out {% endif %} sold-out"> {% form 'contact' %} {% if form.posted_successfully? %} <p class="accent-text">{{ 'products.product.sold_out_thanks' | t }}</p> {% else %} <p>{{ 'products.product.sold_out_notify_me' | t: product_name: product.title }}</p> {% endif %} {% if form.errors %} <div class="error feedback accent-text"> <p>{{ 'products.product.sold_out_valid_email' | t }}</p> </div> {% endif %} {% unless form.posted_successfully? %} <div id="notify-me-wrapper" class="clearfix"> {% if customer %} <input type="hidden" name="contact[email]" value="{{ customer.email }}" /> {% else %} <input required="required" type="email" name="contact[email]" class="styled-input{% if form.errors contains 'email' %} error{% endif %}" value="{{ contact.fields.email }}" /> {% endif %} <input type="hidden" name="contact[body]" value="Please notify me when {{ product.title | escape }} becomes available." /> <input class="btn btn-sold-out" type="submit" value="Send" /> </div> {% endunless %} {% endform %} </div> |
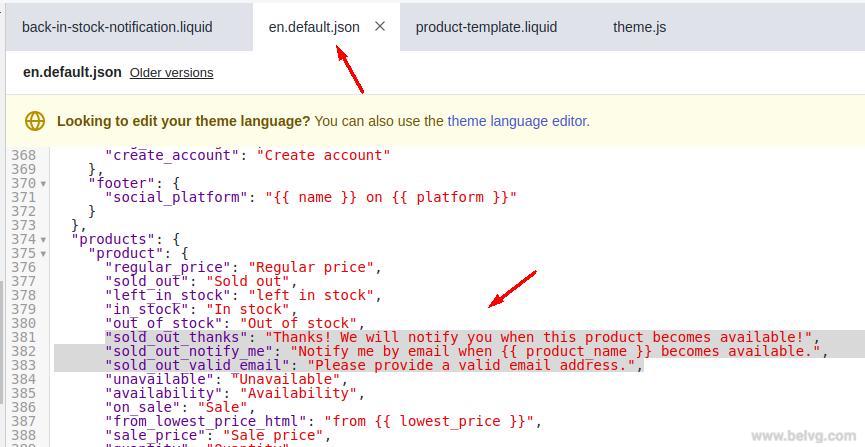
3. Then you need to add the text content that will appear on the page when a customer interacts with the form. In order to do it, you should open Locales > en.default.json and add the translation in the product object:
|
1 2 3 |
"sold_out_thanks": "Thanks! We will notify you when this product becomes available!", "sold_out_notify_me": "Notify me by email when {{ product_name }} becomes available.", "sold_out_valid_email": "Please provide a valid email address.", |
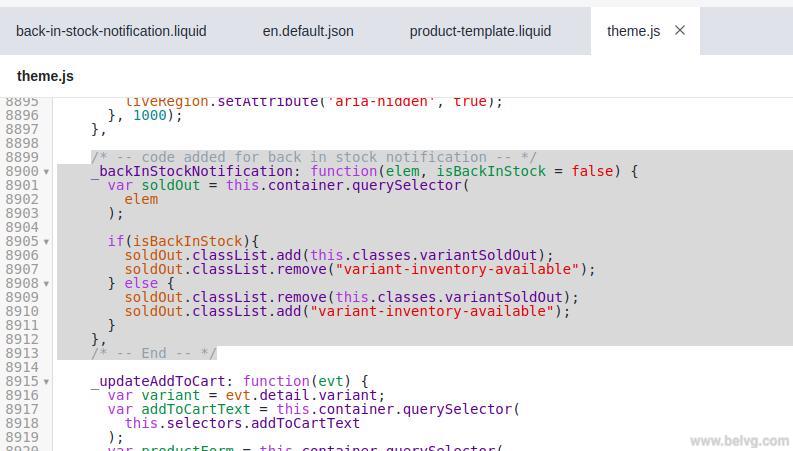
4. After that, you need to proceed to Assets > theme.js and create a new “_backInStockNotification” method above the “_updateAddToCart” method:
|
1 2 3 4 5 6 7 8 9 10 11 12 13 14 15 |
/* -- code added for back in stock notification -- */ _backInStockNotification: function(elem, isBackInStock = false) { var soldOut = this.container.querySelector( elem ); if(isBackInStock){ soldOut.classList.add(this.classes.variantSoldOut); soldOut.classList.remove("variant-inventory-available"); } else { soldOut.classList.remove(this.classes.variantSoldOut); soldOut.classList.add("variant-inventory-available"); } }, /* -- End -- */ |
5. Then, you set up calling the new method when displaying product variants:
|
1 2 3 4 5 6 7 8 9 10 |
if(inventory_qty == 0){ variantInventory.innerHTML = theme.strings.outOfStock; this._backInStockNotification("#sold-out", true); } else if(inventory_qty > 10) { variantInventory.innerHTML = theme.strings.inStock; this._backInStockNotification("#sold-out"); } else { variantInventory.innerHTML = inventory_qty + " " + theme.strings.leftInStock; this._backInStockNotification("#sold-out"); } |
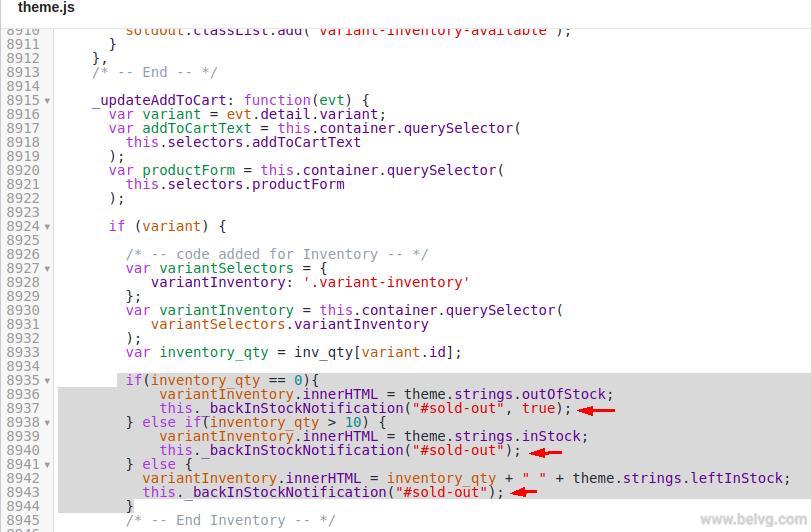
6. Time to check how the notification form is displayed on frontend.
Here is what you get for a product without variants:
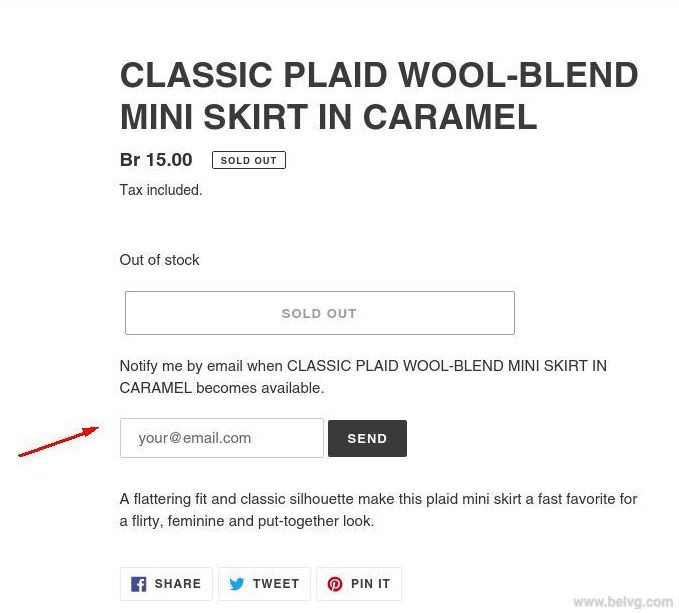
The result for a product that has variants should look like this:
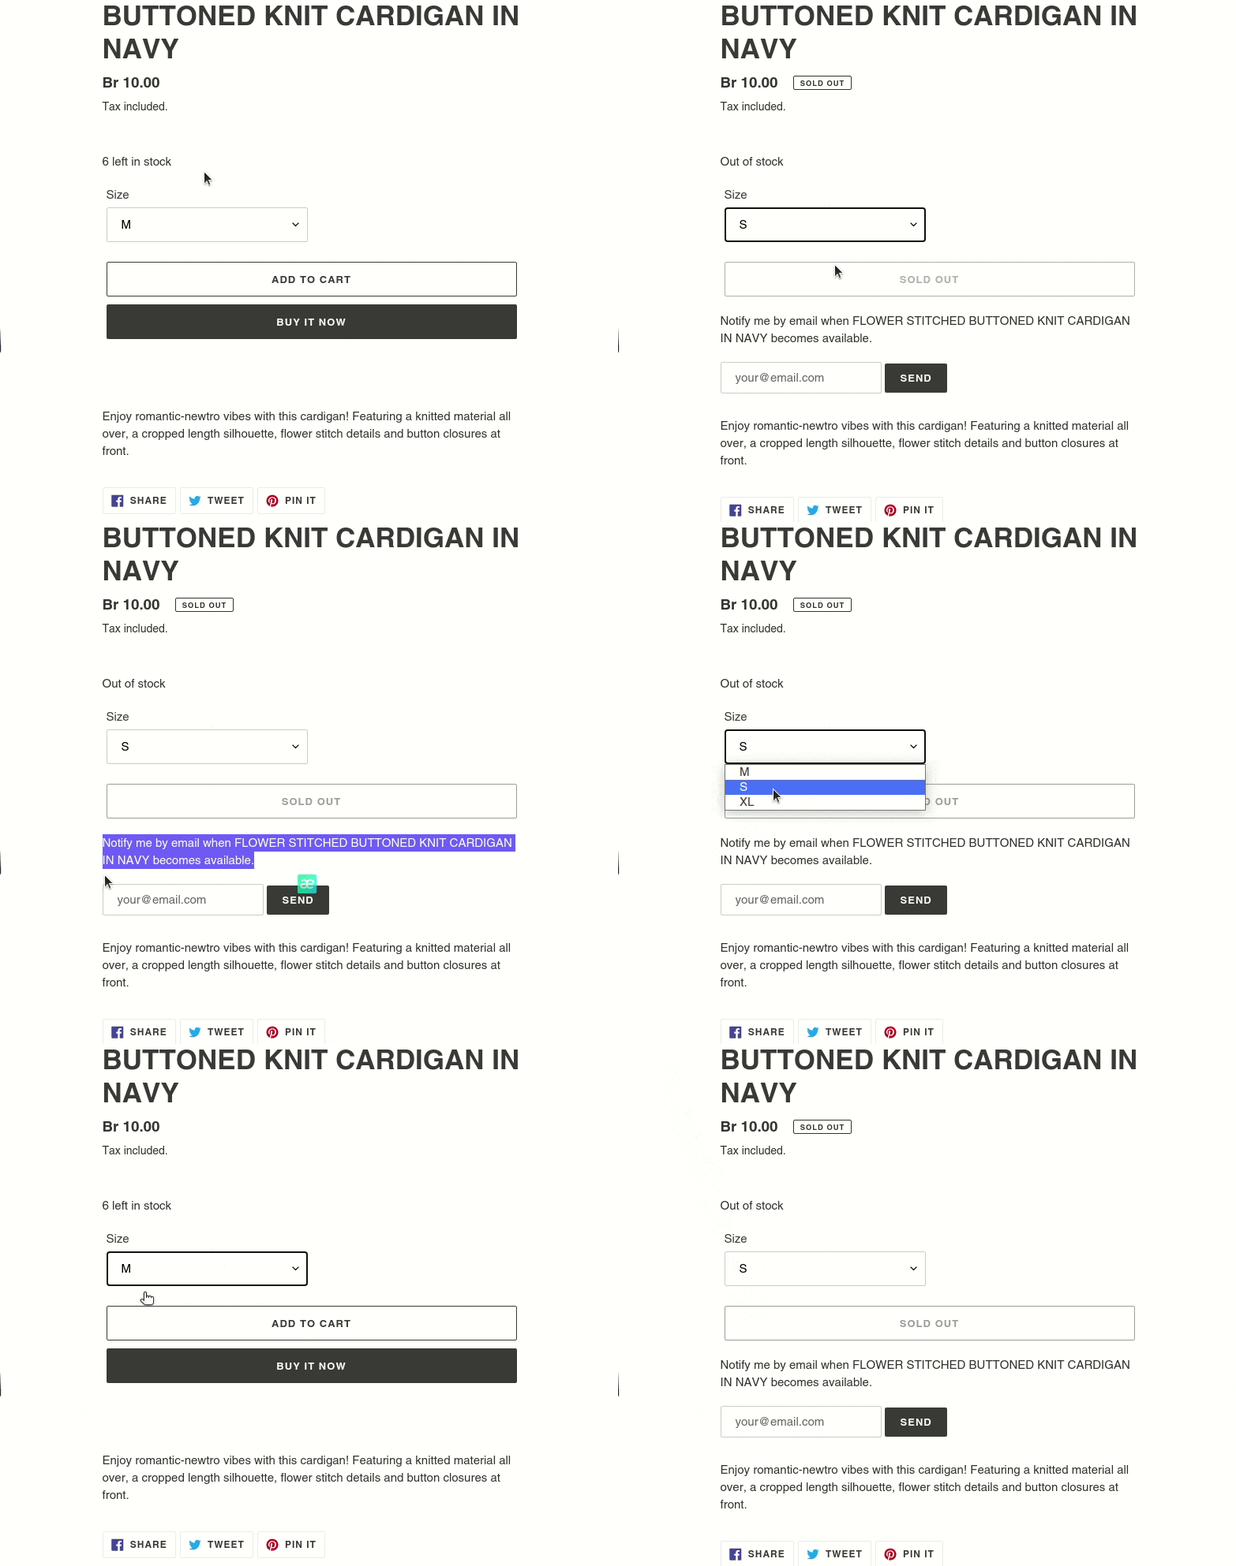
And finally an email with the correct content should be sent to the email you put in the form:
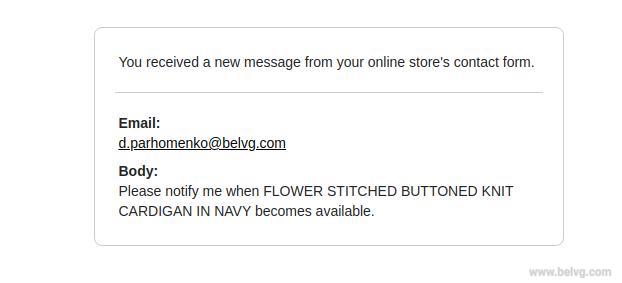
Another way to set up customer notifications is by using one of the Shopify apps. For example, you could use this app: Back In Stock ‑ Restock Alerts. The advantage of using the app over the form that we described above is that it automatically notifies customers when a product is back in stock.
Want to learn more about Shopify development? Check other articles of this author:
- How to Add Shopify Size Chart
- How to Remove “Powered by Shopify” & Edit Shopify Footer
- How to Set Up Shopify Product Customizer
Good sales to you!


Thanks for such a great article here.
Thank you for such a detailed example!
Your solution seems like what I need.