
Want to make sure your customers can find any information they need? Footer is one of the most significant components as it serves for webstore navigation, contact information, valuable resources such as social links. Here, you will learn how to remove “Powered by Shopify” sign and edit it to meet any user’s needs. Footer can have a higher impact on users than any other part of a page. Let’s get started!
How to add logo to Shopify footer
How to change Shopify footer menu
How to Set up Shopify Newsletter
How to change Shopify payment icons
How to remove “Powered by Shopify”
How to add social media to Shopify
In the default theme, Shopify footer looks like this:
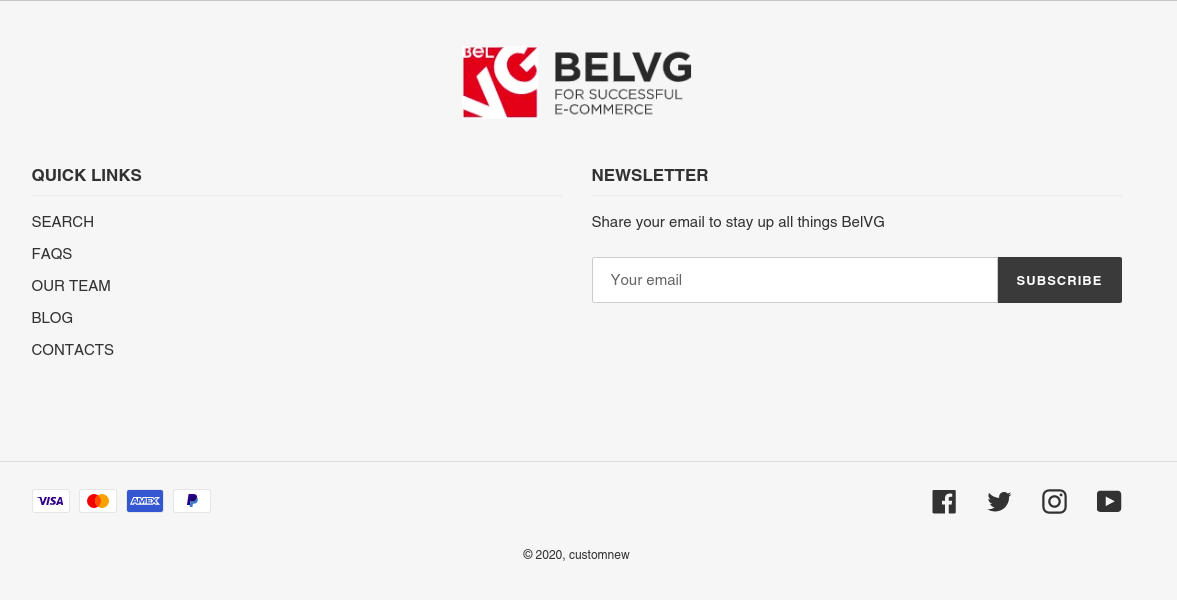
After editing, it will look like this:
It’s important to note that any time you make changes in the files theme and visual editor, don’t forget to save the changes!
How to add logo to Shopify footer
Make a condition using liquid in the markup to display the logo image if it is attached or show the store name.
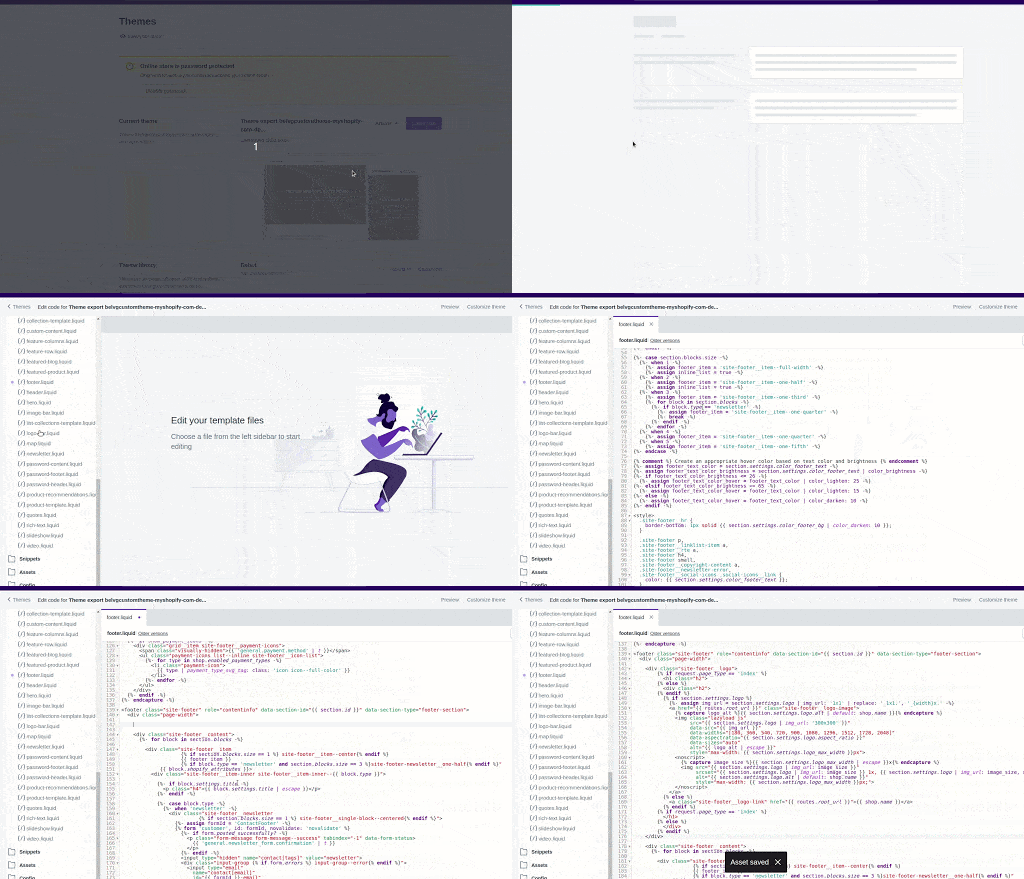
Go to edit a theme code and find the footer.liquid file in the Sections folder.
Line 140 must contain the following code <div class="page-width"> . Place the code after the line 140:
|
1 2 3 4 5 6 7 8 9 10 11 12 13 14 15 16 17 18 19 20 21 22 23 24 25 26 27 28 29 30 31 32 33 34 35 |
<div class="site-footer__logo"> {% if request.page_type == 'index' %} <h1 class="h2"> {% else %} <div class="h2"> {% endif %} {% if section.settings.logo %} {%- assign img_url = section.settings.logo | img_url: '1x1' | replace: '_1x1.', '_{width}x.' -%} <a href="{{ routes.root_url }}" class="site-footer__logo-image"> {% capture logo_alt %}{{ section.settings.logo.alt | default: shop.name }}{% endcapture %} <img class="lazyload js" src="{{ section.settings.logo | img_url: '300x300' }}" data-src="{{ img_url }}" data-widths="[180, 360, 540, 720, 900, 1080, 1296, 1512, 1728, 2048]" data-aspectratio="{{ section.settings.logo.aspect_ratio }}" data-sizes="auto" alt="{{ logo_alt | escape }}" style="max-width: {{ section.settings.logo_max_width }}px"> <noscript> {% capture image_size %}{{ section.settings.logo_max_width | escape }}x{% endcapture %} <img src="{{ section.settings.logo | img_url: image_size }}" srcset="{{ section.settings.logo | img_url: image_size }} 1x, {{ section.settings.logo | img_url: image_size, scale: 2 }} 2x" alt="{{ section.settings.logo.alt | default: shop.name }}" style="max-width: {{ section.settings.logo_max_width }}px;"> </noscript> </a> {% else %} <a class="site-footer__logo-link" href="{{ routes.root_url }}">{{ shop.name }}</a> {% endif %} {% if request.page_type == 'index' %} </h1> {% else %} </div> {% endif %} </div> |
Now, let’s add a logo image via the admin panel in the footer section, and resize it using a range type.
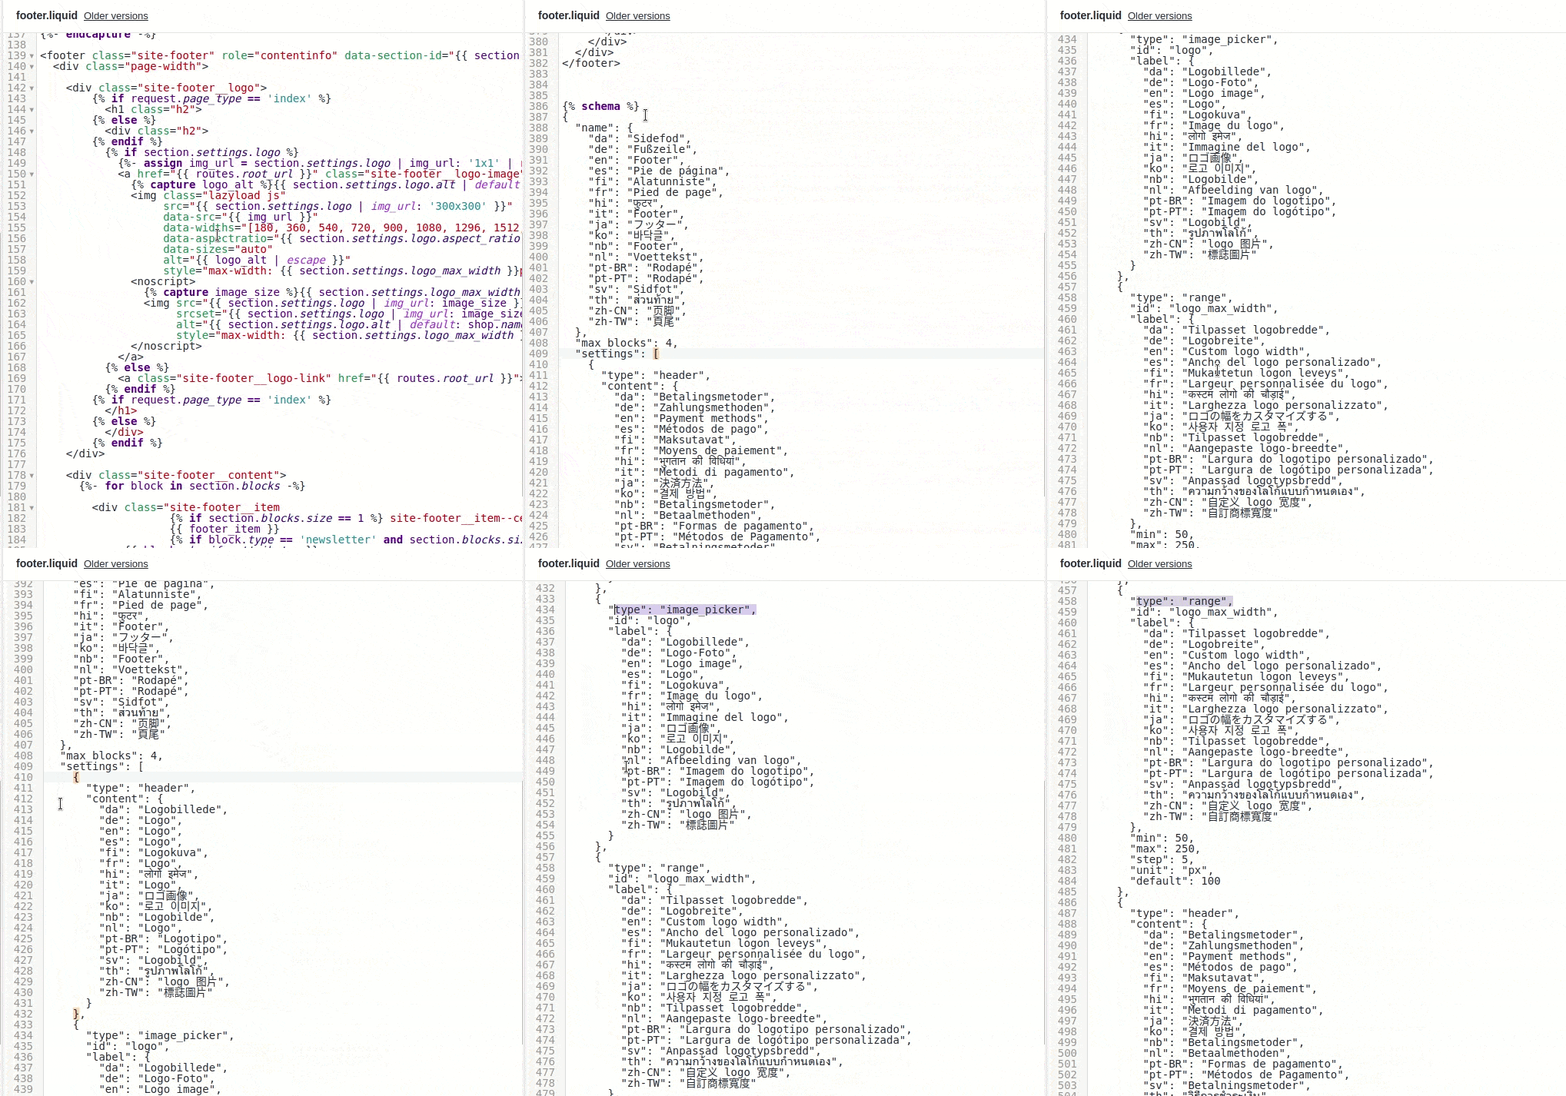
To do this, find the {% schema %}{% endschema %} block and the beginning of the array settings JSON object at the bottom of the page, and place the following code:
As it is a JSON object, keep an eye on the closing and opening brackets, commas, and quotation marks.
|
1 2 3 4 5 6 7 8 9 10 11 12 13 14 15 16 17 18 19 20 21 22 23 24 25 26 27 28 29 30 31 32 33 34 35 36 37 38 39 40 41 42 43 44 45 46 47 48 49 50 51 52 53 54 55 56 57 58 59 60 61 62 63 64 65 66 67 68 69 70 71 72 73 74 75 76 |
{ "type": "header", "content": { "da": "Logobillede", "de": "Logo", "en": "Logo", "es": "Logo", "fi": "Logokuva", "fr": "Logo", "hi": "लोगो इमेज", "it": "Logo", "ja": "ロゴ画像", "ko": "로고 이미지", "nb": "Logobilde", "nl": "Logo", "pt-BR": "Logotipo", "pt-PT": "Logótipo", "sv": "Logobild", "th": "รูปภาพโลโก้", "zh-CN": "logo 图片", "zh-TW": "標誌圖片" } }, { "type": "image_picker", "id": "logo", "label": { "da": "Logobillede", "de": "Logo-Foto", "en": "Logo image", "es": "Logo", "fi": "Logokuva", "fr": "Image du logo", "hi": "लोगो इमेज", "it": "Immagine del logo", "ja": "ロゴ画像", "ko": "로고 이미지", "nb": "Logobilde", "nl": "Afbeelding van logo", "pt-BR": "Imagem do logotipo", "pt-PT": "Imagem do logótipo", "sv": "Logobild", "th": "รูปภาพโลโก้", "zh-CN": "logo 图片", "zh-TW": "標誌圖片" } }, { "type": "range", "id": "logo_max_width", "label": { "da": "Tilpasset logobredde", "de": "Logobreite", "en": "Custom logo width", "es": "Ancho del logo personalizado", "fi": "Mukautetun logon leveys", "fr": "Largeur personnalisée du logo", "hi": "कस्टम लोगो की चौड़ाई", "it": "Larghezza logo personalizzato", "ja": "ロゴの幅をカスタマイズする", "ko": "사용자 지정 로고 폭", "nb": "Tilpasset logobredde", "nl": "Aangepaste logo-breedte", "pt-BR": "Largura do logotipo personalizado", "pt-PT": "Largura de logótipo personalizada", "sv": "Anpassad logotypsbredd", "th": "ความกว้างของโลโก้แบบกำหนดเอง", "zh-CN": "自定义 logo 宽度", "zh-TW": "自訂商標寬度" }, "min": 50, "max": 250, "step": 5, "unit": "px", "default": 100 }, |
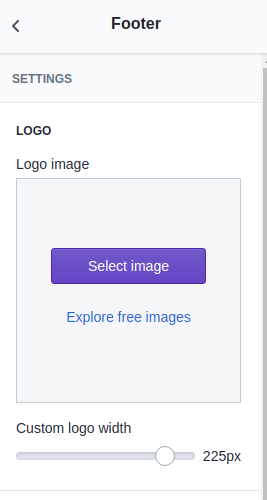
After that, the following settings will be displayed in the footer section of the admin panel:
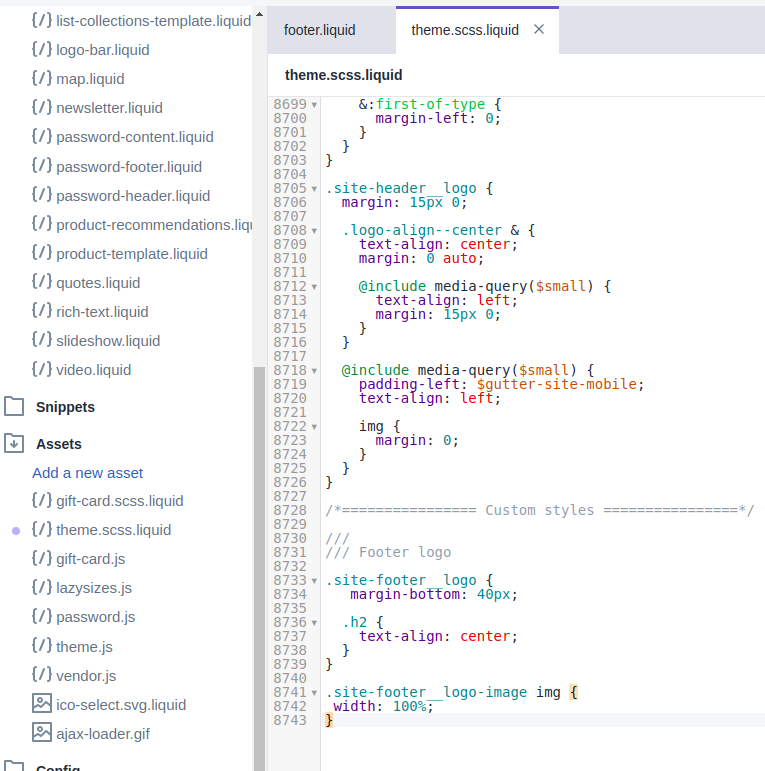
Open the theme.scss.liquid file in the Assets folder and add custom styles at the bottom of the file:
Place the following styles:
|
1 2 3 4 5 6 7 8 9 10 11 12 13 14 15 16 |
/*================ Custom styles ================*/ /// /// Footer logo .site-footer__logo { margin-bottom: 40px; .h2 { text-align: center; } } .site-footer__logo-image img { width: 100%; } |
How to change Shopify footer menu
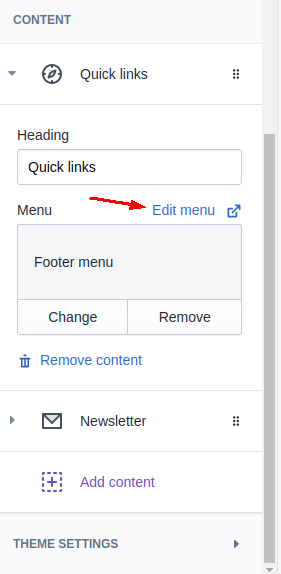
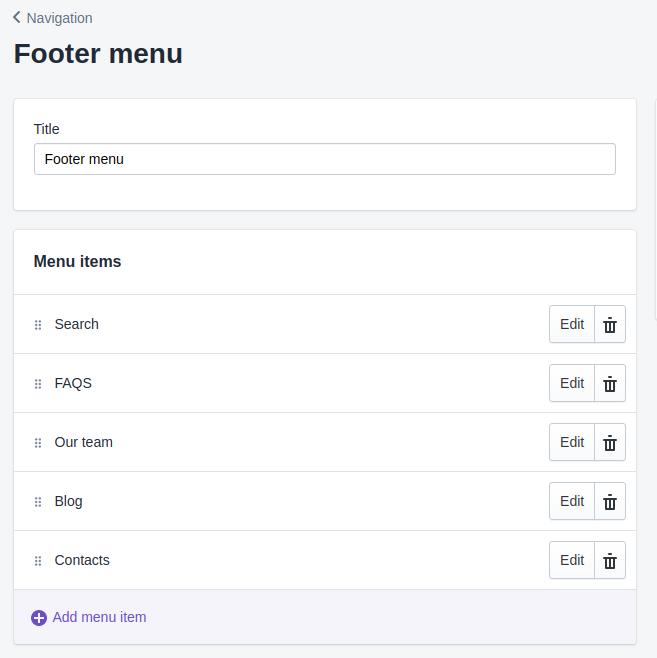
To edit Shopify menu, open Quick links. There you can change the menu’s name and its links.
Click on Add new menu items, and fill out the name and link for it.
Add styles for the menu:
|
1 2 3 4 5 6 7 8 9 10 11 12 13 14 15 16 17 18 19 20 21 22 23 |
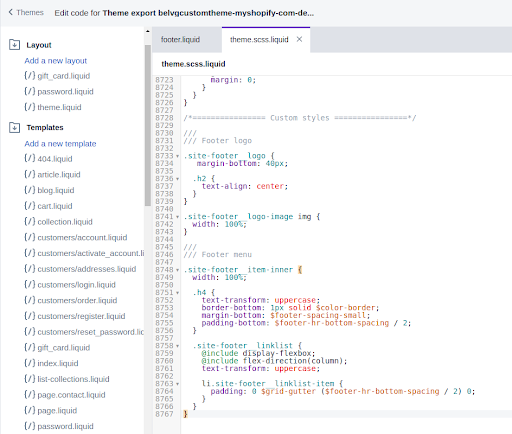
/// /// Footer menu .site-footer__item-inner { width: 100%; .h4 { text-transform: uppercase; border-bottom: 1px solid $color-border; margin-bottom: $footer-spacing-small; padding-bottom: $footer-hr-bottom-spacing / 2; } .site-footer__linklist { @include display-flexbox; @include flex-direction(column); text-transform: uppercase; li.site-footer__linklist-item { padding: 0 $grid-gutter ($footer-hr-bottom-spacing / 2) 0; } } } |
Now, custom styles look as follows:
How to Set up Shopify Newsletter
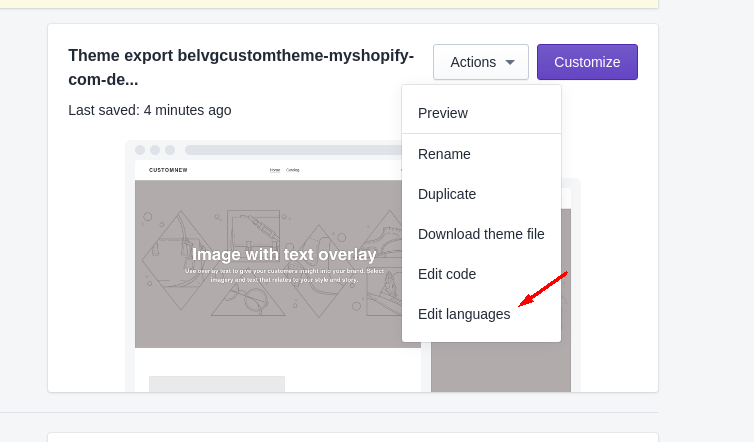
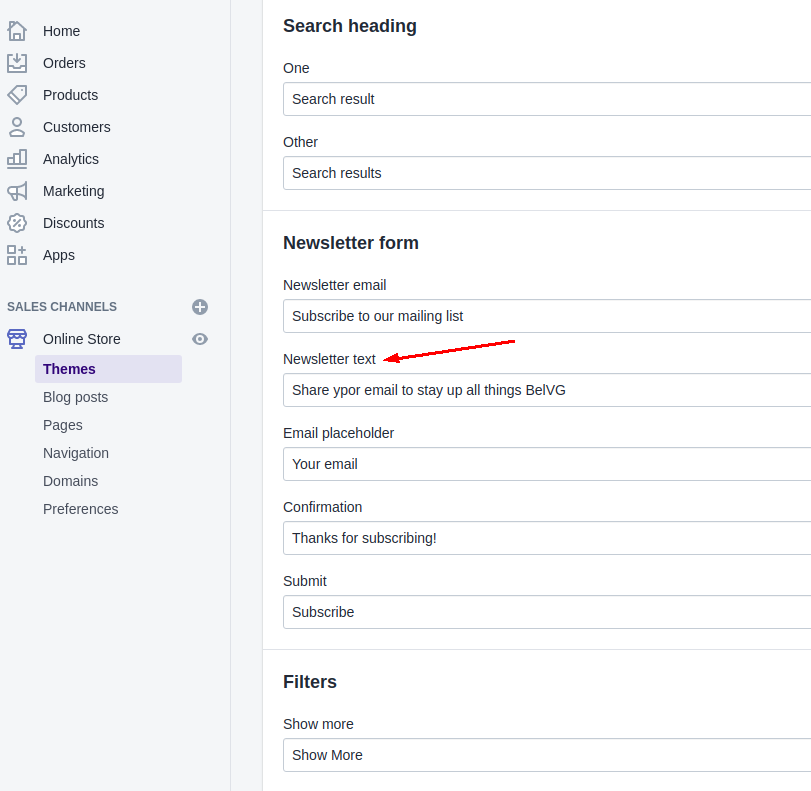
To change the placeholder text, click on Edit language.
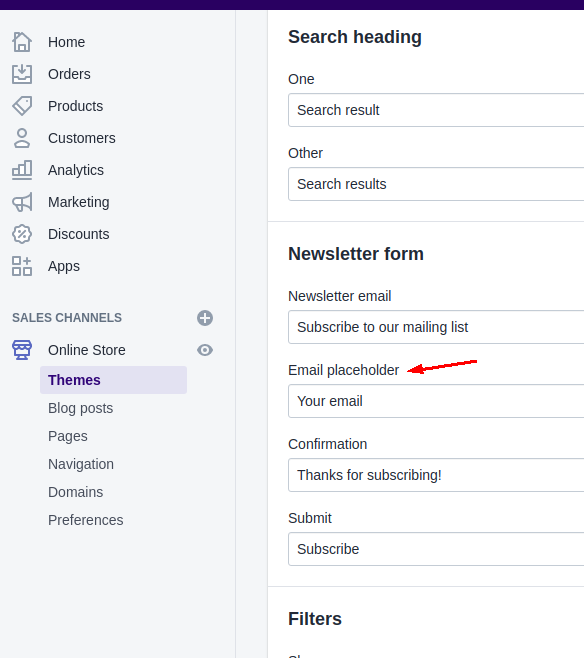
Find the Newsletter form section and change the text.
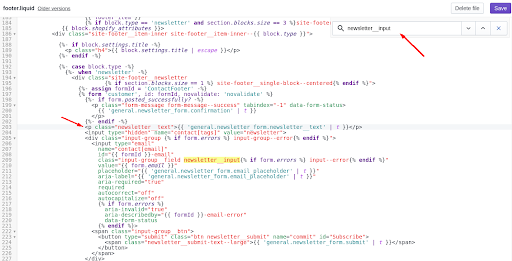
If you want to add a text above the subscription form, in the footer.liquid file find the Subscription form by class newsletter__input using the keyboard shortcut Ctrl + F and place the code above it.
<p class="newsletter__text">{{ 'general.newsletter_form.newsletter__text' | t }}</p>
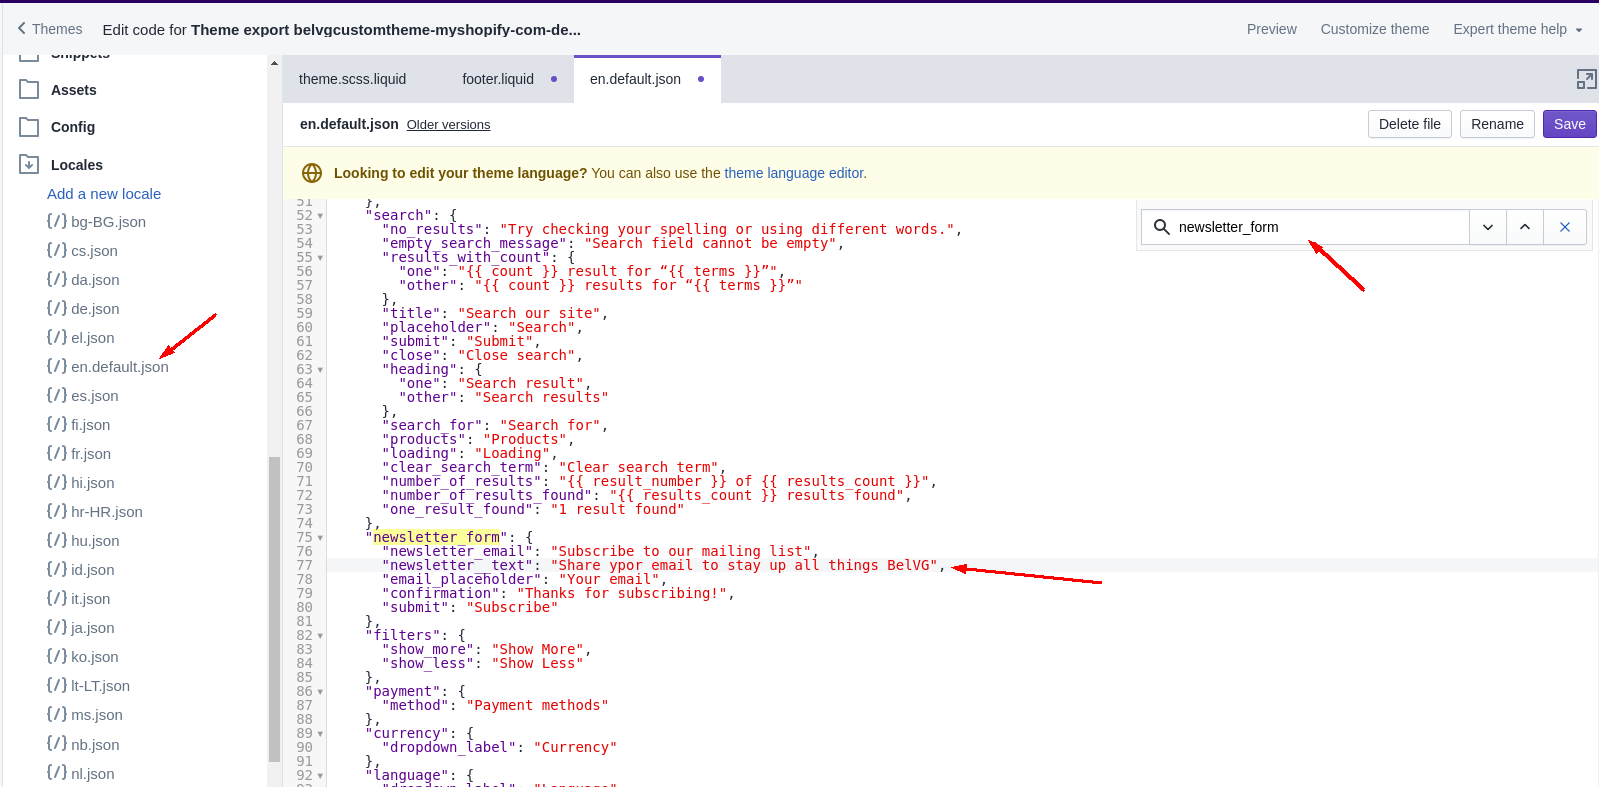
Then open the en.default.json language file on the way Edit code – Locales – en.default.json. In the search, find the newsletter_form object and insert the newsletter__text key into the text.
Now our field is displayed on the translation page in the Newsletter form section.
You can also sign up newsletters this way for other language files.
How to change Shopify payment icons
Find the following code in the footer.liquid file:
{% for type in enabled_payment_types %}
Replace it with:
|
1 2 |
{% assign enabled_payment_types = 'visa,master,american_express,paypal' | remove: ' ' | split: ',' %} {% for type in enabled_payment_types %} |
The payment providers that you include in this list will determine which payment icons display on your online store.
The values you can use are listed below:
- american_express
- apple_pay
- bitcoin
- dankort
- diners_club
- discover
- dogecoin
- dwolla
- forbrugsforeningen
- google_pay
- ideal
- jcb
- klarna
- klarna-pay-later
- litecoin
- maestro
- master
- paypal
- shopify_pay
- sofort
- Visa
How to remove “Powered by Shopify”
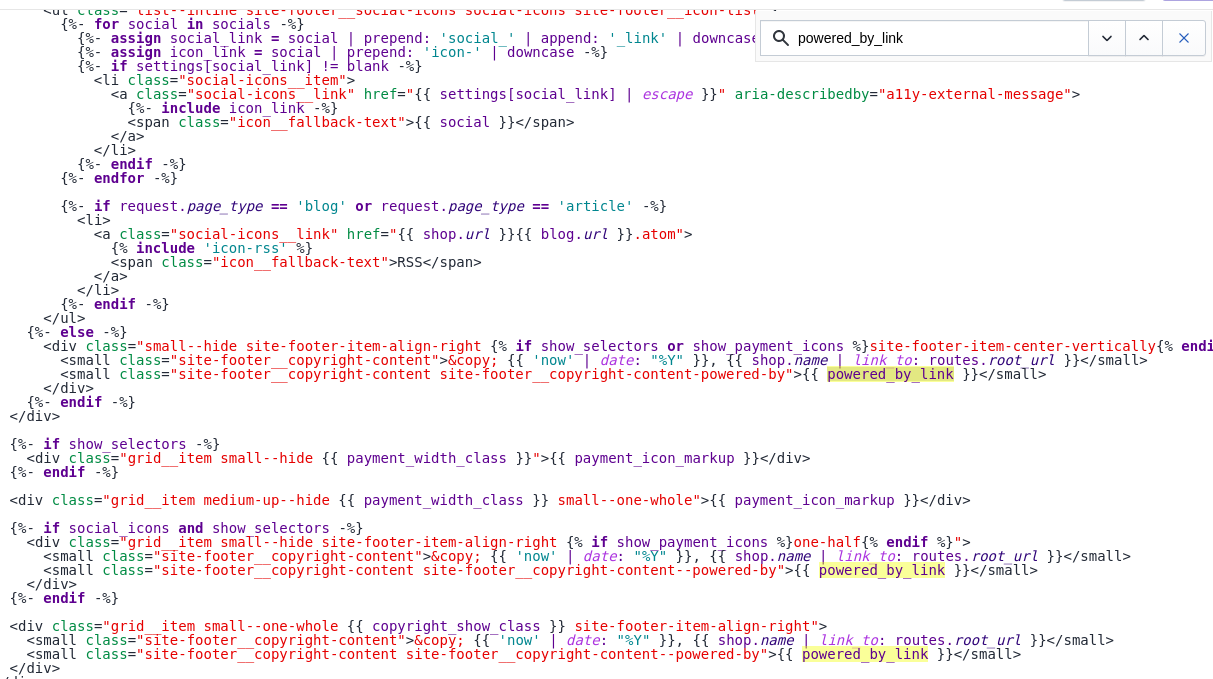
Using a quick search, find all the places where with the text powered_by_link.
And delete all of these places:
How to add social media to Shopify
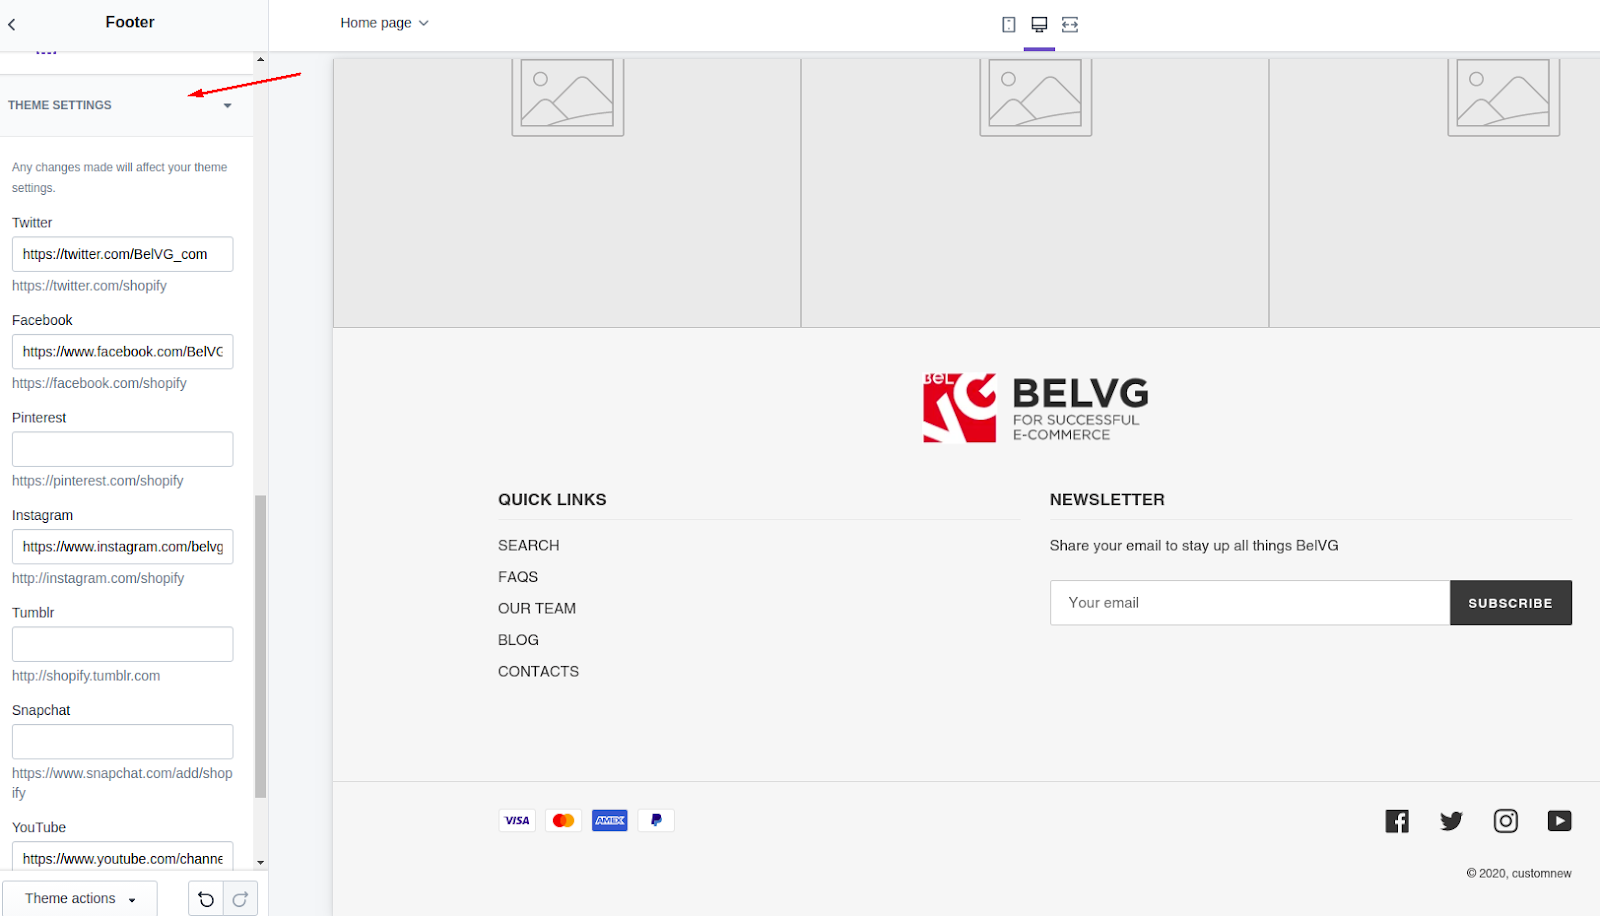
Go to the Visual editor, select the footer section and add links to social networks in the theme settings. After adding, social icons will be displayed in the footer.
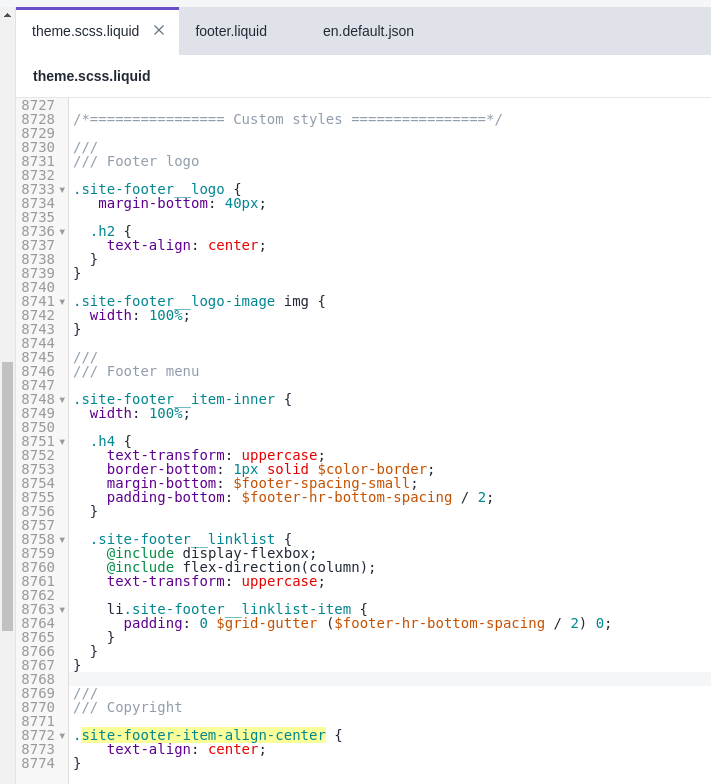
Move the copyright to the center:
1. Find all the site-footer-items-align-right classes in the footer.liquid file and replace it with site-footer-items-align-center.
2. Add a style for the class.
|
1 2 3 4 5 6 |
/// /// Copyright .site-footer-item-align-center { text-align: center; } |
That’s all, your new footer is done! We hope that our article was useful for you, and helps you create the footer for your website. We tried to describe everything simple and in detail. However, if you need some advice, feel free to ask in the comments below!






Hi, Mardi. Thanks for a question. You can try adding a property here https://prnt.sc/20lo3gh
margin: 0 auto;
If this does not help, then you need to look at what kind of markup you have and perform one of the centering described here
https://www.w3schools.com/css/css_align.asp
Also, to help you more, send a link to your website.
Hi, Dani. Thanks for the comment. More information is needed to help you.
Where exactly did you place the code? Can you show a screenshot in the code and place on the site where you want the logo to be placed?
Also, to help you more, send a link to your website.
Hello, thanks for this amazing article. I do have a little issue I would like to resolve.
I want to place my logo in the footer menu, however I use a shogun homepage, and I placed the code on the right places but now the logo is placed at the left bottom right above the footer menu. I really don’t have any coding skills so I don’t know what to adjust.
Can you maybe help?
Thanks.
Hi,
Thanks for this article! It’s been a great help.
I have done all the steps to get my logo in the footer but it won’t centre for some reason? Is there another way to do this?