We continue exploring the topics for Magento 2 Certified Professional Developer exam. Today we will take an in-depth look at themes and template structures in Magento 2 and learn how to customize the Magento UI using themes. Here is the list of questions covered in this article:
When would you create a new theme?
How do you define the theme hierarchy for your project?
Demonstrate the ability to customize/debug templates using the template fallback process.
How do you identify which exact file is used in different situations?
How can you override native files?
Creating a new theme
When we want to change the appearance of our site or its functionality, the first thing we should do is to create a new theme. Check out our Magento 2: Creating a New Theme article to see how it’s done.
Defining theme hierarchy for your project
Here is how the theme hierarchy looks like in Magento 2:
⦁ Custom theme (current theme)
⦁ Parent theme (default theme)
⦁ Basic theme
In other words, if the system does not find the required file in the current theme, it looks for it in the parent theme (the parent theme is specified in the theme.xml file in the root of the theme), and if it does not find it there, it looks for it in the basic theme.
Here is an example. Let’s say our current theme “custom_theme” is in the “custom_package” package and has a “default” parent theme in the same “custom_package” package. Then the theme hierarchy will look like this:
⦁ app/design/frontend/custom_package/custom_theme
⦁ app/design/frontend/custom_package/default
⦁ app/design/frontend/base/default
Customizing/debugging templates using the template fallback process
In order to customize a specific template file for a parent or base theme, we need to copy it to our theme at the same path as it was in a parent or base theme. Remember never to delete this file from a parent or basic theme, since this will make it difficult to debug this file if it is lost or damaged. In other words, if we want to debug a template file from the current theme (for example, we may have accidentally deleted it or edited it and there was no backup version left), you can always find this file in the parent or basic theme.
In general, these are the methods for debugging templates:
⦁ XDebug (The main feature of this method is the installation of breakpoints and the ability to view and change variables at any time);
⦁ Developer mode (This mode is used in Magento 2, which allows you to display errors directly on the screen);
⦁ Logs (The method uses log files in which the system enters information about what exactly goes wrong when the program’s algorithm fails);
⦁ Display Magento errors (displays error messages that the system records automatically, but does not show by default);
⦁ Template path hints (displays templates’ names and paths).
More information on debugging methods: Developer Mode and Debugging in Magento 2.
Identifying which theme file is used in different situations
In order to determine which template file is used in a certain place on the site, it is convenient to turn on the path hints for this file.
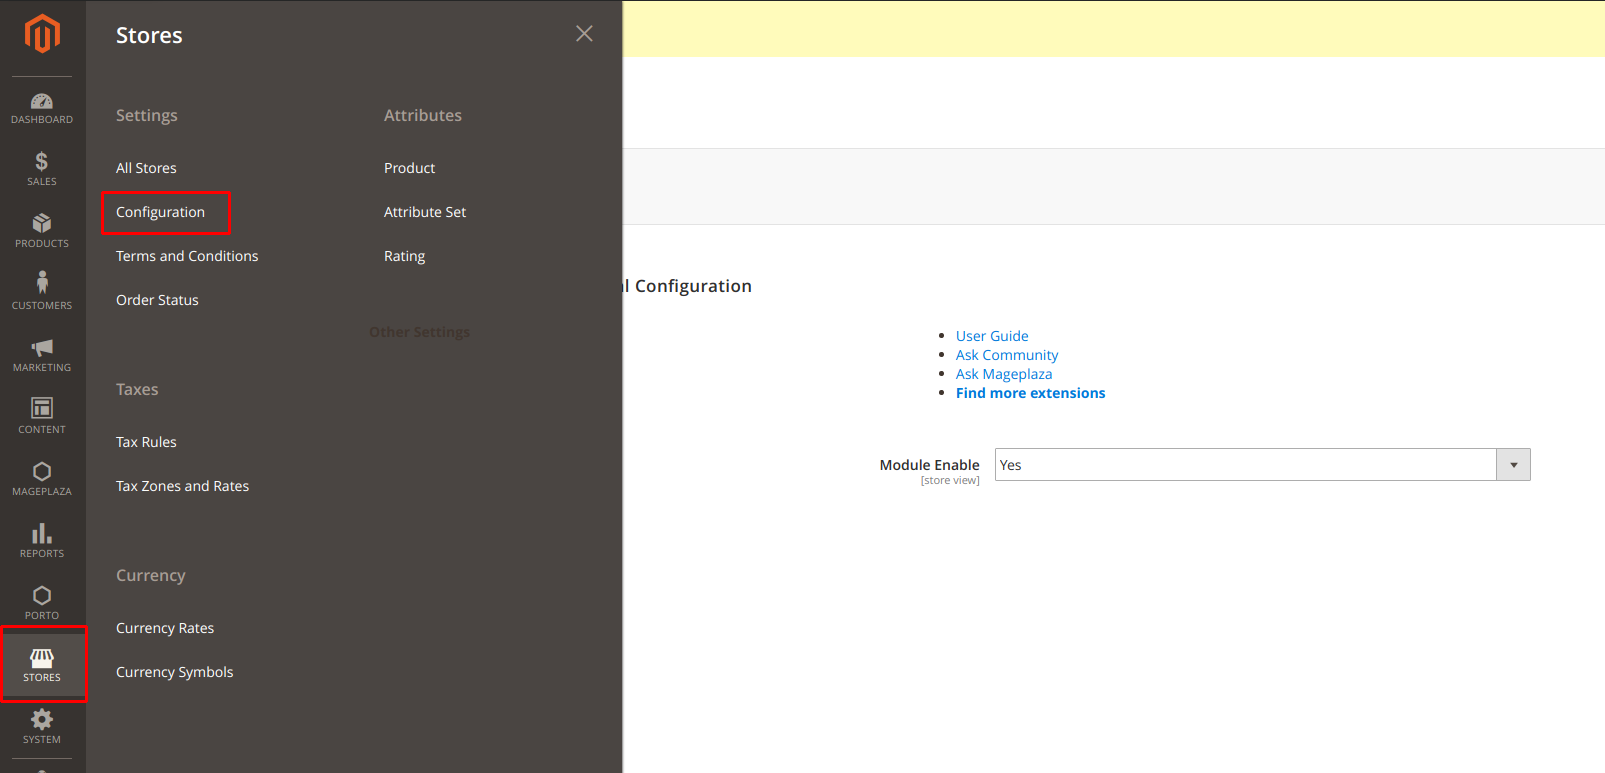
To do this, open the admin panel and go to “Stores ➜ Configuration”
Next, go to the “Advanced ➜ Developer” section. Here, on the “Debug” tab select “Yes” for the “Enabled Template Path Hints for Storefront” attribute.
If you have multiple stores, then choose the one for which you want to turn on the path hints.
Please notice that if we turn on the path hints, it will be enabled for all site users and if the site is in production, then this is unacceptable. To enable path hints only for a particular IP-address, on the “Developer Client Restrictions” tab in the “Allowed IPs (comma separated)” field, write a specific IP-address (if it is necessary to write multiple IP-addresses, they should be separated by a comma).
Having done this, you will see the paths to the template files (white in red rectangles) appear on the front end of the site:
Following the specified path, we can easily find the required template files.
Overriding native files
Overriding native files in Magento is quite easy. To do this, you need to copy these files to your theme at the same path as they were in the parent or basic theme.
Let’s look at an example. Let’s say we want to override the template gallery file gallery.phtml on the page of the product, which is located in the parent theme along the path: “app/design/frontend/parent_package/parent_theme/Magento_Catalog/templates/product/view/gallery.phtml”
To do this, we need to copy the file, located at: “app/design/frontend/our_package/our_theme/Magento_Catalog/templates/product/view/gallery.phtml”.
As a result, the system will use the gallery.phtml file from our theme, instead of the file from the parent or basic theme.
Please note that this method overwrites the template files. However, if you copy the layout file in a similar way, it will not overwrite but will complement the file of the parent theme. More information on re-writing layout files in Magento 2: Override a Layout in Magento 2.


