Every developer knows how it’s important to be good at debugging in Magento 2. In the article we consider the debug technique and suggest the steps you should follow to achieve the result. Hope you’ll find it useful.
In Magento 2 there are some application modes:
1. Default mode
The mode is enabled when no other mode is specified. In this mode:
- Static files are generated dynamically in response to a request.
- Static files are published to the pub/static directory for generating faster. If they are missing, it is generated from the basic templates (placed in vendor or app).
- Errors are not displayed to users and stored in log files.
2. Developer mode
The mode is used for developing. It is characterized by following:
- Static files are generated and published to pub/static directory (as it is in the default mode). With that, they are always generated from basic templates.
- Errors are displayed in the browser and can be seen by users.
- Errors that get in var/reports are more detailed.
3. Production mode
The mode is considered to be the most optimized and suitable for server production. In this mode, all data is loaded from cache (if there is). For generating you need to use the deployment mechanism (in bin/Magento). In this mode:
- Static files are stored in the cache only.
- Errors are not displayed and stored in the log files.
In order to change the production mode for developer mode, you need to get bin/magento started with settings deploy:mode:set developer.
Then you need to delete the content of the following directories (except for .htaccess files and the file of pub/static/deployed_version.txt version):
|
1 2 3 4 5 |
var/cache var/di var/generation var/view_preprocessed pub/static |
Debugging
For debugging in Magento 2 the following methods can be applied:
1. XDebug
In my opinion, the method is the best, but it can’t always be used. In order to apply it, you need to configure the environment (PHP/apache) and install some modules to connect it. On the Internet, you can find a lot of manuals how to install XDebug (for example, http://wiki.netbeans.org/HowToConfigureXDebug or http://devdocs.magento.com/guides/v2.0/cloud/howtos/debug.html which is from official Magento 2 documentation). The main advantage of the method is breakpoints installation and the ability to review and change variables at any time.
2. Developer mode
Here the developer mode is used in Magento 2. The mode allows displaying errors directly on the screen. It is convenient when debugging failed modules (blank page or 500 error). In order to make the mode enabled, you need to add the following to the directory using console:
|
1 |
php bin/magento deploy:mode:set developer |
3. Logs
In the method, log files are used. It directs when the program algorithm fails and what exactly goes wrong. The method is hidden from the user and doesn’t require displaying the data on the screen. Moreover, in Magento 2 there’s the \Psr\Log\LoggerInterface class that allows logging events and output variables to Magento log files. It has the following public methods:
|
1 2 3 4 5 6 7 8 9 |
emergency($message, array $context = array()) alert($message, array $context = array()) critical($message, array $context = array()) error($message, array $context = array()) warning($message, array $context = array()) notice($message, array $context = array()) info($message, array $context = array()) debug($message, array $context = array()) log($level, $message, array $context = array()) |
The log method is more general.
$level – here the level of logging is set (all the constants are in the \Psr\Log\LogLevel class).
$message – the output message.
$context – the variables array for output which is converted to JSON.

Magento Development Services
Take your online store to the next level with BelVG Magento development
Click to visit the pageAll logs will be output to var/log/system.log, except for the debug method, as it stores logs to var/log/debug.log file.
For example,
|
1 2 3 4 5 6 7 8 9 10 11 12 13 14 15 16 |
namespace Belvg\someModule\Block; class someClass extends \Magento\Framework\View\Element\Template { protected $log; public function __construct( \Magento\Backend\Block\Template\Context $context, \Psr\Log\LoggerInterface $logger, array $data = [] ) { $this->log = $logger; parent::__construct($context, $data); } public function test() { $this->log->debug(“testlog”); } } |
4. Display Magento errors
Magento 2 automatically saves error messages to var/reports and doesn’t display on the screen. In order to get it displayed, you need to rename the local.xml.sample file placed in pub/errors into local.xml. The file contains error display settings. Here you can configure emailing error notifications.
The content of local.xml.sample:
|
1 2 3 4 5 6 7 8 9 10 11 12 13 14 15 16 17 18 19 20 21 22 23 24 25 26 27 28 29 30 31 |
<?xml version="1.0"?> <!-- /** * Copyright © 2013-2017 Magento, Inc. All rights reserved. * See COPYING.txt for license details. */ --> <config> <skin>default</skin> <report> <!-- "action" can be set to "print" to show exception on screen and "email" to send exception on specified email --> <action>print</action> <!-- in "subject" you can set subject of email --> <subject>Store Debug Information</subject> <!-- "email_address" admin email address --> <email_address></email_address> <!-- "trash" is handle about trace info value "leave" is for store on disk value "delete" is for cleaning --> <trash>leave</trash> </report> </config> |
5. Template path hints
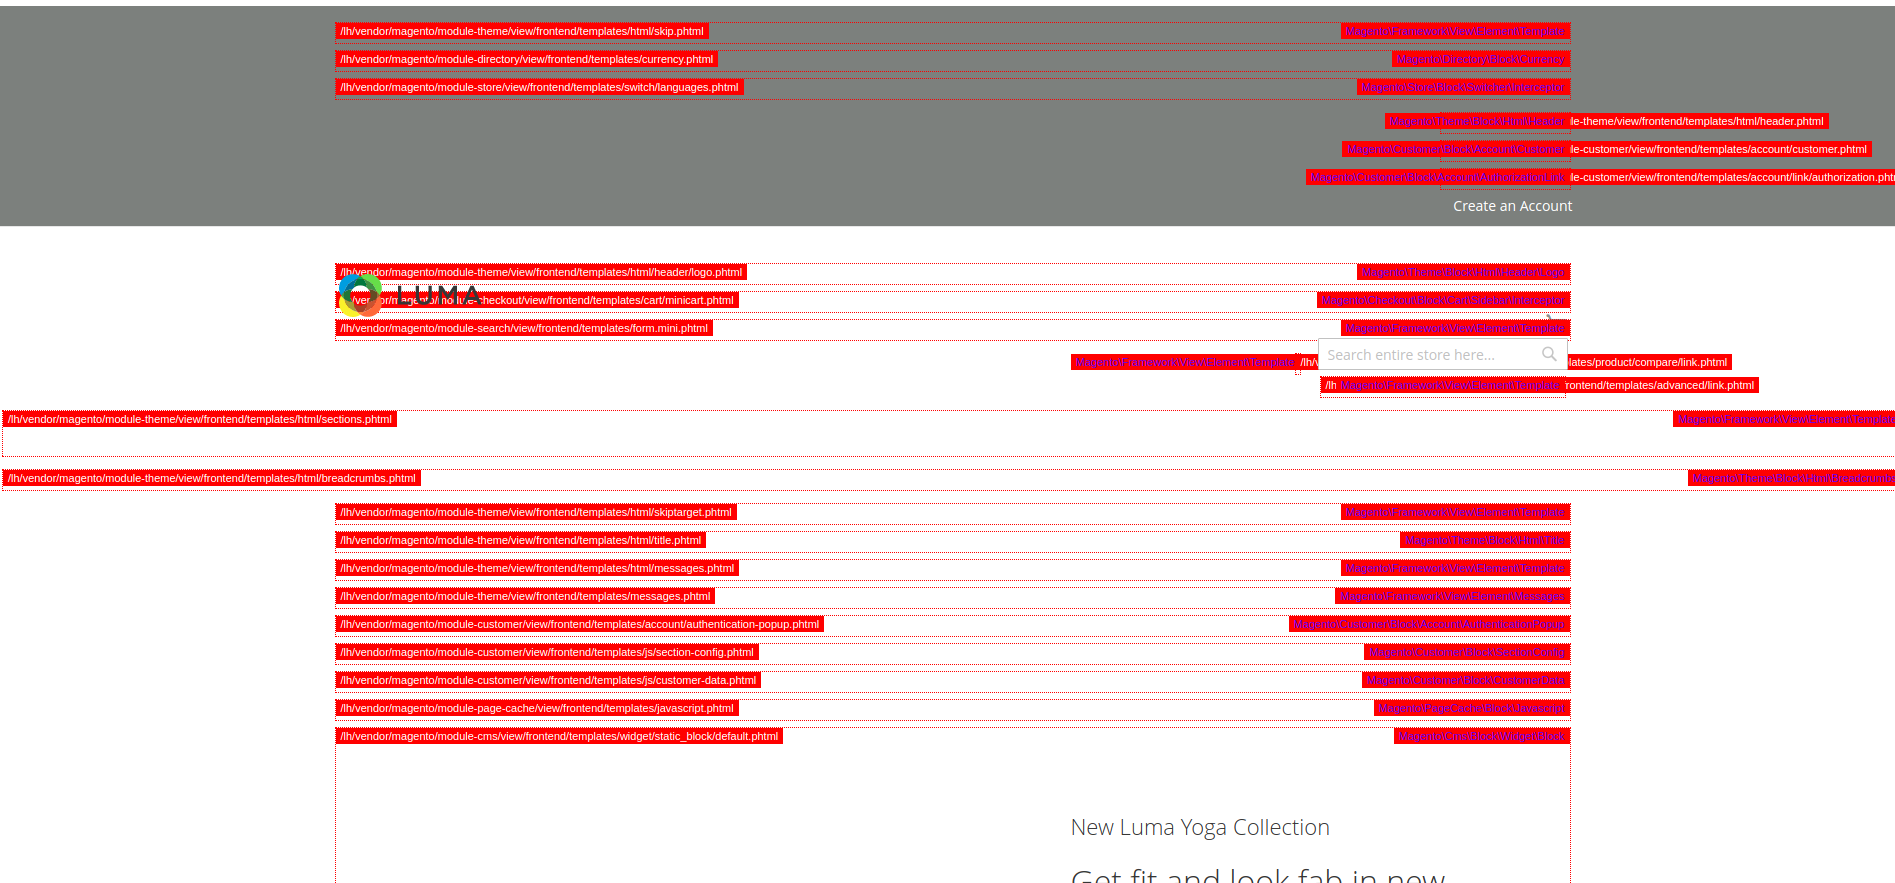
The method outputs the names of all page blocks and classes. In order to enable path hints, you need to go to Stores->Configuration->Advanced->Developer, then on the tab “Debug” choose “Enabled Template Path Hints for Storefront” and “Add Block Names to Hints”.
Looking for an expert Magento 2 development team? Turn to BelVG!

Magento Webdesign
Take your online store to the next level with BelVG Magento Webdesign
Visit the page


I read your blog, Really amazing blog about Debugging in Magento 2. Thanks for share it.
Happy to share, Syed. Stay tuned!
Nicely explained, Andrey.