This is the final fourth part of our PrestaShop 1.7.5 guide, and today I want to cover a number of miscellaneous functionalities that might come of use to the online shop manager like:
How to Change the Order of Blocks on Homepage
How to Manage Tags
How to Use Memcached
How To Add New Employees and Set Up Permissions
How to Change Modules Position
Change the Order of Blocks on Homepage in PrestaShop 1.7.5
From time to time, you will want to renew the look of your online shop homepage, so there’s no better and easier way to make it look a little bit different is to change the order of blocks. In PrestaShop 1.7.5 this is an easy task that requires no special developer skills.
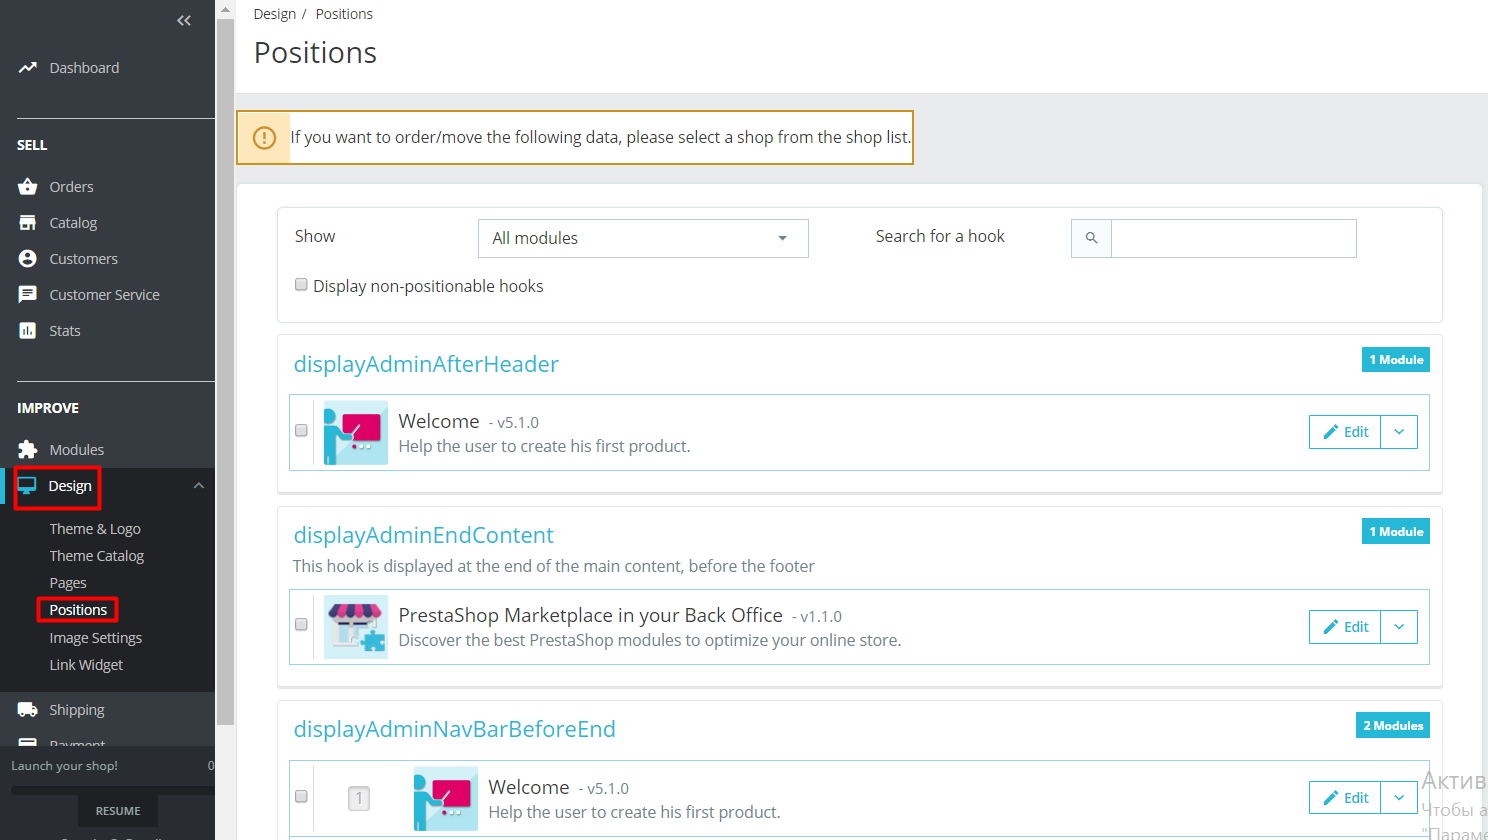
To begin with, log into the admin panel and find the Improve section. Go to Design -> Positions.
You’ll see the following page with all blocks on from your webstore grouped according to what page they belong. You need to find the displayHome block. Here you can see the arrangement of blocks on your homepage. This is how it is at ours.
To change blocks position, use simple drag-and-drop to arrange them the way you want or even delete the ones you don’t want to have anymore.
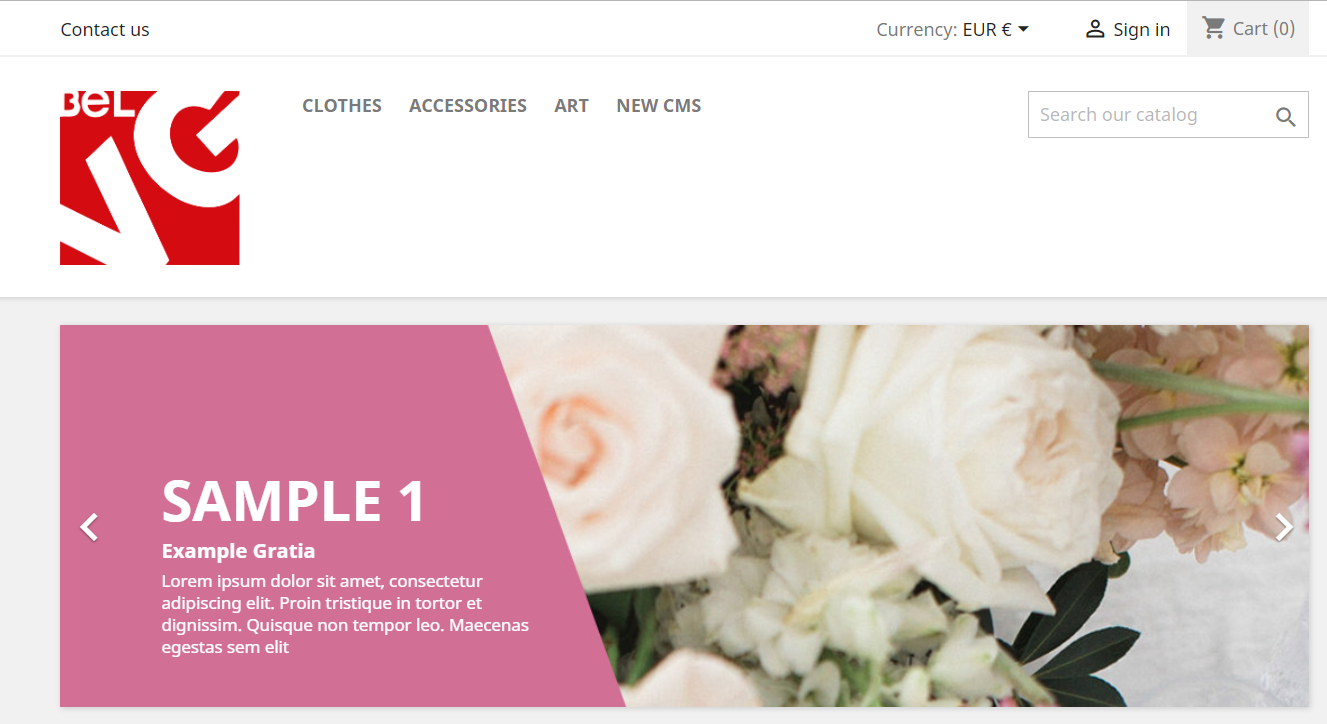
So this is how our homepage looked before.
And how it looks now, after we changed the position of blocks.
As you can see, it’s all very simple, and what’s most important – you don’t need any specialized intervention to rearrange blocks position in PrestaShop 1.7.5, which means you can experiment to find the most eye-pleasing configuration.
How to Manage Tags in PrestaShop 1.7.5
Tags are wonderful and uncommon navigation tools that will allow your customers quickly find the products or services they want and came for or search for similar goods. In PrestaShop 1.7.5 tags are easy to add and manage. Let me walk you through the process of tags configuration.
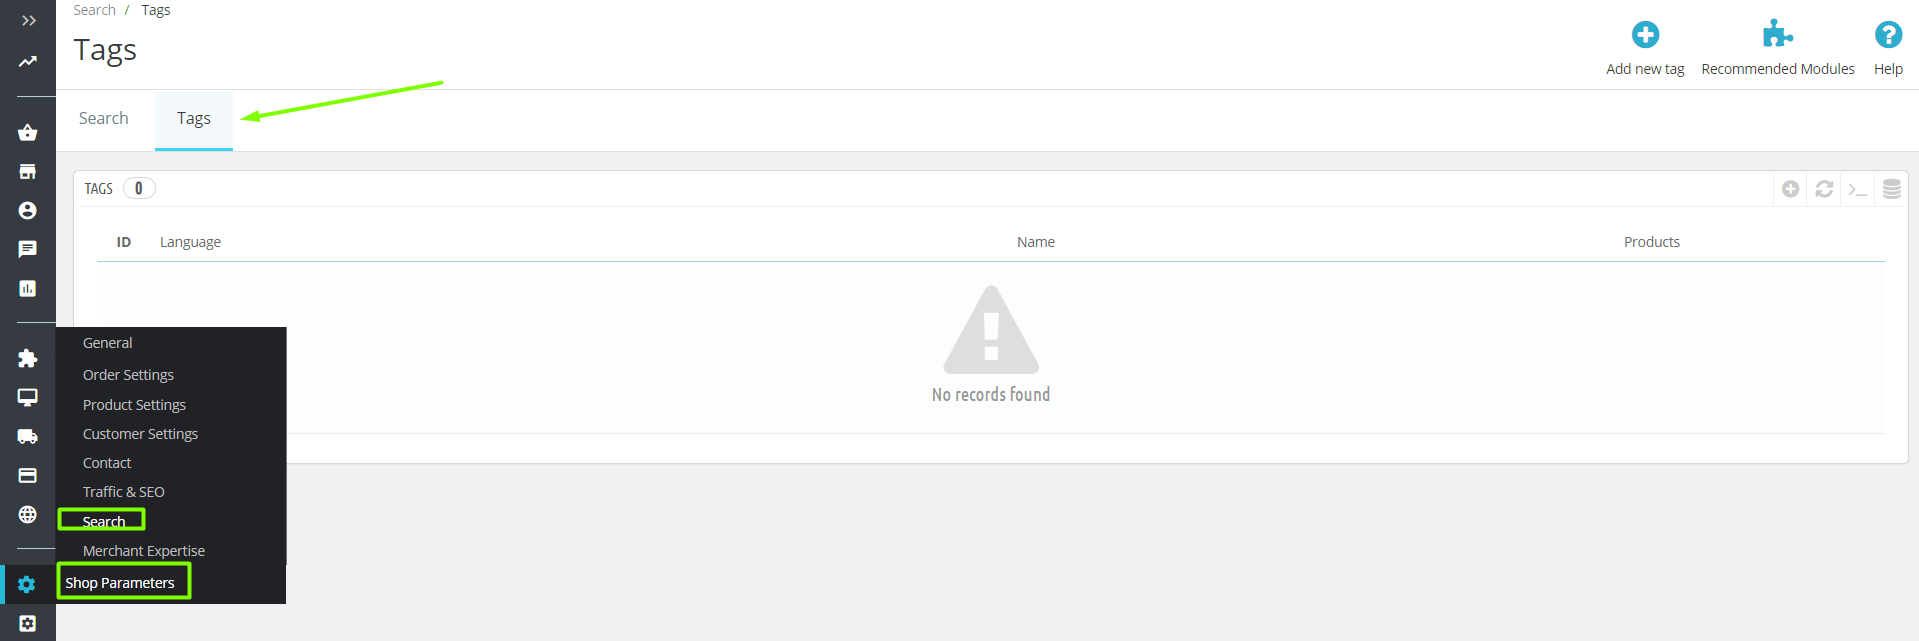
We begin by navigating to the Configure section and going to Shop Parameters -> Search -> Tags tab.
Here you will see all the tags used in your store (in our case, there are none).
To add a new one, click the “Add new tag”.
 You’ll need to fill in the following fields:
- Name of the tag,
- Language,
- Products to be applied to.
Click Save to preserve changes. Your newly created tag appeared at the Tags tag and at the product page you specified.
How to Use Memcached in PrestaShop 1.7.5
In order to optimize the performance speed of your PrestaShop online store, the most basic thing you can do is improve its caching. For that purpose, I would greatly advise you the memory object system Memcached. This system will cache the elements you rarely modify in server memory, saving you memory and power. But before you decide to enable it in your PrestaShop, make sure that your server supports it. In case your PHP configuration features the Memcached PECL extension, everything should be fine (you can download it here). As you’re all set, let’s have a look at how to use Memcached in PrestaShop 1.7.5.
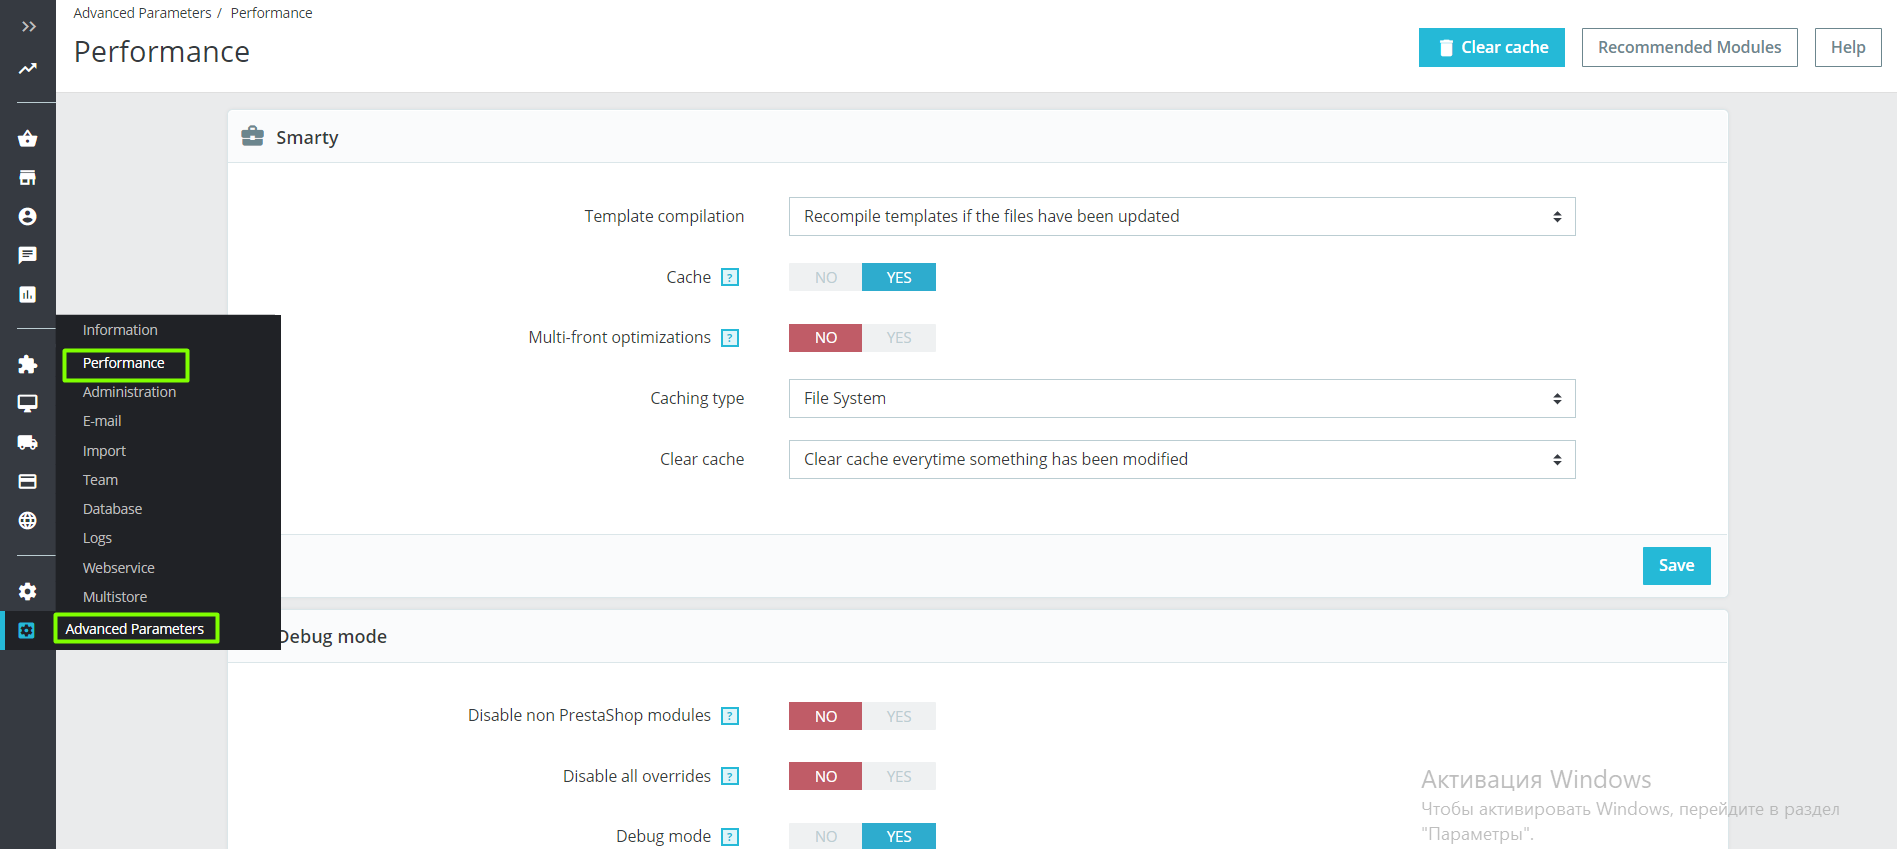
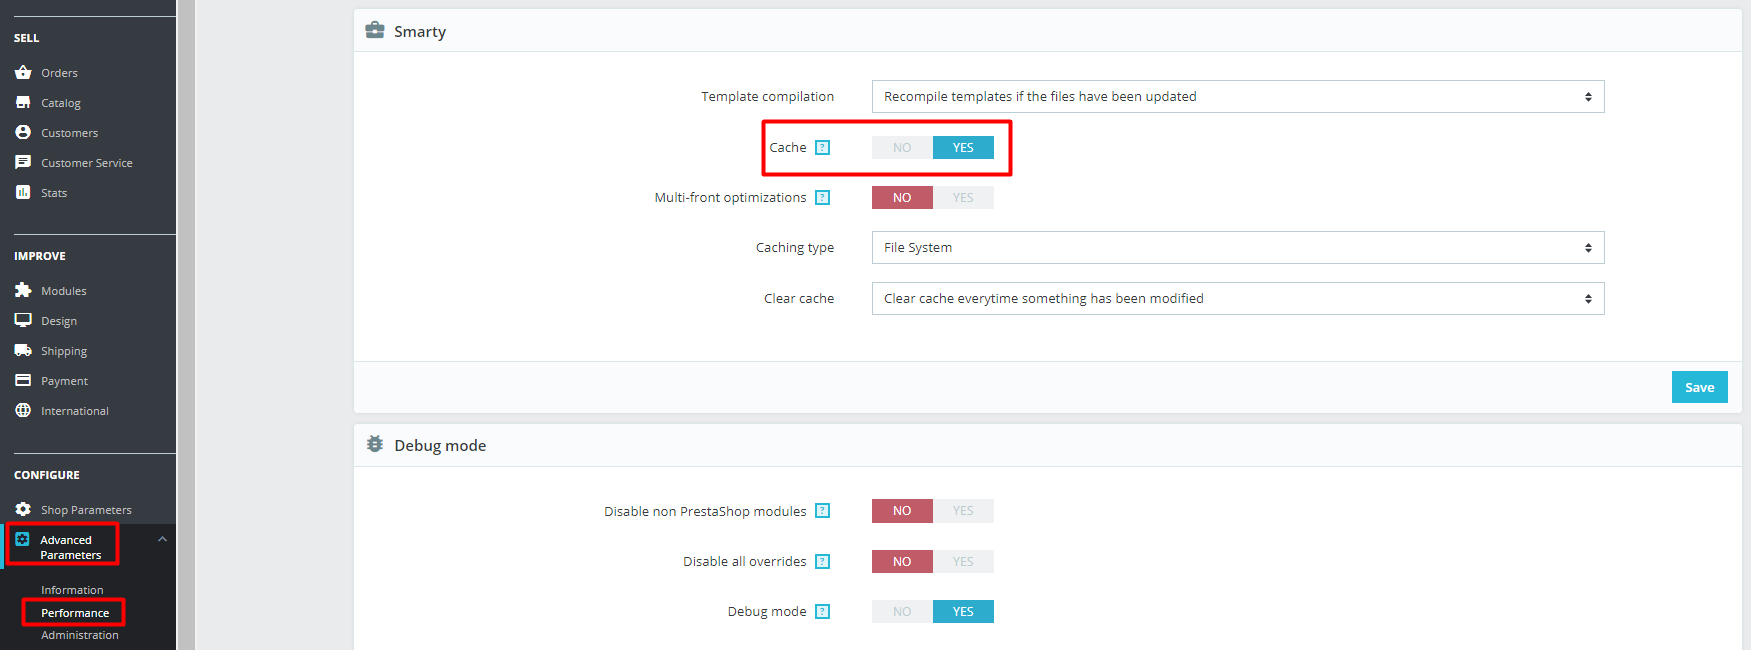
Go to Configure section and navigate to Advanced Parameters -> Performance.
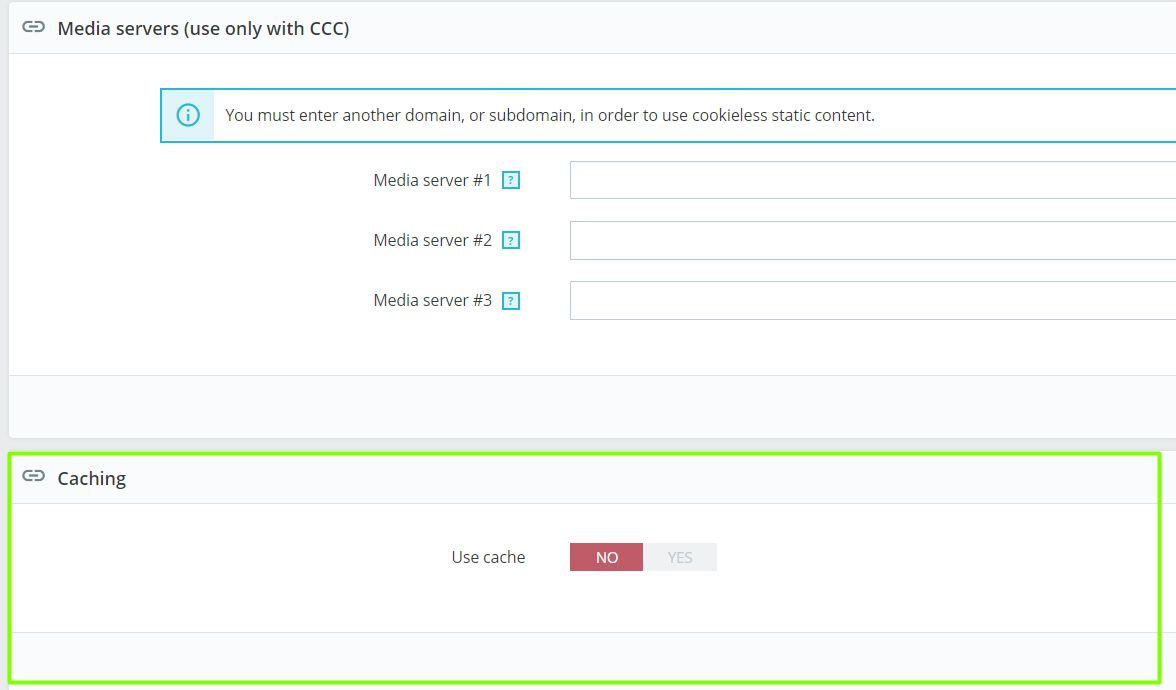
Scroll down to the Caching block and click Yes to enable.
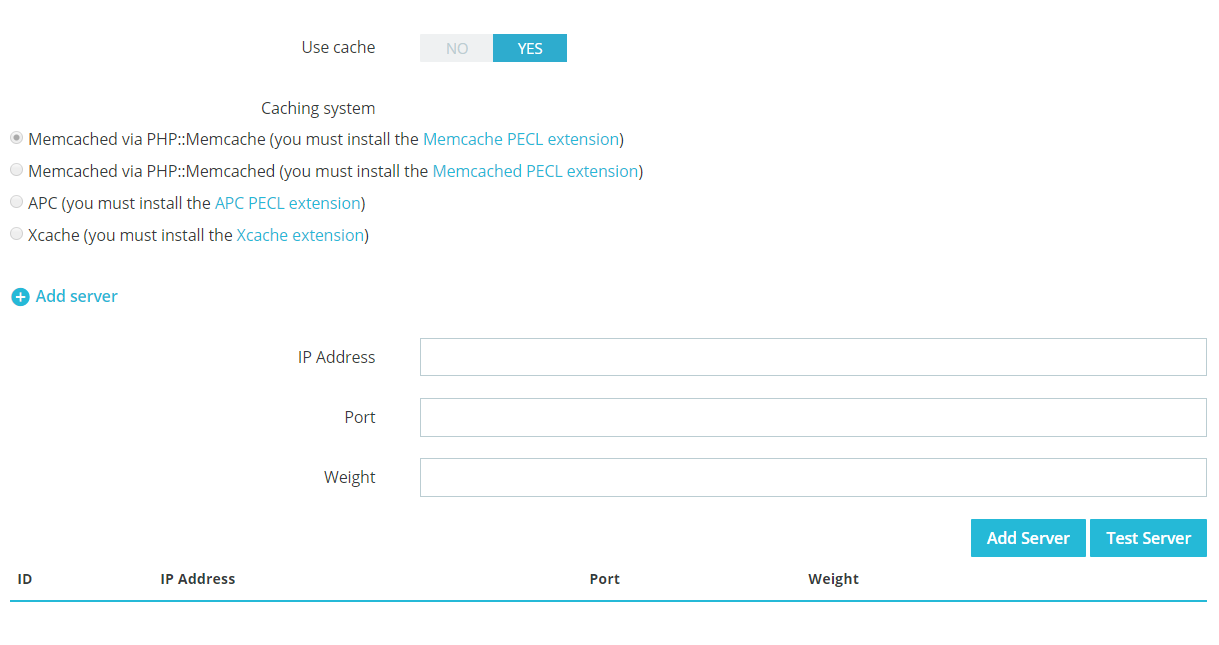
You’ll get to the following menu.
Here you will need to fill in 3 fields:
- IP Address where the service will be available (usually it’s 127.0.0.1).
- Port where Memcached is running (it’s 11211 by default).
- Weight. If you are using a single Memcached instance, enter “1”.
As you’ve done all that, click Test server button if you want to test it out first or just Add server. Click Save – and that’s all.
How To Add New Employees and Set Up Permissions in PrestaShop 1.7.5
Even a small online shop can’t be managed solely by one person. In PrestaShop 1.7.5 you are able to create whichever number of employees and differentiate their permissions and functionalities. If you want to learn how to do this, please read on.
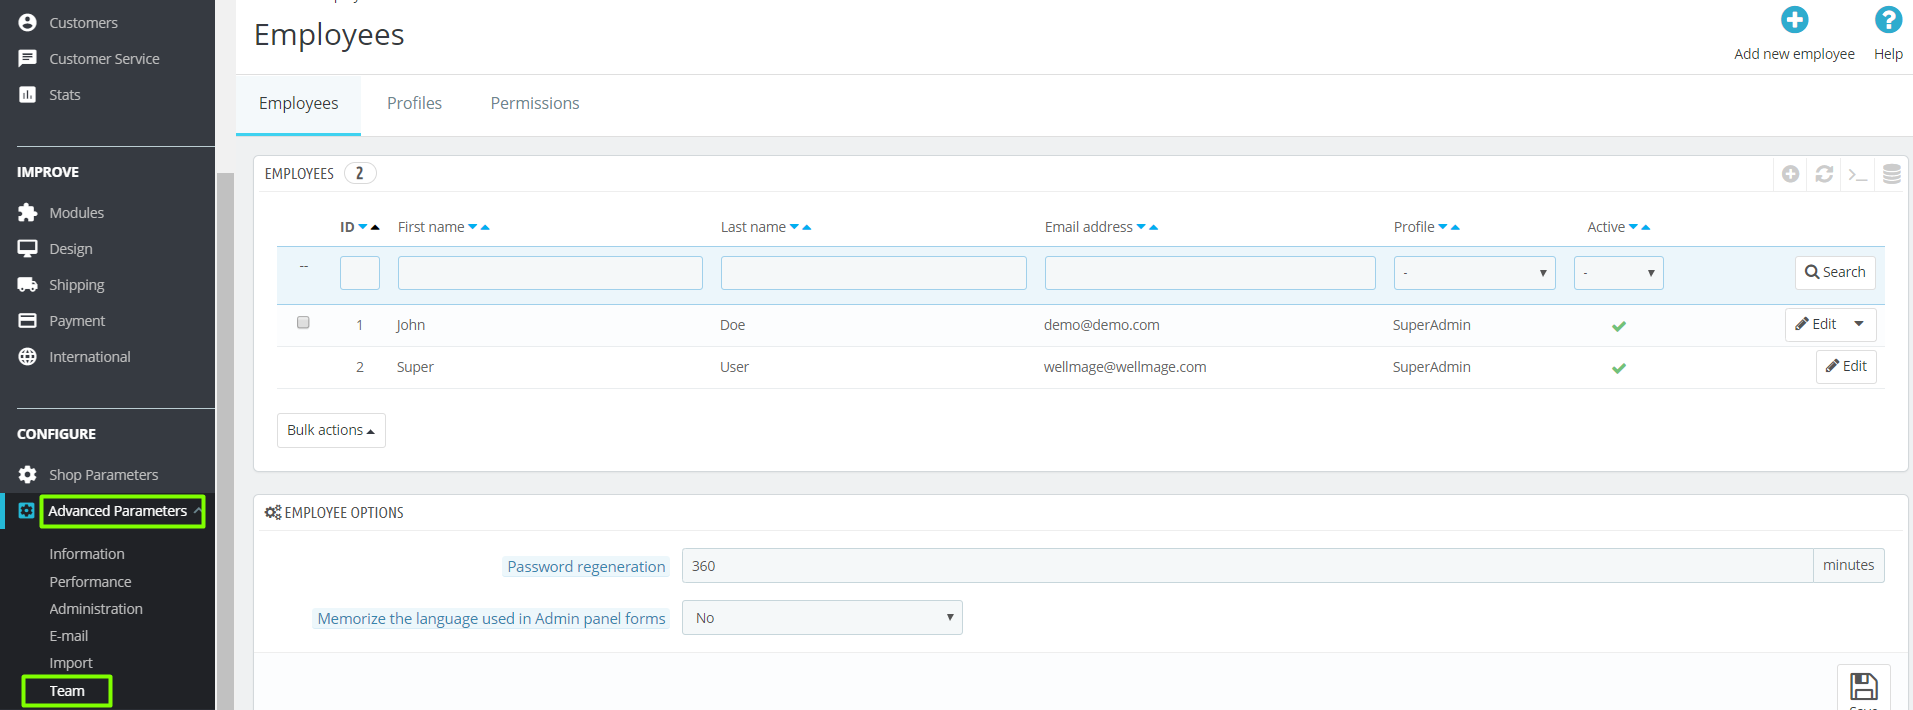
Go to Configure section and navigate to Advanced Parameters ->Team. You’ll get to the page with 3 tabs: Employees, Profiles and Permissions. Let’s see what can you configure in all three of them.
The Employees tab is where your current staff is listed. You can edit their data or add a new employee.
Below you see the Employee Options section. Here you can set up:
- Password regeneration – the allowed frequency of manually changing passwords;
- Memorize the language used in Admin panel forms – allows users to set up their own default language.
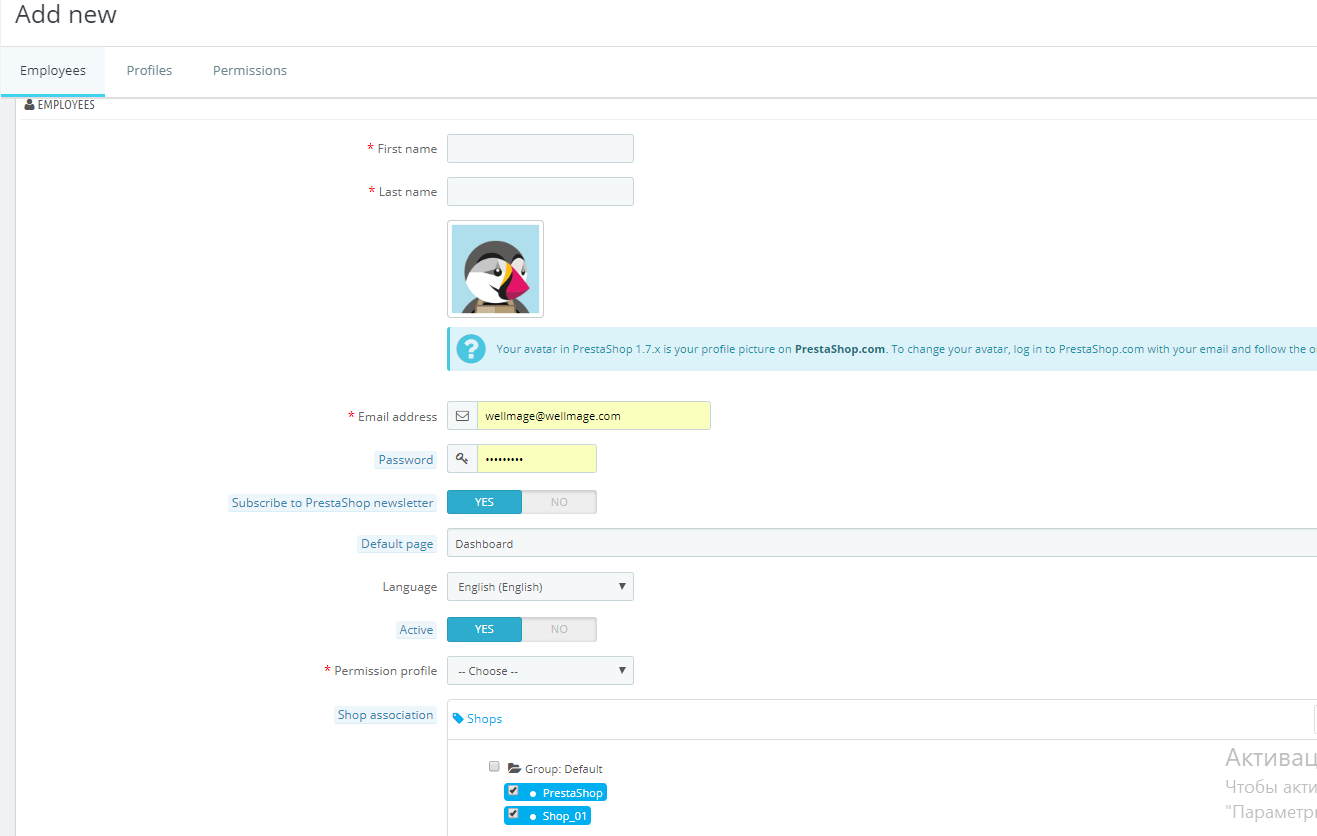
Now let’s create a new employee. As you click the button Add new, you’ll get to the following page.
Here you need to fill in:
- First name and Last name of the employee;
- User image;
- Email address for receiving notifications and to serve as account identifier;
- Subscribe to PrestaShop newsletter button;
- Default page to set up where the user gets to first as he logs in;
- Language;
- Active – you can enable or disable the created account as you wish. This functionality is great for creating temporary accounts when you need them and easily disabling them afterward;
- Permission profile – set up the access permissions this user is granted.
Next tab is Profiles. Here you can Edit and Add new ones as well as manage profile names.
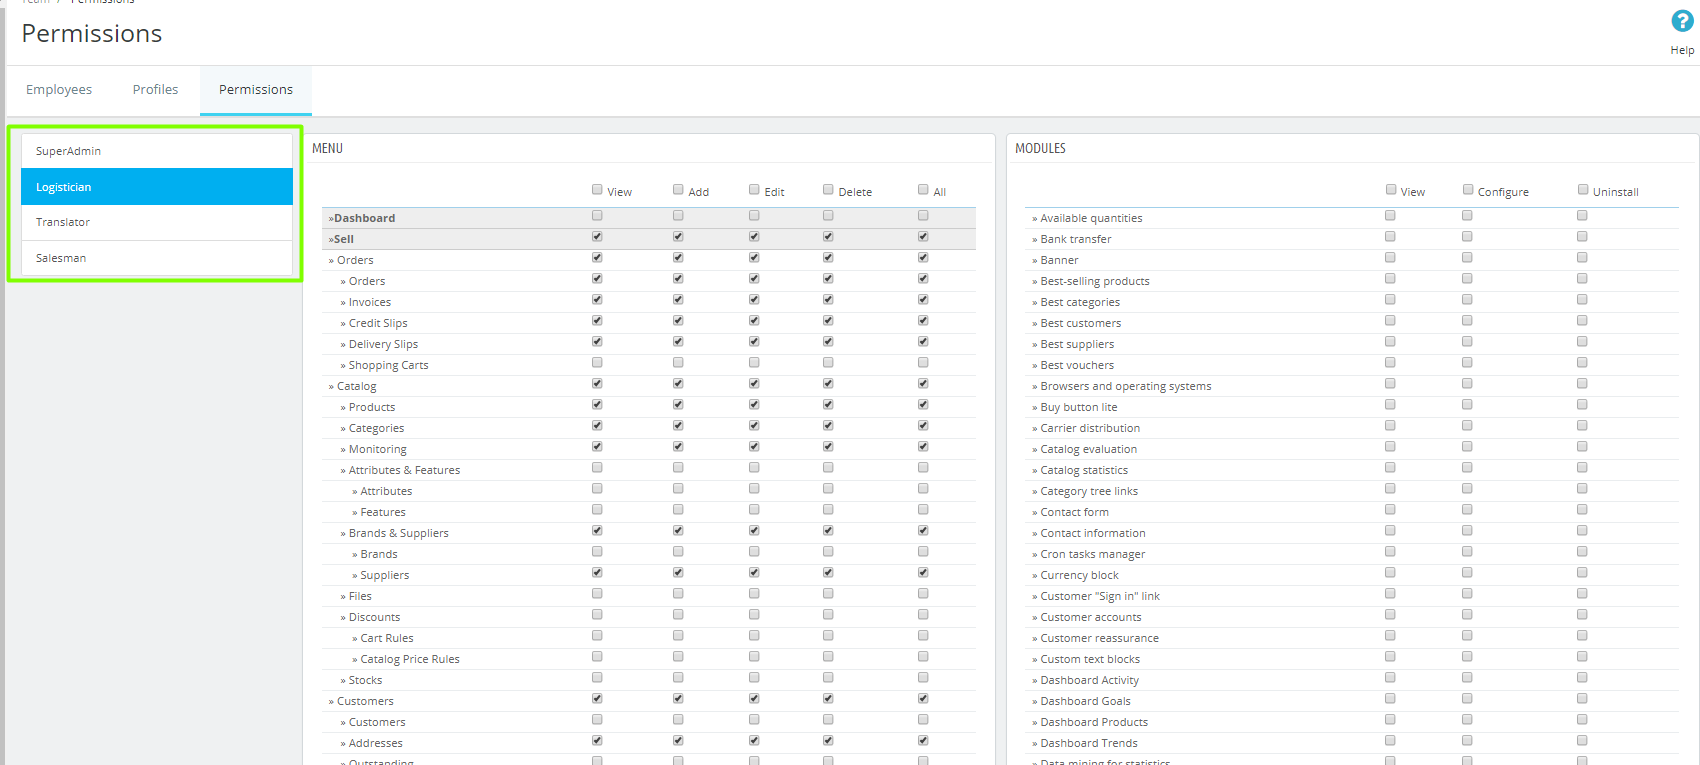
The third tab is Permissions. Here you will see a large list of actions available to certain users which you can modify, giving the ability to View, Add, Edit or Delete.
Here you won’t find the Save button, because every change is automatically saved by PrestaShop.
This is basically all you need to know about employees management. And one last thing to bear in mind – be very careful to assign someone with SuperAdmin status, because such role can control other employees.
How to Change Modules Position in PrestaShop 1.7.5
You can change modules position two ways:
- by drag-and-drop at Design ->Positions (this method I’ve already described above in How to Change the Order of Blocks on Homepage);
- by transplanting.
So let’s look closer at the second method – transplanting, which means adding a module to more than one hook. And there are two peculiarities of this method worth keeping in mind:
- some modules can be attached to only a given set of hooks;
- some hooks cannot accept specific modules.
As you’ve made sure that modules and hooks are compatible, you can begin – but before testing a new module in the frontend make sure you disabled the cash at Advanced Parameters -> Performance.
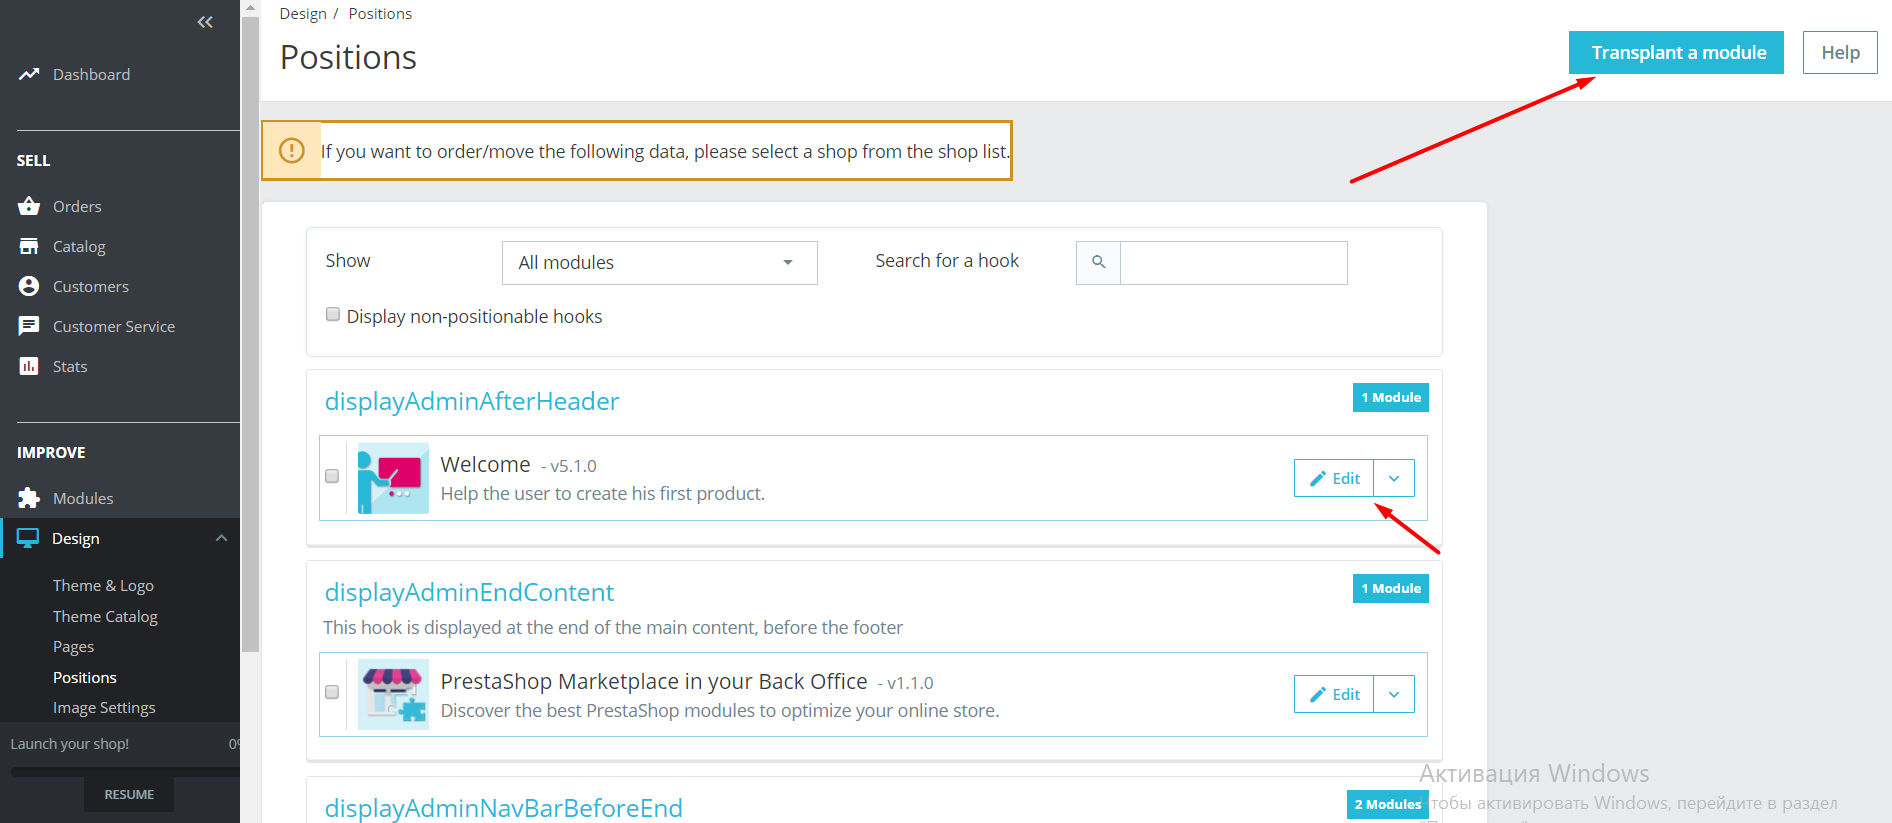
Now you can proceed to Design -> Positions. In the right corner you’ll find the button Transplant a module.
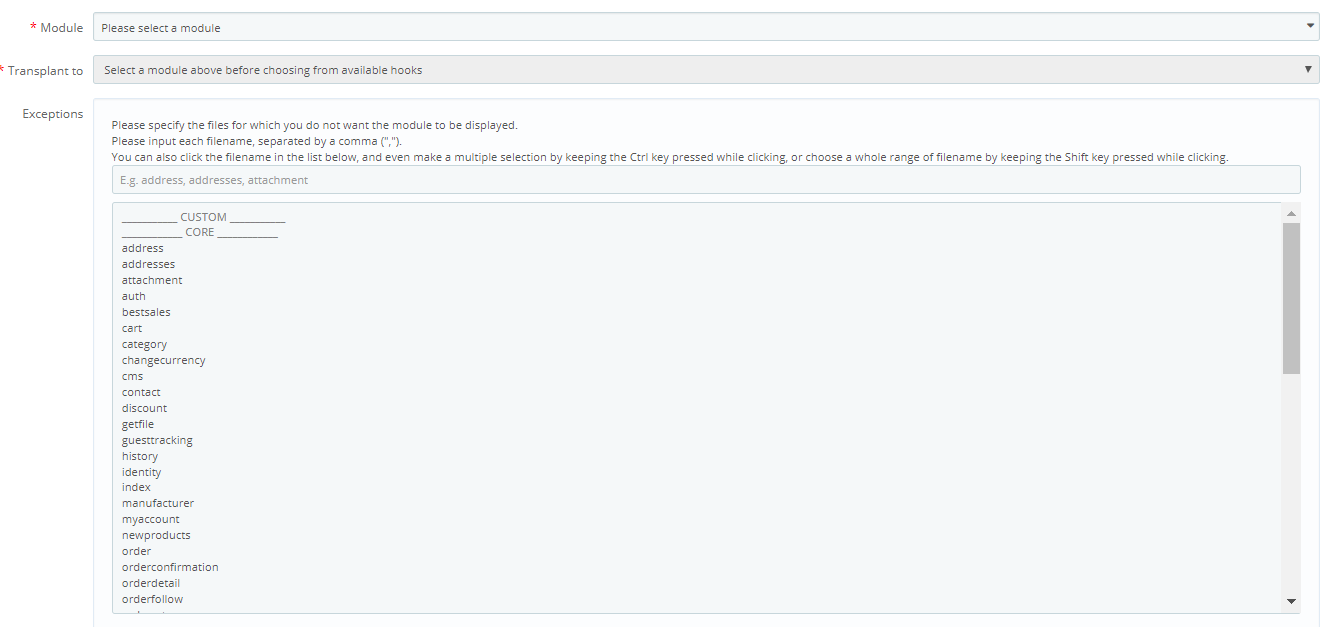
Press it and you’ll get to the following Transplantation interface.
- Module is where you select which one to transplant;
- Transplant to is to select the hook where you want to transplant the module;
- In Exceptions you can specify the files to which you don’t want the module displayed.
Press Save as you finished making changes.
Please bear in mind that there are still some logic limitations to where you can and can not move modules – column modules can be moved only within columns (right or left), etc.
This is all to our PrestaShop 1.7.5 guide – we covered all the staple functionalities you might need for online shop management.
If you have any question left or want to leave a comment, you are most welcome!
In case you missed previous parts of the PrestaShop 1.7.5 tutorial:
Part 1 – PrestaShop 1.7.5: Configure Slider, Change Header Logo, Edit Footer and Other.
Part 2 – PrestaShop 1.7.5: Configure Product Attributes, Emails, Promotions and Other.
Part 3 – How to Manage Order Statuses, Edit Order Messages and Add Tax Rules in PrestaShop 1.7.5.









I am thankful for this. This a great source to learning Prestashop Basic things, which everybody should know.