If you want to improve webstore SEO and help search engines to understand your business, you need a clear sitemap. This article will give step-by-step instructions for creating a sitemap on PrestaShop 8. In addition, we put advice on how to generate a Prestashop Google sitemap file.
Take your time and get ready to optimize your online business!
Table of Contents:
How to Create a Sitemap in PrestaShop 8
How to Add the Sitemap to Google Search Console
How to Create a Sitemap in PrestaShop 8
Search engines use a sitemap to swiftly index your webstore. It’s a crucial tool, an XML file that contains all the pages and products located at the site. When coming across this file, search engines use the list to effiсiently index each piece of content on the online store. Thus, product and specific pages are shown in the search results when a user googles something.
To create a sitemap in PrestaShop 8, you must install and configure a particular module. You can build a map of your online store and update it when needed.
We recommend searching for such add-ons on the official marketplace. There are more about 30 variants, starting from free-to-download and ending with the reasonably priced SEO Pack Premium, which costs about $500.
To illustrate the sitemap creation process, we’ll use the basic Google sitemap Module by PrestaShop, which can be downloaded for free from the marketplace. Before you install the chosen module, make sure that the folder name matches its name—in our case, it is sitemap. Otherwise, no installation will happen.

PrestaShop Module Development
Learn more on how to improve your online store with BelVG PrestaShop Module Development
Visit the pageNow, let’s move directly into the creation process.
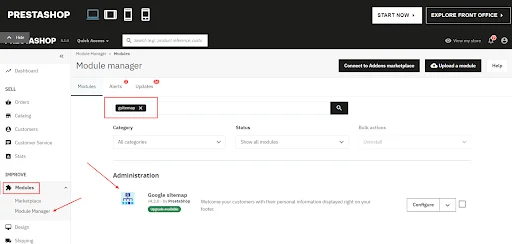
The first step you need to follow is opening the admin panel and proceed to Improve -> Modules -> Module Manager -> tab Modules and type the keyword sitemap into the search bar:
Modules will only work for standard pages. If we put, for example, on a blog, then it is unlikely that it will have any extension for adding pages to the sitemap. As you can see, the configuration page has several settings:
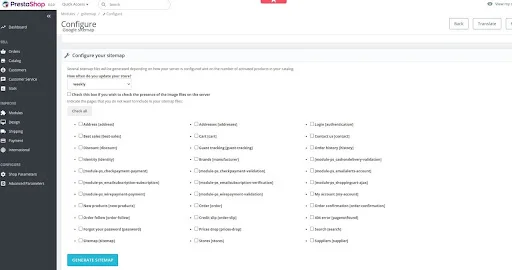
At this stage, you should choose and mark those categories that won’t be included in the sitemap. We recommend you exclude the following:
- authorisation page
- shopping cart
- personal page
- order history
- pages with the same information displayed for each visitor at the same address
- service pages like 404.
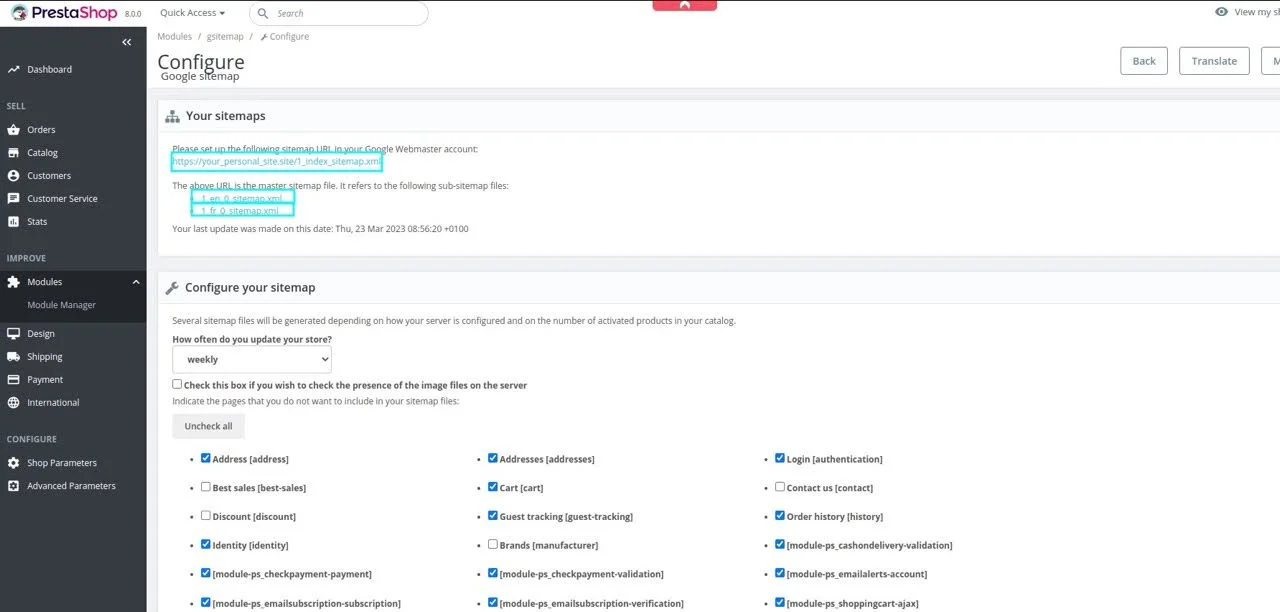
You can generate the file after you’ve marked all the needed checkboxes. Click on the Generation Sitemap, and you’ll see the sitemap address. It will be something similar to https://your_personal_site.site/1_index_sitemap.xml. You should save this URL into your Google Search Console account and robots.txt. The module will also show you the file size and the number of indexed pages.
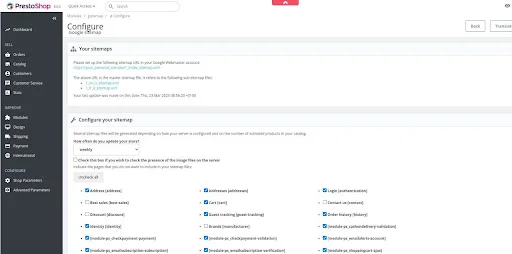
We recommend updating this file regularly to ensure search engines’ full indexation. If you prefer not to manually update the sitemap file, you can navigate to the page with the cron link. By creating a cron task using the provided URL, the server will automatically update the sitemap, relieving you of this task.
If you don’t know what a cron task is, consult your hosting provider for the details.

Prestashop Upgrade & Migration
Upgrade your online store and stand out among others with the BelVG Upgrade and Migration services
Visit the pageHow to Add the Sitemap to Google Search Console
Following the above guide, you know how to generate the sitemap in Prestashop. What’s the next step? You must add the sitemap file to Google Search Console to inform the engine about your website. We’ve worked out a simple guide for you to follow and succeed with the aim.
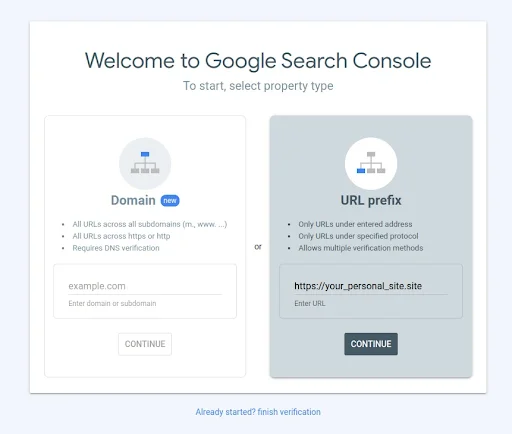
Step 1. First of all, you should sign in to the Google Search Console. We use the URL prefix, which is just entering the site URL and clicking on the Continue button.
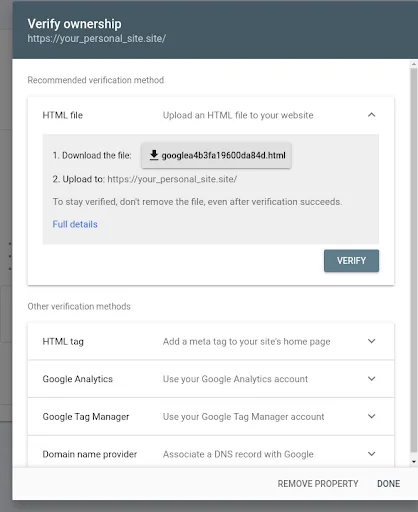
Step 2. You should download the HTML file and add it to your website. With the help of the FTP manager, you can use, for example, the file manager in your hoster panel. You need to add this html file to your site’s root directory.
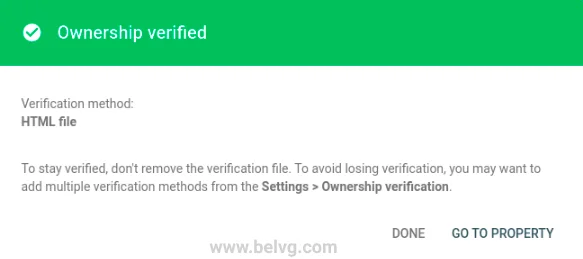
If you click on the Verify button, you’ll get the following message:
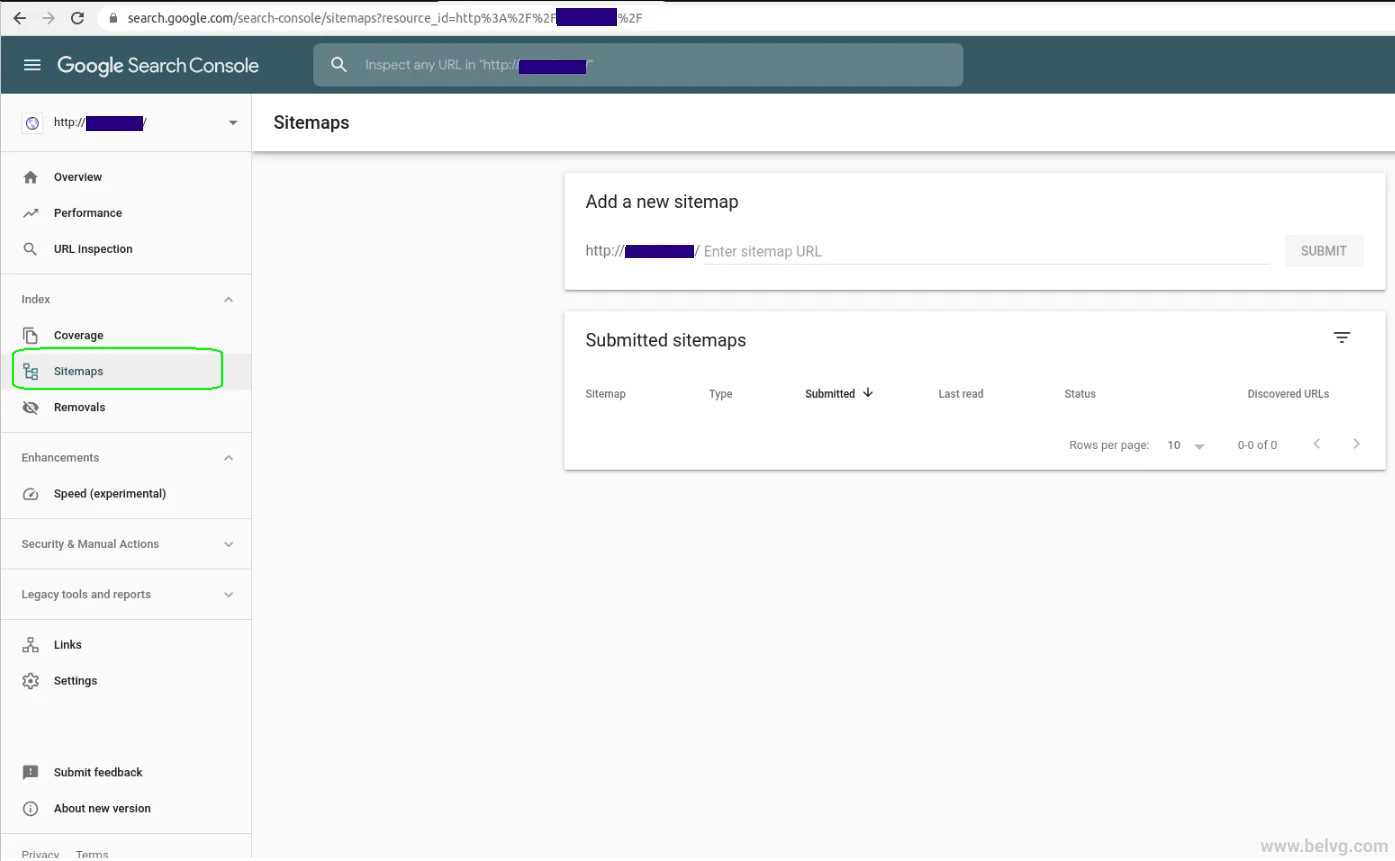
Step 3. Log in your Google Search Console account and select the Sitemaps tab.
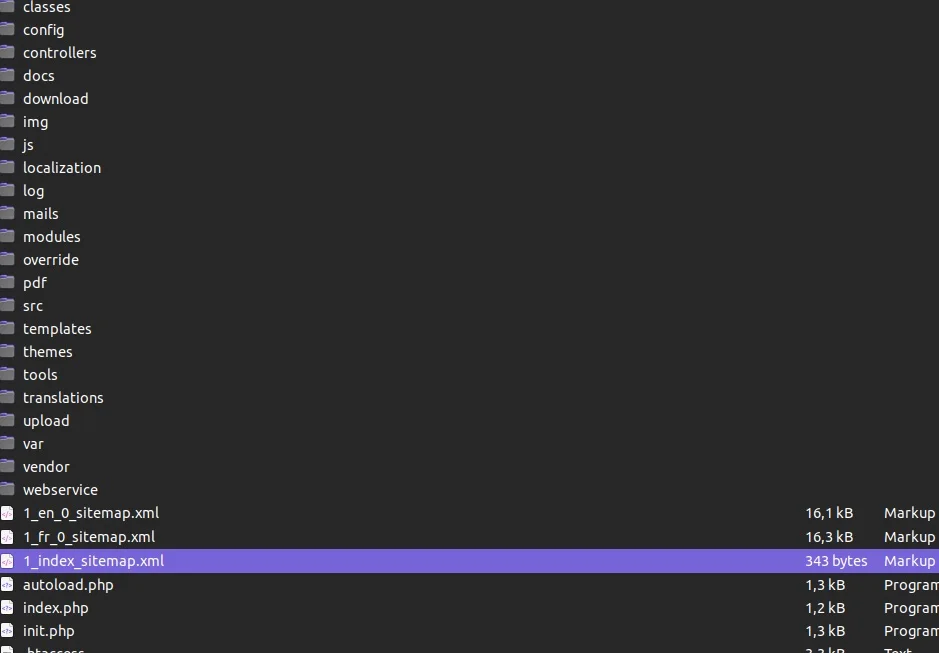
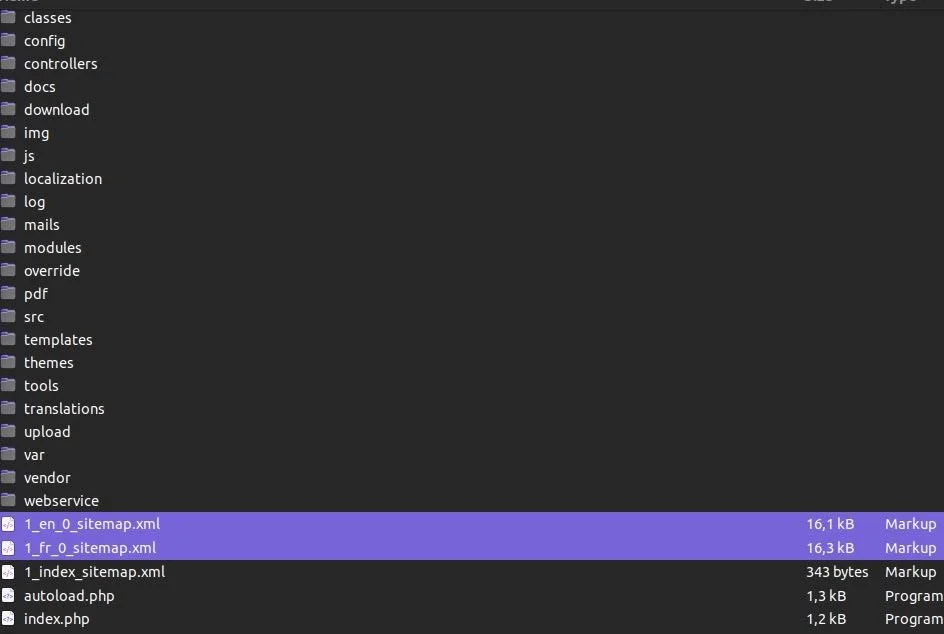
Step 4. As we’ve already generated sitemap files using the PrestaShop module, we can move directly to the admin panel of the site and check it.
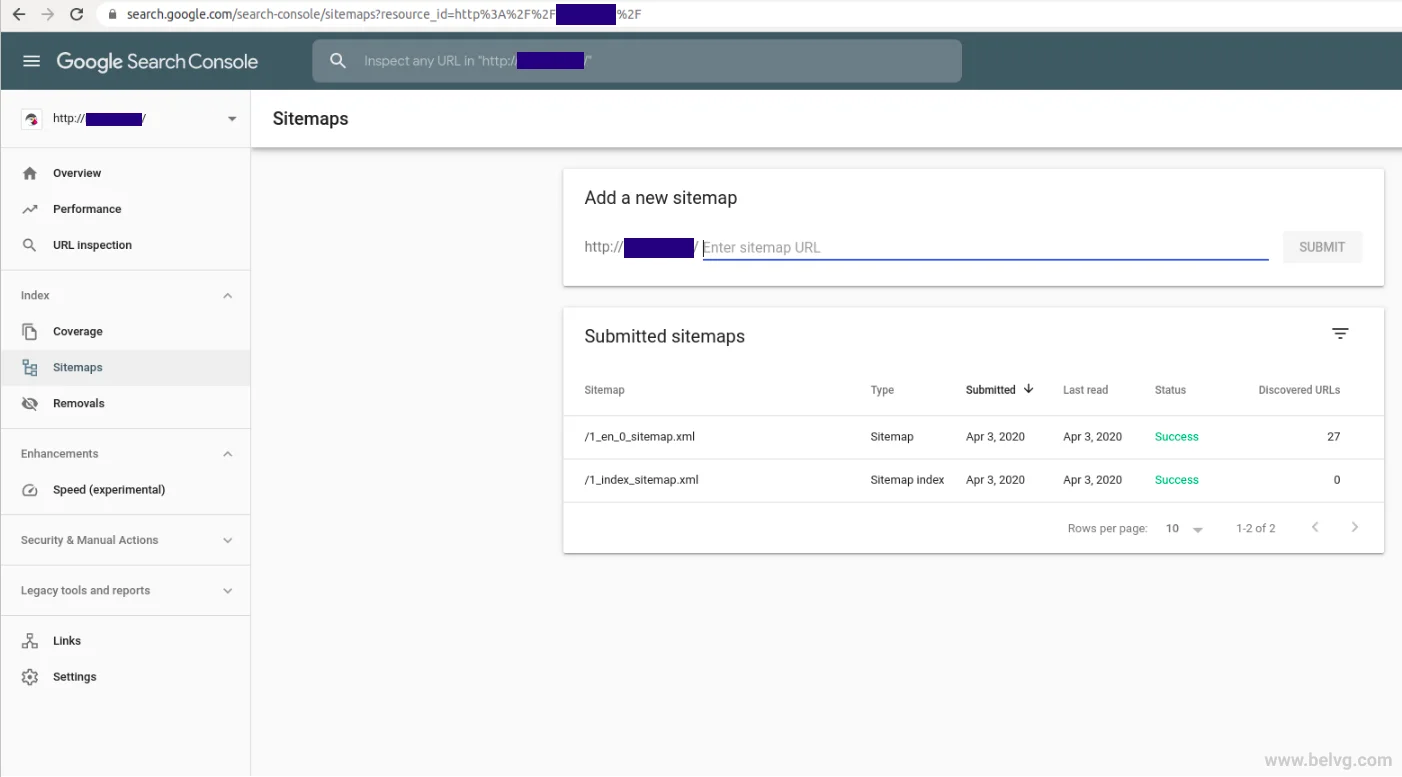
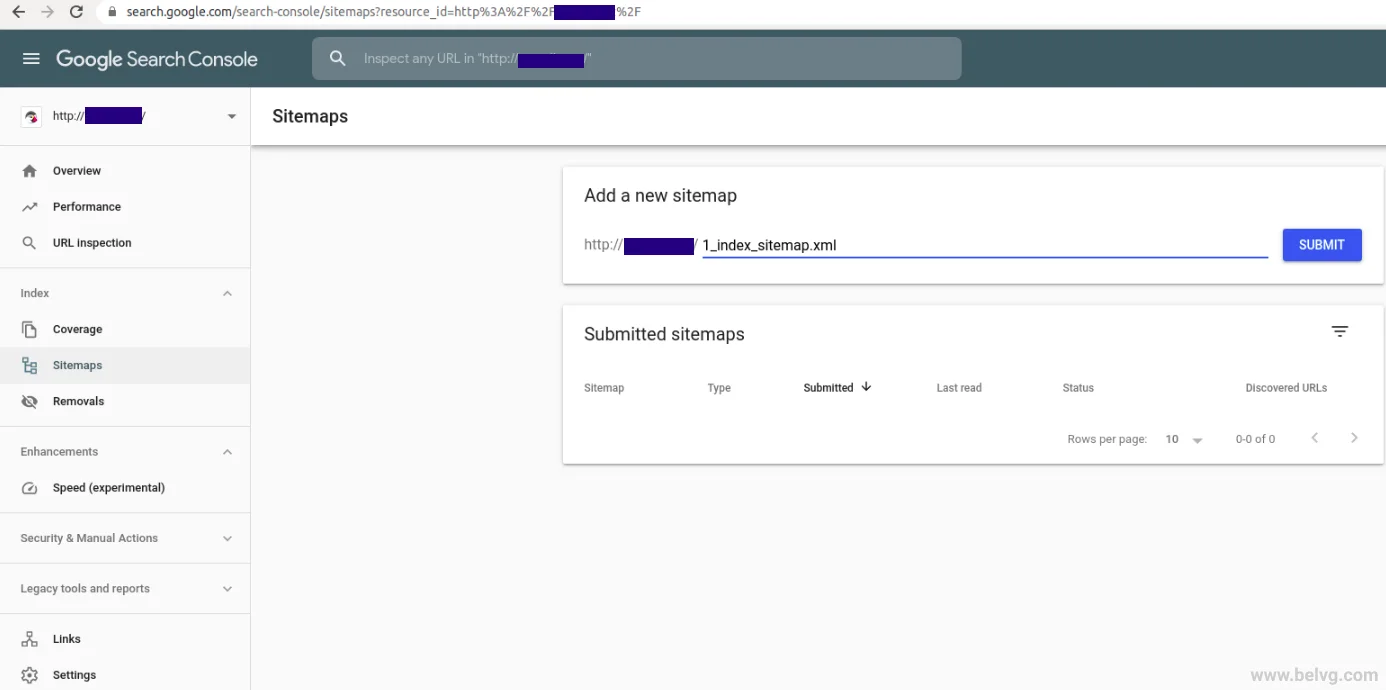
Step 5. Finally, we can add Prestashop sitemap URLs in the Google Search Console.

In case everything was performed well, you will get the following result.
Wrapping it up
Congratulations! Now, Google can see and index your webstore much better.
If you have any questions on this topic or if something went wrong while you were following the instructions, feel free to leave comments below. We’re here to help you.




Thank you, this is the article I used to be searching for.
Hi Ondrej
Please check the module file /modules/gsitemap/gsitemap.php, method _createIndexSitemap(), 864 line
Hi I have similar problem as Anna said. In which file do I find the line of code which should been edited? pls
Thnx
Regards
Ondrej
Hi, Anna! Thanks for your question.
You need to rename the file name in the code so that it would not be rejected. The name should be changed in the following line of code file_put_contents($this->normalizeDirectory(_PS_ROOT_DIR_) . $this->context->shop->id . ‘_index_sitemap.xml’, $xml_feed->asXML());.
What concerns your question about whether it will updated weekly – it will be only in case you have set up cron.
hi, Google rejecting the file name, they want me to rename it, if I rename the file, does the app recognize the file and update it weekly?
thank you
Hi, Fred! Thanks for your question.
As I see it, the archive extension can be as a file with .zip format, but if it doesn’t work, you may try a tarball format (.tar, .tar.gz or .tgz).
Hello , when I got to the module page in my admin and try to upload th Zip file I get a message saying Upload Failed.
Should I unpack the Zip file and upload it with FileZilla ?
Hi, Robert!
It’s rather difficult to answer your question not knowing the details. What module exactly did you install?
I have a problem with the official module from Prestashop, it seems that it does not include in the sitemap the tags, although they are permitted by Google Robots. Have any ideea?
Hi, John
Thank you for your question.
It seems that you have problem with permissions. Please, check the sitemap file in the root directory.
I have downloaded and installed module, and 2 sitemaps has been generated. The problem is that i am getting 404 on clicking sitemap address. How to debug that issue ?
Hi Florian,
First, open the “Manage installed module” page (https ://prnt.sc/l66xs5) and upload this archive (https ://goo.gl/zGP9SS) there. The archive extension can be: .zip or a tarball format (.tar, .tar.gz or .tgz). Most importantly, the name of the module and the archive should be “gsitemap” (http ://prntscr.com/l66z4u). If this doesn’t work, you will need to check the access rights to the folders.
Hi I’ve downloaded the module and renamed it but still can’t find it in the “module” panel. is there any other step?