We are continuing our guide over PrestaShop 1.7.5 (the previous part, concerning slider, footer, header in PrestaShop 1.7.5 is here) and how to work with it. We’ve already had a tour over the admin panel and began with the configuration of basic elements of an online shop – main page slider, header, footer, copyright message, and social media buttons. In this post we are going to take a look at:
How to Add Categories in a Drop Down Menu
How to Add Product Attributes and Combinations
How To Set Up Special Promotions
How to Configure Newsletter Subscriptions
How to Edit Email Templates
How to Add Categories in a Drop Down Menu in PrestaShop 1.7.5
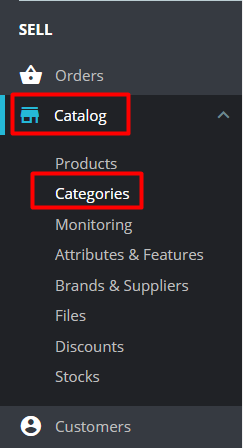
Drop down menu at the top of every page is a must for every good online store. To begin configuring the menu in PrestaShop 1.7.5, log into the admin panel, then proceed to Catalog -> Categories.
Here you will see the list of categories already existing in your store and reflected at the frontpage.
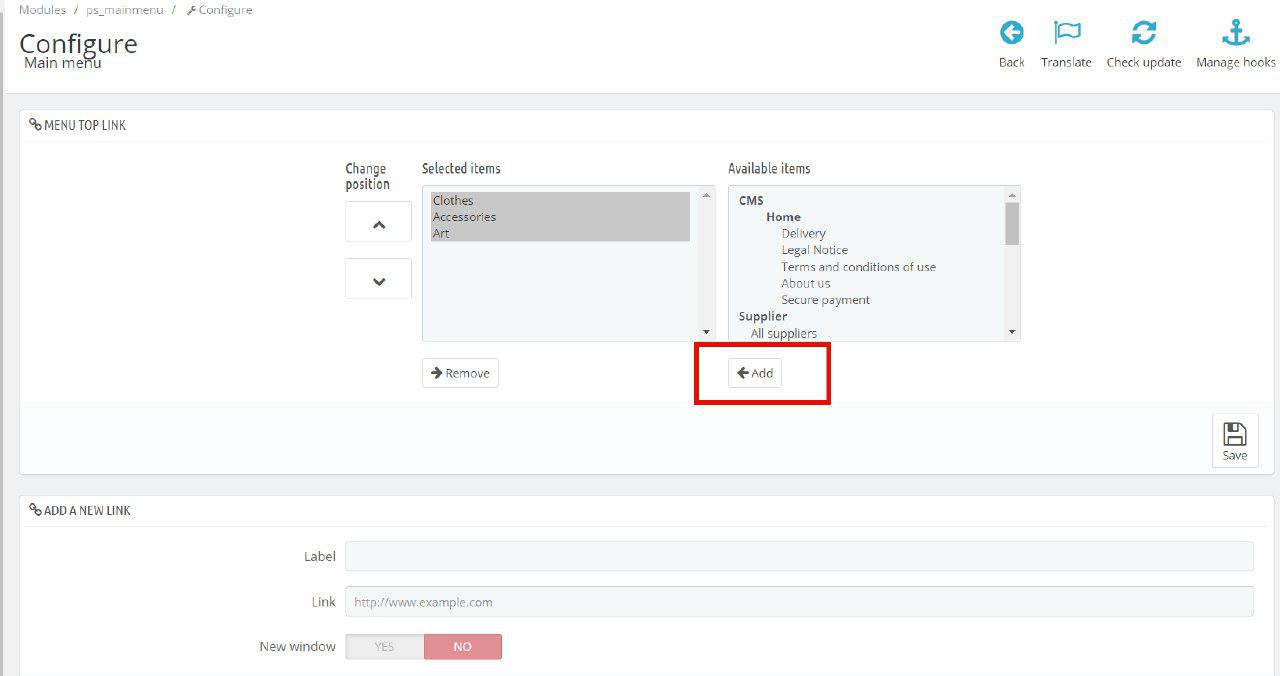
If you want to add a new category, go to Modules -> Module Manager and find the Main Menu module. Click Configure button.
You’ll get to the following menu.
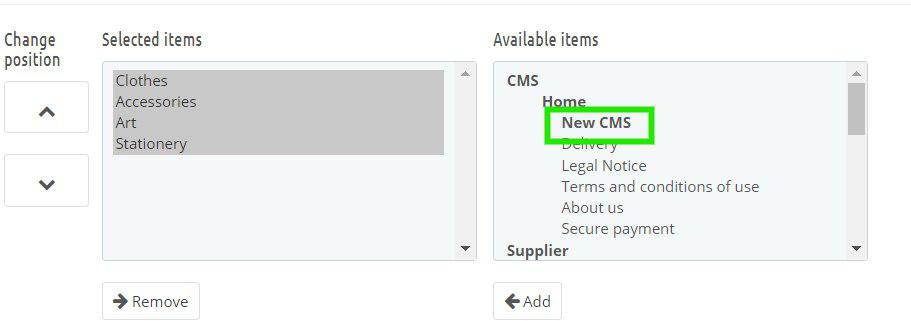
There you can see the Selected Items field (the ones you have in your frontend) and the Available Items field (the ones you can add). You can select the category from the latter list and click the Add button. The selected category will appear in the left field. You can change the position of categories by moving them up and down with the arrows on the left. Press Save to save changes.
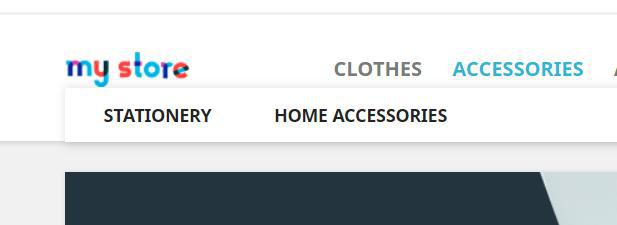
See what you got in the frontend.
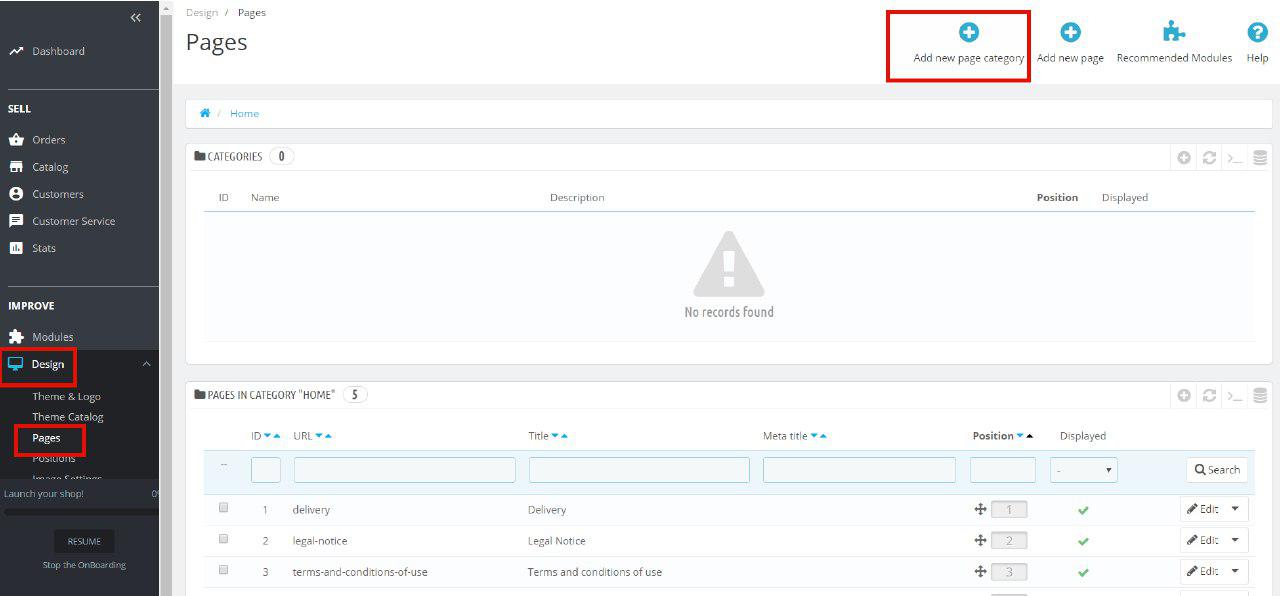
But perhaps you want to add CMS categories to your dropdown – what should you do? Begin with creating a CMS category – go to Design ->Pages and click Add new CMS category.
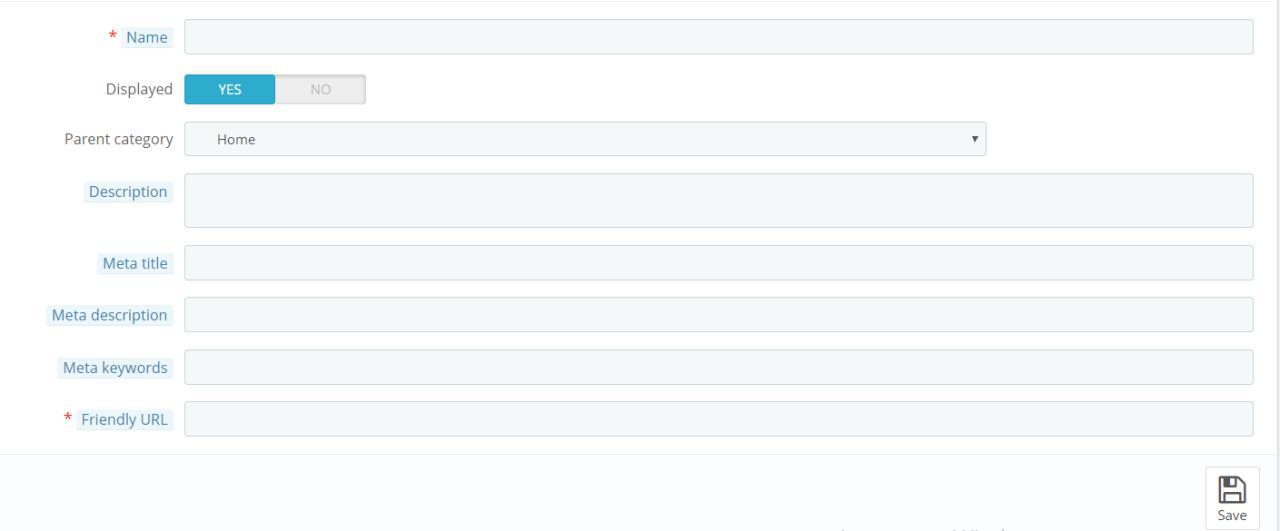
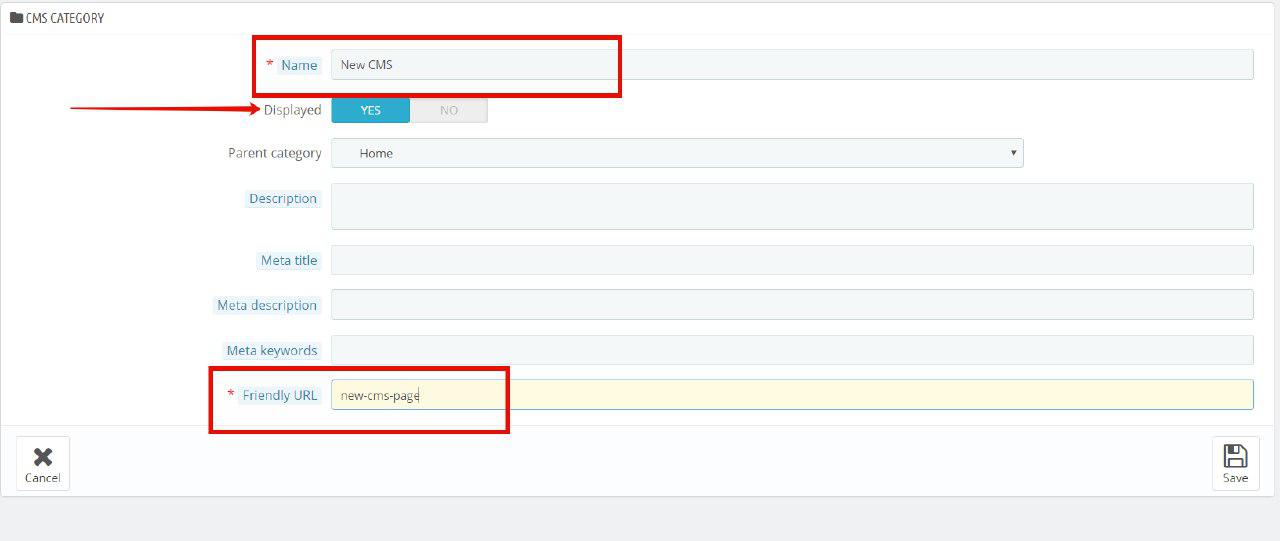
This will get you to the following settings.
Fill in the fields; bear in mind that Friendly URL is autocompleted according to you category Name, but you can change it to whatever you feel suitable. Click Yes at Displayed and save changes.
As you will return to the Main Menu module, you will find your new CMS category among the Available Items. Add it to the left field and click Save.
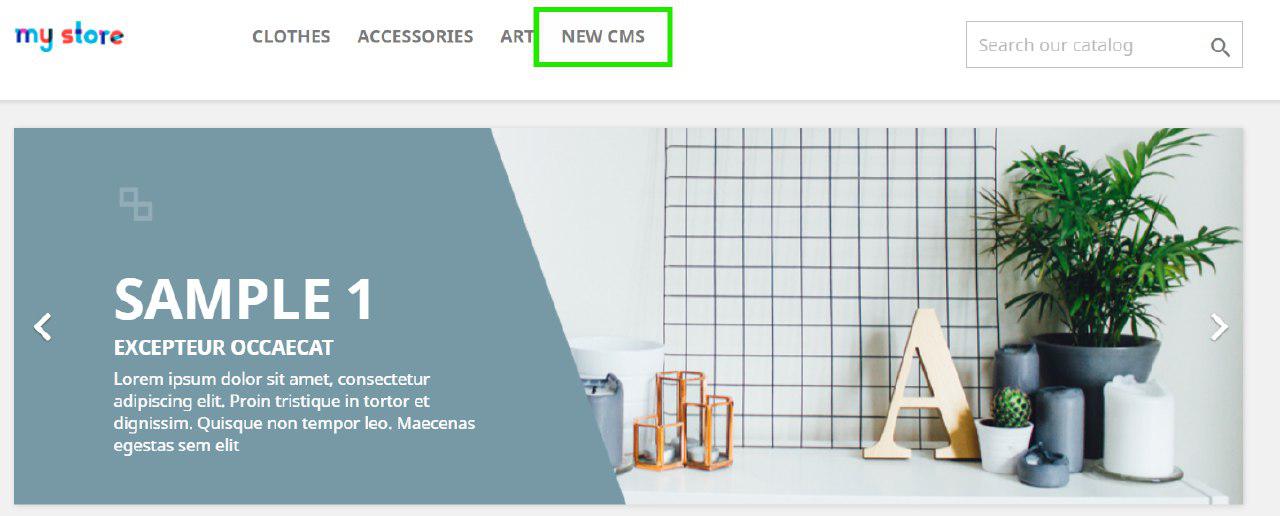
Now you have a new CMS category at your main page.
How to Add Product Attributes and Combinations in PrestaShop 1.7.5
As a retailer, you need to pay extra attention to your product pages. They need to be as descriptive and informative as possible, containing various fields with information like size, color, material, etc. PrestaShop 1.7.5 offers each store owner freedom to act and configure their shop as they like it. Let me show you how you can do this.
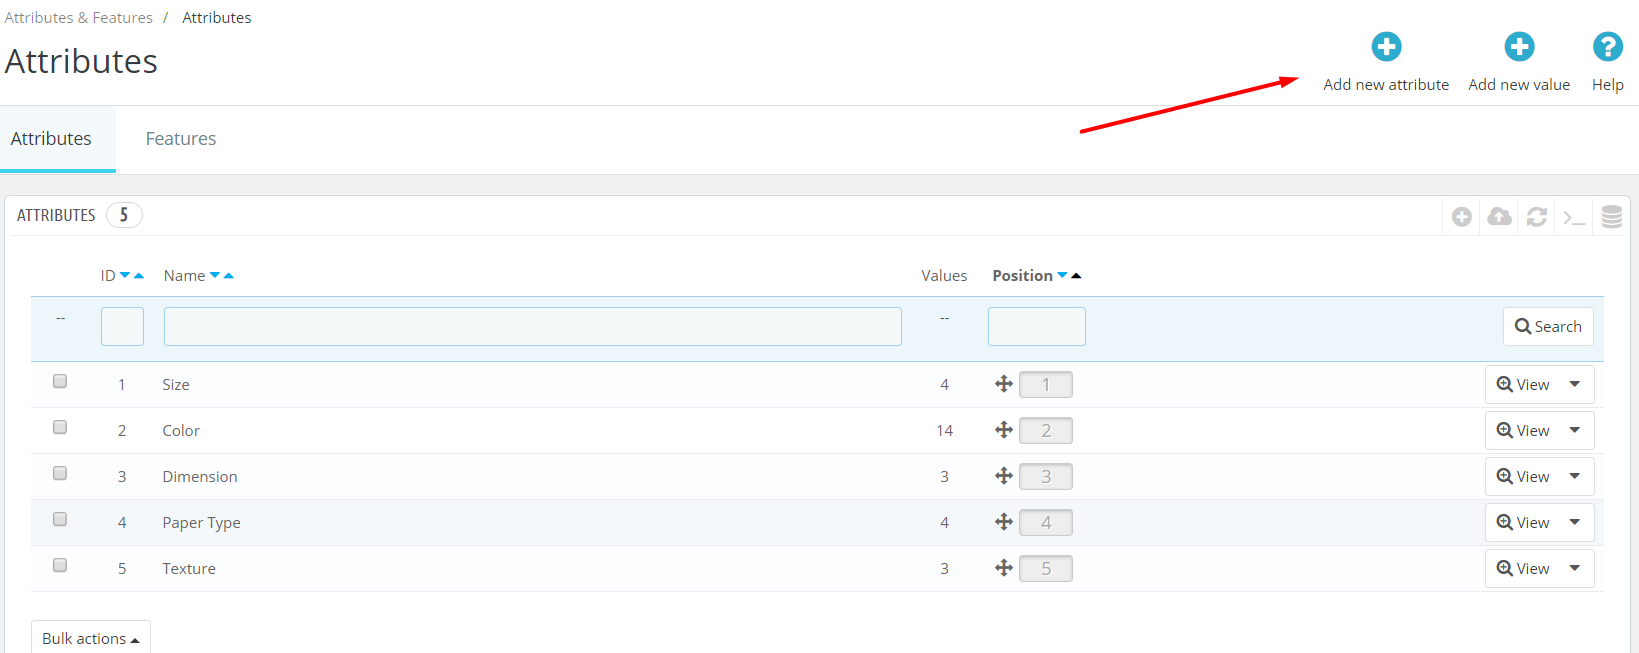
Go to your admin panel and find Attributes & Features in Catalog category. You’ll get to the list of attributes the goods in your shop have. In our case, it’s Size, Color, Dimension and Paper Type.
As you click on any attribute, you’ll see the list of available values, which can be added and deleted.
Creating an attribute is a rather easy task. First, click the Add new attribute at the Attribute panel.
You’ll need to fill the following 3 fields:
- Name of an attribute, which will be displayed in the admin page
- Public name, the one the product page will contain
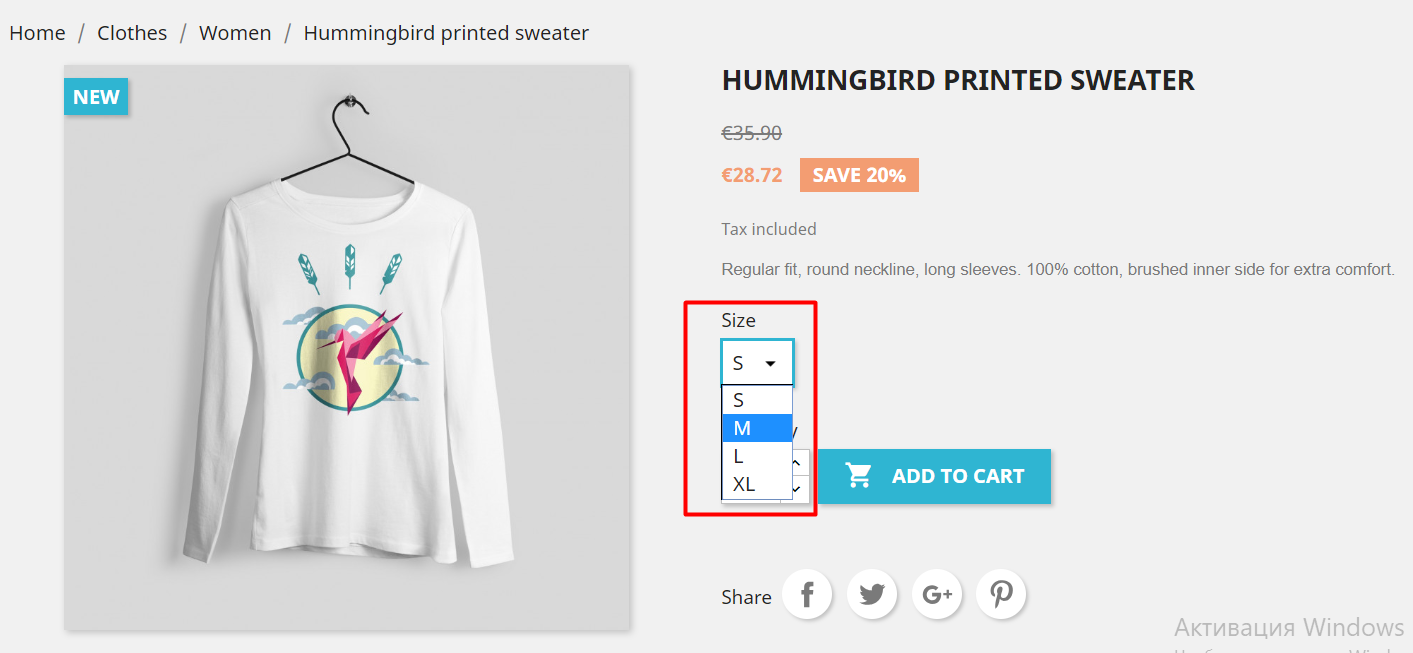
- Attribute type, where you can choose the way attribute choice will look at the product page. PrestaShop 1.7.5 offers three alternatives: Drop-down list, Radio buttons, Colour and texture.
As you fill in this information, don’t forget to press Save.
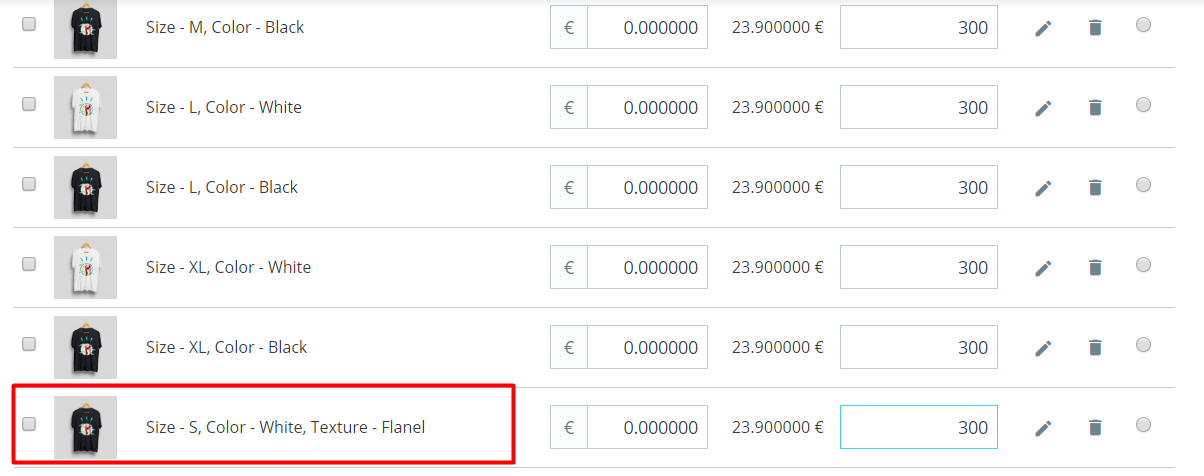
Now you need to add values to it. As you can see, I decided to create the Texture attribute and give it three values – Silky, Cotton, Flannel. Creating a value, you need to fill in 2 fields – Attribute Group (its Texture in my case) and Value (Silky, Cotton or Flannel).
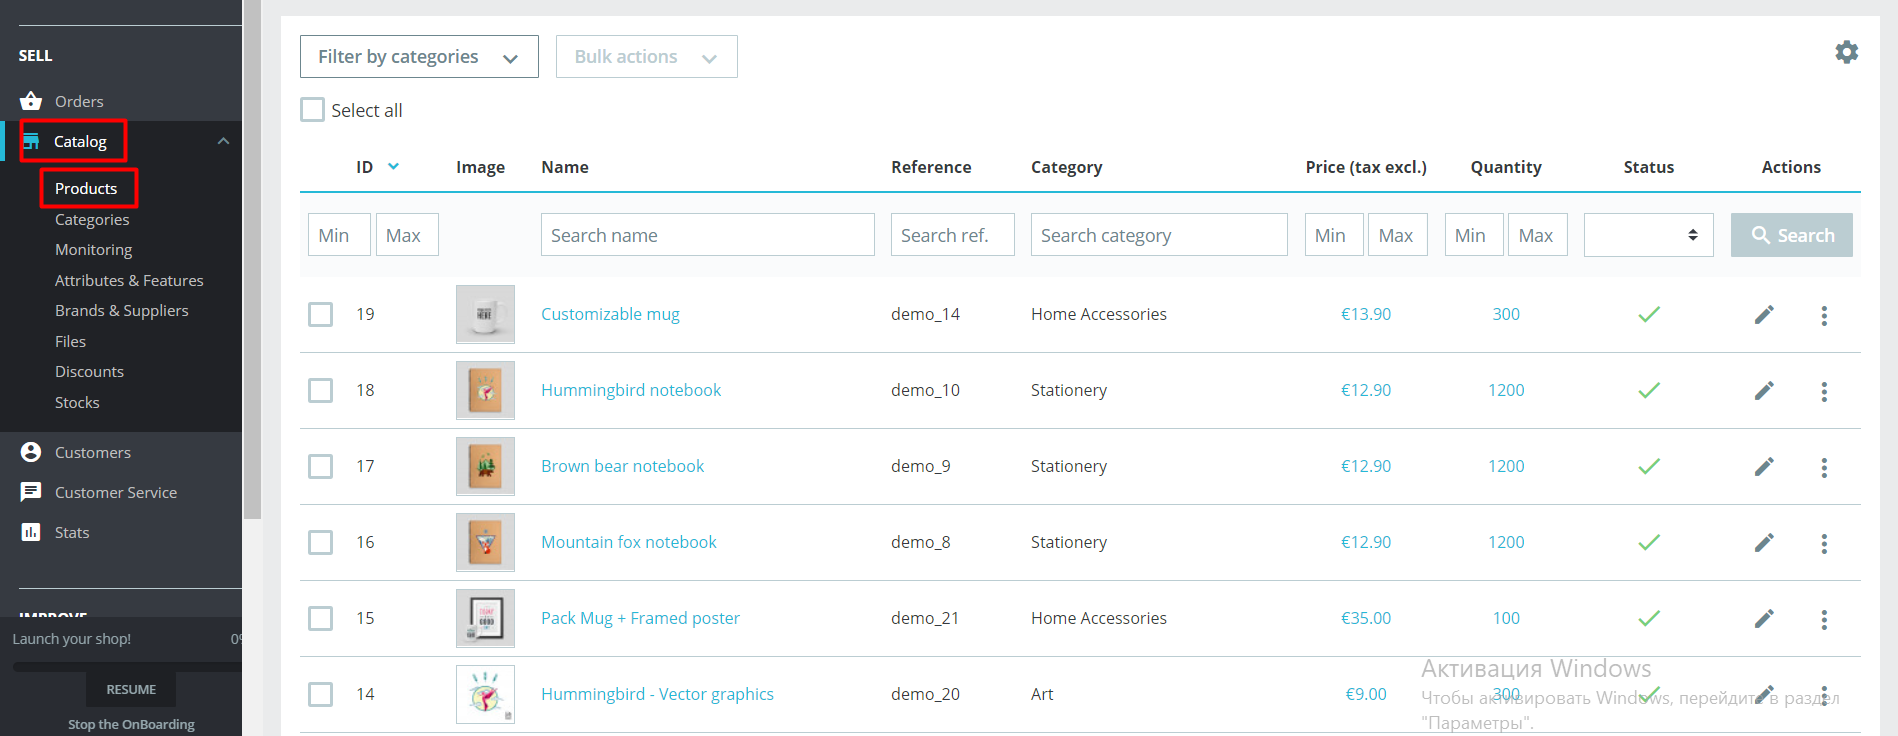
After you added all the attributes you wanted and saved changes, go to Catalog -> Products. There you will see the list of all the goods you sell together with its attributes.
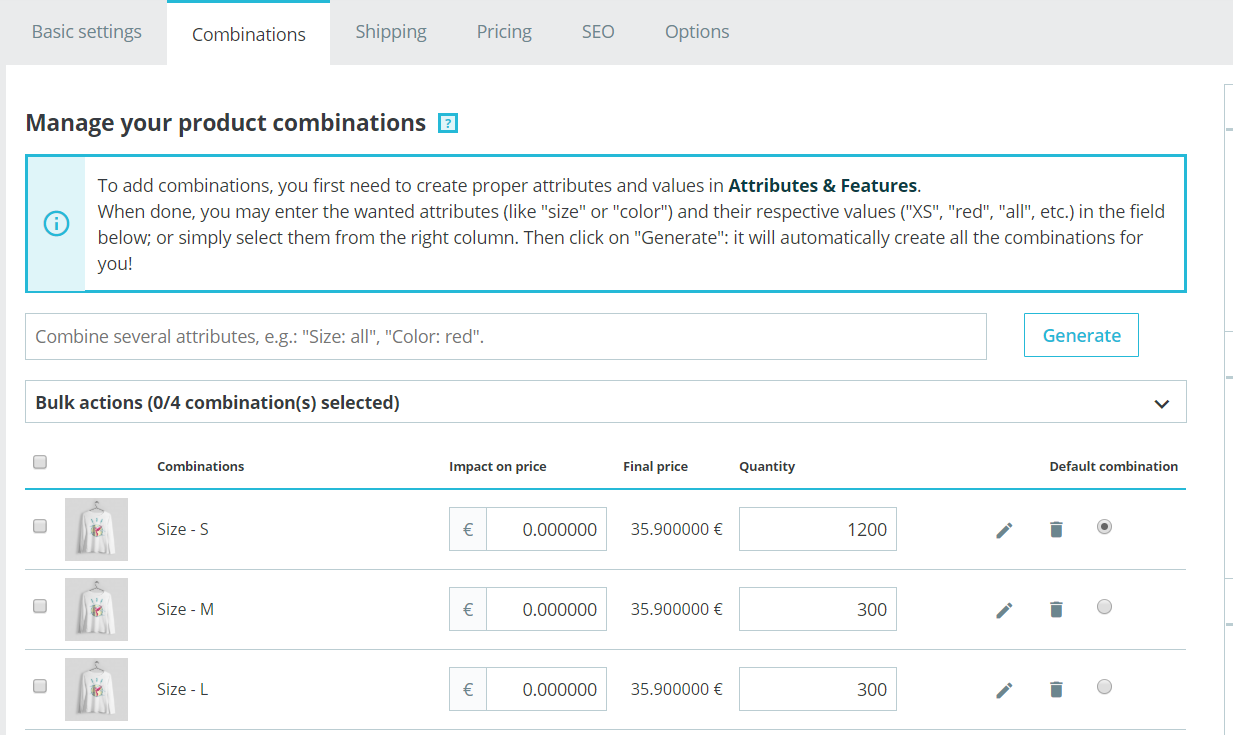
Click on any of them and go to the Combinations tab.
This is where you incorporate the new attribute to the products. To do that, fill in the attributes you want your product to have (size, color, texture) and click Generate. The item with the corresponding attributes will appear in the product list.
Click Save as you finish your work and go to see changes in your shop.
How To Set Up Special Promotions in PrestaShop 1.7.5
What is better for pleasing your current customers and attracting new than a delicious special offer? Probably nothing. Let’s learn how to create and configure promotions in PrestaShop 1.7.5 admin panel.
Begin with going to Catalog -> Discounts. You’ll get to the Cart Rules tab, where you click the Add new cart rule to create your special promotion.
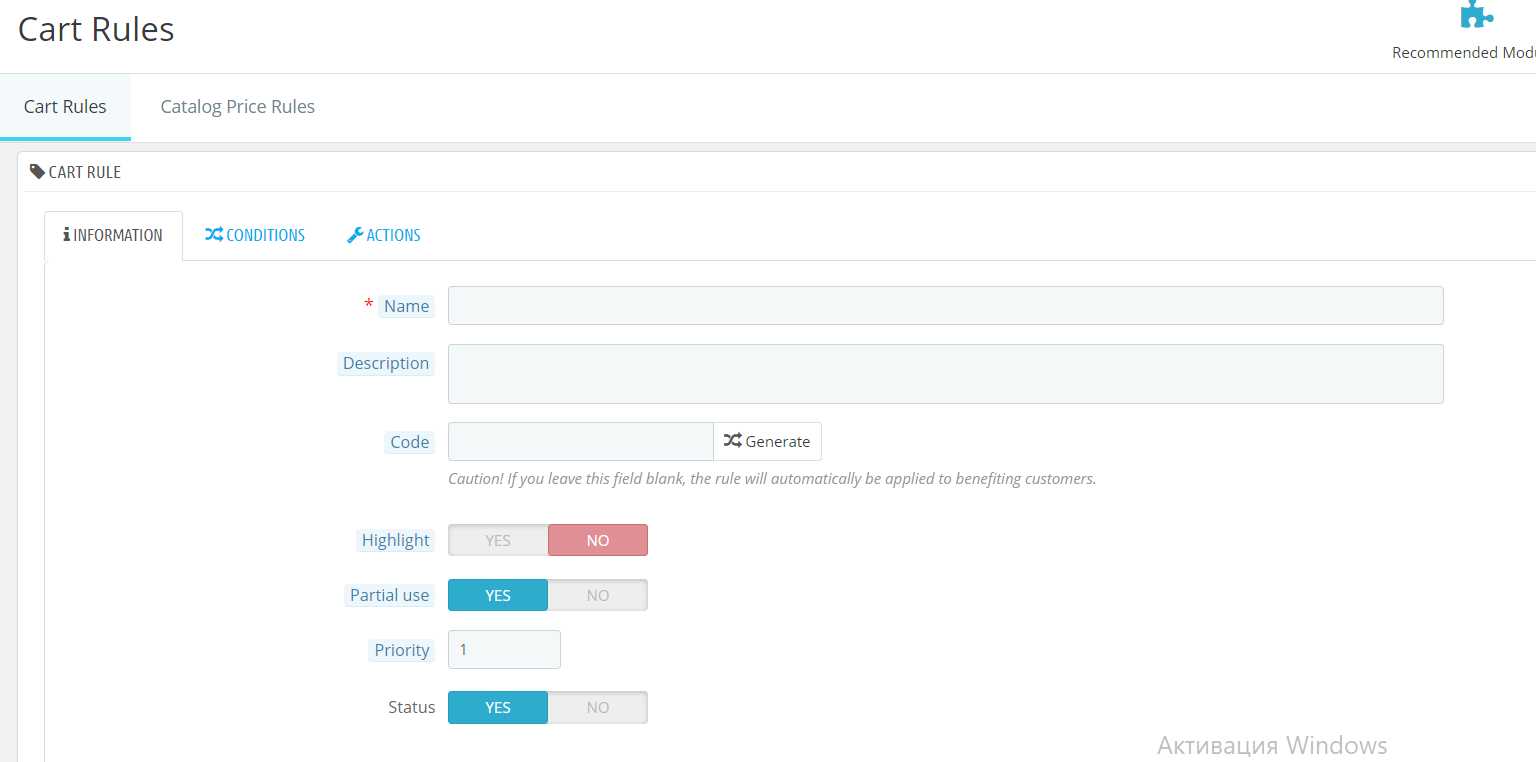
There you can see three tabs. First one is Information, where you fill in the general data of your promotion rule:
- Name. The name of the rule, visible to customer.
- Description. The description will be visible only at the admin panel, but still needs to be clear and understandable.
- Code. The promo code your customers will need to fill in to get the discount. It can be automatically generated.
- Highlight. If the voucher is not in the cart it will be displayed in the cart summary.
- Partial Use. Allow or disallow the voucher application if the value of a discount it gives is bigger than the total amount of the order.
- Priority. If you have a number of vouchers, you can differentiate their priority.
- Status. Press “Yes” to enable the cart rule.
Click Save and Stay to proceed to the next tab, which is Conditions. You will find here the following fields.
- Limit to a single customer if you want the rule to be applied to only one person.
- Valid. The time period this rule will apply.
- Minimum Amount. The minimum sum after exceeding which the rule can apply.
- Total Available. The number of clients who will be using the Cart Rule.
- Total available for each user. Here you can limit the times a Cart Rule can be used by one customer.
- Restrictions. Limit the rule to a certain group of customers, carrier or product.
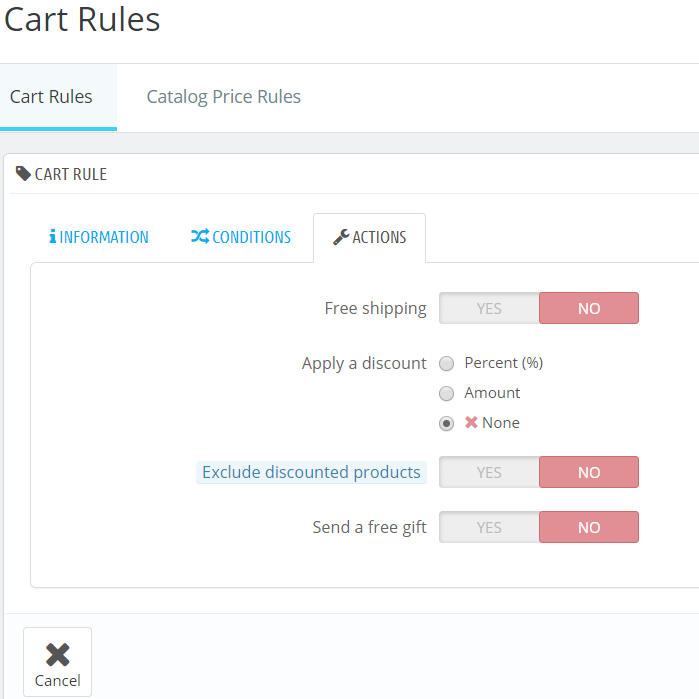
The third tab is Actions. There you need to configure the following:
- Free Shipping.
- Apply a Discount. Choose the type of discount applied to the order.
- Exclude discounted products. Disallow voucher use for the products already on sale
- Send a free gift. A gift will be automatically given to the person who uses the voucher.
As you have filled in all the fields and configured settings, click Save – and your special promotion is ready.
How to Configure Newsletter Subscriptions in PrestaShop 1.7.5
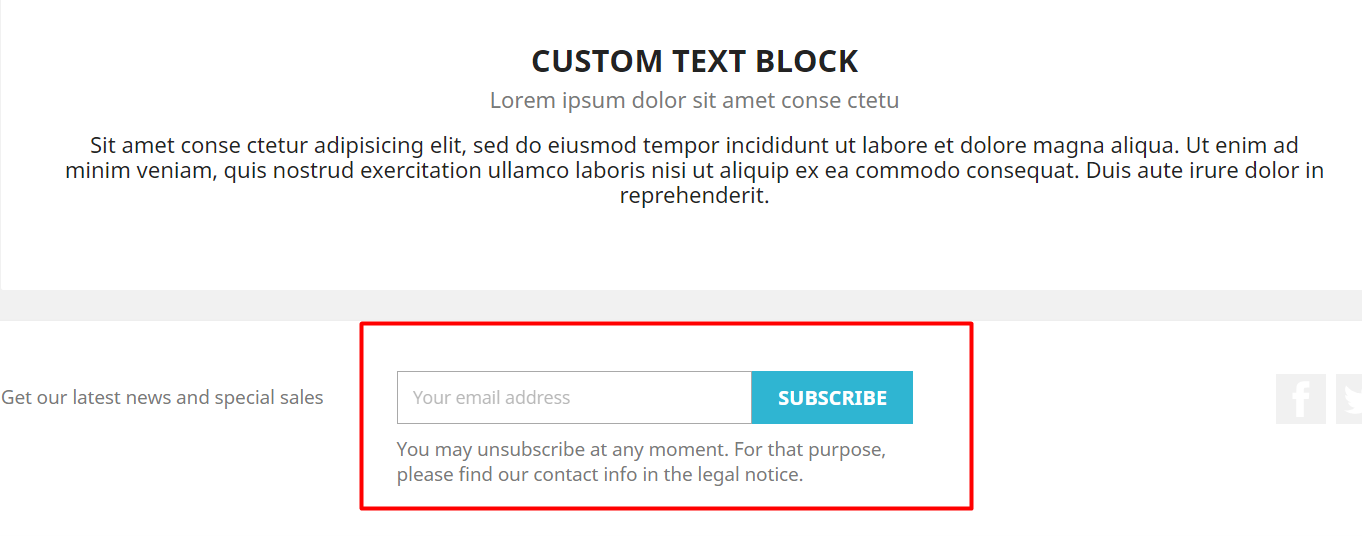
There’s no better solution for keeping your customers informed about the latest sales, promotions, special offers in your webstore or announce upcoming events or changes than the newsletter. You have probably seen such fields in many online stores – all customers need to do is to leave their email address and they’ll start receiving newsletters periodically.
PrestaShop 1.7.5 offers merchants wide capabilities for setting up their own newsletter. To begin with, log in to your admin panel and go to Improve section, Modules -> Module manager. Find the Newsletter subscription module and click Configure.
You’ll get to the following Settings panel.
Here you’ll need to set up the fields like:
- Would you like to send a verification email after subscription?
- Would you like to send a confirmation email after subscription?
- Welcome voucher code. If you wish to include one in the first welcome message a promo code, fill it in this field.
- Newsletter conditions – the text with the subscription conditions that is usually placed nearby the field for email.
Click Save and scroll lower. There are three more sections:
Search for addresses – here you can find a certain subscriber by his email.
Newsletter registrations – the list of those who submitted their email address and other personal data to your form.
To export your subscribers’ data in the CSV file, proceed to Export customers’ addresses field.
Here you need to set up:
- Customers’ country
- Newsletter subscribers – choose whose addresses you want to upload: subscribers with or without an account, all or non-subscribers.
- Partner offers accepted – filter clients who receive your partners offer.
As you finished configuration, click Export CSV file and save the document.
How to Edit Email Templates in PrestaShop 1.7.5
PrestaShop offers default email templates that are sent to a customer as he creates an account, subscribes to a newsletter, makes an order, when his order is shipped, etc. Yet if you want such letters to be unique or conduct some special information, you can customize them any time.
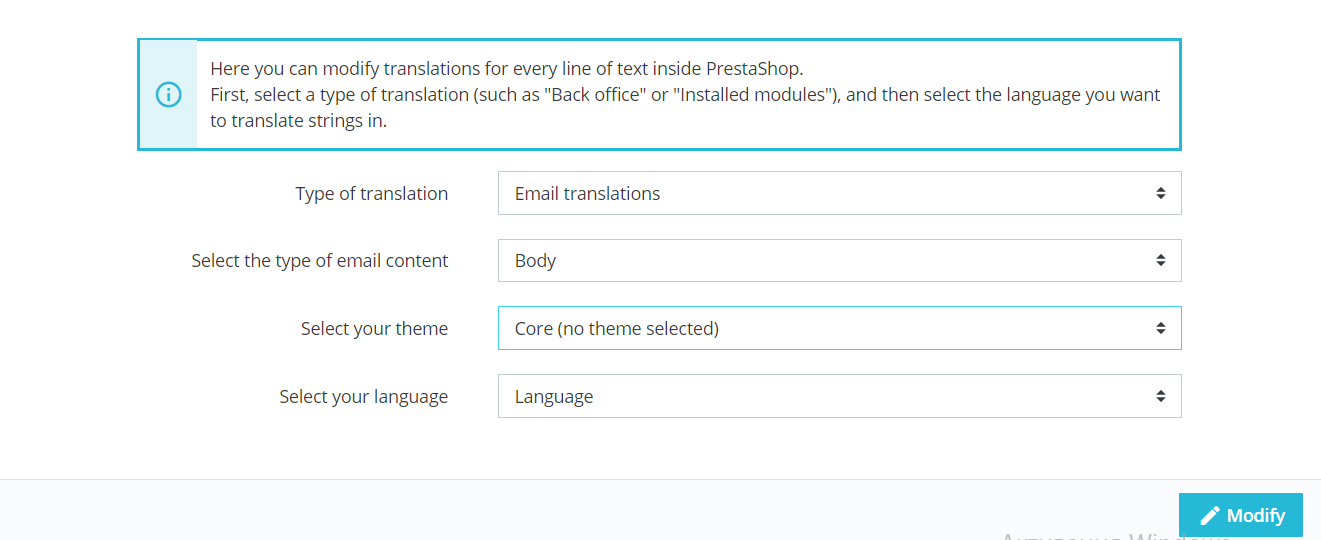
For that, log in to the admin panel, find Improve section and go International ->Translations.
First, you’ll need the Modify Translations section.
- Type of translation: Email translation
- Select the type of email content: Body
- Select your theme: Core (no theme selected)
- Select your language: English in our case, it can be any in yours.
Press Modify button to save changes. You’ll get to the Email Templates page.
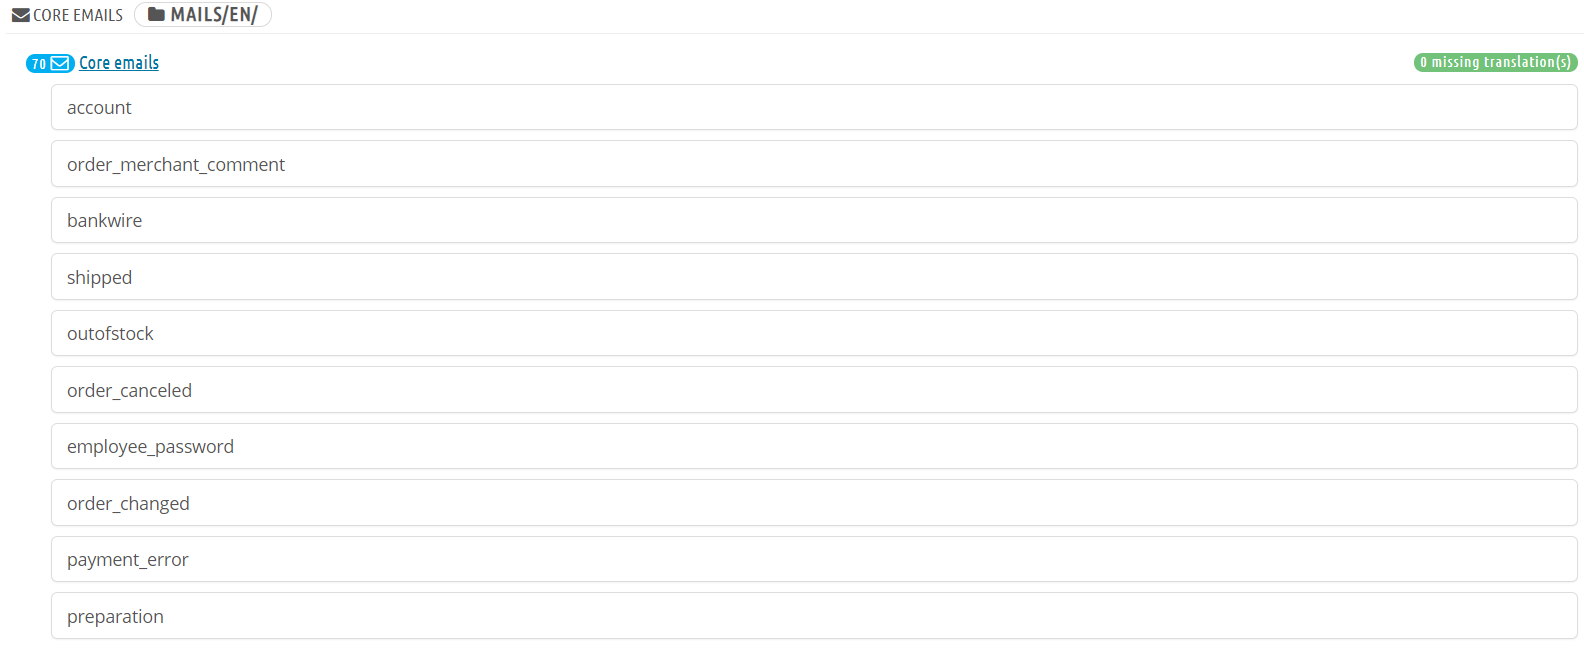
Click on Core Emails. You’ll get a long list of PrestaShop email templates – from payment to refund.
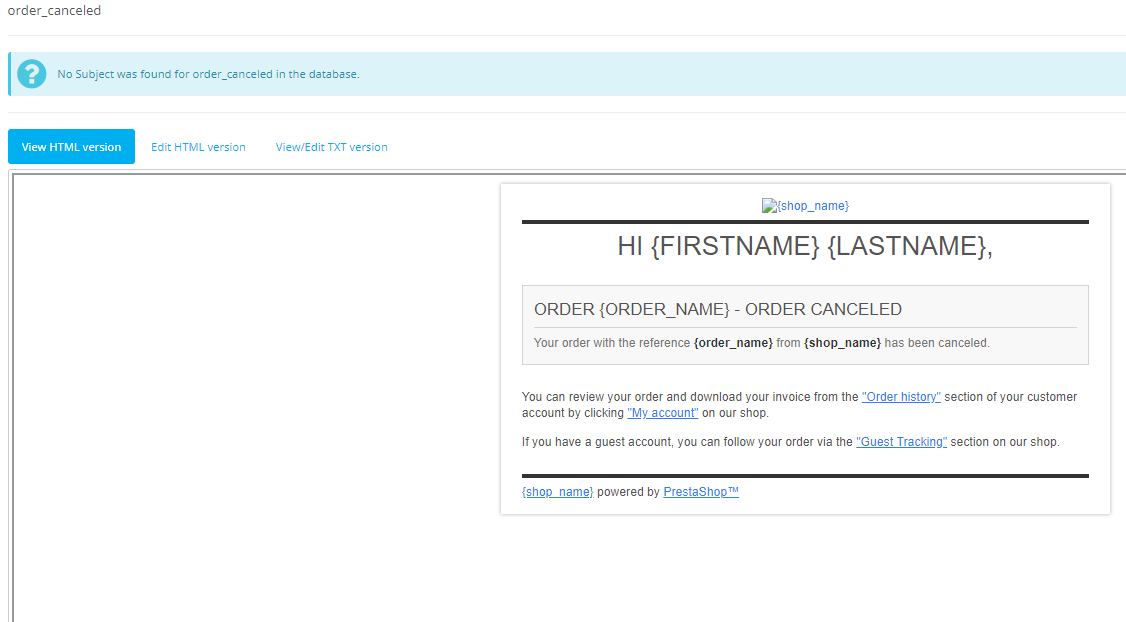
Click on the template you wish to edit (it’s order_canceled in my case) it in HTML or TXT version.
After you made all the changes you wanted, click save.
This is all for today’s article, I hope you found it useful. Stay tuned for the next part of PrestaShop 1.7.5, until now – if you have a question or comment, feel free to leave them down below.


