Page Builder was announced in connection with the release of a new Magento 2.3 at the end of November, 2018. This tool promised extended content management functionality for store admins of Magento Commerce, in particular, the ability to create pages without having the specialized technical knowledge and using HTML and CSS. Now, as around half a month has gone since the Magento 2.3 release, we have thoroughly tested this new tool and are going to describe its functionality for you.
Table of contents:
What is Page Builder in Magento 2.3
How to install Page Builder
Page Builder tools
Page Builder element configuration
How to create a banner in Page Builder
What is Page Builder in Magento 2.3
Page Builder is a powerful tool for creating and editing cms pages, blocks and dynamic blocks. It has an intuitive drag-and-drop interface and an advanced set of content management functionalities. With page builder, you can easily create and configure both product pages and categories, not only their design and layout, but also the behavior of certain dynamic elements.
The introduction of this tool immensely simplifies the process of webpages creation and enables store admin new exciting capabilities.
How to install Page Builder
At the moment, PageBuilder is available for Magento Commerce 2.3.1 only, so you need to upgrade the current version of Magento Commerce to be able to work with this tool. Magento Open Source 2.3.1 version does not provide the PageBuilder.
Page Builder tools
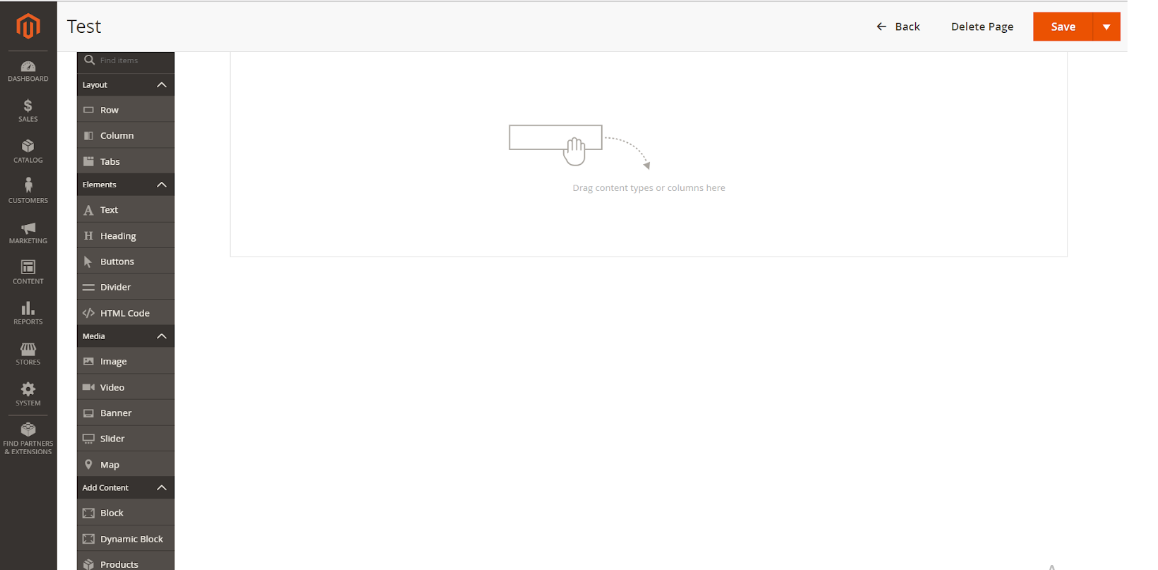
This is how the layout of the installed Page Builder looks like. As you can see, most part of it is a clear field, representing your future page, where you drag and drop the elements. On the left, there is a set of tools for building your page, divided into several sets.
Tool #1: Layout set
Tools from the layout set are used to create the page layout by placing columns and rows. Apart from the ability to create a horizontal and vertical breakdown, we can also create tabs.
Tool #2: Elements set
With tools from the elements, you can create basic elements of your future page: text, headings and buttons. There is also such tool as divider that inserts a horizontal line and the tool for inserting html code directly.
Tool #3: Media set
In the tab you will find the instruments for inserting such media elements into the page, like image, video, map, as well as our own banner and slider.
Tool #4: Add content set
This tool set allows to add content from in form of static and dynamic blocks. You can also create and place a block with your products using the corresponding instrument from the set.
Page Builder element configuration
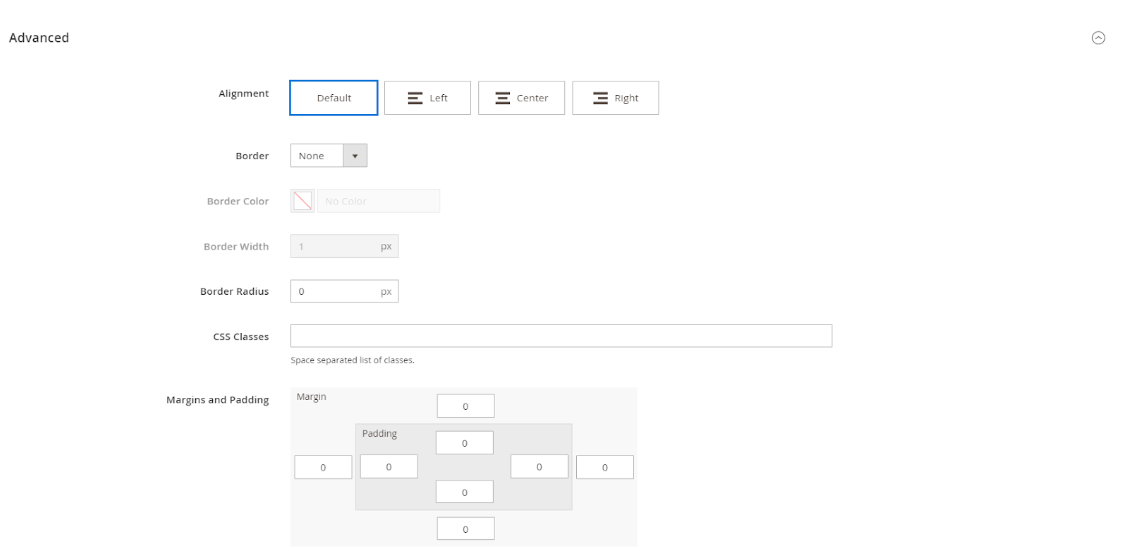
There is a wide configuration set for each page builder element, enabling you to deeply customize the look of your pages. Each element has both its own unique settings as well as advanced settings, common to many elements.
Advanced tool settings allow to adjust the following:
- Alignment: without alignment, on the left, in the center;
- Border type: by default, without border, dotted, dashed, solid, double, groove, ridge, inset, outset;
- Border color and width (if a border type is selected) ;
- Border radius to round the corners of an element;
- CSS Classes, where you can add a class for compatibility with a custom theme;
- Margins and Padding, where you can adjust the external and internal padding of an element.
How to create a banner in Page Builder
Page builder is also a useful tool for creating and configuring banners and sliders – the elements that are especially important for an ecommerce website. Before the introduction of Page builder, there was no default tool in Magento that would allow configuring slider and banners, which meant the store owner had to install a separate module for this purpose.
Step #1: Choose appearance
Select the type, position and the minimum height of the banner block.
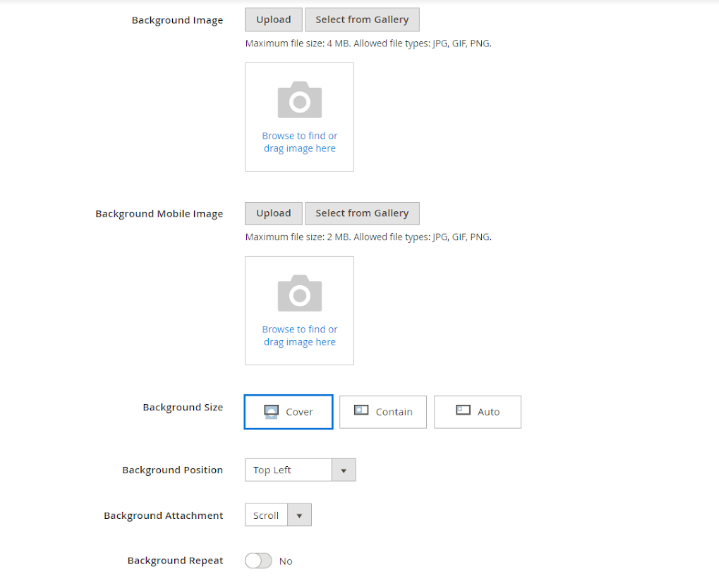
Step #2: Configure the background
For that, complete the following settings:
- Background Color;
- Background Image – you can select different background images for the desktop and the mobile version in the Background Mobile Image;
- Background Size – select from: Cover to set the banner block inside the background, Contain – the background will be inside the banner and Auto – the elements will be situated relative to each other depending on types and sizes;
- Background position – determines the background position inside the banner;
- Background attachment – whether there will be a scrollbar inside the banner;
- Background repeat – enable to repeat the background image.
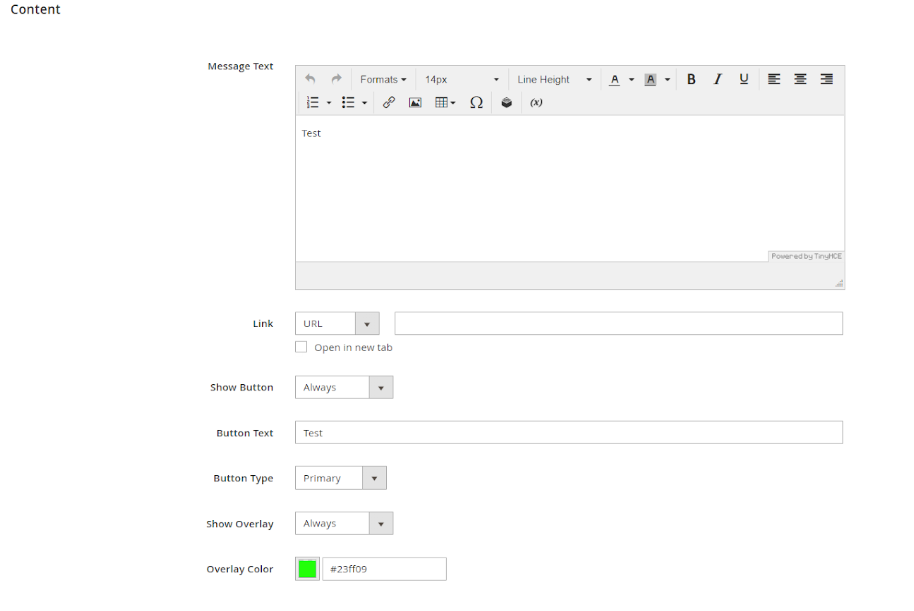
Step #3: Create banner content
Configure the following fields:
- Message Text – fill in the text you wish the banner to contain;
- Link – url of the page your banner will lead to;
- Show Button – add or remove a button to the banner;
- Button Type – select the type of button;
- Show Overlay – specify the banner background behavior when a customer hovers the mouse over it;
- Overlay Color – select the color of the banner overlay.
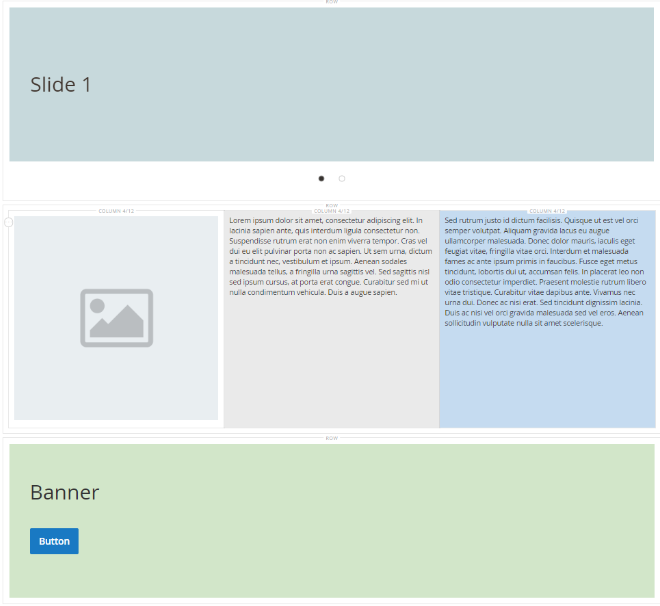
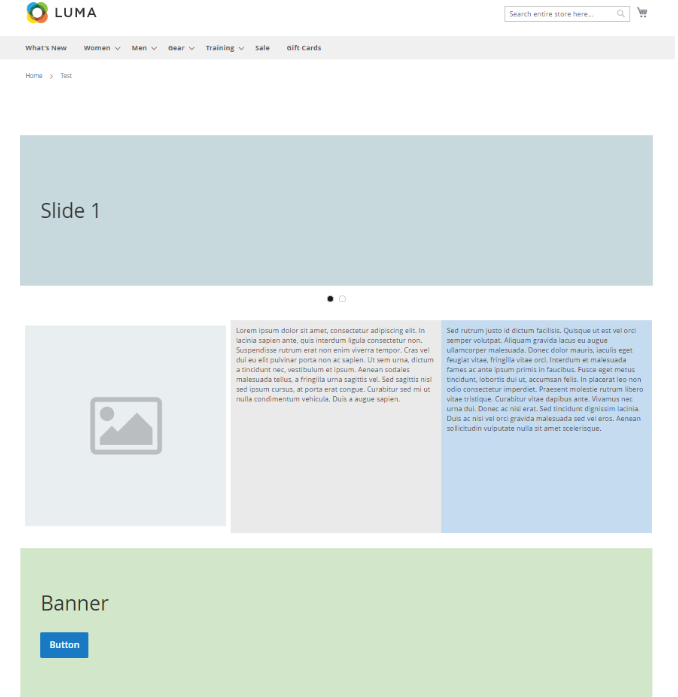
Let us now create a test page. In the header, we place a two-element slider, and into the footer – our newly created banner. The content section will consist of three columns: the one on the left with the picture, the middle and far right text with text.
This is how it will look in the admin panel of the page builder:
As you press Save, you will get the following new page at your website.
Wrapping it up:
The article provided a comprehensive description of the new Page Builder tool, its functions, and capabilities. We strongly recommend every store owner implementing this tool in their admin panel.
If you have any questions or comments, feel free to leave them down below.

