
The main menu of your store can navigate your customers to any page on your site, such as product pages, collection pages, store policies and blog posts. It commonly appears as a list of items across the header or in the sidebar. The location of the menu and its appearance usually depend on the theme that you use, but it also can be fully customized.
How to create Shopify drop down menu
How to add sub menu in Shopify
How to create mega menu Shopify
How to enable Shopify sidebar menu
How to create Shopify drop down menu
You can add a Shopify drop down menu to group and organize similar items such as products and collections in your store. With this option customers can find the type of products they’re searching for at once, improve navigation of your store and make it easier to follow. In order to create a menu you need to proceed to
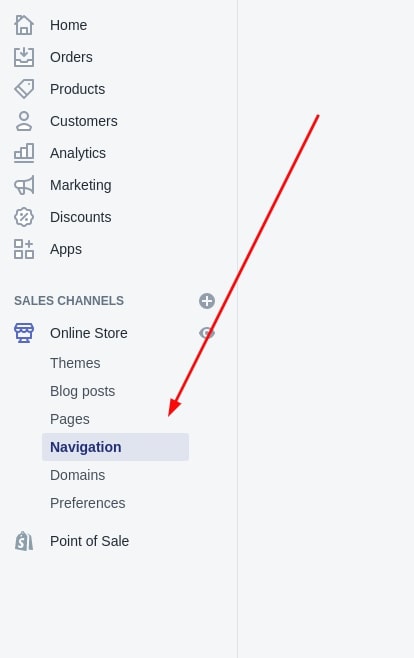
Online store – Navigation in the Admin panel.
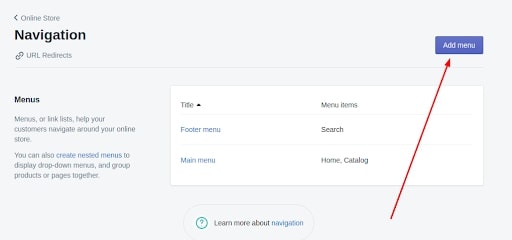
And then you need to press the Add menu button.
In this window you can see the following configurations:
- Title – the name of the menu
- Handle – the menu id, in order to use it where needed in future
- Menu items – the elements of menu
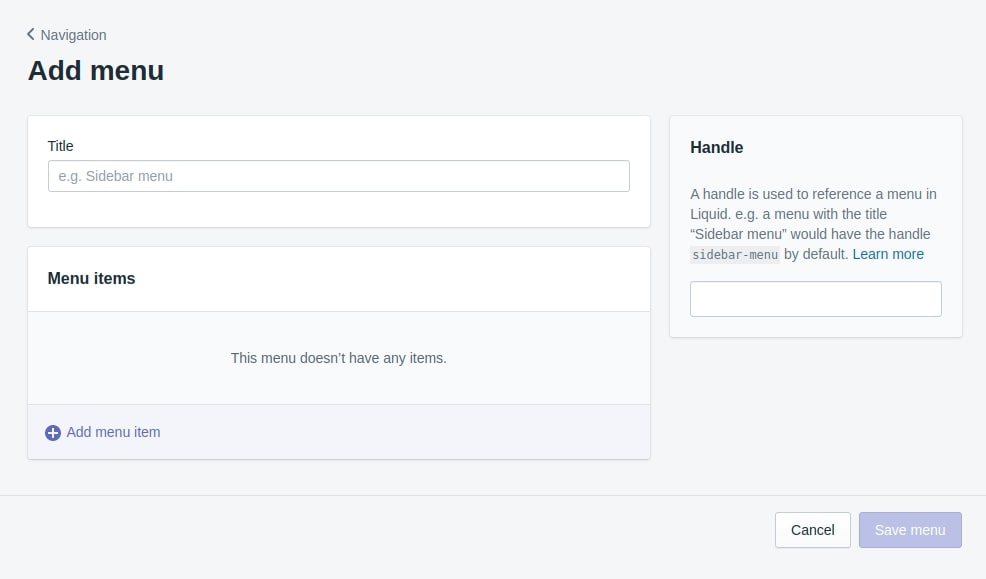
To add a new item to the menu you have to press Add menu item.
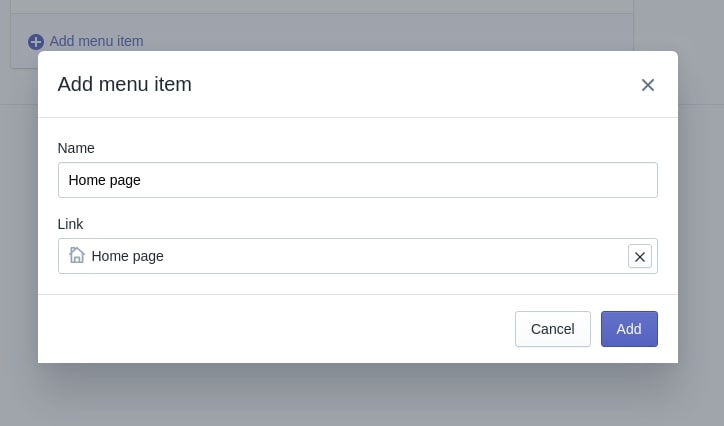
Then you have to fill in the Name field in the new window.
In the Links field, you can set a link to the inner website resource such as homepage, collections, products, special pages, search pages, politics pages, blogs, blog pages, etc.
To create a subitem in the menu create one more menu item. Then you have to move it with the mouse button under the relevant menu item.
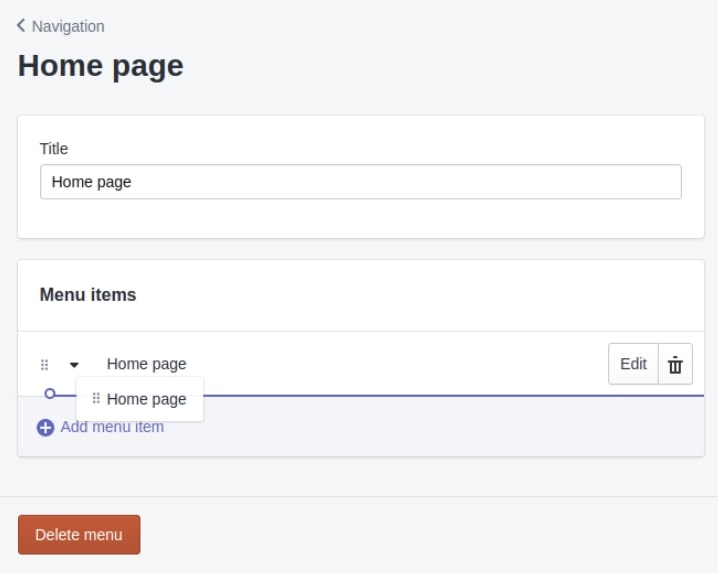
To publish this menu on the website you have to switch to the page builder of your website in the Header section. You can learn how to do it in our article about Shopify themes.
In the Menu field, in this section you have to press Change and select a new menu.

Ready! Your menu has been added to the website.

How to add sub menu in Shopify
You can use the sub menu to create the two-level navigation hierarchy for your store. This useful function will improve the menu’s appearance and help avoid trouble fitting all the pages into the main menu. Using Liquid you can also create a nested menu with three levels that lets users “drill down” and find the product or the collection they need.
Once your customers find the product they are looking for, let them select an item on the product page with a product dropdown menu which is a good alternative to radio button options. Sub menu is impossible to add in a common way. There are a few other ways how you can do it. You can either create your own menu model, install a third-party one or install a third-party menu that has such a menu.
How to create Shopify mega menu
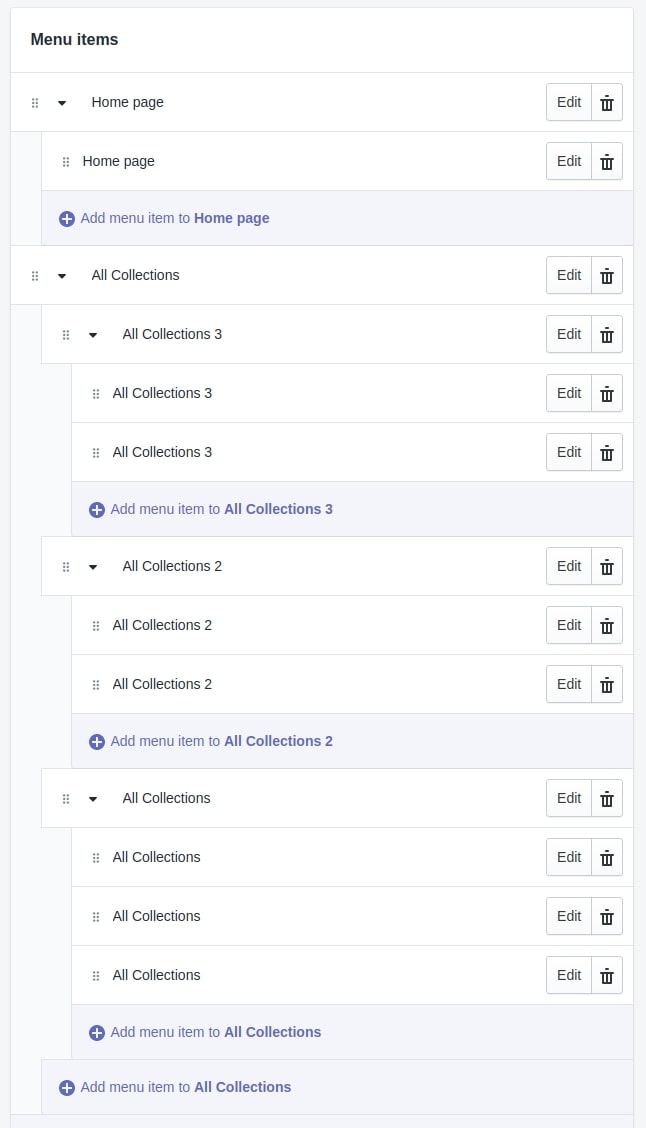
If you have a large store and plenty of pages then creating a custom mega menu is a right decision. It will simplify the search and navigation for users. It is an expandable menu in which many choices are displayed in a two-dimensional dropdown layout. Mega menu, unlike the dropdown menu, offers all options in one mega panel and can cover the whole store in a single click.
To create mega menu you have to build the following structure:
How to enable Shopify sidebar menu
You can change the location of the main menu by removing it from the header and adding it to the left or right side of the website. Make sure that your theme supports a Shopify sidebar menu. If the theme doesn’t have this option, you can also program this feature while customizing your theme.
A standard Shopify theme doesn’t have a sidebar menu. But do not worry, you can add a sidebar to your shop in a different way. The easiest option is to find and buy a ready-made Shopify theme which already includes an adjustable sidebar.
If you do not want to entirely rebuild your site and just want to add a sidebar, you can use a third-party module that you can find in the Shopify apps store.
Turn to BelVG for Shopify store customization and get a UX-friendly menu!


