
Looking for a way to give your website a unique look? Want to find out how to edit a Shopify theme? Read the article to find out how to change colors, fonts, social network icons, create new Shopify sections (blocks in PageBuilder) and new templates. Here you will also learn how to customize a checkout page and add a product.
How to edit Shopify theme
How to create new Shopify sections (blocks in PageBuilder)
How to create new Shopify templates
How to create a Shopify checkout page
How to add a product to Shopify
How to edit Shopify theme
If you decide to create your own theme, you need to register on the Shopify service, and then set up your own store following the instructions.
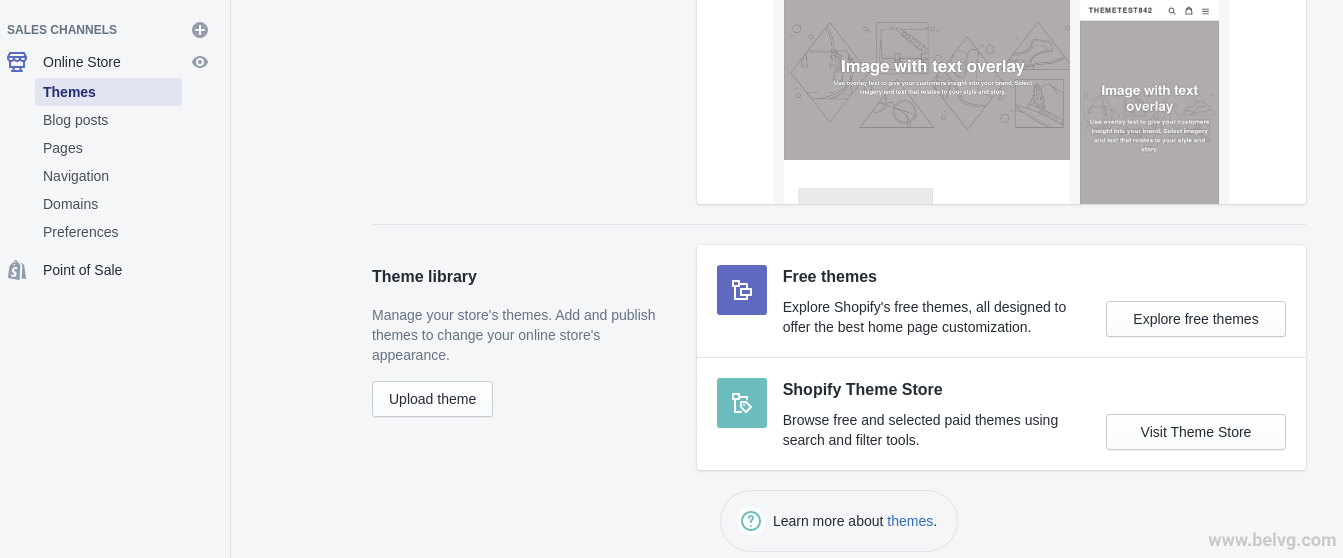
Once you enter the basic information, such as store name, currency, country and others, you can start customizing a standard theme or use ours. If you choose the second option (our theme), go to the Online store -> Themes.
Click on Upload theme and select the archive with our theme. Now you can customize our theme and then choose it as the main one.
Here we demonstrate how you can edit Shopify theme at the example of FoodStore theme by BelVG. It’s parent theme is the standard one. Customization of themes created by other developers might slightly differ.
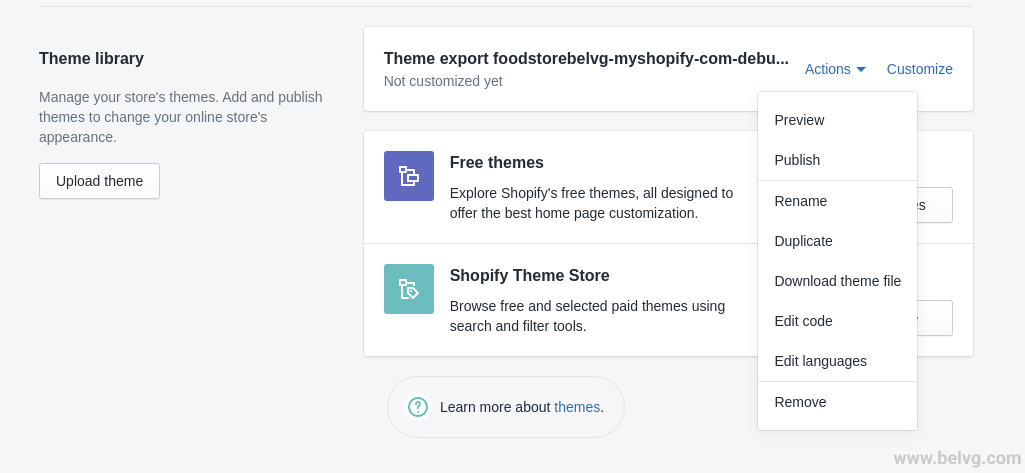
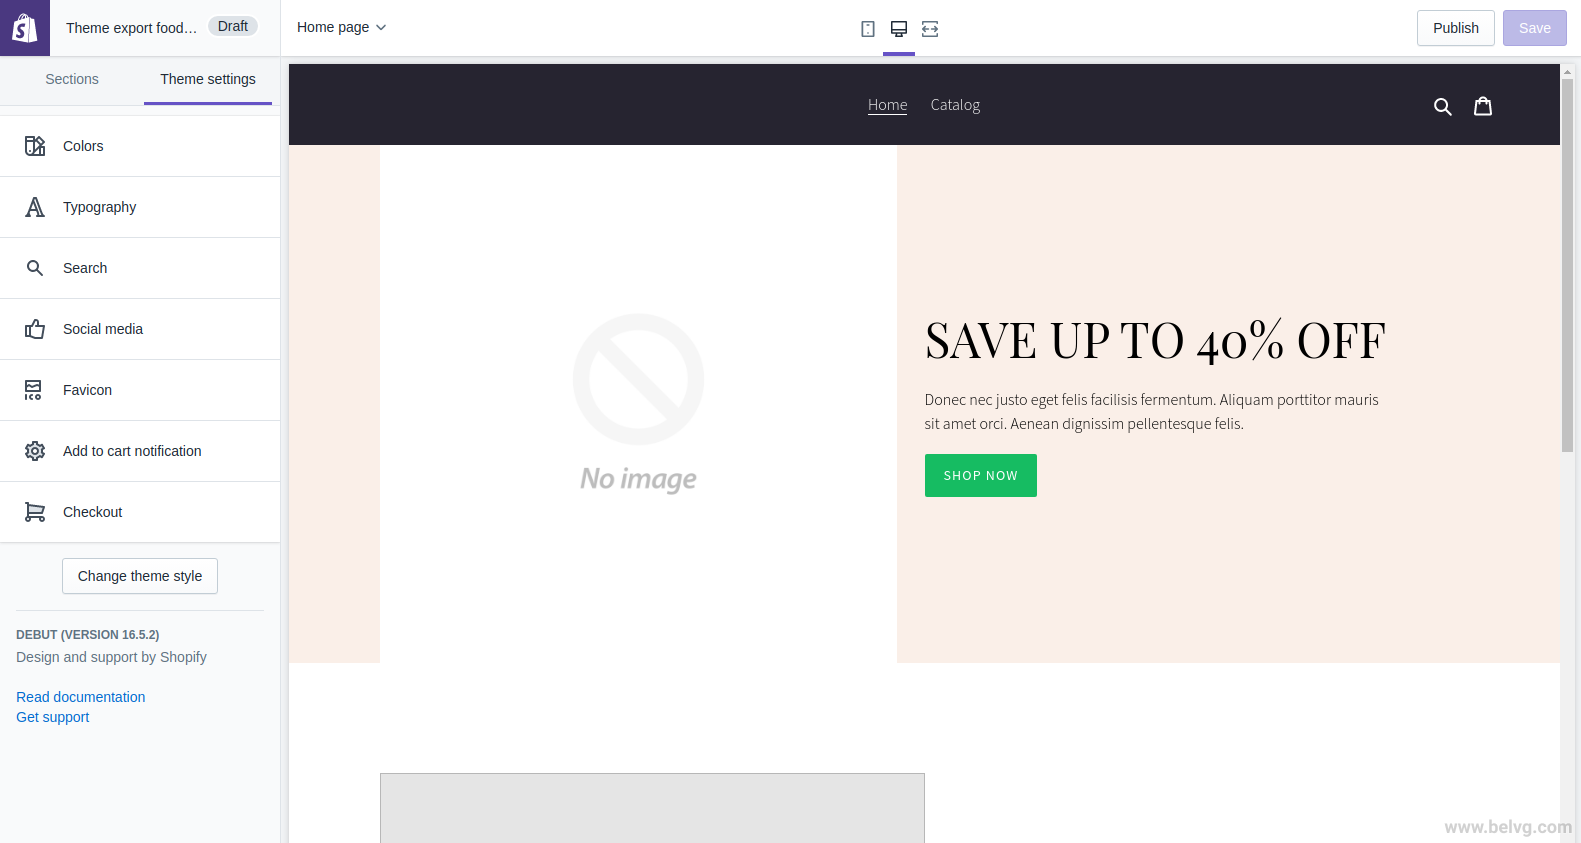
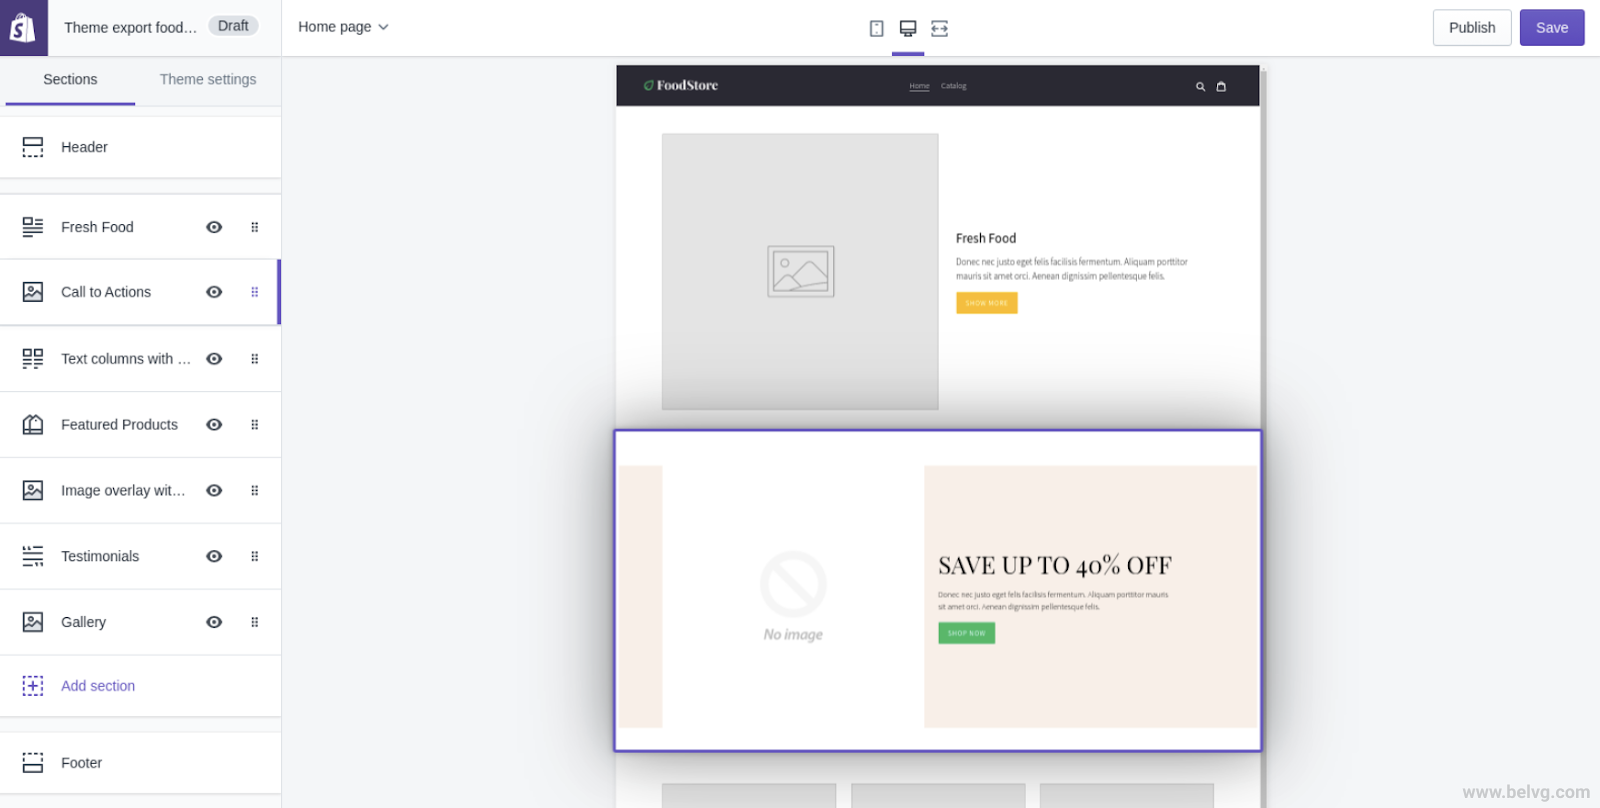
To start customizing the theme, you need to click on the Customize button. It will open the page builder with the main page of your store.
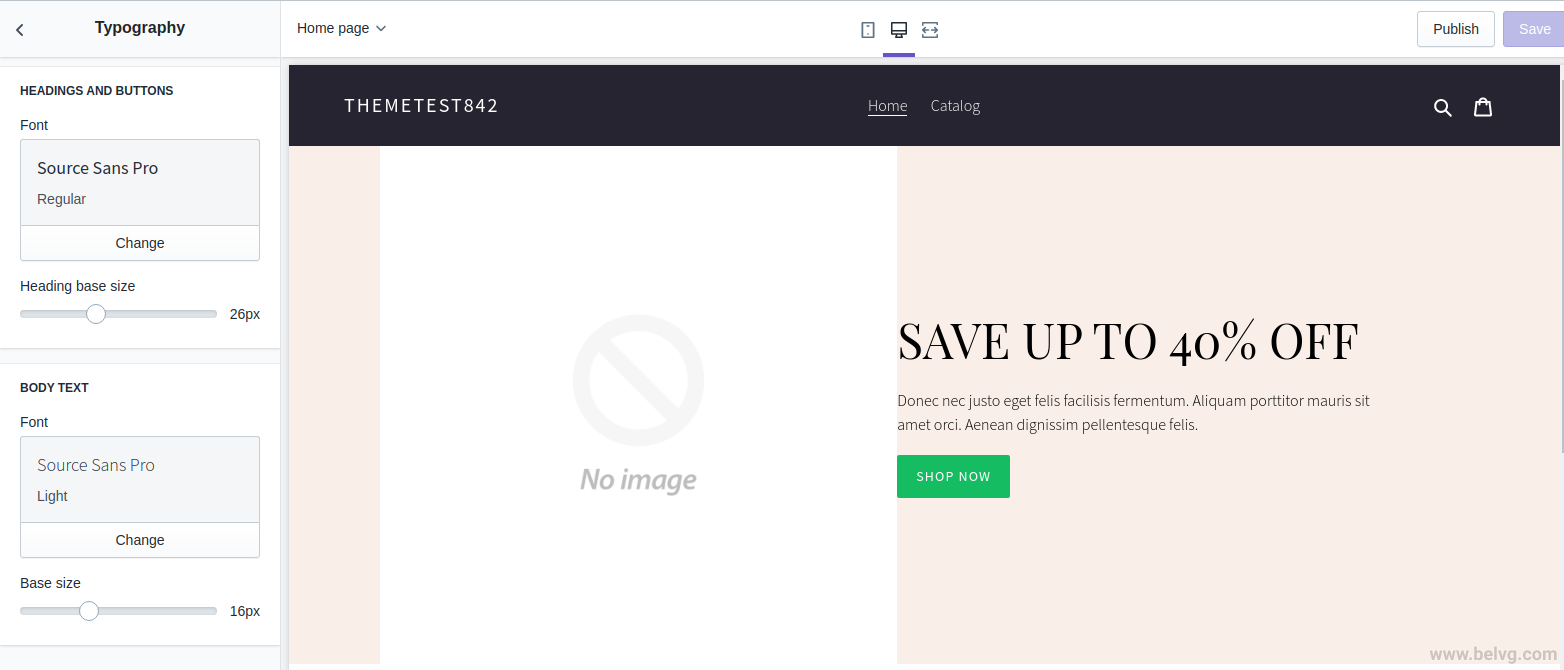
To change the visuals of your theme, you need to click on Theme settings. It opens the fields where you can change the visuals.
The visuals include:
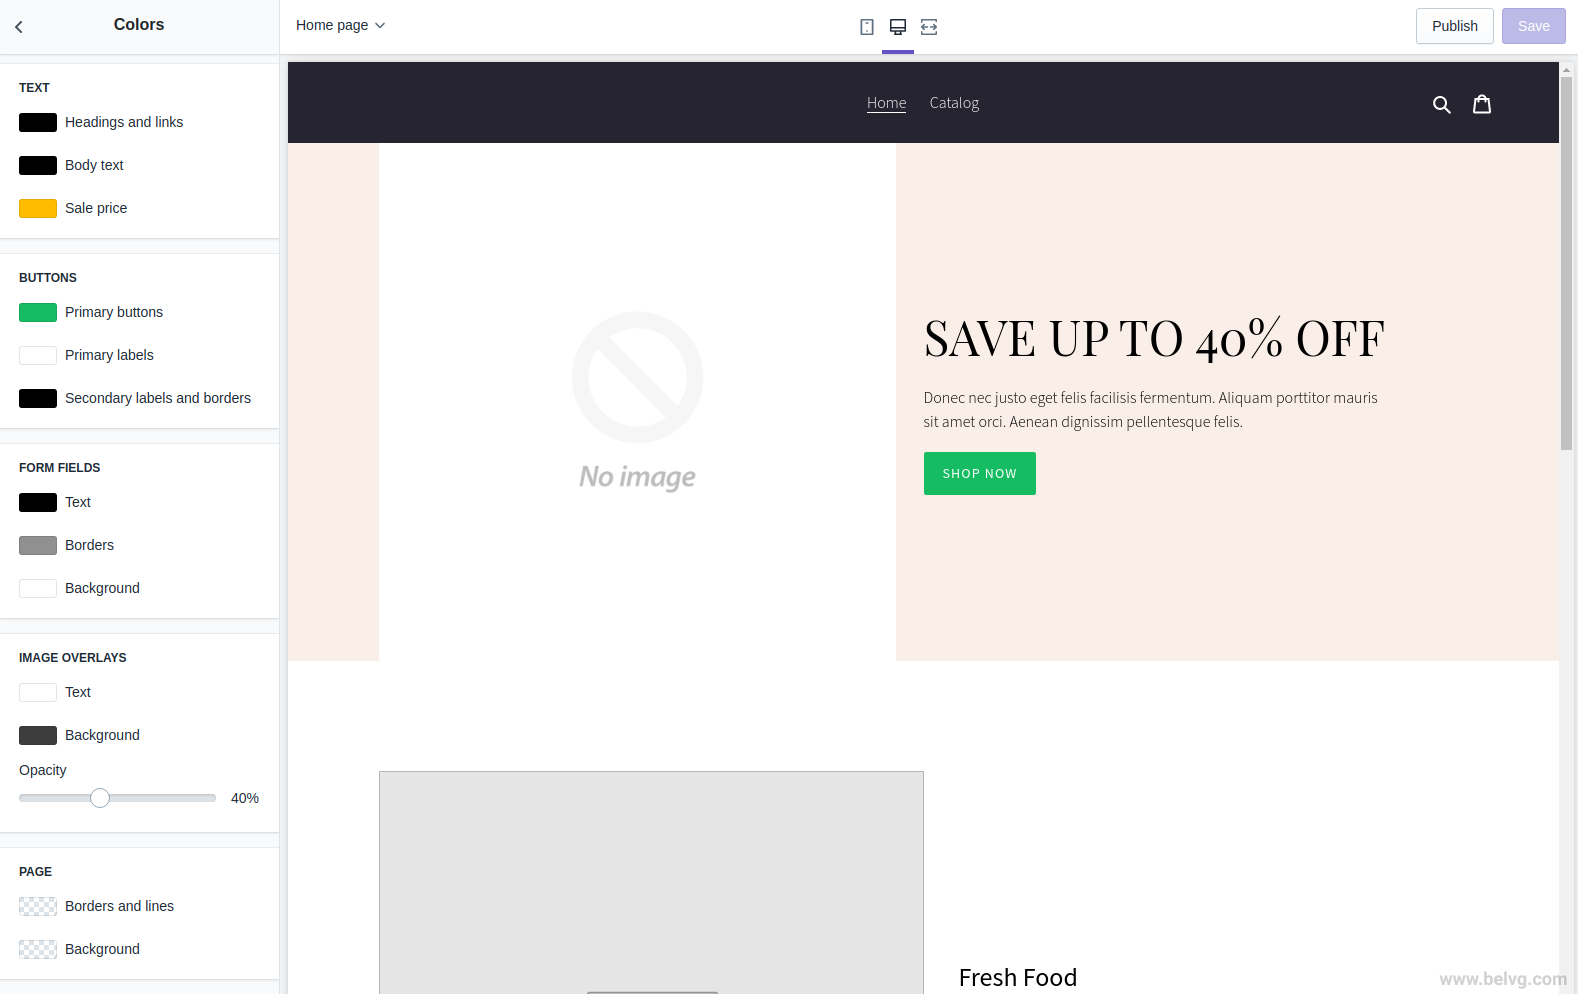
- Color (Heading and links, body text, price, buttons color, fields color, image overlays and page background).
- Fonts (font-family and fonts size for heading, buttons and body text).
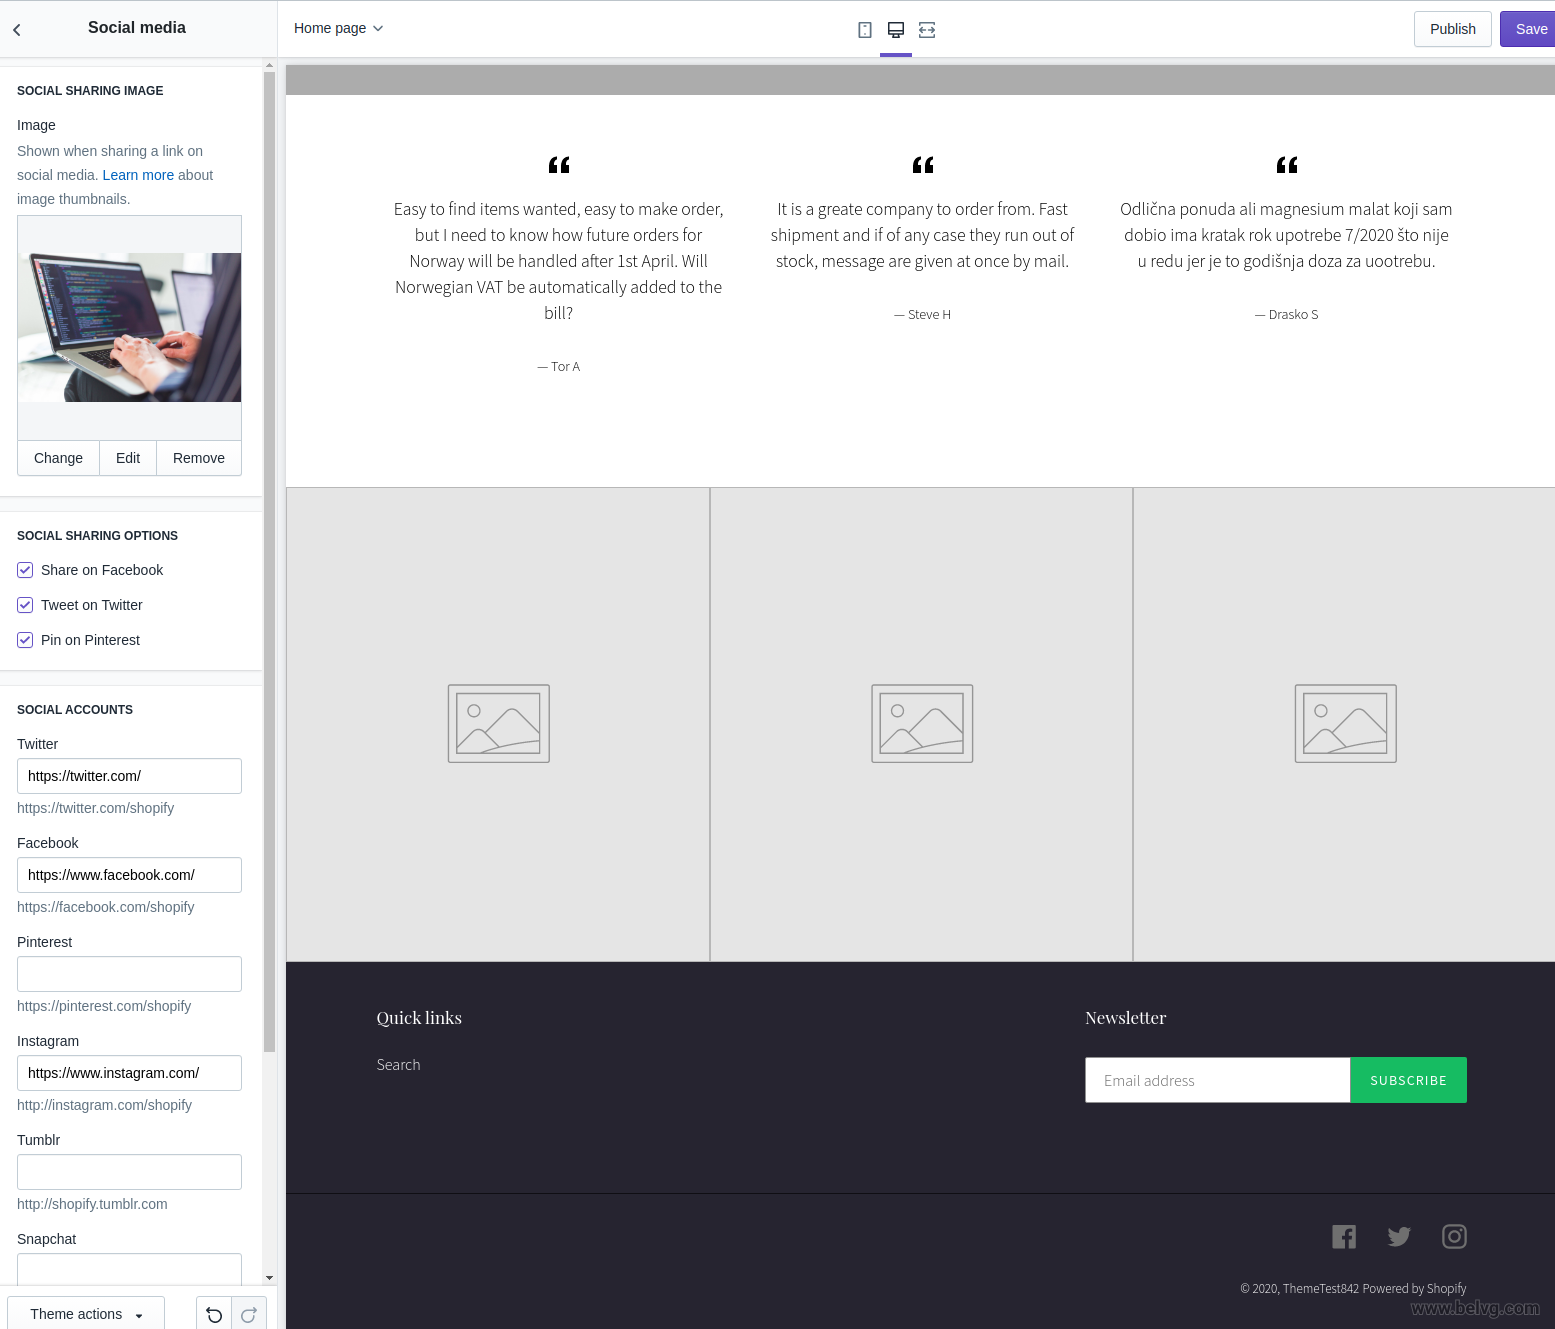
- Social networks. Here you can specify links to your store in social networks. The icons of these networks will appear in footer. Besides, you can indicate social networks to share products.
- Favicon. Here you can change or add your site’s favicon.
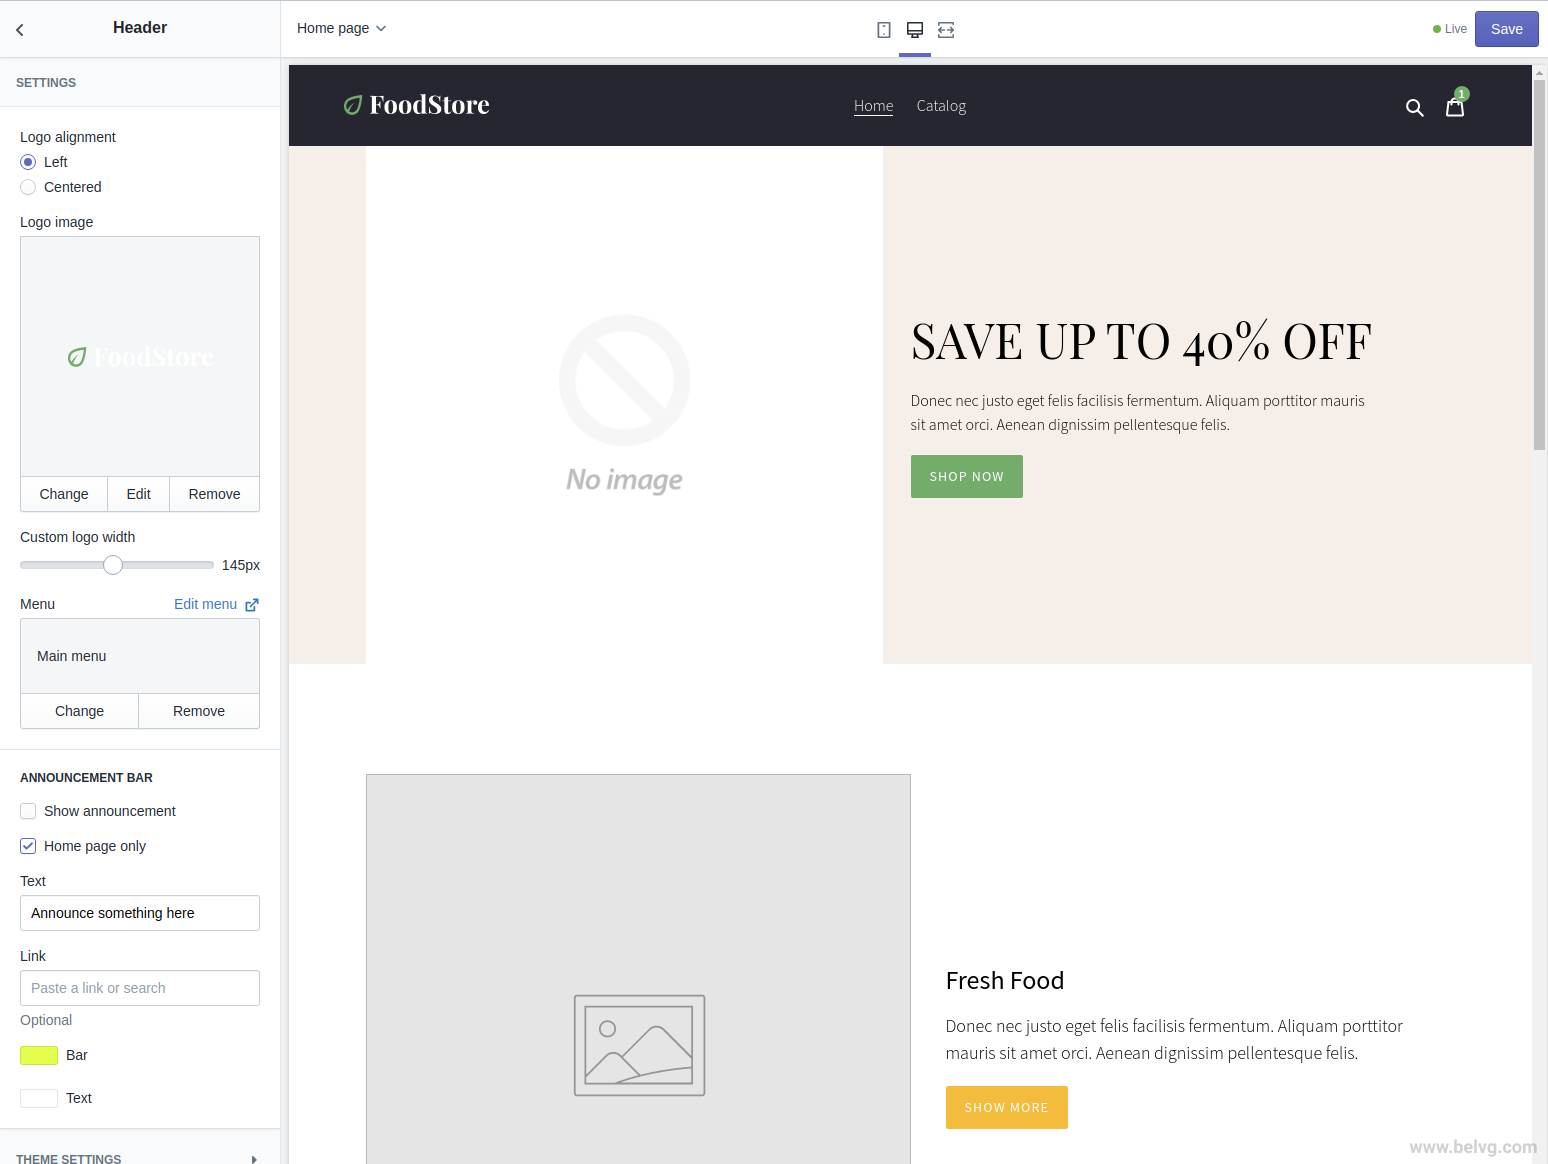
- To change the header visualization, go to Section and select the Header block. In this block, you can add a logo, change its location and adjust the size of the logo. Moreover, in this block you can choose what menu to display in the header.
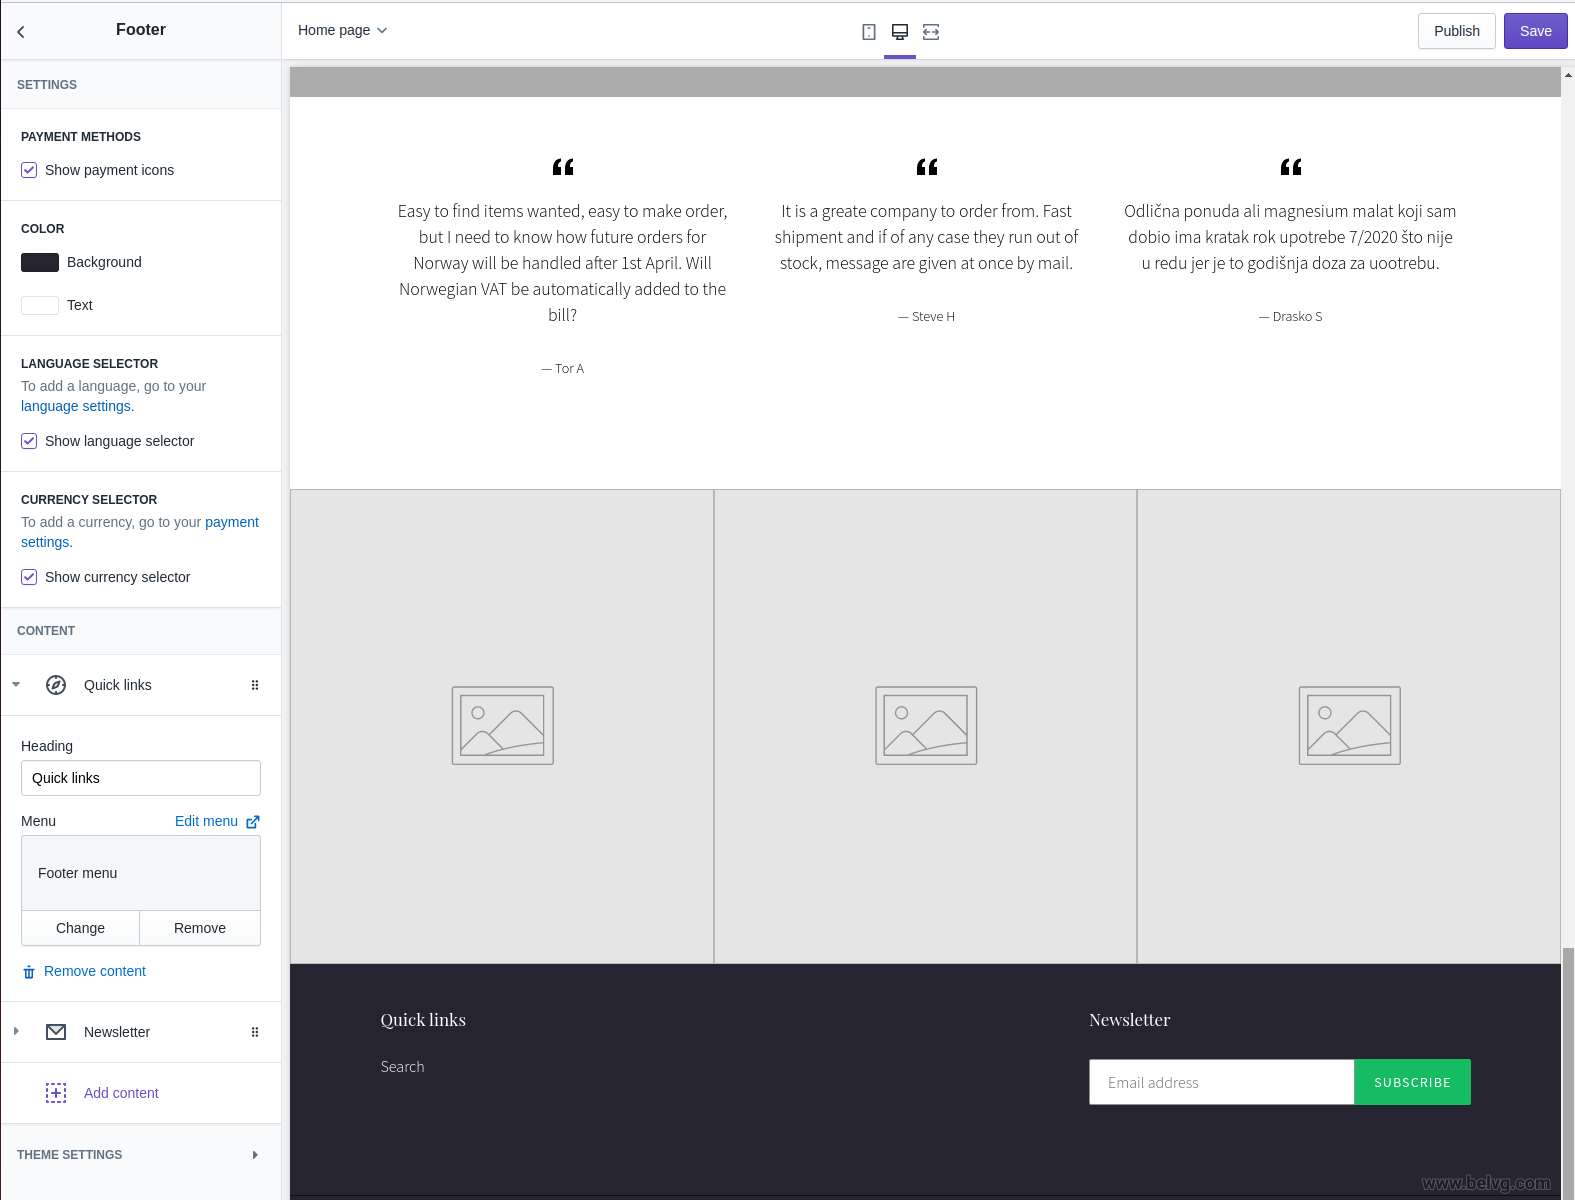
- To change the footer type, go back to the Section and select Footer. In this block you can choose whether to display payments icons, language and currency selection. You can also change the name of the blocks and choose the menu to display in the footer.
Return to the Section to modify the content on the main and other pages. You can move blocks in this section or, by clicking on the block, change the content in the block.
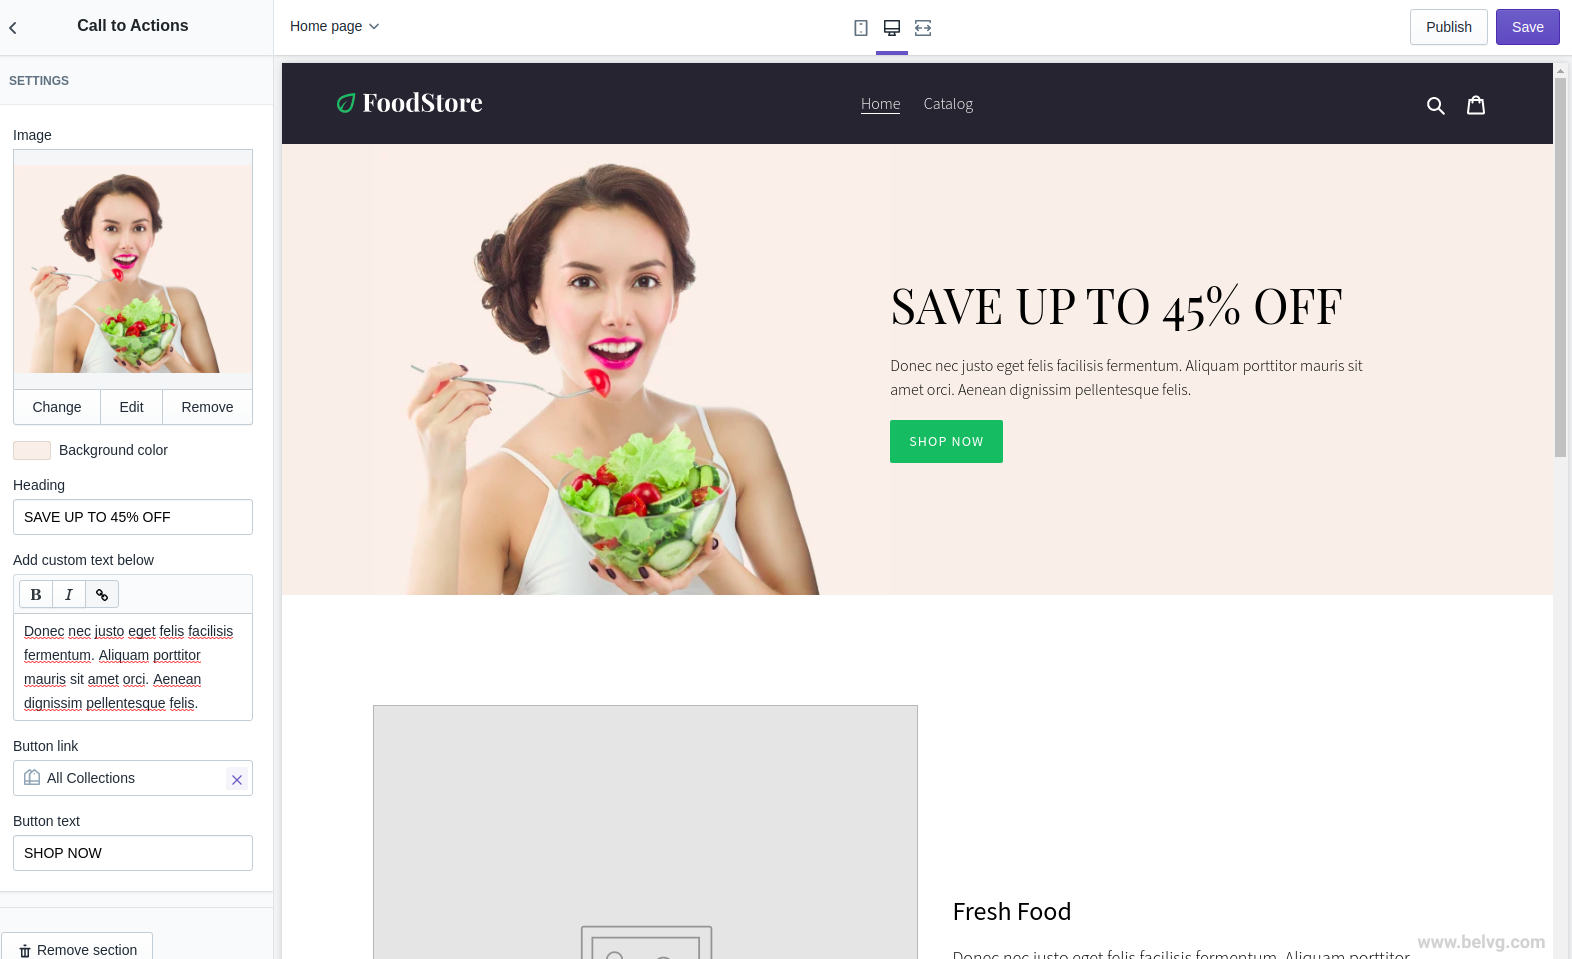
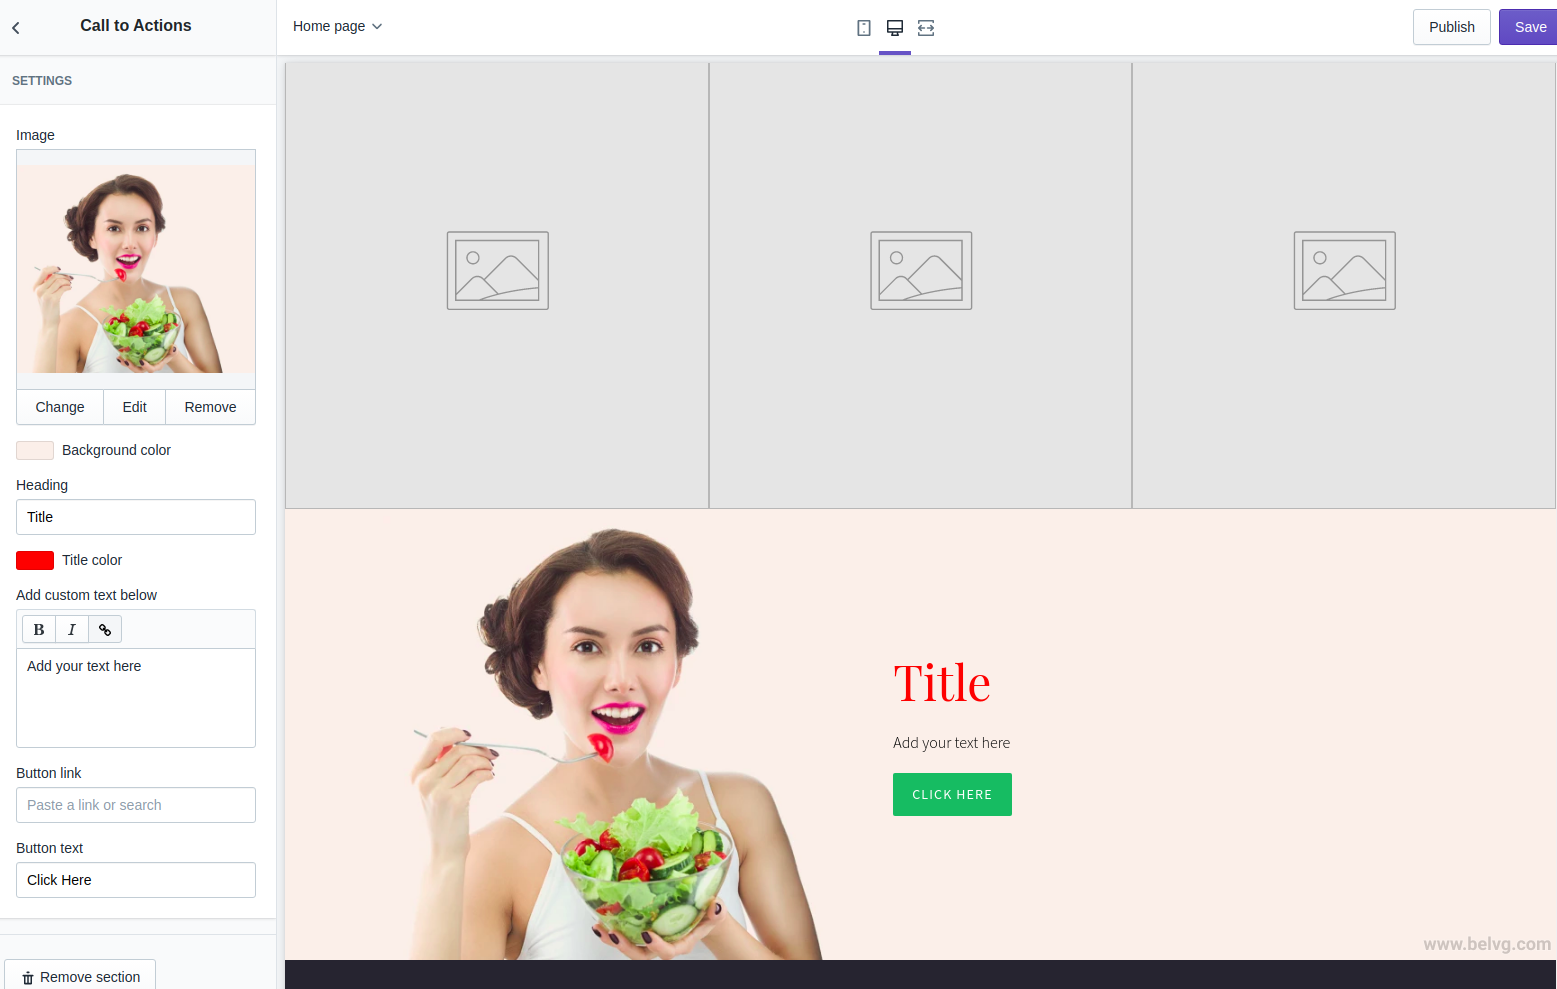
For instance, select the Call to actions block. In this block, you can simply select the parameters, such as picture, background color, title text, text for the block, button text, and a link when pressed. With such simple manipulations, you can add content to your site.
To add a new block to the page, you need to return to the section with all the blocks and select Add section. It will bring up a list of blocks that can be used in your theme.
How to create new Shopify sections (blocks in PageBuilder)
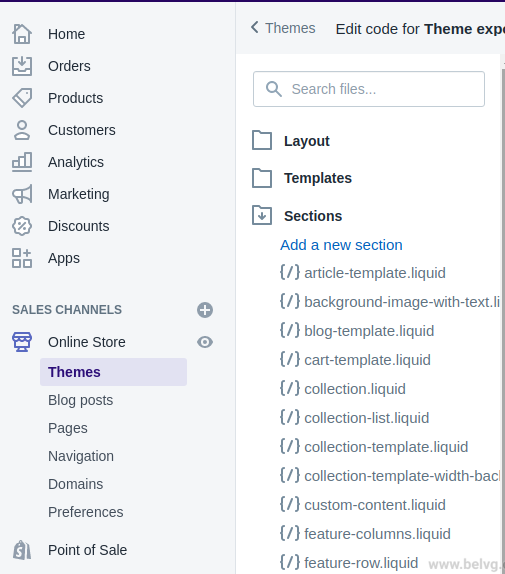
Let’s create a new block, identical to the Call to Actions one but with the ability to change the color of the header text. To create a new block, go to Online store -> Themes -> Actions -> Edit code in the admin panel. Click on the Add a new section button and enter a name for a new template.
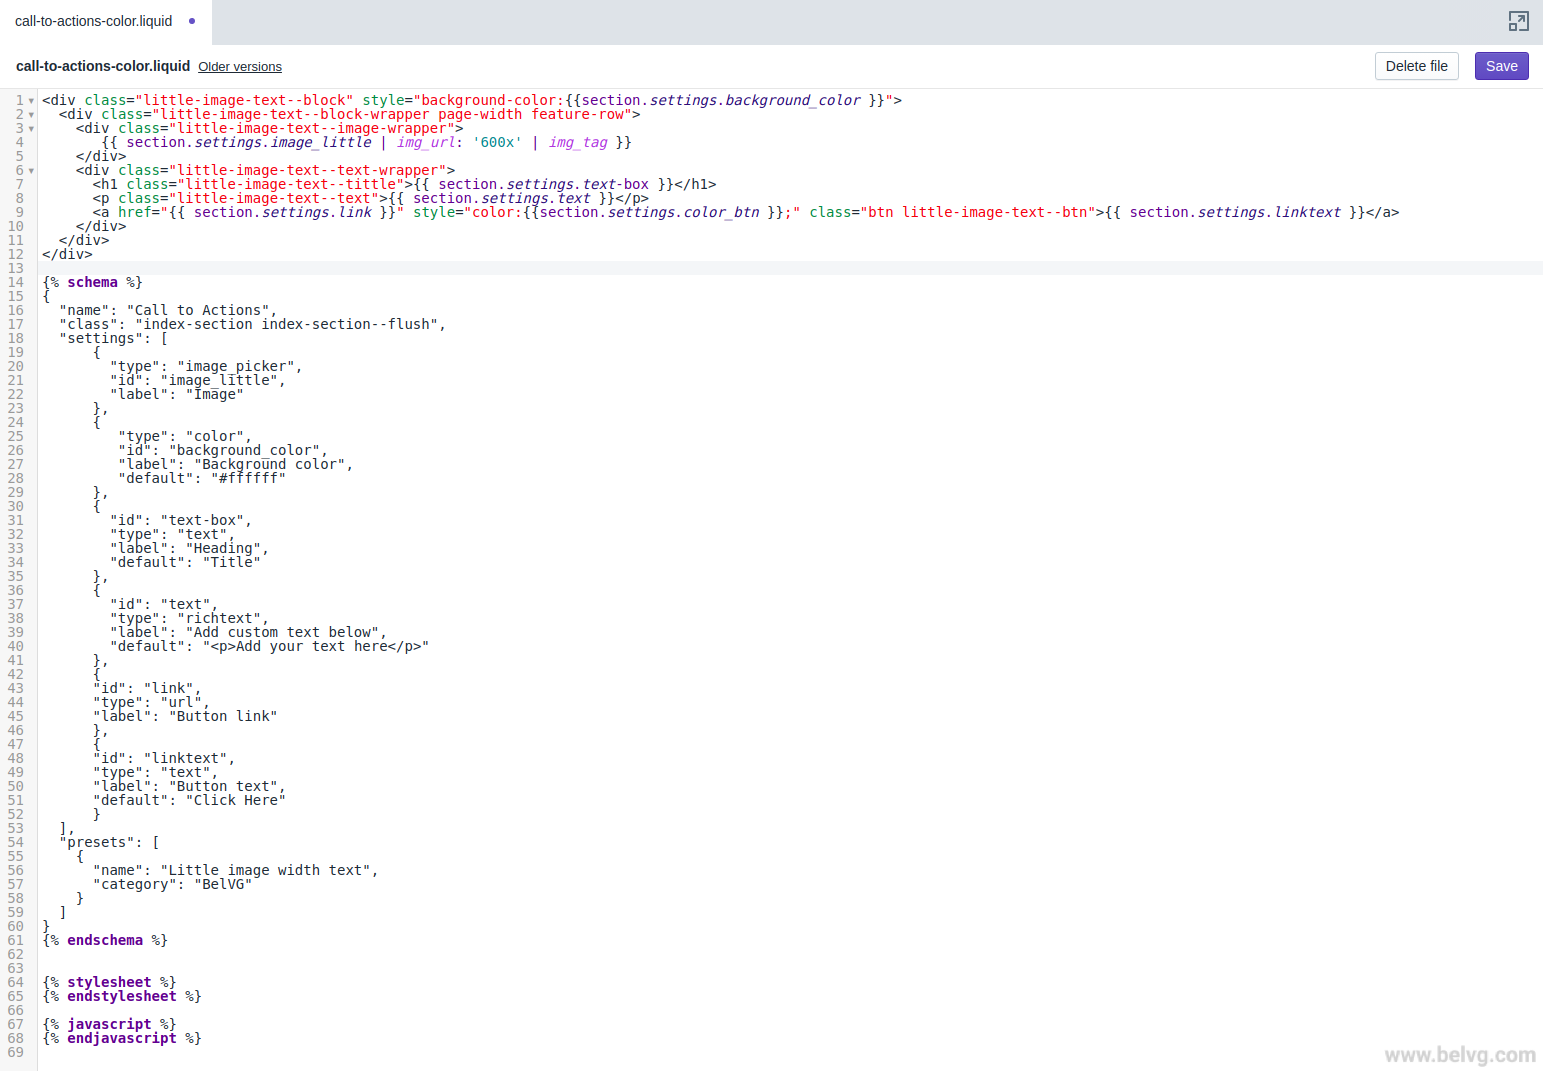
Then, you need to copy the code of the Call to actions block to our file.
First, we need to add a color picker for the title in this block. To do this, you should add the following piece of code to our template:
|
1 2 3 4 5 6 |
{ "type": "color", // type selector "id": "title_color", //id this block "label": "Title color", // label on the page builder "default": "#333333" //default setting }, |
If we want to apply settings to the title, we need to add a unique class to the h1 tag:
<h1 class="little-image-text--tittle color-text-{{ section.id }}">{{ section.settings.text-box }}</h1>
To use the color variable exactly with the title that we change, we need to add the following code to the HTML part:
|
1 2 3 4 5 |
<style> .color-text-{{ section.id }} { color: {{ section.settings.title_color }}; } </style> |
To make our block unique, change its name. It will make it much easier to find:
As a result, the code of our template will look like this:
|
1 2 3 4 5 6 7 8 9 10 11 12 13 14 15 16 17 18 19 20 21 22 23 24 25 26 27 28 29 30 31 32 33 34 35 36 37 38 39 40 41 42 43 44 45 46 47 48 49 50 51 52 53 54 55 56 57 58 59 60 61 62 63 64 65 66 67 68 69 70 71 72 73 |
<div class="little-image-text--block" style="background-color:{{section.settings.background_color }}"> <div class="little-image-text--block-wrapper page-width feature-row"> <div class="little-image-text--image-wrapper"> {{ section.settings.image_little | img_url: '600x' | img_tag }} </div> <div class="little-image-text--text-wrapper"> <h1 class="little-image-text--tittle color-text-{{ section.id }}">{{ section.settings.text-box }}</h1> <p class="little-image-text--text">{{ section.settings.text }}</p> <a href="{{ section.settings.link }}" style="color:{{section.settings.color_btn }};" class="btn little-image-text--btn">{{ section.settings.linktext }}</a> </div> </div> </div> <style> .color-text-{{ section.id }} { color: {{ section.settings.title_color }}; } </style> {% schema %} { "name": "Call to Actions", "class": "index-section index-section--flush", "settings": [ { "type": "image_picker", "id": "image_little", "label": "Image" }, { "type": "color", "id": "background_color", "label": "Background color", "default": "#ffffff" }, { "id": "text-box", "type": "text", "label": "Heading", "default": "Title" }, { "type": "color", "id": "title_color", "label": "Title color", "default": "#333333" }, { "id": "text", "type": "richtext", "label": "Add custom text below", "default": "<p>Add your text here</p>" }, { "id": "link", "type": "url", "label": "Button link" }, { "id": "linktext", "type": "text", "label": "Button text", "default": "Click Here" } ], "presets": [ { "name": "Call actions width color", "category": "BelVG" } ] } {% endschema %} |
To add our block to the site, you need to open the needed page in the Customize mode. Click on Add sections and select the block. Add the main information and see that the title text changes depending on the one you’ve selected.
How to create new Shopify templates
To create or edit page templates, open the Template tab in the code editor. In this section, select an existing file or create a new one. For instance, create a new Collection page template with static text below the title. To do this, create a file called collection.width-static-text.liquid. In this file, the standard collection section will be displayed by default.
{% comment %}
The contents of the collection.liquid template can be found in /sections/collection-template.liquid
{% endcomment %}
{% section ‘collection-template’ %}
You need to create your new section to display the static text. To do this, create a new section called collection-template-width-text, copy the code from the standard section of the collection into this section and edit it.
Change the path to the section file in the new collection template:
{% comment %}
The contents of the collection.liquid template can be found in /sections/collection-template.liquid
{% endcomment %}
{% section ‘collection-template-width-section’ %}
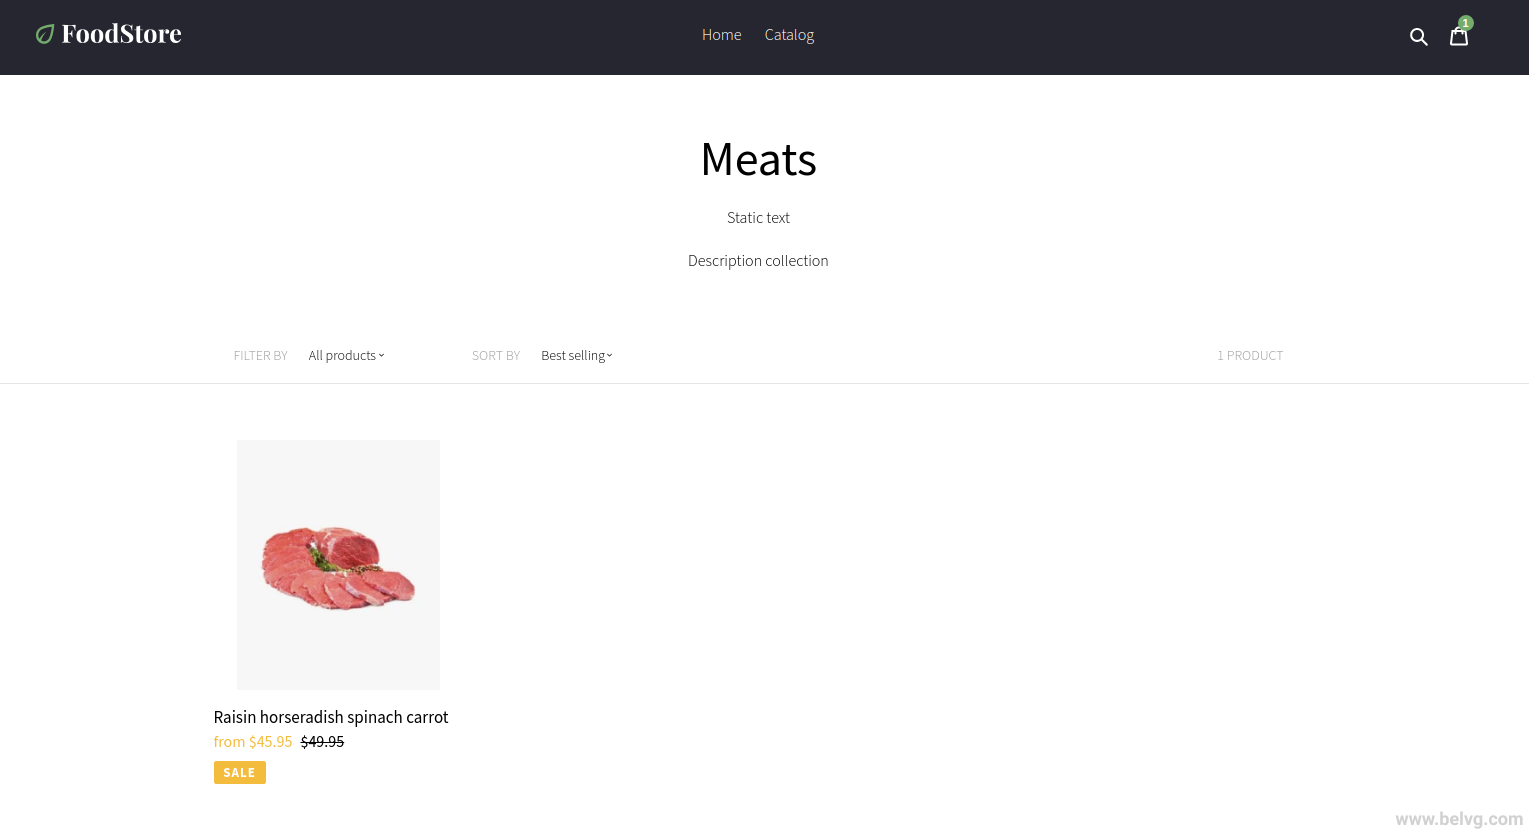
To apply these settings to a specific section, go to Products -> Collections in the admin panel. Select the needed collection and change the template of our page to the previously created one. Save all changes. And now the page of the selected category will look like this:
How to create a Shopify checkout page
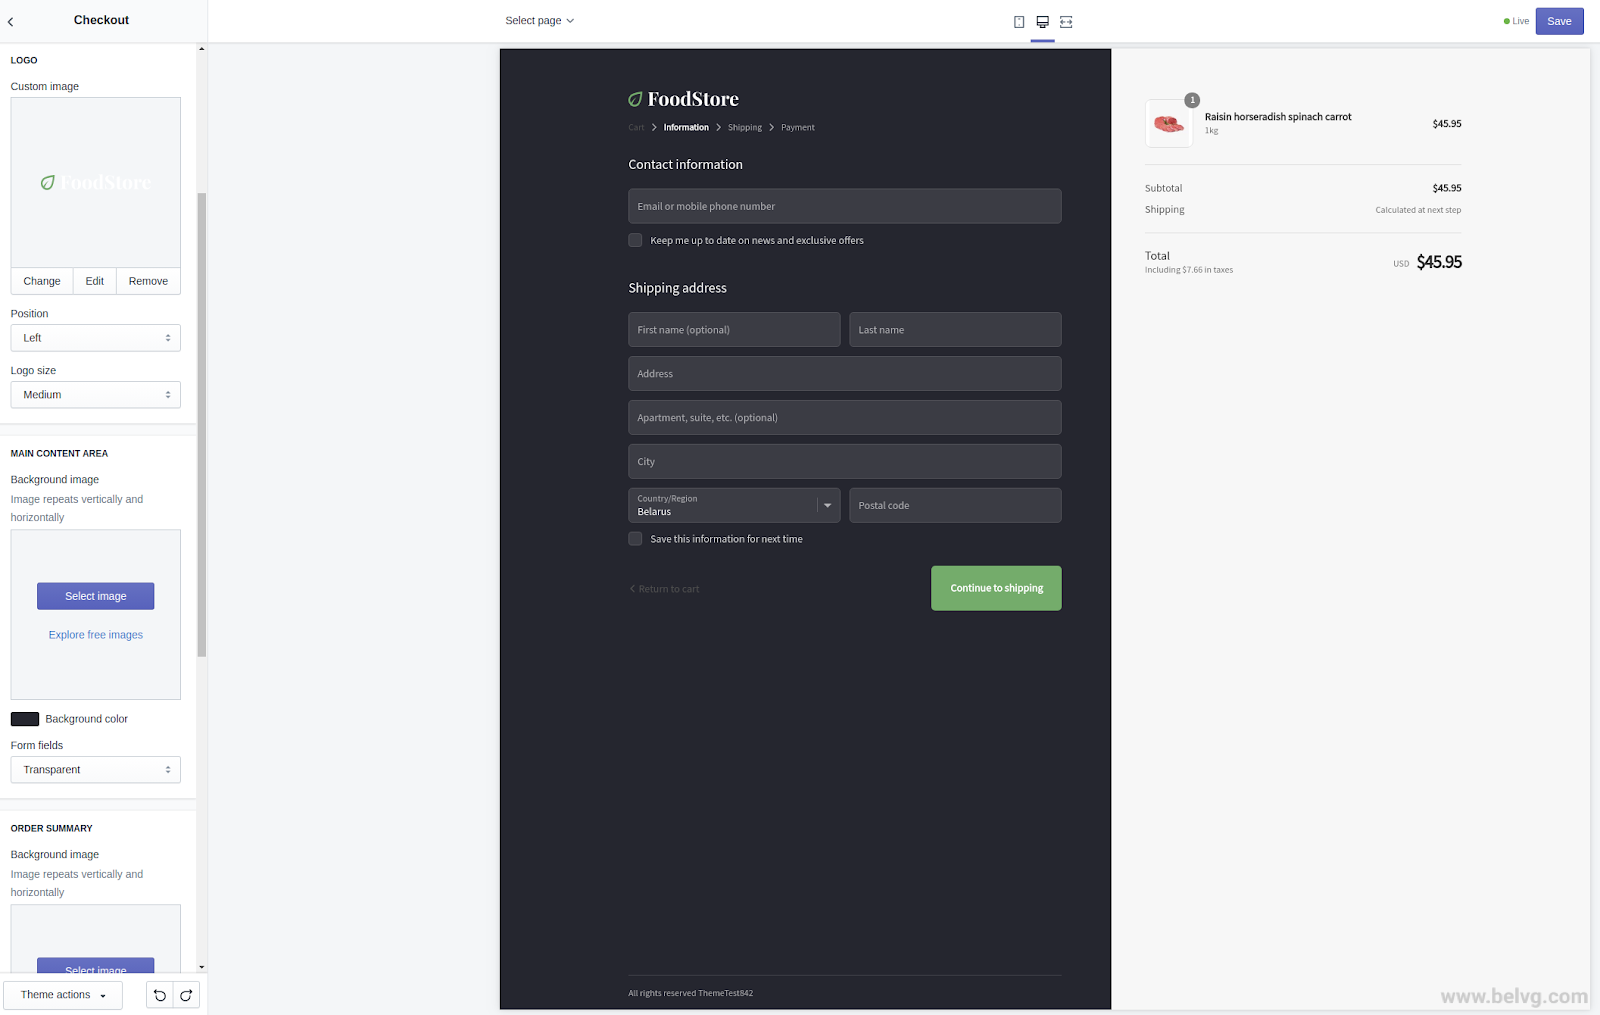
To change visuals of the checkout page, open the cart page in PageBuilder mode. The basic Shopify version provides several settings to change visuals. To add your blocks to the checkout page or add your own css styles, you need to operate the Shopify Plus version.
The basic Shopify plan provides the following settings to change the checkout visuals:
- Add a logo.
- Change background of columns.
- Change font family for title and text.
- Change the color of text, buttons and errors.
How to add a product to Shopify
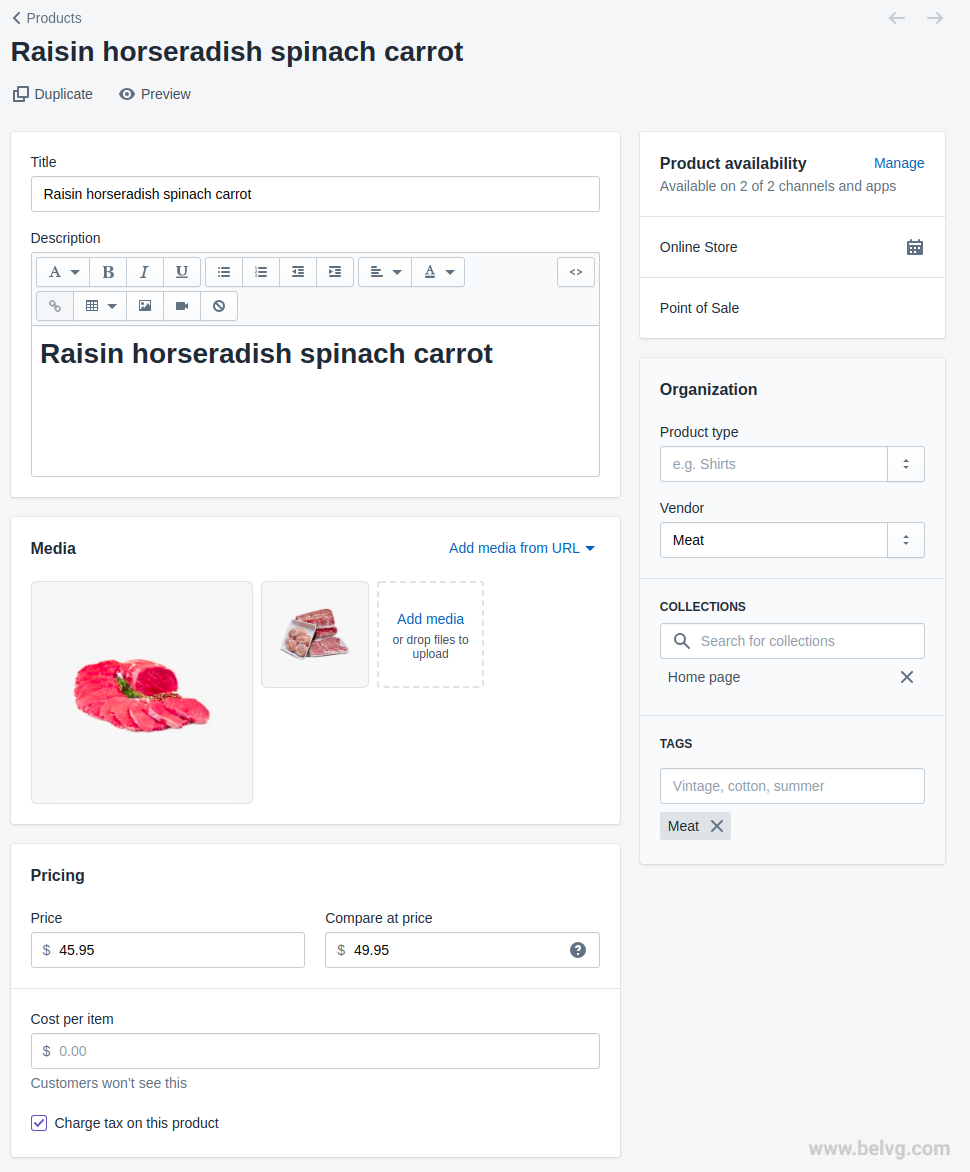
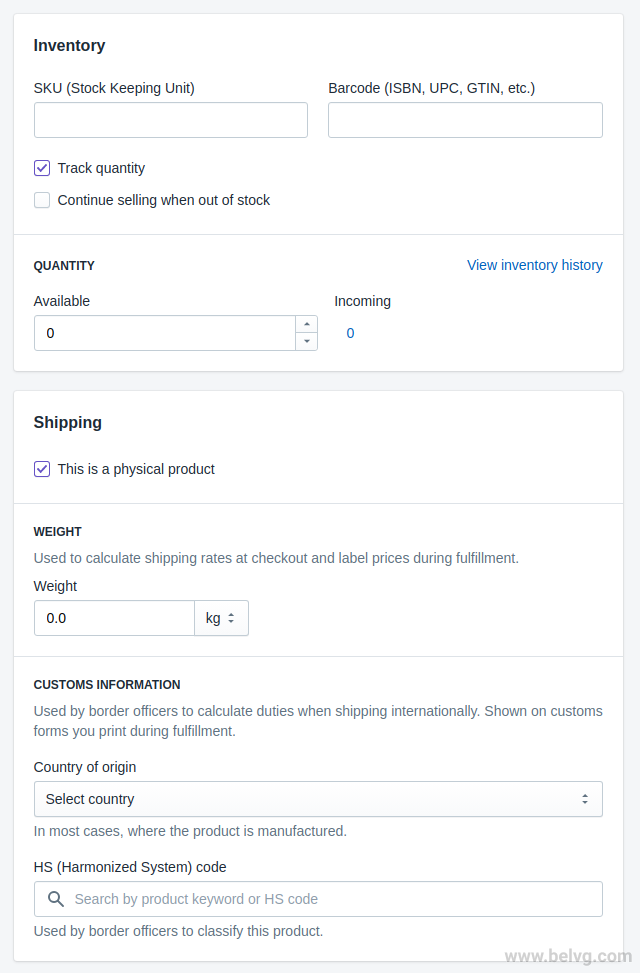
To add a product to the catalog, open the Products -> add product tab in the admin panel. You will see the page where you can enter the basic information about the product.
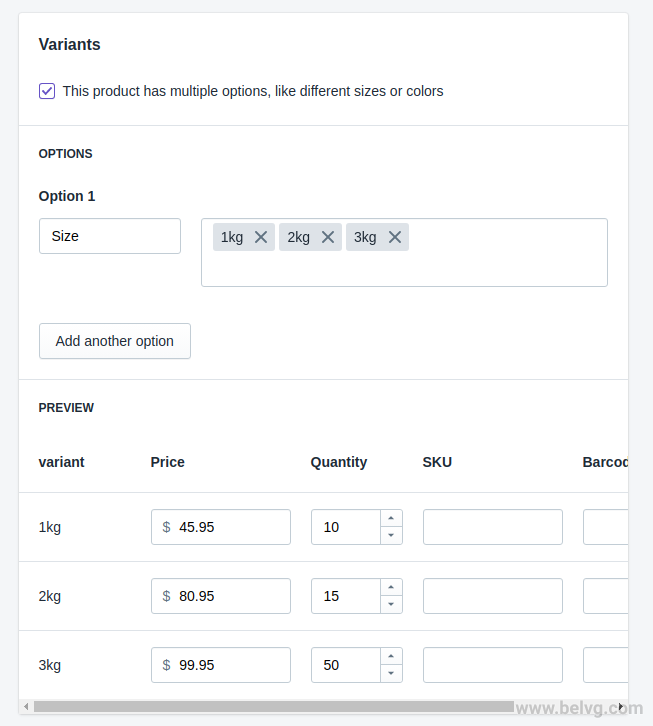
Besides that, you can create combined products with different prices for each characteristic.
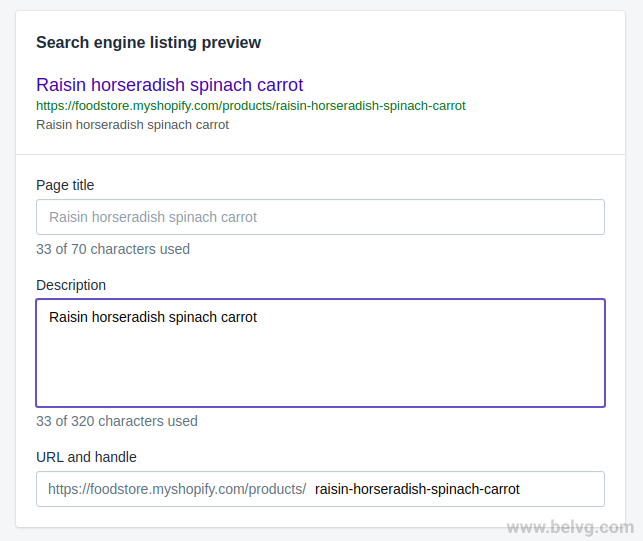
You can also change the title and description for SEO.
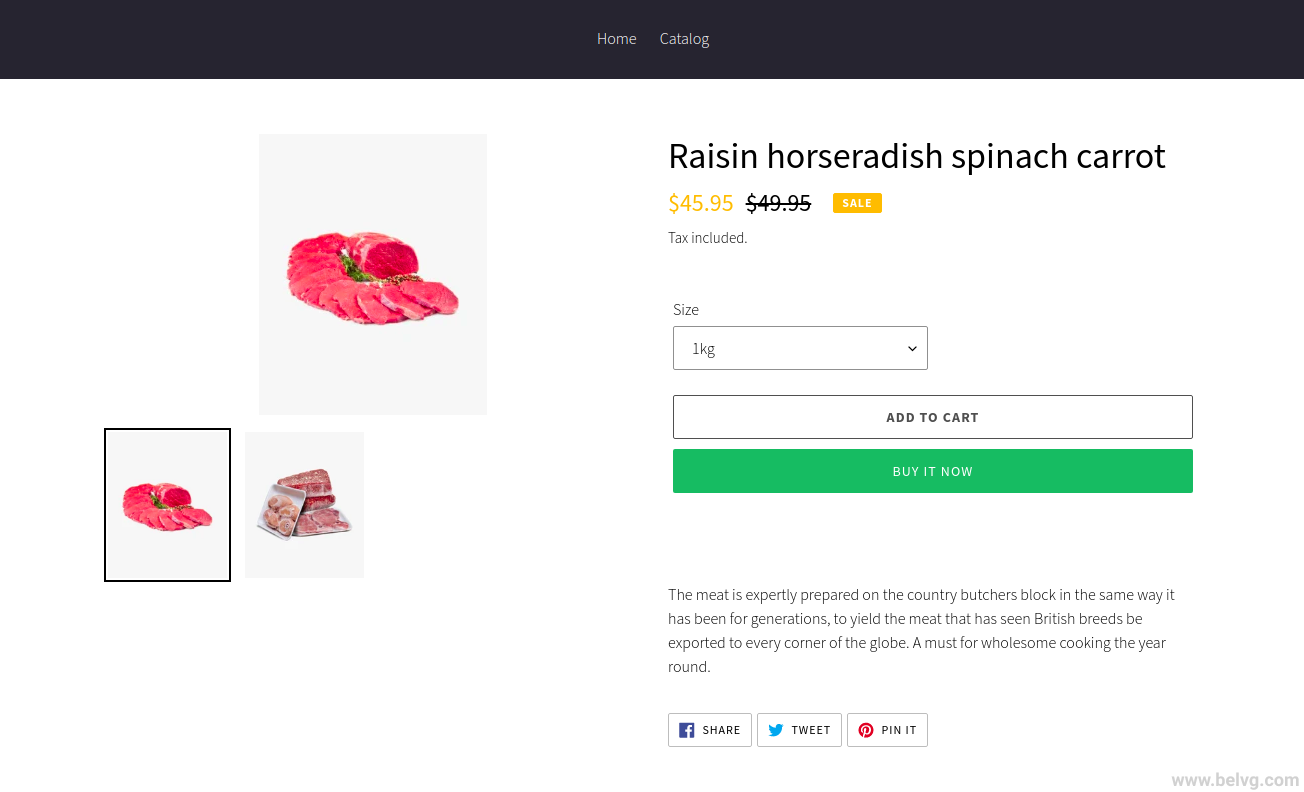
As a result, the page with the created product looks like that:
Wrapping it up
Now, you can professionally develop and design your Shopify theme following our step by step guide. We did our best to keep all the information and steps simple but if you still need some assistance or want to rely on a dedicated developer, the BelVG team is here to help. Contact us to get the perfect solution for your online business.
Have any questions? Feel free to ask anything in the comments below!




Great article! theme customization enhances the performance of e-store and can be better representative of your products to the users & can give a great look.