
Creating a product can be a difficult task for a non-specialist. In our second article about creating products in Magento 2.0 we go a little bit more Advanced in an “Advanced Pricing” section – which holds all the necessary goodies to set up various group prices and recurring payments.
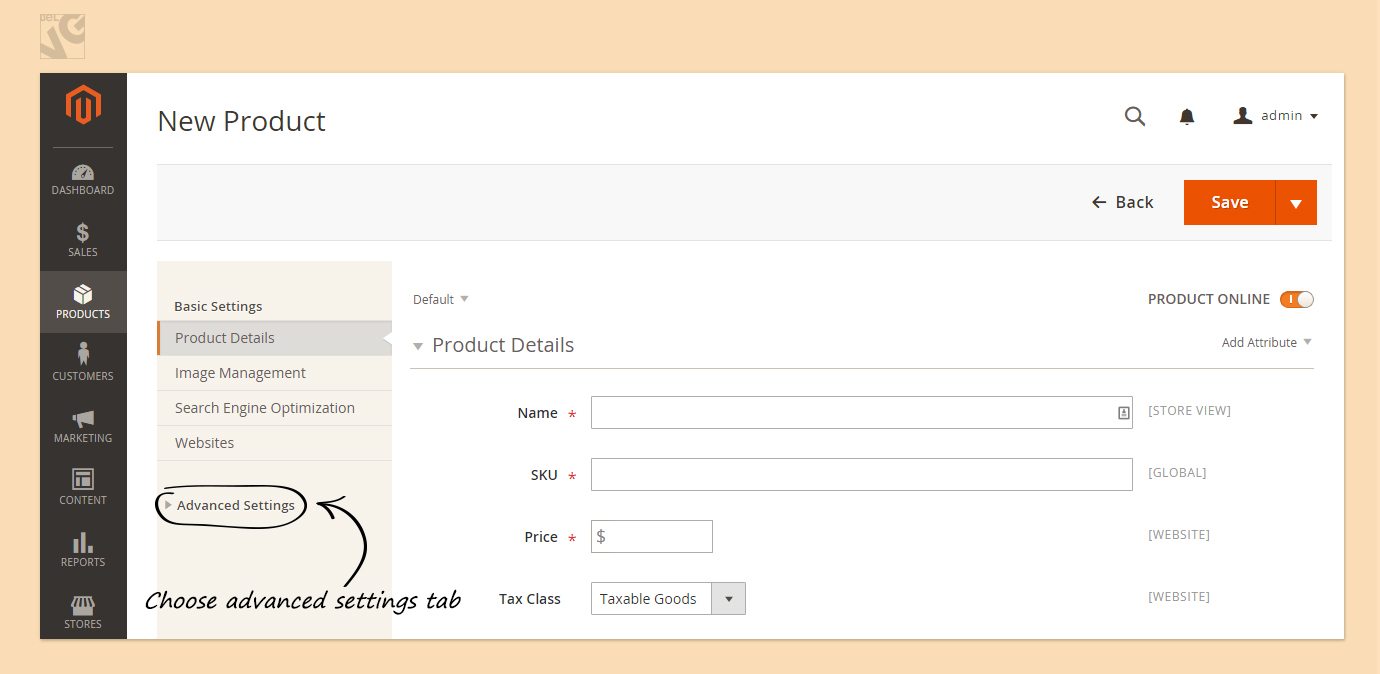
Advanced Pricing gives you an option to add a Group Price. In this case you should press the button (Group Price) that opens the field where you choose:
- A Website (select Websites you want the product to be available from);
- Customer Group (Not logged in, general, wholesale, retailer);
- Assign a unique Price for your group product.
If you want to delete your Group price press the bin under the Action column button otherwise do not forget to save everything.
Then, goes Special Price, where you can assign discounts or promotions to particular products. All you need to do is just add a special price in the allocated field. Moreover, under the Special Price there are fields where you can choose the promotion period by entering start and end dates for the sale.
In the Advanced Pricing page you can find the field named Tier Pricing as well. Tier pricing is a promotional tool that lets you price items differently for higher quantities purchased. For example, if a customer buys 4 items he gets 25% discount, 30% for 5 and so on. In a Tier Pricing you can also set:
- A Website or Websites (select Websites you want the product to be available from);
- Customer Group (Not logged in, general, wholesale, retailer);
- Quantity you wish to start the tier pricing at;
- New Price per item that will take effect at the quantity specified.
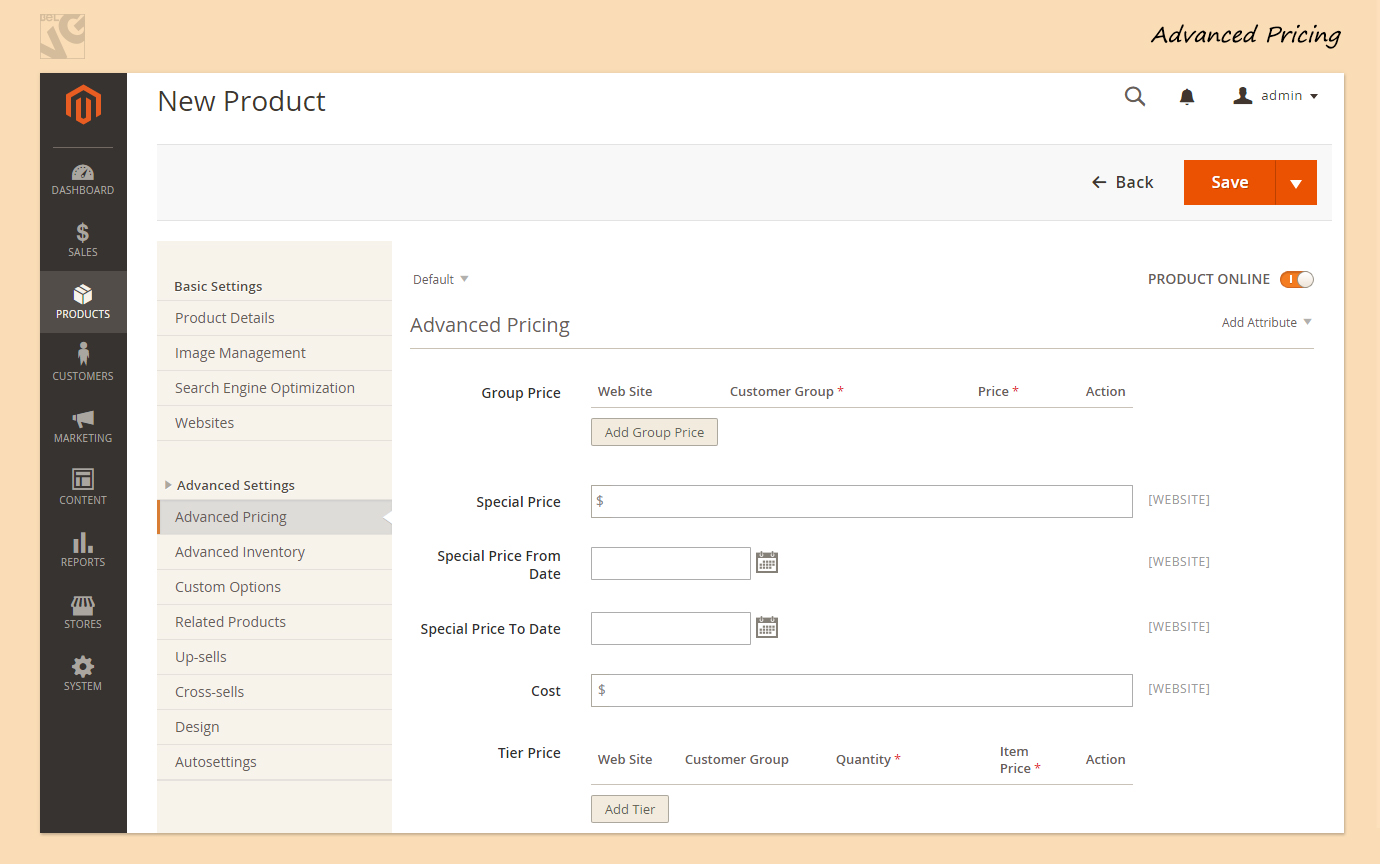
Recurring Payment (this option is no longer avaliable)
The last box in this page is Recurring Payment. And checking it to Yes brings a LOT of scary stuff below. But don’t worry – it’s way simpler in Magento 2.0 as most necessary settings are now combined to Recurring Payment section.

Let’s see what we should do to set up a Recurring Profile for a product:
Schedule Settings
- First of all you need to choose Customer Defined Start Date (if you want to allow customers to set the start date – set it to Yes. No means that the start date is the date of purchase);
- Then fill in the Schedule Description (where you should provide a short description that is shown on frontend. The user will see this while ordering the product);
- Then type the Maximum Payment Failures (set the number of payment failures if you want to have them. If not, the profile will cancel itself on the first failed payment);
- And after that choose Auto Bill on Next Cycle (Yes means that Magento will attempt to charge the card for the number of missed payments the next time it attempts to create an order. If set to No, each time the recurring profile fails, the subscription will be elongated by the Billing Period Unit).
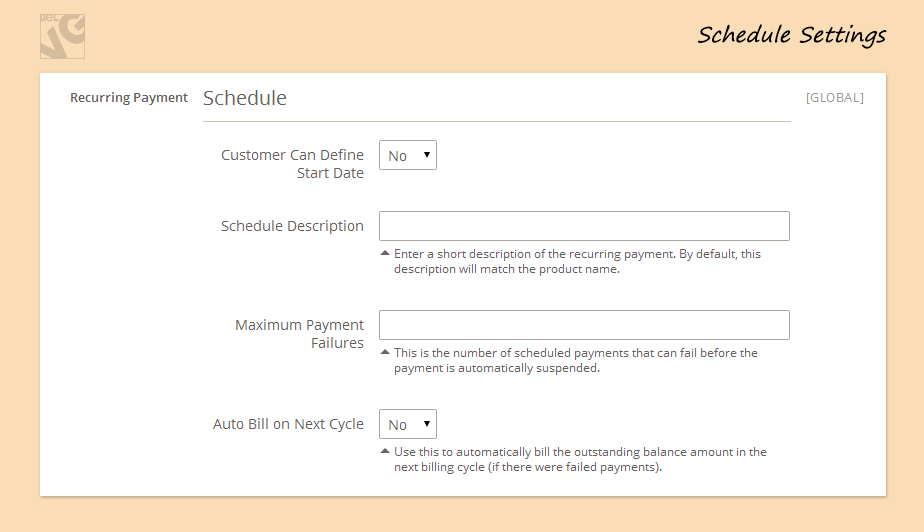
Billing Settings
- Here you first of all should set the Billing Period Unit (days, months, years);
- Then enter the Billing Frequency (which shows how many billing period units are in the recurring profile);
- While filling in Maximum Billing Cycles you set up a limit on how long the recurring profile will continue. If this is empty, the recurring profile will only end when the user or an administrator cancels the profile.

Ecommerce Development
Take your online store to the next level with BelVG ecommerce development
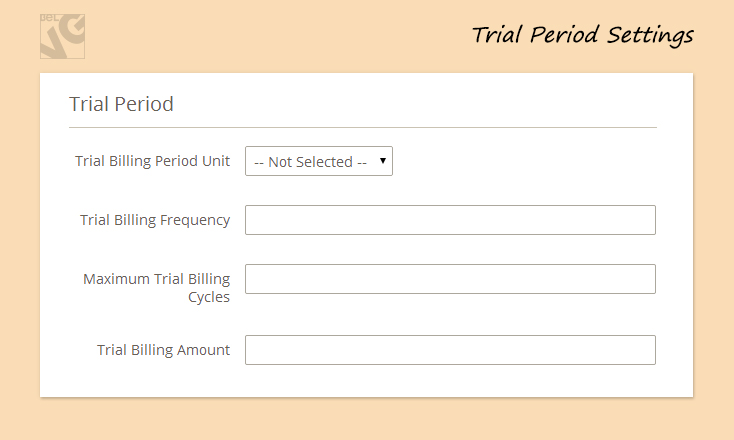
Visit the pageTrial Period Settings
- Next goes the Trial Billing Period Unit (day, week, month, etc.);
- Type the product Trial Billing Frequency that specify how often within the billing period unit the payment system will initiate a payment transaction for the recurring profile;
- Set Maximum Trial Billing Cycles in order to limit the number of payments in the trial period;
- Then fill in the Trial Billing Amount which can help you specify the product price for the trial period in the Trial Billing Amount field.
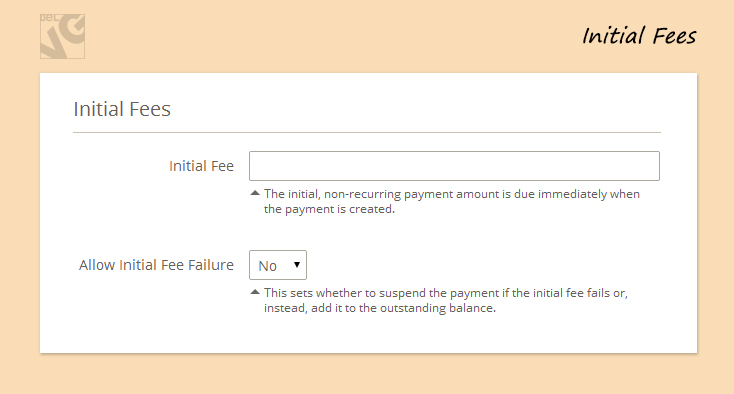
Initial Fees
- Regarding Initial Fee you enter this additional fee to charge for the start date of the recurring profile. The fee isn’t recurring and will be charge only once during the whole period of the recurring profile;
- Last but not least you should choose Allow Initial Fee Failure (yes button means that the recurring profile will continue even if the first payment was unsuccessful, otherwise it will immediately suspend the recurring profile).
Now all settings are filled in and we are ready to save our changes (click SAVE button in the upper-right corner of the page).
Video guide on advanced pricing section management in Magento 2.0
Need quality Magento webdesign services to make your online store modern and appealing? BelVG can help!



Why the recurrent option is not available anymore? Do you know how can I implement it in Magento 2? Like for a monthly subscription