In the following article, we are going to explain how to create blocks and widgets in Magento 2. Please find the previous part, dedicated to Magento 2 CMS here. Get ready for Magento Solution Specialist Certification Exams.
Сreating a block
1. On the Admin menu, go to Content > Elements >Blocks.
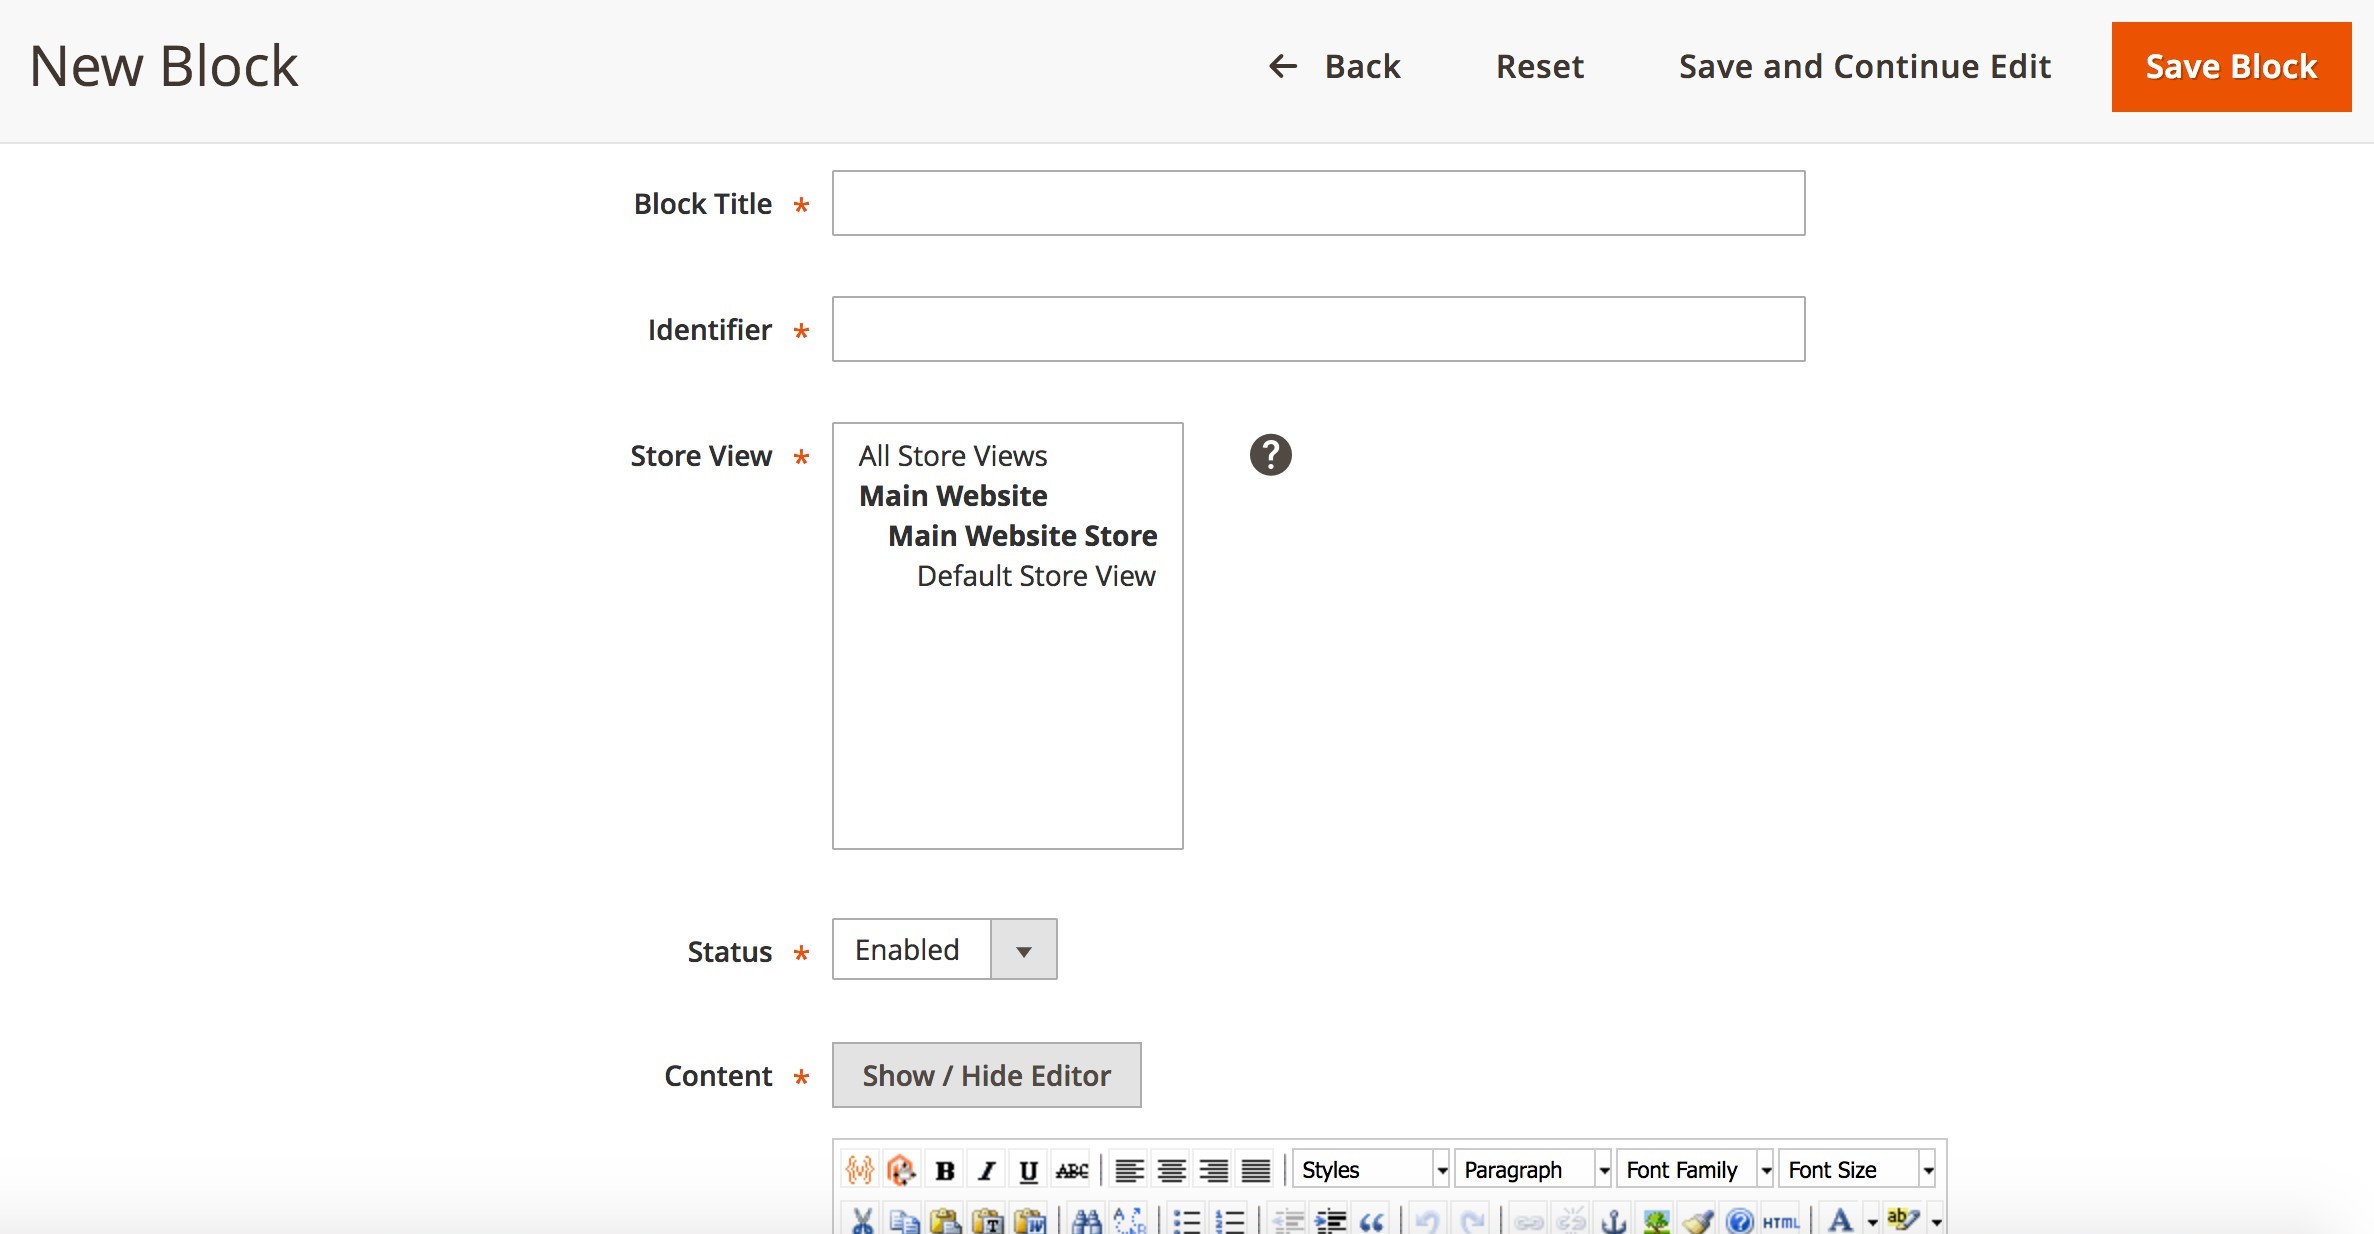
2. Click the Add New Block button in the upper-right corner. Now follow these steps:
- Specify descriptive block name in Block Title field.
- Write down a unique Identifier using all lowercase characters and underscores instead of spaces. This internal reference will be used by the system.
- Choose the Store View(s) where the created block will appear.
- Enable the block to be visible on frontend by setting its Status.
- Enter the Content for the block. Use the WYSIWYG and edit text, add links and tables, upload images, video, and audio.
3. Press the Save Block button when it is complete.
It is now possible to add a newly created block on any page via link widget.
A widget is a small block that performs a specific function. The widget tool allows you to add content such as static blocks with images and text, interactive elements and features at specific block references in your store.
The widgets allow you to create landing pages for marketing purposes and show promotional content. You can add chats systems, pools and review blocks, product ratings and subscription forms, enhance navigation system with tag clouds, and much more.
Creating a Widget
Magento provides you with various widget types, their creative process is almost the same except that the last part that is specific to the type of widget you want to create. So, let’s follow these steps to create a widget.
Step 1: Select the Widget Type
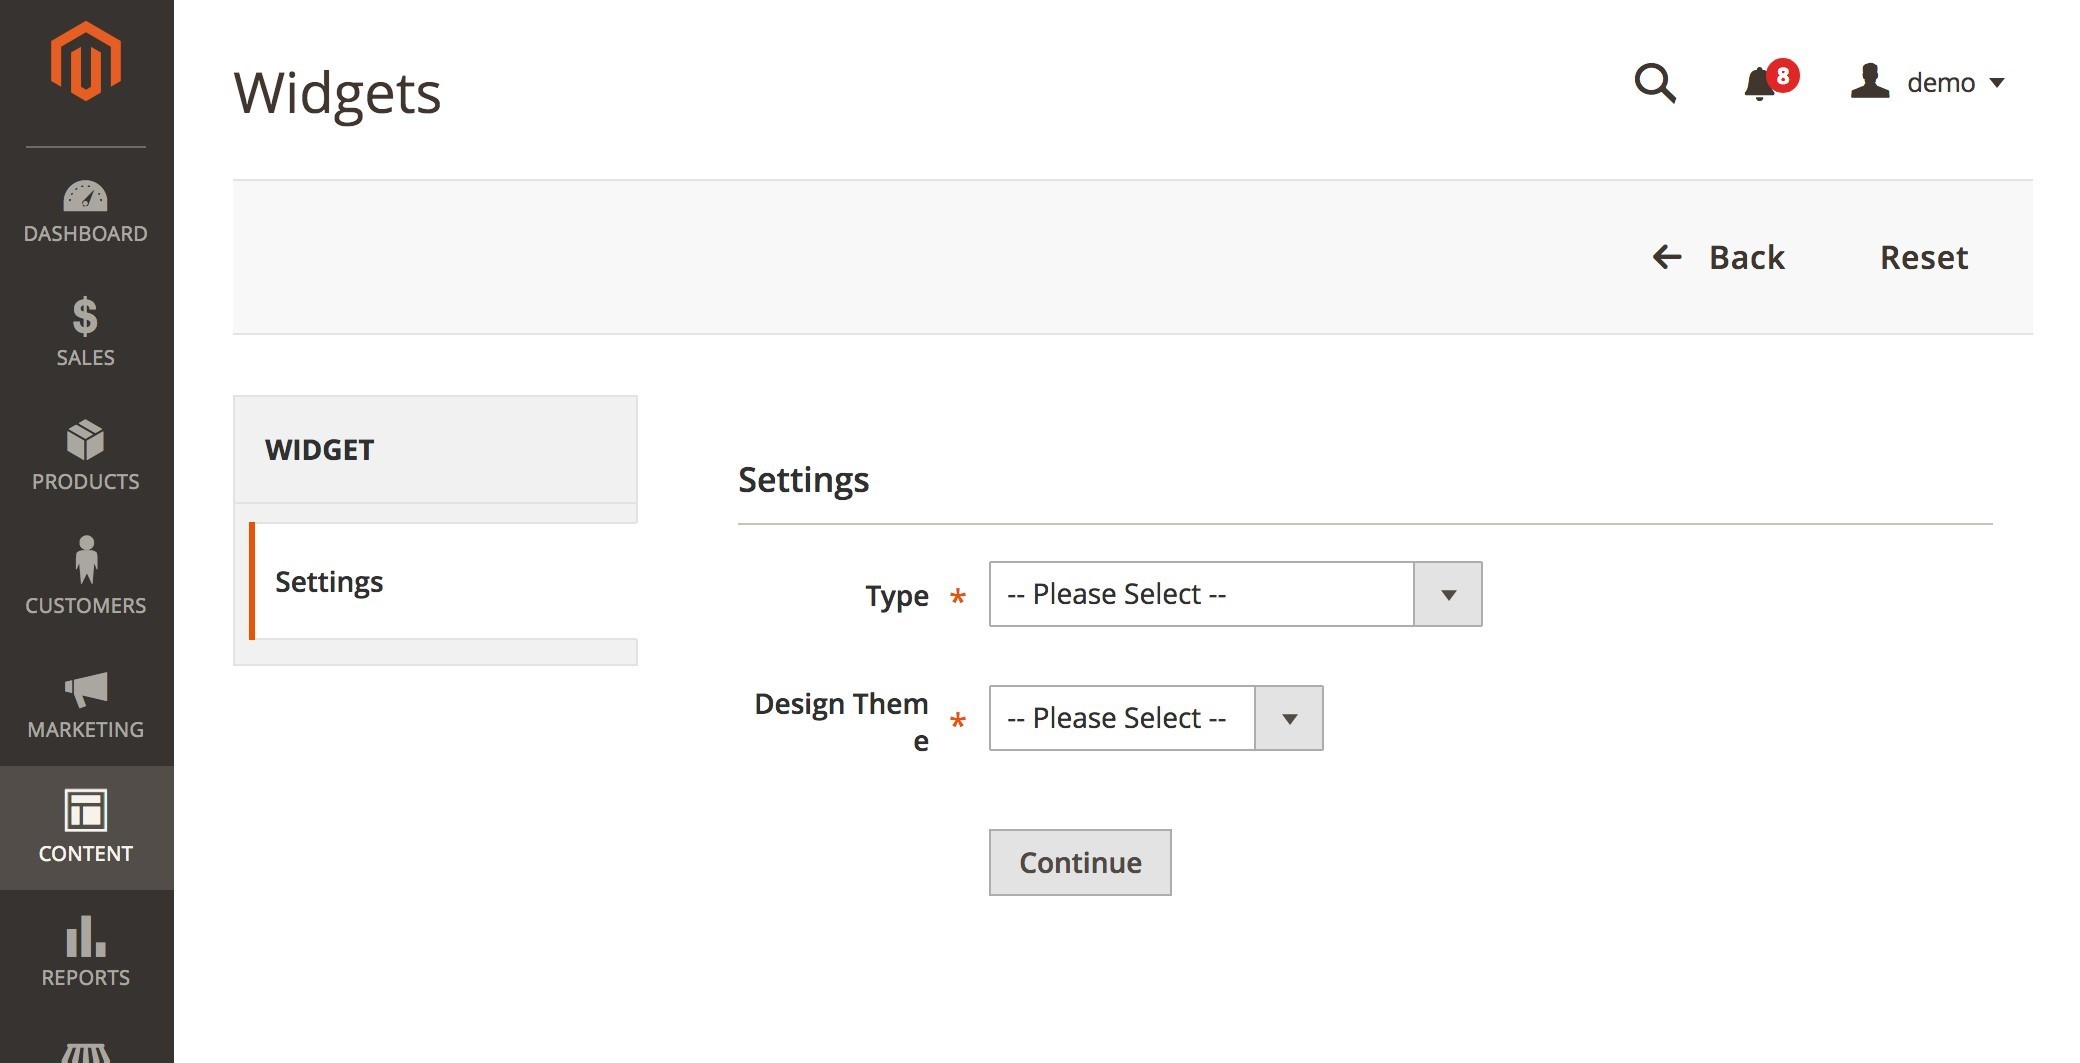
1. Go to Content > Elements > Widgets in Admin panel.
2. Press the Add New Widget Instance and choose the Type of widget you want to create, and Design Package/Theme that will be used with the widget.
3. Press the Continue button.
4. Frontend Properties section will appear. Please, follow these steps:
- Enter a descriptive title in Widget Title field.
- Select “All Store Views,” or to the view where the widget to be available in Assign to Store Views.
- In the Sort Order field, you need to enter a number, it defines block order if you have others in the column. Set zero for the top position.
Step 2: Choose Where It Goes
1. Press the Add Layout Update button in Layout Updates.
2. Select from Display On drop-down the type of category or product page where the widget will be.
3. In Page, Container and Template lists set the block or section the widget to appear.
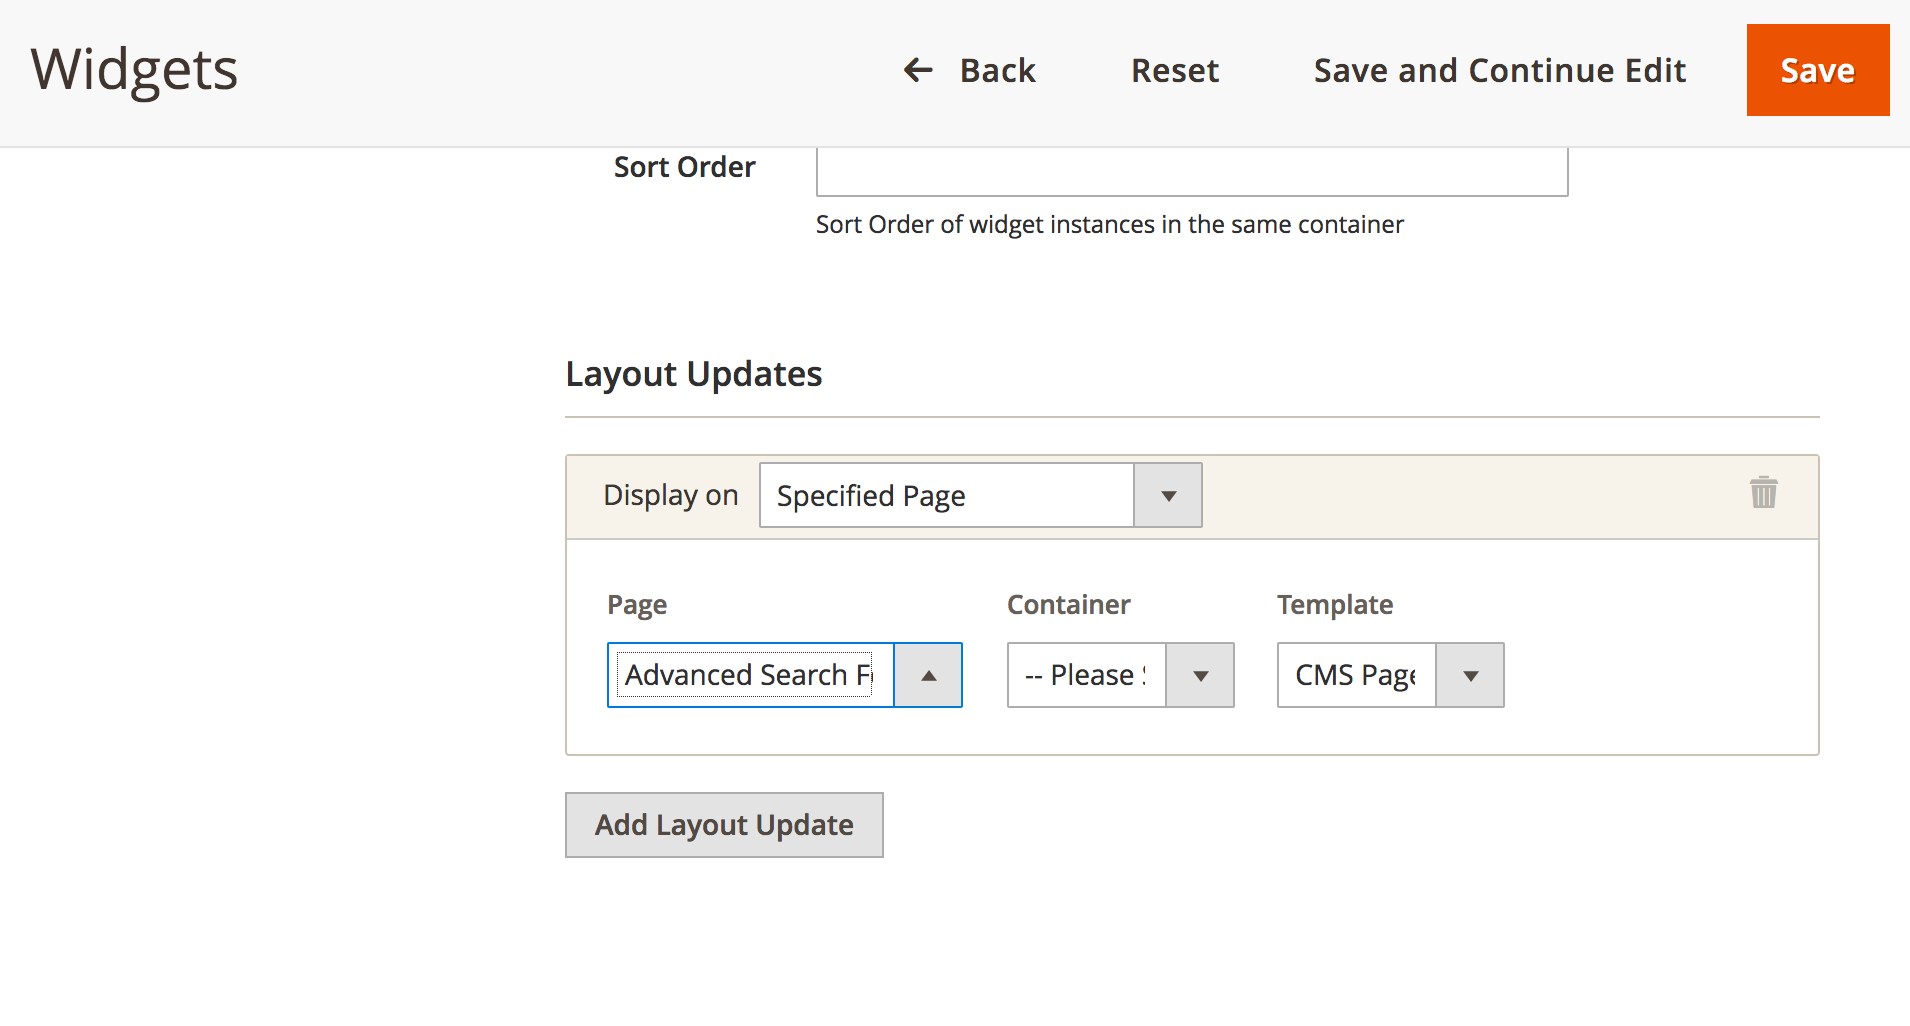 4. Hit Save and Continue Edit to save your modifications and continue configuration.
Step 3: Configure the Widget Options
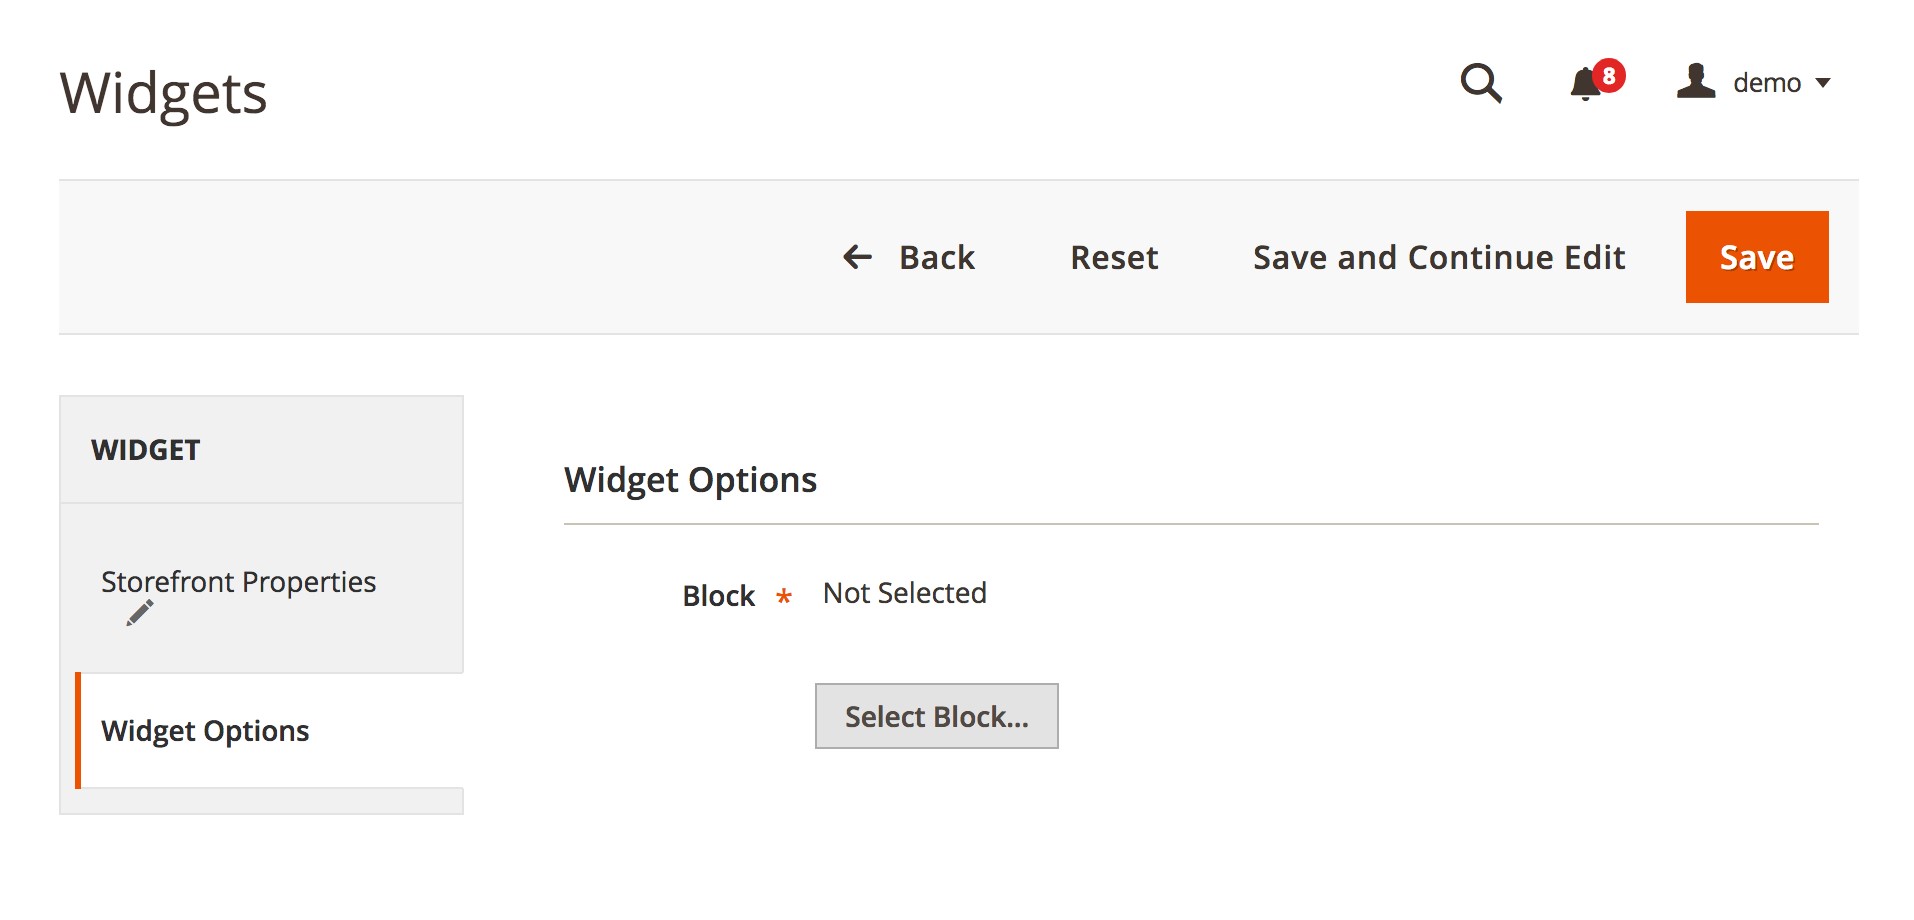
The options for every type are very similar, as well as process. Let’s review as an example how to place a CMS Static Block.
1. Go to Widget Options.
2. Press the Select Block button.
3. Choose the block where you to locate it.
4. Press the Save button.
5. You may need to update cache, so just check the instructions at the top of the workspace.
Go to your site front office and see if the widget is placed correctly. You can always try a different page or block reference to place your widget.




Great blog! Magento 2 is a magnificent upgrade by Magento company, Enhancing your e-store capacity and capabilities by allowing you to add more extensions and more customizations.