
When it is preferable to use automated tests
There are some points to be considered before starting using automated tests in your company: first of all, think whether your investments will be payed off shortly and whether you are planning to add new functionality to the module or it will be sold in conjunction with other modules. Because this will entail repeating the same tests again and again and increase in regression testing, which will influence the costs of testing and as a result will affect the price of the final product. Automated tests are definitely preferable if you know that your project will evolve, i.e. you are planning to develop and issue new versions that are compatible with new Magento versions. In general, the level of test automation is considered individually for each project, but in most cases the acceptance phase is automatized in the first place. This happens because the main aim of acceptance tests is to quickly run through the major product functionality, without going deep into any specific part. That is why they are easy to modify in case some program part is changed. The implementation of development standards which would regulate the usage of recursion, the level of nesting agents, the usage of constants, naming conventions etc, can help avoid further test compatibility problems.
What language to use for automated tests writing
My further examples of test development will be based on the Selenium client library in the Java language, which works in conjunction with the Selenium RC server. Selenium RC is sufficient enough to start writing automated tests for Mаgentо, Why not PHP? Unfortunately, Selenium has recently stropped the official support for PHP and currently only third-party libraries are available for development. If you are familiar with any of the programming languages such as Java, C#, Python, Ruby, you can use them to develop your own tests. They are equally supported by Selenium, and detailed description for each class and method can be found on the official website and by selecting the appropriate API.

Why not Selenium IDE
It is better to start in automated test development using Selenium IDE. It has quite a simple graphical user interface, visual progress history, description of the applied method and many other options that would be useful for any novice. Selenium IDE is an add-on for Mozilla Firefox, which can be downloaded here.
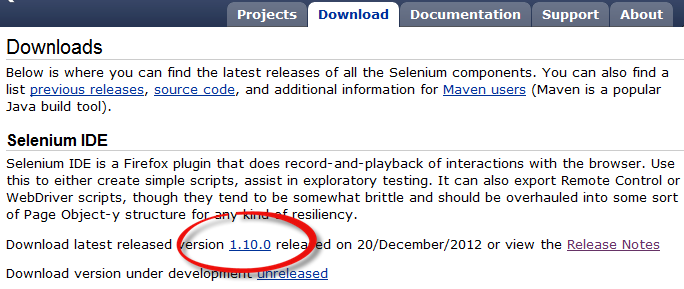
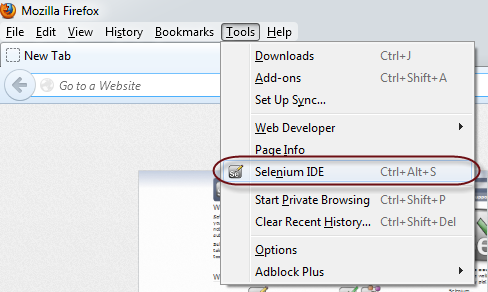
It also allows exporting your created or written test as Java, C#, Python or Ruby file. In order to write and export a test you should start Selenium IDE in the browser menu.
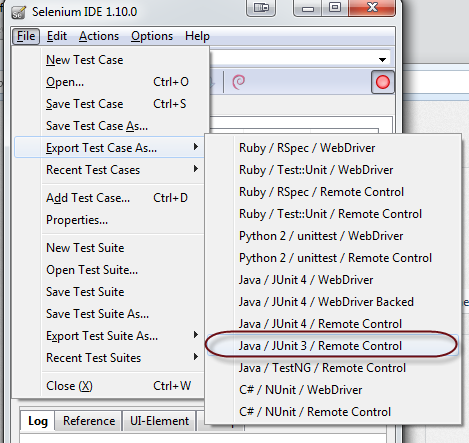
Then, after you are finished with writing your test steps go to the Selenium menu and select File -> Export test case as … ->. Next, select the file format – we will use Java /JUnit3/Remote Control – and save the file. Now this file can be opened in any IDE to get an example of Selenium capabilities.
We will need this feature when writing tests in Selenium RC, and I will refer to it later in the article. Although Selenium IDE can perform most of the functions that are available in Selenium RC, it still lacks many features of a full fledged programming language. For example, you will not be able to use conditional operators, loops, create classes and apply patterns. Due to this fact, it is impossible to create flexible, scalable and easily supported tests.
Where to begin
Although it is possible to write tests using just Notepad++ functionality, Ide can make the development process much faster due to availability of hot keys, possibility to jump quickly between variables and classes and many other functions that can facilitate the process. It is a matter of taste whether to use Eclipse or Netbeans , their capabilities and interfaces are quite similar. I personally prefer Netbeans, and in this article will describe the settings exactly for this IDE.
So, where to begin?
First, download and install Mozilla Firefox, then install Selenium IDE and Firebug.
Then download and install Netbeans with JDK 7 from this page.
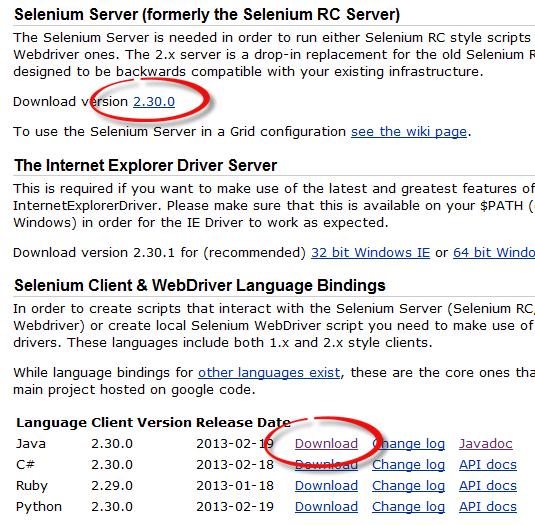
Download selenium-server-standalone-2.30.0.jar file for Selenium RC Server from and Selenium Client & WebDriver Language Bindings – the Java file name is selenium-java-2.30.0.jar.
Now open Netbeans. Launching the software for the first time and creating the first project may take a bit longer then usual. To create a new project click File -> New Project.
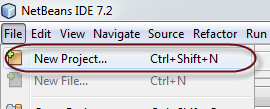
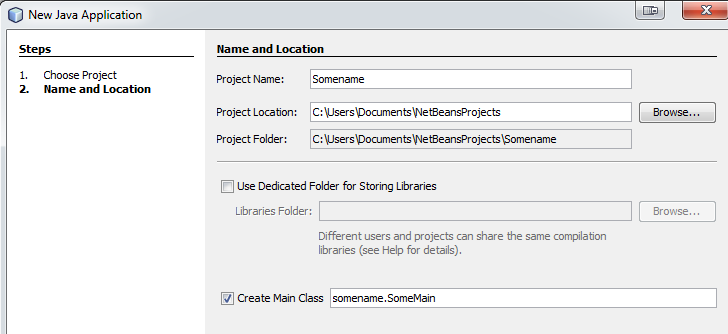
Choose Java Apliсаtiоn and click Next. Specify the project name, the path to the files, the name of the Main class and click Finish.
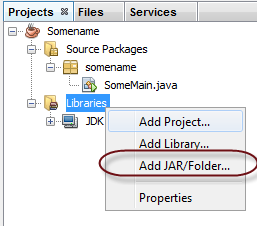
Now we need to add client libraries to the project. Right-click the Libraries folder and choose Add jar/folder, then select selenium-java-2.30.0 .jar and selenium-server-standalone-2.30.0 .jar files.
Now your IDE will see all Selenium classes and methods. More detailed information you can find in Javadoc. This document provides detailed overview of Selenium capabilities, therefore, I advise you to study it pretty thoroughly.
But it is not very convenient to consult Javadoc each time you try to recall a method, therefore, lets configure NetBeans to show us some tips when a method or class is called. We need to unzip selenium-java-2.30.0 .jar and add it to the project. Of all the content we are interested only in this file, since it stores the original files with the comments.
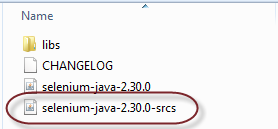
So, lets unzip this archive. Copy selenium-java-2.30.0 -srcs.jar file into the scr project folder and unzip it as a common archive. As a result quite a number of packages get added to our project, but this is a small price for the tips we get for methods and classes.
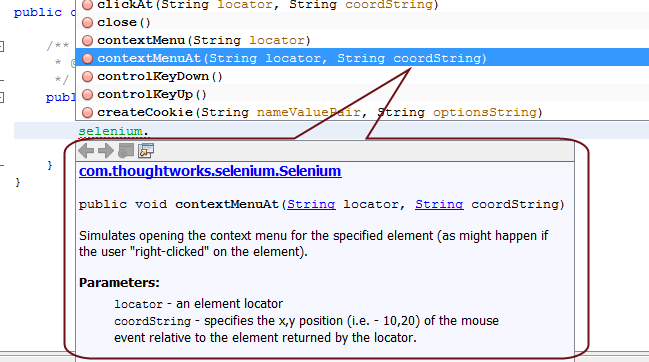
To access a tip use CTRL+Space shortcut after writing a class. For example, you are trying to call a standard Selenium method and there is a dot (.) after operator. Just press the hotkeys and you will see the entire list of available methods with the description.
In order to run tests it is necessary to launch Selenium Server first. There are several ways to do this.
Windows allows you to launch selenium-server-standalone-2.30.0 .jar just double-clicking the file. In this case, it will run invisibly in background. Also, tests will stop showing errors at the beginning of execution.
Another way is to run the command Java -jar selenium-server-standalone-2.30.0 .jar in Windows command line.
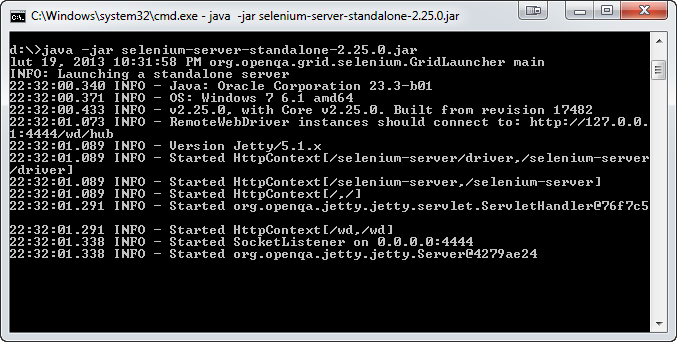
In this case, in the command line window you will see the progress of Selenium Server execution.
And the last method is to launch and stop the server directly from the test.
By default the server can be started as follows:
|
1 2 |
SeleniumServer seleniumServer = new SeleniumServer(); seleniumServer.start(); |
If you need additional settings, you can use the class RemоteCоntrоlCоnfigurаtiоn. Create object RemоteCоntrоlCоnfigurаtiоn and pass it to the constructor SeleniumServer:
|
1 2 3 4 5 6 7 8 9 |
RemoteControlConfiguration rcc = new RemoteControlConfiguration(); // to configure SeleniumServer // use RemоteCоntrоlCоnfigurаtiоn options if necessary // For Example: set flag True to trust all SSL certificates: rcc.setTrustAllSSLCertificates(true); SeleniumServer seleniumServer = new SeleniumServer(rcc); seleniumServer.start(); |
Later I will devote a separate article to how you can use this method in your tests.
The first test
So now we are ready to write our first test. Open Netbeans and choose to create a new class. To do this, right click the package and select New -> Java class.
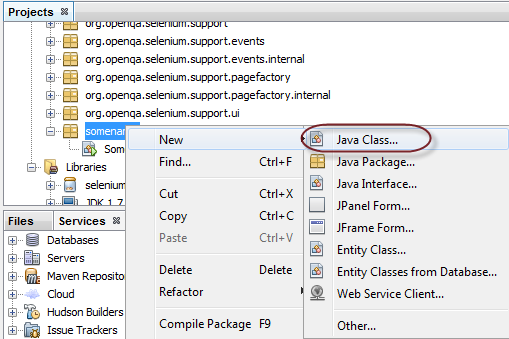
Then we name it, for instance, Test1 and click Finish. Now there are 2 classes in our package: Test1 and Main. Test1 class will contain the test itself, which will be launched from the class Main. So, lets open class Test1 and start creating our test.
|
1 2 3 4 5 6 7 8 9 10 11 12 13 14 15 16 17 18 19 20 21 22 23 24 25 26 27 28 29 30 31 32 33 34 35 36 37 38 39 40 41 42 43 44 45 46 47 48 49 50 51 52 53 54 55 56 57 58 59 60 61 62 63 64 65 66 67 68 69 70 71 72 73 74 75 76 77 78 79 80 81 82 83 84 85 86 87 88 89 90 91 92 |
/** * At the very beginning it is necessary to declare a package, * and it should match with where our class is located */ package somename; /** * Importing the necessary library * otherwise we will not be able to apply standard * Selenium methods */ import com.thoughtworks.selenium.; /** * Declaring a class, the class name should match the file name * extends SeleneseTestCase indicates that it has been inherited * from the parent class SeleneseTestCase */ public class Test1 extends SeleneseTestCase { /** * The first test method should be named setup() * It is necessary to indicate throws Exception if our method * can independently generate exceptions. You can learn more about this * in Java manuals. But do not worry * if you are not yet a professional in this sphere, because Netbeans * itself will prompt you to insert the throws exception method * in case it generates its own exceptions. */ public void setUp() throws Exception { /** * Here we call the standard Selenium setUp method , in our case * we pass 2 arguments into it - basic URL and the browser * where the test should be started . But it can also be called * with the third Port argument. */ setUp("http://belvg.info/", "*firefox"); } /** * This method contains the steps of test execution */ public void runTest() throws Exception { /** * Opens the specified URL, attaching it to the basic one, i.e. the final URL * which will be opened in the browser - that is http://belvg.info/demo/magento/test/ * The execution of the next method will not begin until the page load event happens. */ selenium.open("/demo/magento/test/"); /** * When the page opens checking if the page title matches the required one */ verifyEquals("Home page", selenium.getTitle()); /** * Do the click operation on the specified link. After that the test execution immediately * moves on to the next method. Therefore, in order to wait for * the page load it is necessary to apply the method waitForPageToLoad */ selenium.click("link=Acer Ferrari 3200 Notebook Computer PC"); /** * Waiting until the page loads and pass the timeout period in milliseconds into the method. * If the page does not load within the specified period, then * exception is called and the test is finished. Please note that the time is passed * as a String type, not int. Therefore, do not forget to put quotation marks. */ selenium.waitForPageToLoad("30000"); /** * This command inputs text «2» into the field with the locator id=qty */ verifyEquals("Acer Ferrari 3200 Notebook Computer PC", selenium.getTitle()); selenium.type("id=qty", "2"); selenium.click("css=button.button.btn-cart"); selenium.waitForPageToLoad("30000"); verifyEquals("Shopping Cart", selenium.getTitle()); /** * The command checks for the text "Acer Ferrari 3200 Notebook Computer PC * was added to your shopping cart.» on the page */ verifyTrue(selenium.isTextPresent("Acer Ferrari 3200 Notebook Computer PC" + " was added to your shopping cart.")); selenium.click("css=button.button.btn-continue"); selenium.waitForPageToLoad("30000"); } } |
Now open class Main, create a Test1 class object in the method Main and apply methods Setup() and runTest( ) to it.
|
1 2 3 4 5 6 7 8 9 10 11 12 |
package somename; public class SomeMain { public static void main(String[] args) throws Exception { Test1 mytest = new Test1(); mytest.setUp(); mytest.runTest(); } } |
Once we have saved all the changes we can launch our test. First we launch Selenium Server – we will use the double click method to start the selenium-server-standalone-2.30.0 .jar file.
Now right-click the Main class and select Run File.
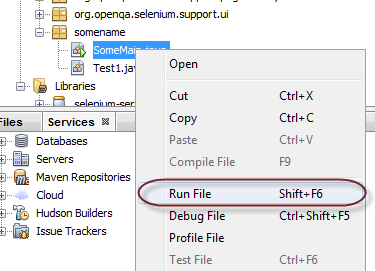
If everything has been properly done, a Selenium window appears. In the window you can observe the command history and the browser window where you can see how the task is being performed in Magento.

If nothing happens and in NetBeans you see the following error

This means that the selenium-server-standalone-2.30.0.jar file failed to be started via the double-click command. In this case, try to run it via the command line, as stated above.
Our first test is rather simple, it is preferable that you try and write a test of your own. Do not be afraid to experiment with methods, locators, as well as use various capabilities of the Java language. In the upcoming articles I will show how to create locators, how to speed up the search of page elements and how to make your tests flexible and scalable. Also I will show some examples of which class hierarchy we use in our tests in BelVG.


Thanks for such a great article here. I was searching for something like this for quite a long time and at last, I’ve found it on your blog. It was definitely interesting for me to read about their market situation nowadays.
Thank you for your information. It very nice article.