Very often when developing extensions or custom solutions it is necessary to cache certain information. In this case the best solution is to use the default Magento cache. It’s relatively easy to use and has only a few distinctions from how it’s made in the default Magento 1.x.
First of all, you need to register a new cache type. This is necessary to make it work as with any other default Magento cache so you could clear / enable / disable it from the admin panel:
|
1 2 3 4 5 6 7 8 9 |
<module_root_folder> / etc / cache.xml : (all examples are taken from a BelVG extension called BelVG_Infscroll) ----------------------------------------------------------------------------------------------------------------------- <?xml version="1.0"?> <config xmlns:xsi="http://www.w3.org/2001/XMLSchema-instance" xsi:noNamespaceSchemaLocation="urn:magento:framework:Cache/etc/cache.xsd"> <type name="infscroll" translate="label,description" instance="BelVG\Infscroll\Model\Cache\Type"> <label>Infinite Scroll</label> <description>BelVG Infinite Scroll plugin cache.</description> </type> </config> |
Then we create instance for the new custom cache:
|
1 2 3 4 5 6 7 8 9 10 11 12 13 14 15 16 17 18 19 20 21 22 23 24 25 26 |
<module_root_folder> / Model / Cache / Type.php : ------------------------------------------------------------------------------------------------------------------------------------ <?php namespace BelVG\Infscroll\Model\Cache; class Type extends \Magento\Framework\Cache\Frontend\Decorator\TagScope { /** * Cache type code unique among all cache types */ const TYPE_IDENTIFIER = 'infscroll'; /** * Cache tag used to distinguish the cache type from all other cache */ const CACHE_TAG = 'INFSCROLL'; /** * @param \Magento\Framework\App\Cache\Type\FrontendPool $cacheFrontendPool */ public function __construct(\Magento\Framework\App\Cache\Type\FrontendPool $cacheFrontendPool) { parent::__construct($cacheFrontendPool->get(self::TYPE_IDENTIFIER), self::CACHE_TAG); } } |
Notice that the class \Magento\Framework\Cache\FrontendInterface is the interface for the cache model. But we use the class \Magento\Framework\Cache\Frontend\Decorator\TagScope because this class contains a very important functionality for clearing cache by tags.
|
1 2 3 4 5 6 7 8 9 10 11 12 13 14 15 16 17 18 19 20 21 22 23 24 25 26 27 28 29 30 |
<magento-framework_root_folder> / Cache / Frontend / Decorator / TagScope.php : ------------------------------------------------------------------------------------------------------------------------------------ <?php namespace Magento\Framework\Cache\Frontend\Decorator; class TagScope extends \Magento\Framework\Cache\Frontend\Decorator\Bare { …. public function clean($mode = \Zend_Cache::CLEANING_MODE_ALL, array $tags = []) { if ($mode == \Zend_Cache::CLEANING_MODE_MATCHING_ANY_TAG) { $result = false; foreach ($tags as $tag) { if (parent::clean(\Zend_Cache::CLEANING_MODE_MATCHING_TAG, [$tag, $this->getTag()])) { $result = true; } } } else { if ($mode == \Zend_Cache::CLEANING_MODE_ALL) { $mode = \Zend_Cache::CLEANING_MODE_MATCHING_TAG; $tags = [$this->getTag()]; } else { $tags[] = $this->getTag(); } $result = parent::clean($mode, $tags); } return $result; } …. } |
The method $this->getTag() in this case will return the value \BelVG\Infscroll\Model\Cache\Type::CACHE_TAG transmitted via __constract when creating a class object. Now we can:
- add (method save)
- upload (method load)
- remove a separate inscription by identificator (method remove)
- cleaning all cache or some particular types only (method clean)
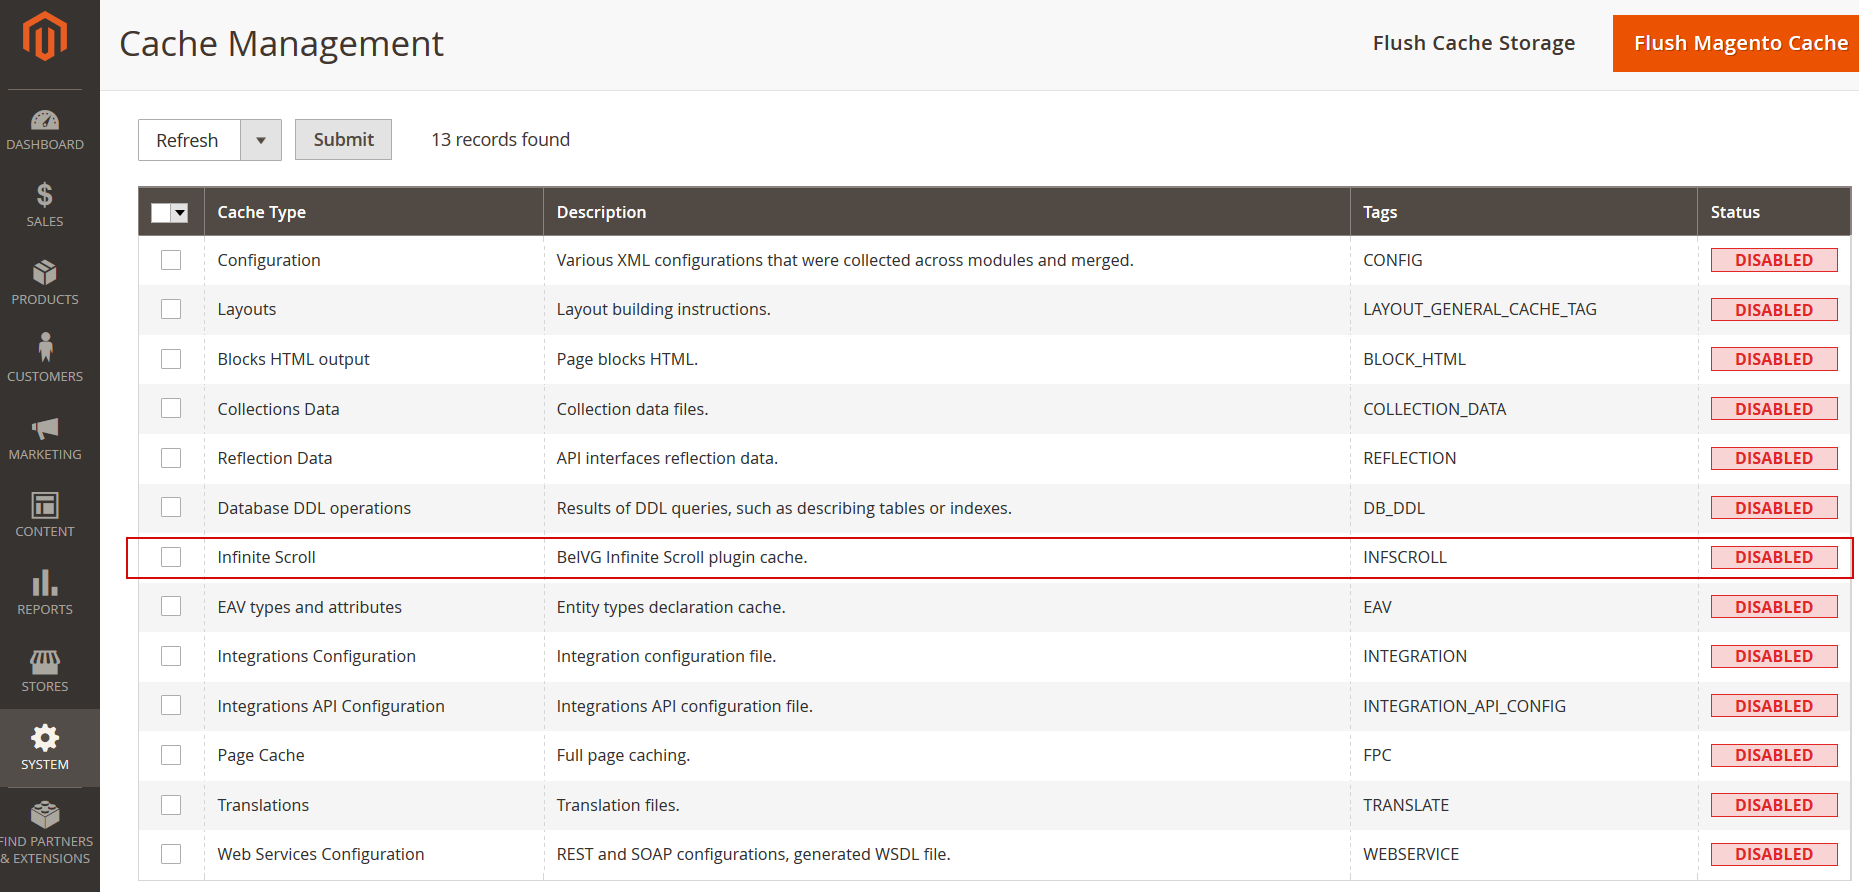
At this point, everything is ready. New cache type is displayed in the ‘Cache Management’ in the admin panel and this cache type can be used as a default Magento cache:

Now you can work with this cache type directly via class object BelVG\Infscroll\Model\Cache\Type (for example, by extending its functionality) or create a separate helper, for example:
|
1 2 3 4 5 6 7 8 9 10 11 12 13 14 15 16 17 18 19 20 21 22 23 24 25 26 27 28 29 30 31 32 33 34 35 36 37 38 39 40 41 42 43 44 45 46 47 48 49 50 51 52 |
<module_root_folder> / Helper / Cache.php : ------------------------------------------------------------------------------------------------------------------------------------ <?php namespace BelVG\Infscroll\Helper; use Magento\Framework\App\Helper; class Cache extends Helper\AbstractHelper { const CACHE_TAG = 'INFSCROLL'; const CACHE_ID = 'infscroll'; const CACHE_LIFETIME = 13600; protected $helper; protected $cache; protected $cacheState; public function __construct( Helper\Context $context, Data $helper, \Magento\Framework\App\Cache $cache, \Magento\Framework\App\Cache\State $cacheState ) { $this->helper = $helper; $this->cache = $cache; $this->cacheState = $cacheState; parent::__construct($context); } public function getId($method, $vars = array()) { return base64_encode('infscroll' . $method . implode('', $vars)); } public function load($cacheId) { if ($this->cacheState->isEnabled(self::CACHE_ID)) { return $this->cache->load($cacheId); } return FALSE; } public function save($data, $cacheId) { if ($this->cacheState->isEnabled(self::CACHE_ID)) { $this->cache->save($data, $cacheId, array(self::CACHE_TAG), self::CACHE_LIFETIME); return TRUE; } return FALSE; } } |
In this helper we added a check on current cache status:
|
1 |
if ($this->cacheState->isEnabled(self::CACHE_ID)) { … }; |
and a function that generates the identificator for cache inscriptions:
|
1 2 3 4 |
public function getId($method, $vars = array()) { return base64_encode('infscroll' . $method . implode('', $vars)); } |
This is a very important moment, because the identificator should be unique for each data sequence. For example, if we have a function that sends requests to a 3rd-party service by transferring certain parameters, then the identificator is generated based on
- the name of the method in 3rd-party service ($method);
- the values of the transferred parameter ($vars).
In this case, each unique data sequence from the 3rd-party service will be cached as a separate inscription.


