
As a PrestaShop administrator, you can setup multiple currencies in PrestaShop 1.6.
The importance of this function is evident as eCommerce business is spread worldwide and the customer should be able to make purchases in their country’s currency.
You need to follow these steps to increase sales by allowing customers to shop and checkout in their local currency.
You are logged in your admin panel, navigate to Localization -> Currencies. You can see just one currency added and enabled now.

This is the currency used by the default store country that you selected during the installation of PrestaShop. This currency is also automatically applied as the default store currency. If you add more currencies, you can change the default currency.
There are two options to add currencies:
- upload localization pack;
- add the currency manually.
Let’s review localization pack option, which is the easiest and the fastest one.
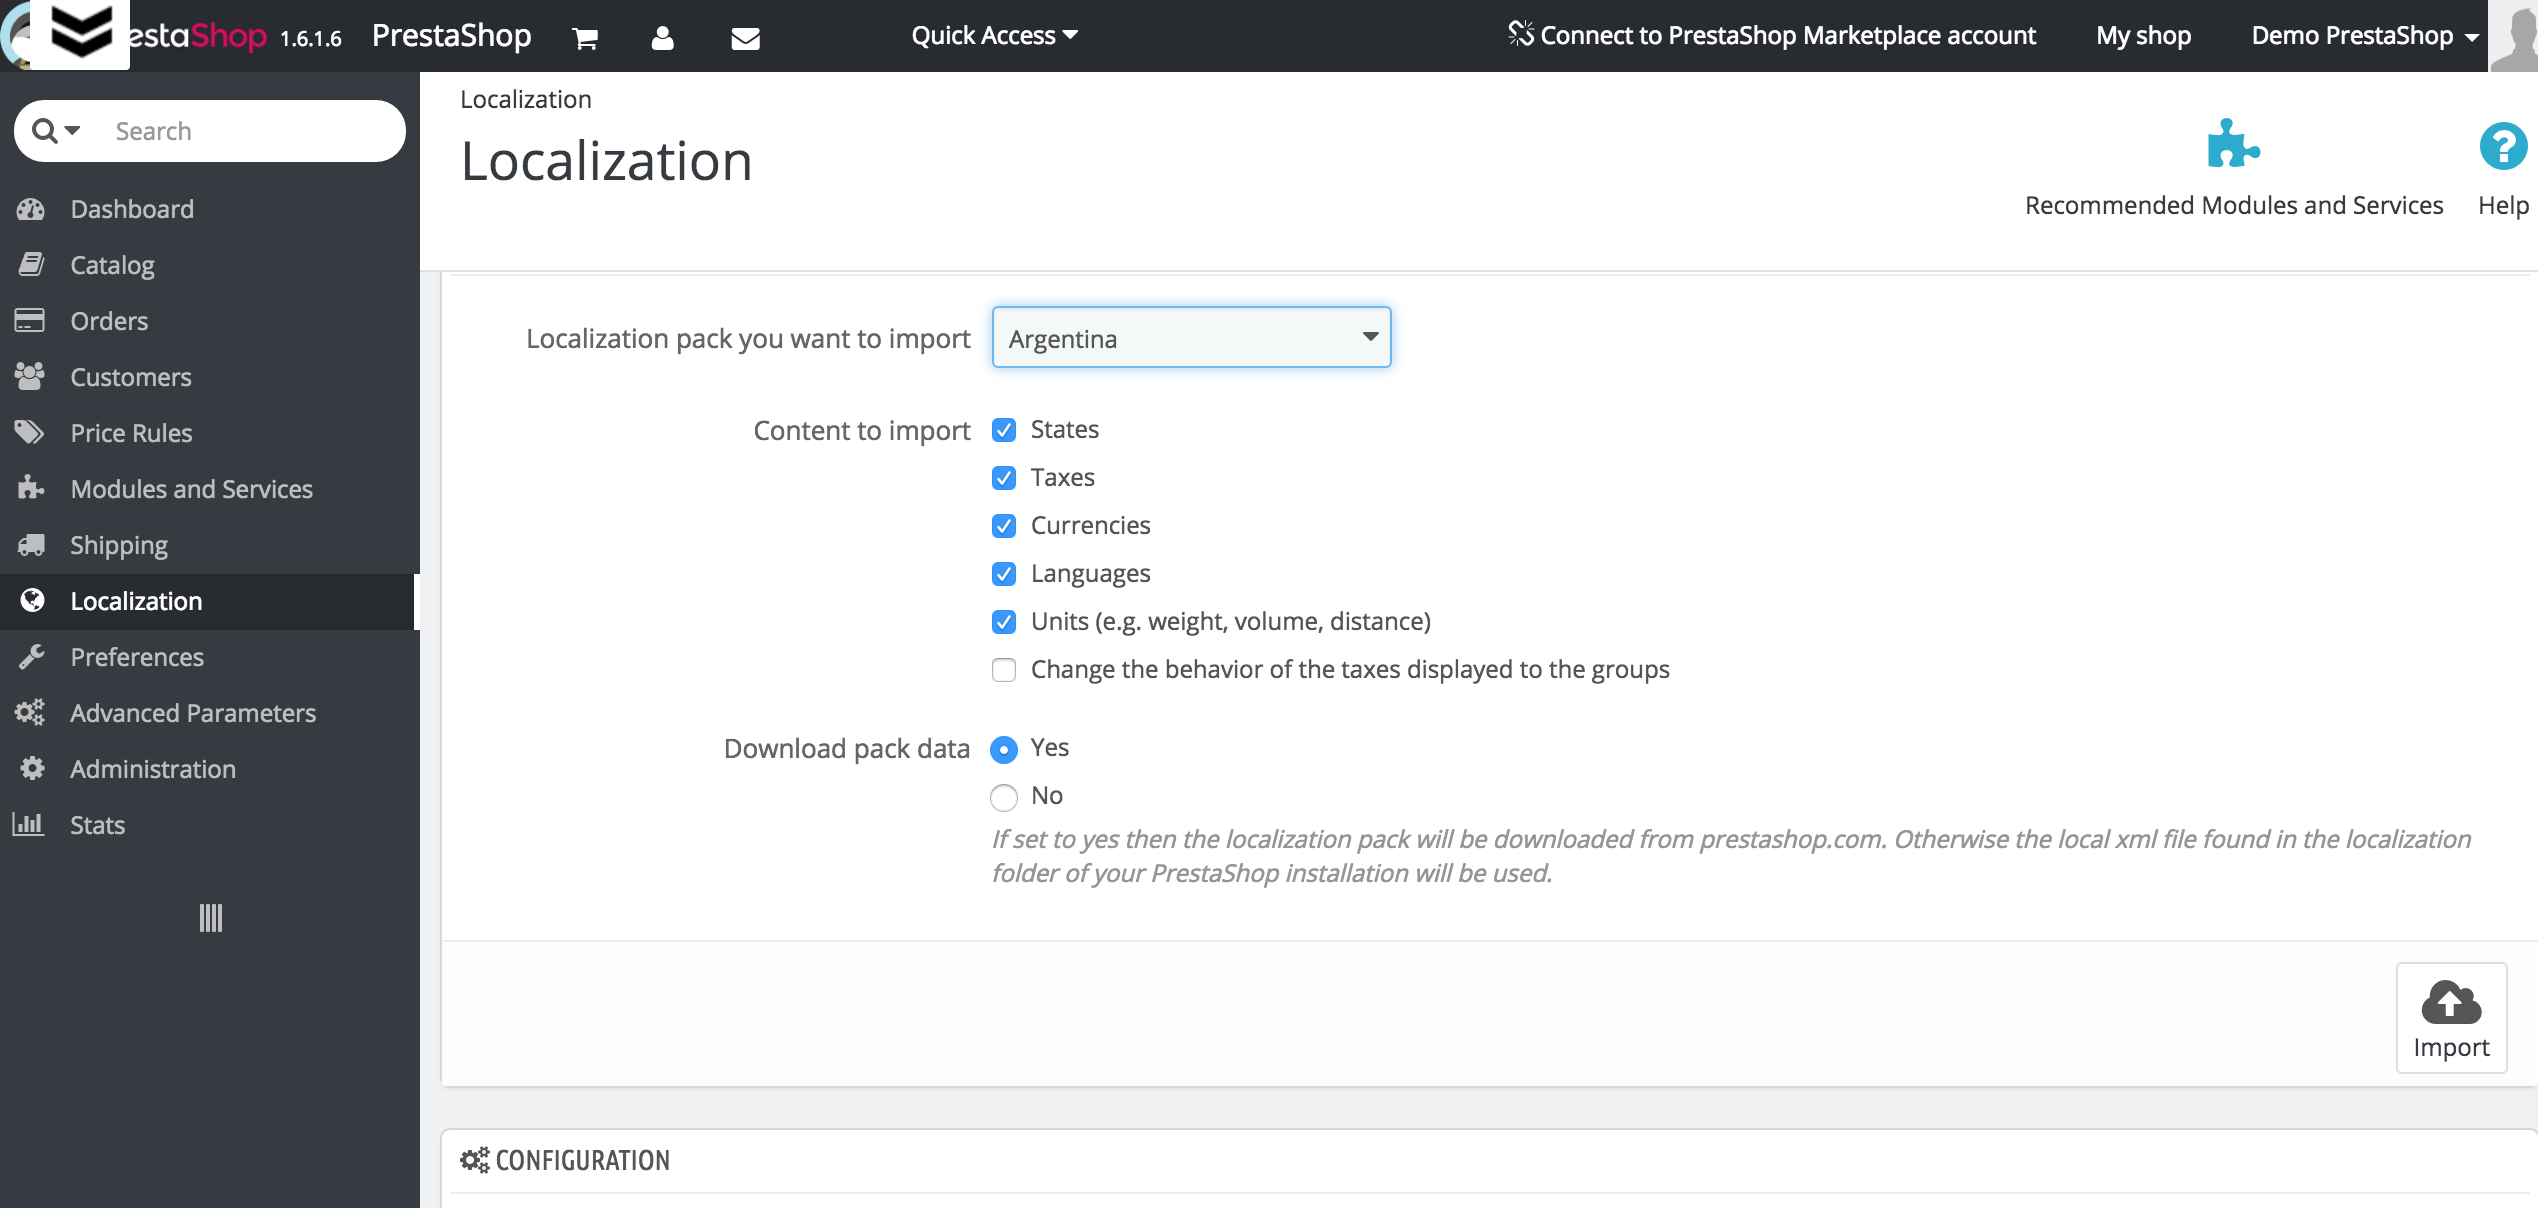
Localization pack includes currencies, languages, etc. of the chosen country. Navigate to your PrestaShop admin panel -> Localization -> Import a localization pack tab -> choose the desired country from the Localization pack drop-down menu the pack you want to import and press Import. This will automatically enable the currency.
The second option offered by PrestaShop is to add the currency manually. It is useful function as sometimes you want to use specific currency which is not featured at any localization pack.
Go to your PrestaShop admin panel -> Localization -> Currencies sub-menu and press the plus sign in the top right corner.
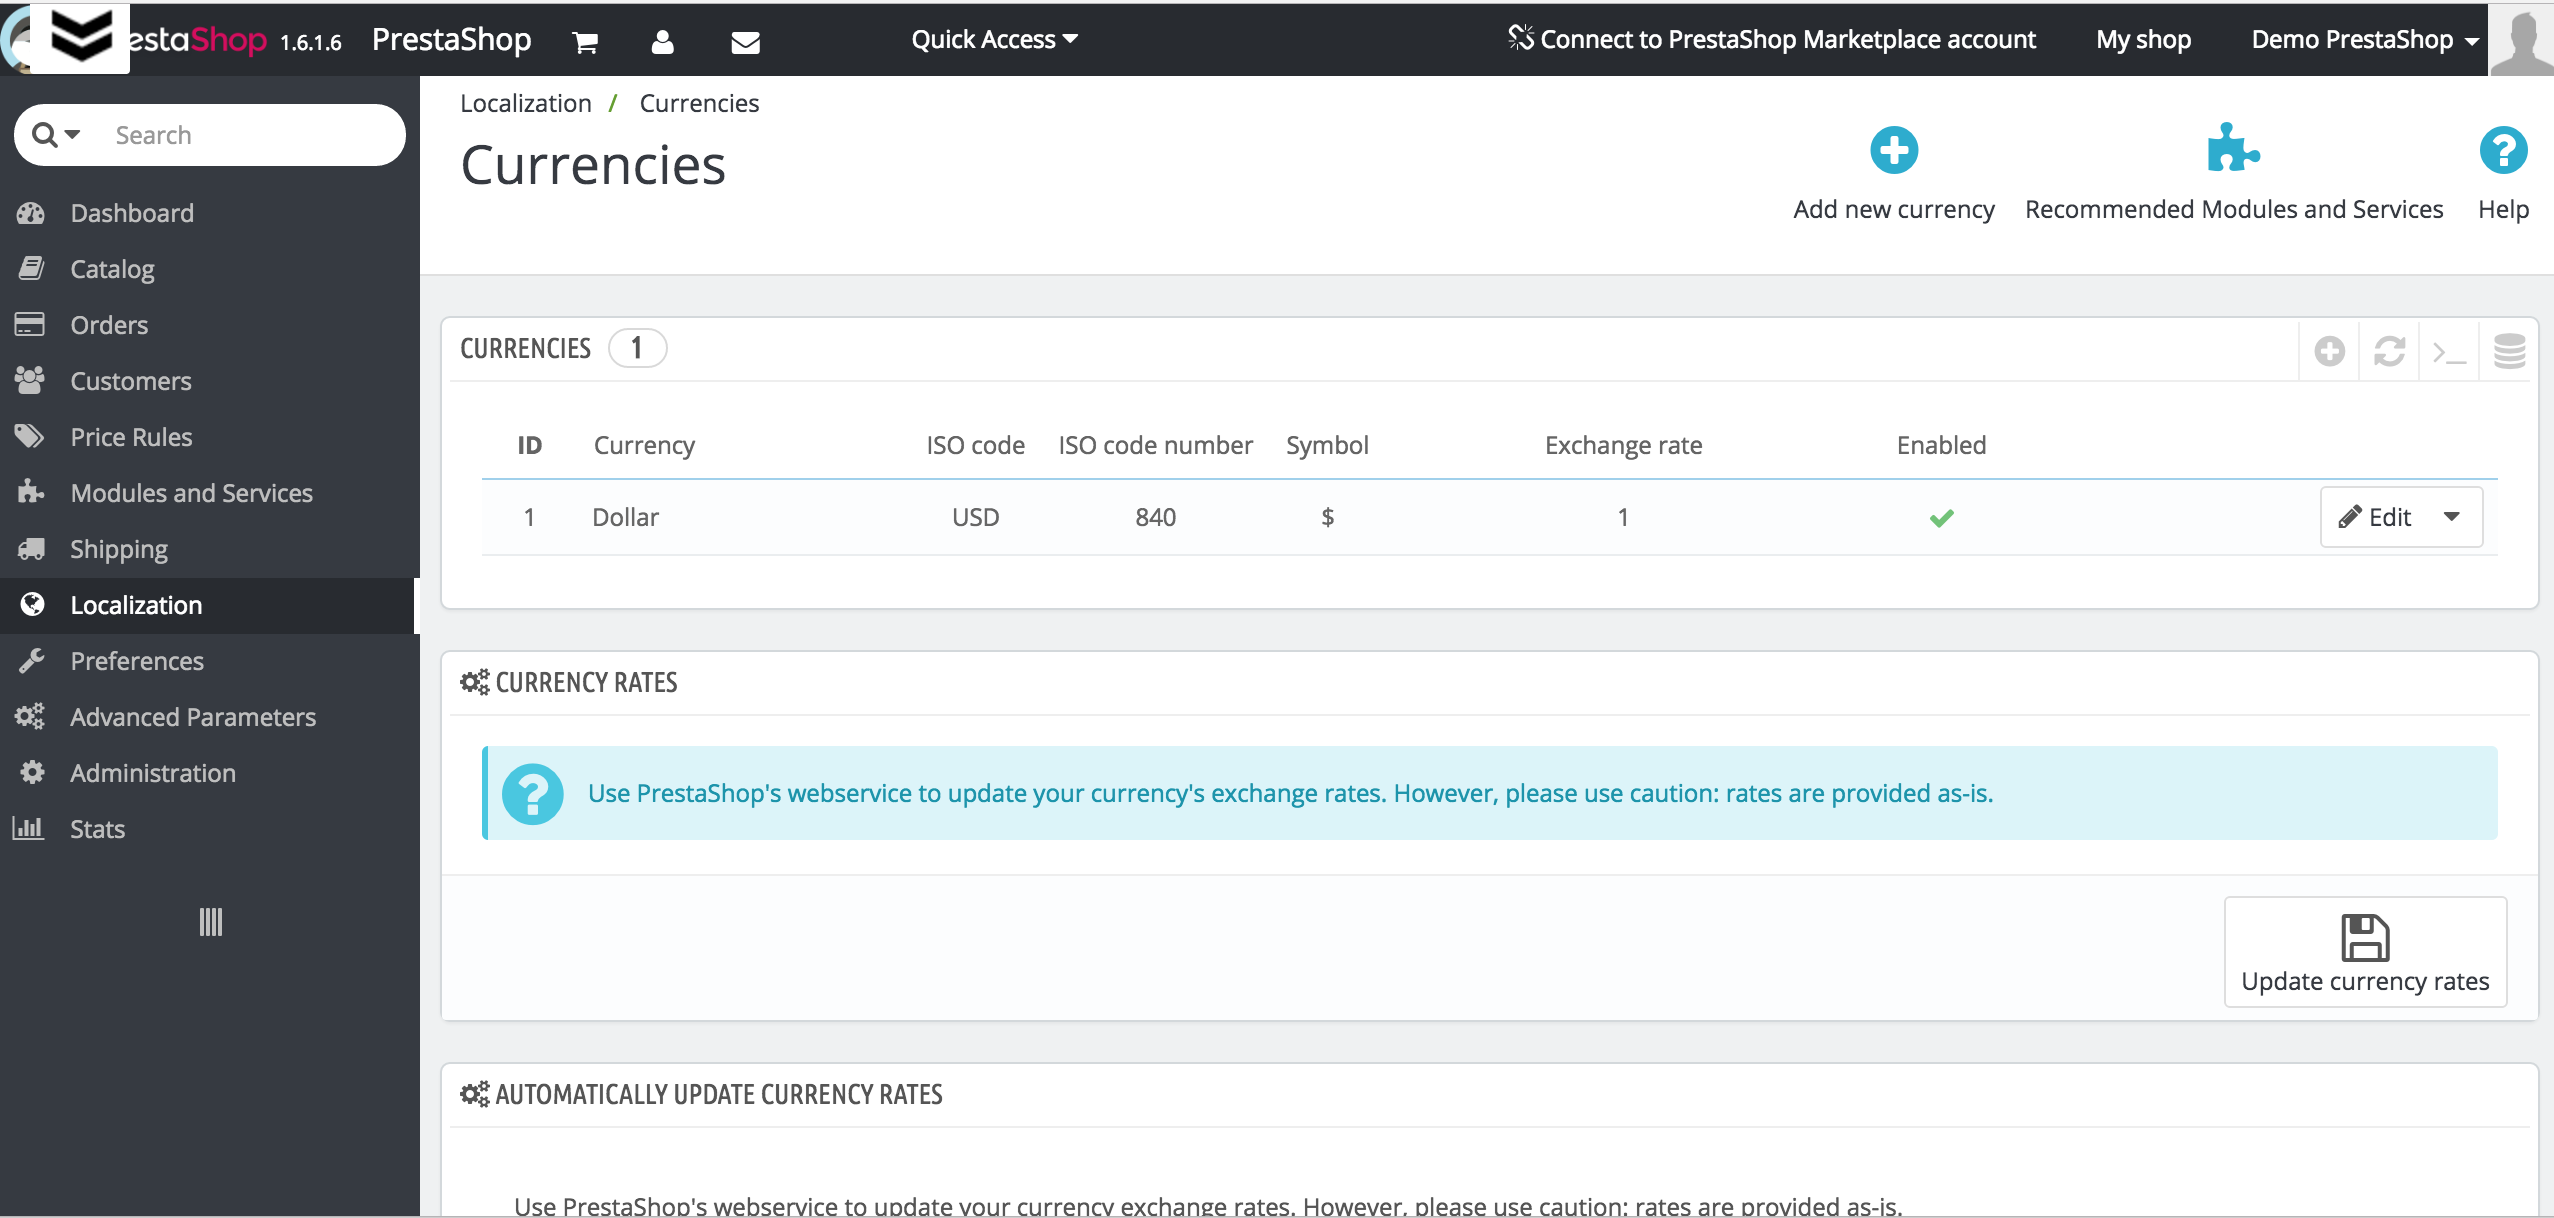
Once you press that button you will be redirected to the Currencies creation interface where after you fill in all of the required fields, your new Currency will be added.
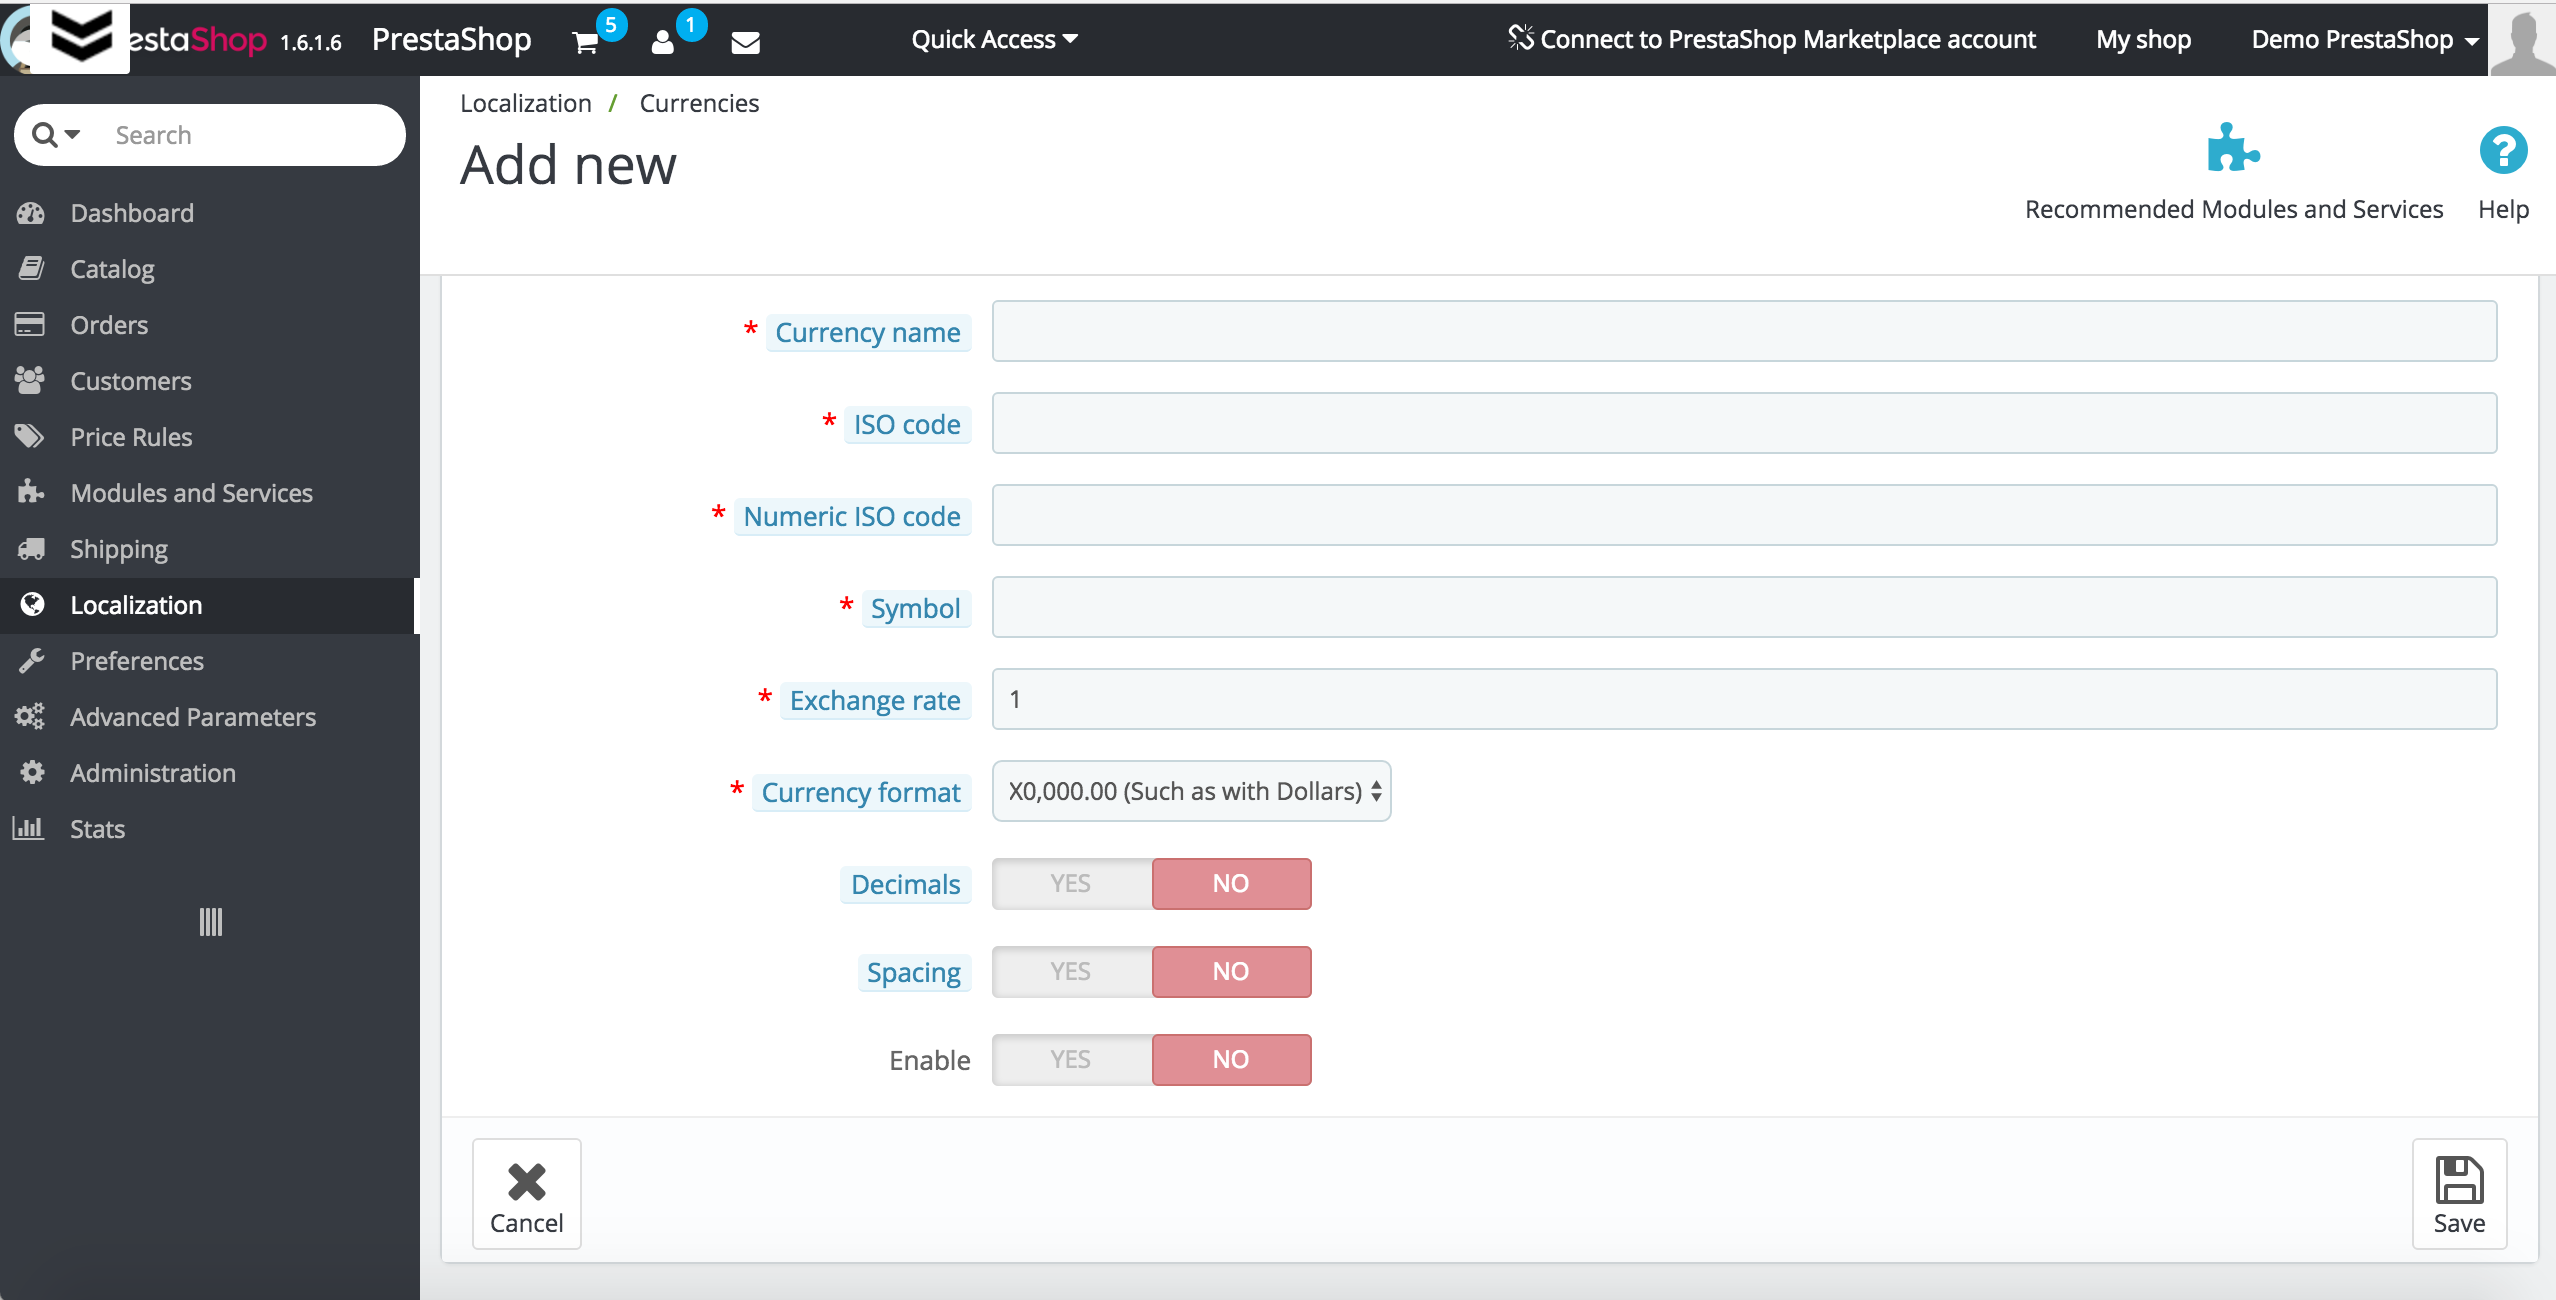
Let’s go through the fields of the form:
Currency name – type the name of the currency (e.g. Dollar, Euro). PrestaShop recommends to write it in English.
ISO code – type the ISO 4217 code for the currency. It represents three letters which delineates currency designators and country codes (e.g. USD for dollars, EUR for euros, etc.). If you don’t know what the ISO 4217 code for the currency is, you can check Wikipedia.
Numeric ISO code – the ISO 4217 code for each currency also has a numeric value (e.g. 987 for euros, 840 for U.S. dollars). You may check the same Wiki page for more information.
Symbol – a currency usually has a symbol (e.g. $ for U.S. dollars). You can check the symbols of currencies on the Wikipedia page and add it into the field.
Exchange rate – type the exchange rate of the currency that you’re adding/editing accordingly to the default store currency (e.g. if the default currency is Euro and the currency you are creating is U.S. dollar, type “1.1”, since 1€ is worth $1.1)
As you may know, exchange rates change daily, as the result you’ll have to update regularly the rates of the currencies that you’ve added. PrestaShop offers two ways to make it: manually click a button and an automatic one. We will learn more about these methods in next paragraphs.
Currency format – you choose how prices should be displayed when the currency is selected. The dropdown represents several predefine choices. The X corresponds to the currency’s symbol. For example, if the currency is the U.S. dollar, you select X0,000.00 format and the price of a item is three thousand, six hundred and fifty dollars and ten cents, it will be shown as $3,650.10.
Decimals – you specify if decimals should be displayed in prices when the particular currency is selected. For example, the price is $3,650.10 and you disable the option, then the price will be shown as $3,650. If you enable the decimals option the full price $3,650.10 will be displayed.
Spacing – you can choose if there should be a space character between the currency symbol and the price itself (e.g. $ 3,650) as some languages may require this, or if the symbol should be put right next to the price, without a space (e.g. $3,650). Choose whichever you feel is best.
Enable – select if created currency is enabled. Enabled currencies can be selected by customers on the frontend. The currency can be enabled/disabled on the page that lists all currencies and on its own edit page at any time.
Once all of these fields are filled and you press the Save button from the top action bar you will be redirected to the Currency home page and a message that your currency is successfully created will be displayed.
Your new Currency will be displayed in the table view of your currencies so you can edit or delete it if necessary.
Change the Default Currency of the Store.
You shop has one standard currency by default. The product prices are set in that currency and this currency is shown on the frontend for the customer. The exchange rates of other currencies is calculated basing on the default currency.
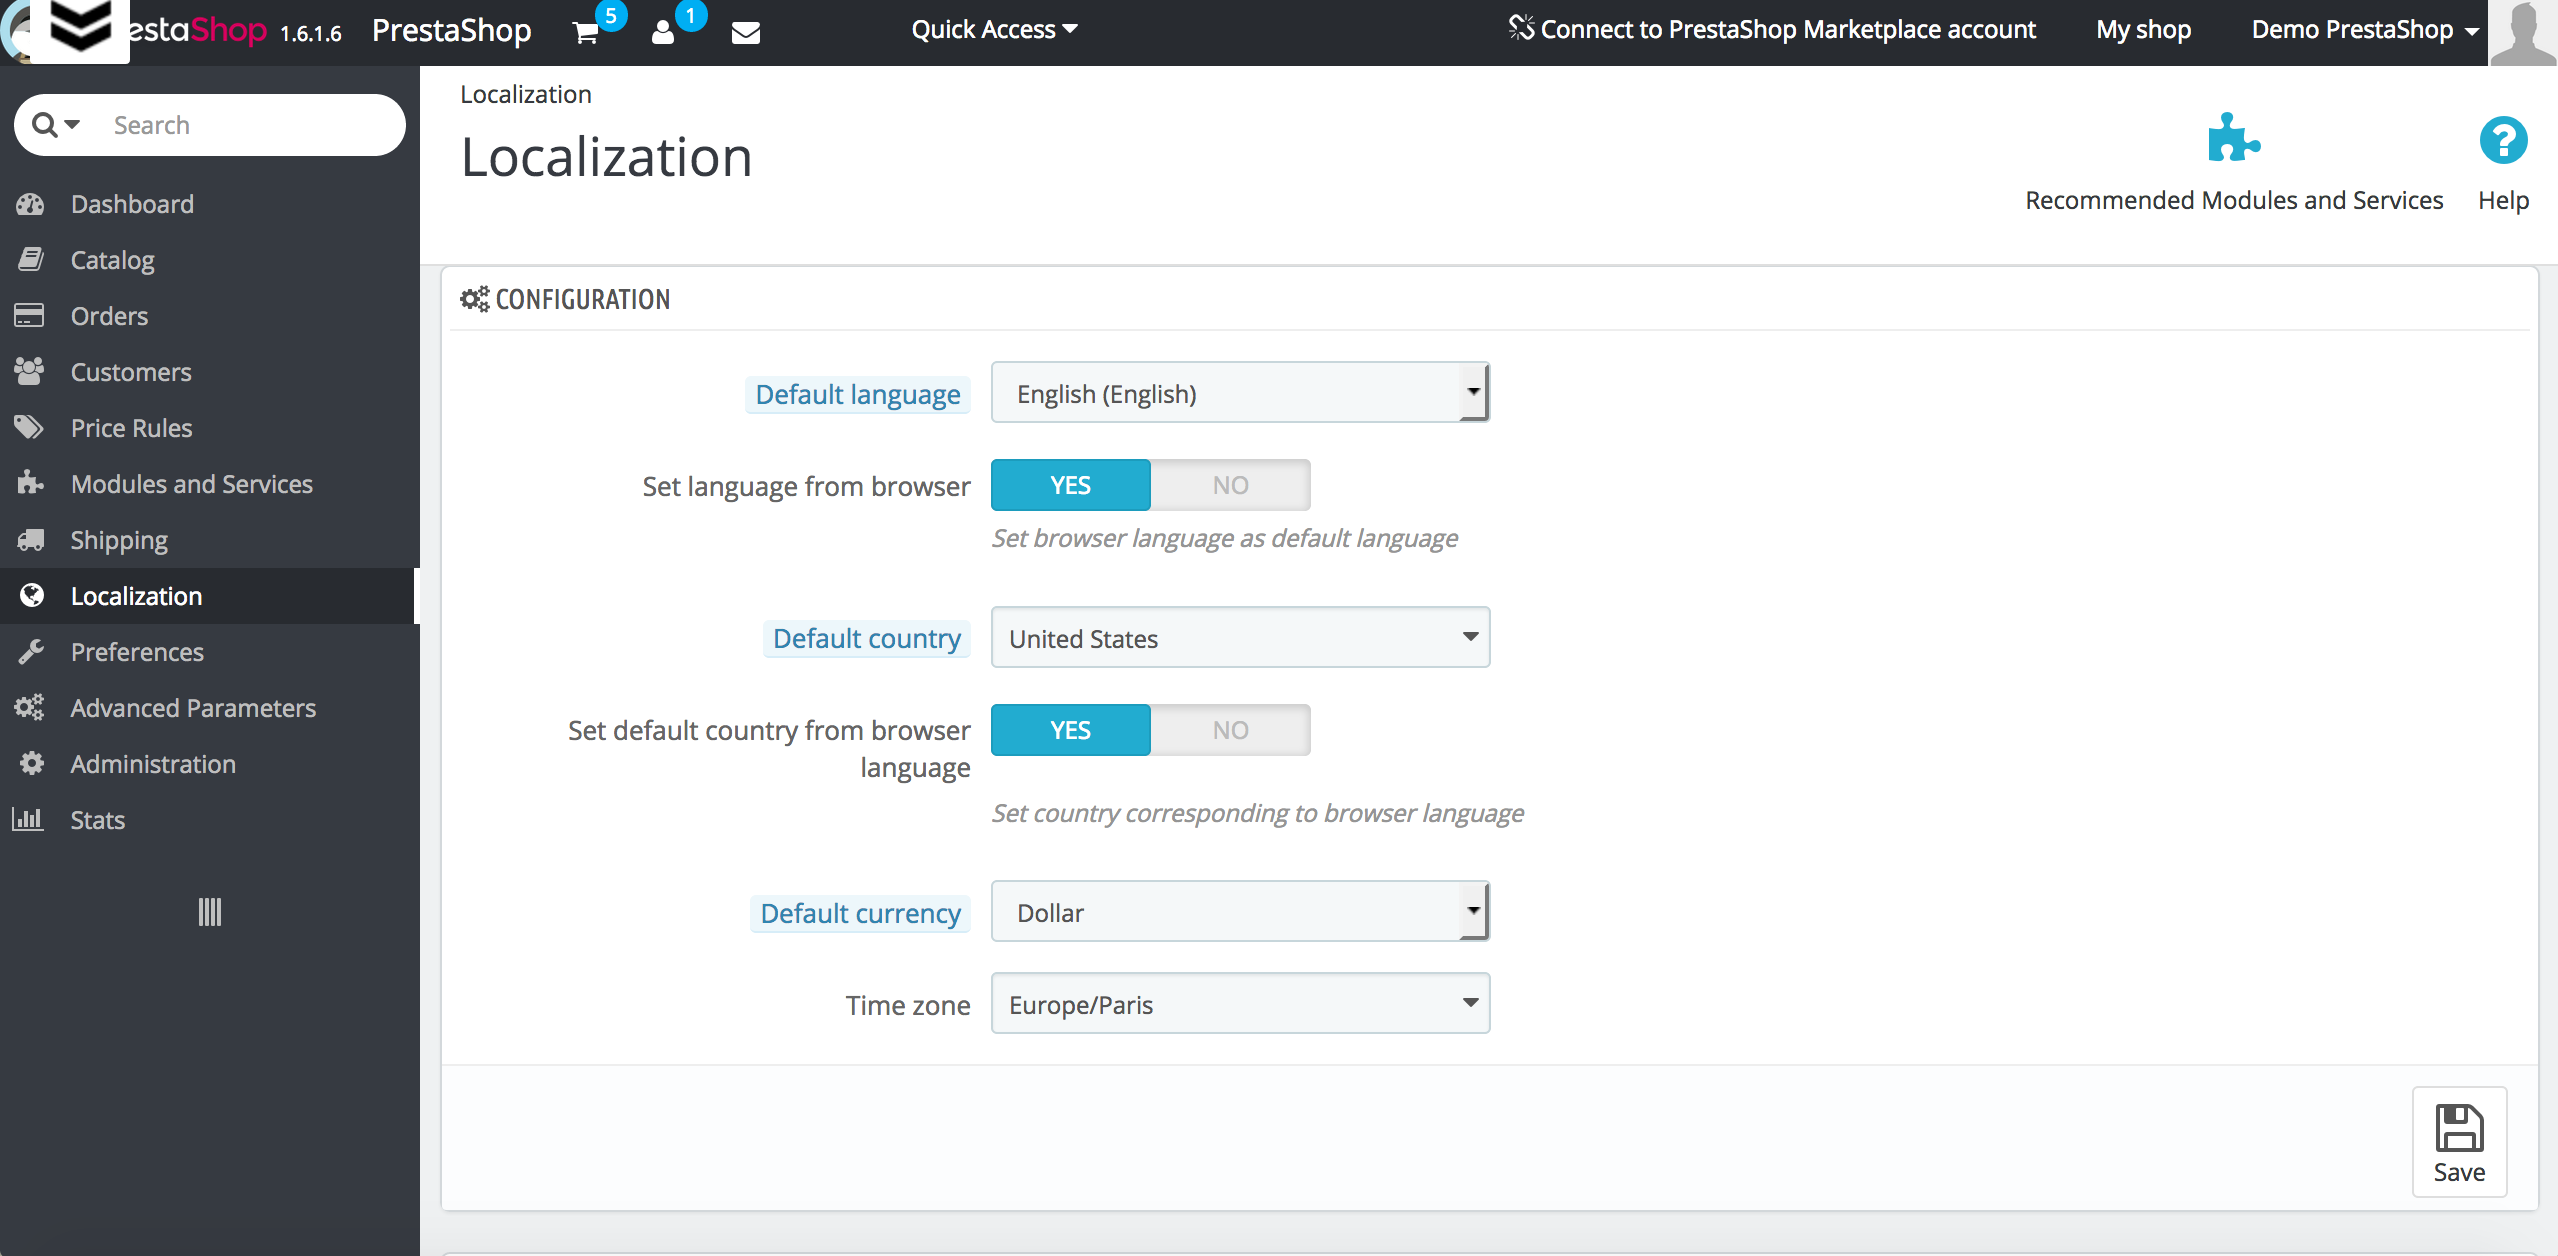
Initially the default currency is configured during the installation of PrestaShop according to the default country that you choose for your store. After that you can change it with any of the currencies that you’ve added. You can set an other the default currency in “Localization” page of the “Localization” menu, and use the “Default currency” option from the “Configuration” section.
Now we will have a closer look at edit, enable, disable delete currencies options.
In your admin panel navigate to Localization menu>Currencies sub-menu. There’s a table with all currencies that have been added. Click the Edit button of the currency that you want to edit.
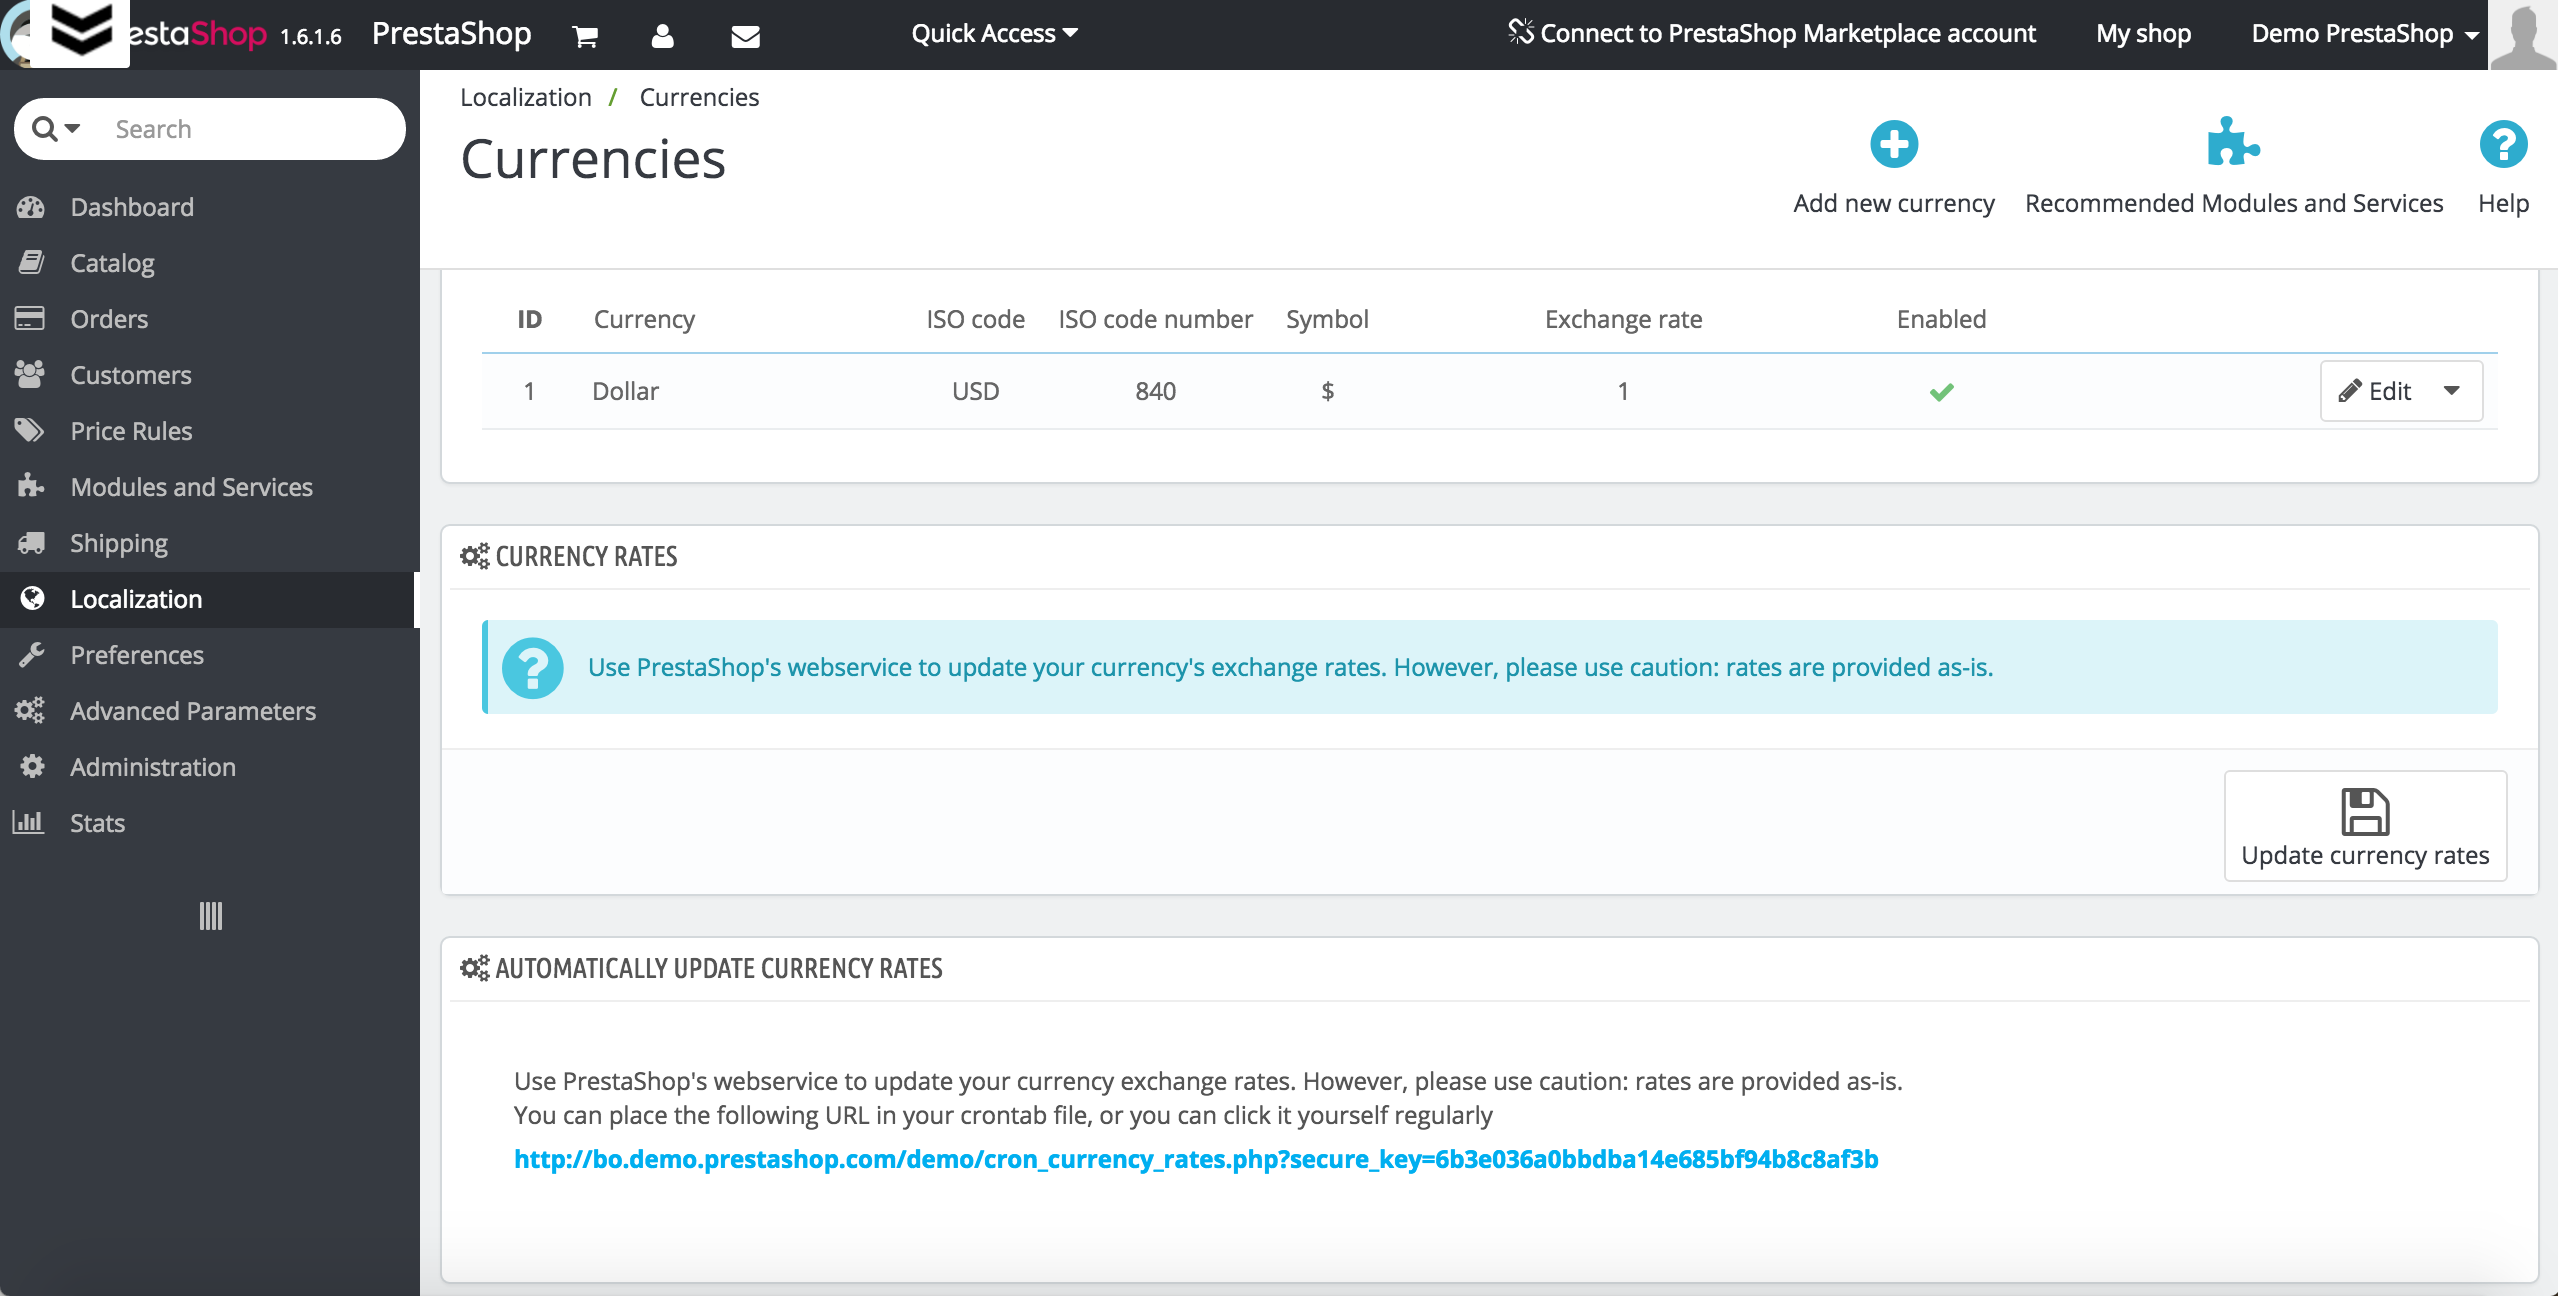
The table shows the options of the currency same as you specified upon creating/editing the currency.
You can enable/disable the particular currency directly in the table that lists the currencies.
The column labeled Enabled shows green checkmarks for enabled currencies and red X symbols for disabled ones. To enable/disable a currency simply click on the symbol for that currency and it will turn into the opposite one.
Sometimes it maybe necessary to enable, disable or delete more than one currency at once, Bulk actions drop-down menu below the table will assist you. You need to check currencies you want to be affected by the action and select the action from the dropdown.
Pay attention to the bottom of the “Currencies” page, there are two simple and important sections. They are relate to your currencies exchange rates (or «conversion rates»).
It is essential to have your rates updated regularly.
As mentioned previously PrestaShop offers two ways to Update currency rate.
The first one is considered as manual one as you have to be logged in back office and click on a button to update the rates.

You can make it in admin panel -> Localization menu>Currencies sub-menu by clicking the button Update currency rates.
All the rates of all the currencies that were added will be updated with just one click, and there is no need to know the actual rates. The information will be taken from the PrestaShop servers.
PrestaShop offers automatic currency rates update as well, which is based on cron job. Using this option is more practical as you won’t have to worry that you may forget to update the rates. So the method is considered as recommended one.
Always in Localization menu>Currencies sub-men, you can see Automatically update currency rates panel and the URL link that’s there.

You add the provided URL to your crontab file in order to activate automatic update.
Cron task will trigger the rate file download how often you want it to be performed.
As the result the values are update automatically in specified time intervals (e.g. thrice a day, whatever period you specify).


