
In this article I will guide you through Tax settings in Magento 2.0. This is something that every store owner should know, implement and always take in mind.
Before you start managing your online store, you will need to change permissions to limit access to your store. Usually, you want very few people to know about your taxes, so probably you need to change permissions first.
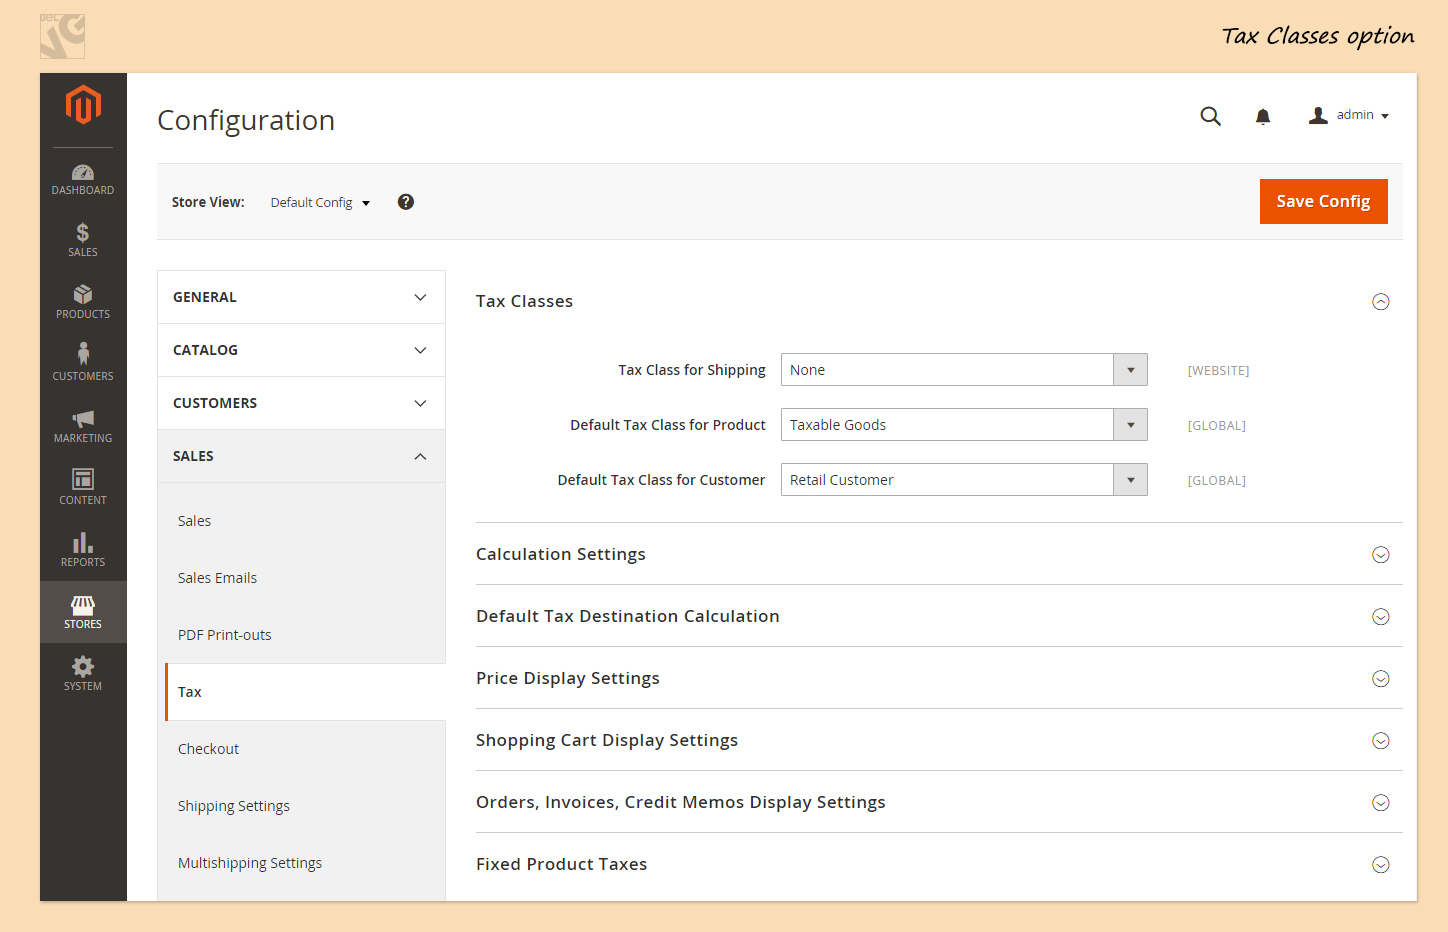
In Tax classes you will see the following:
Select Tax class for Shipping. Here I have 2 default options: Taxable Goods and None. By default your product’s tax class will be Taxable Goods and Defaut Tax Class for Customer will be Retail Customer. You cannot change it here (you will see how to add new classes below in this article).
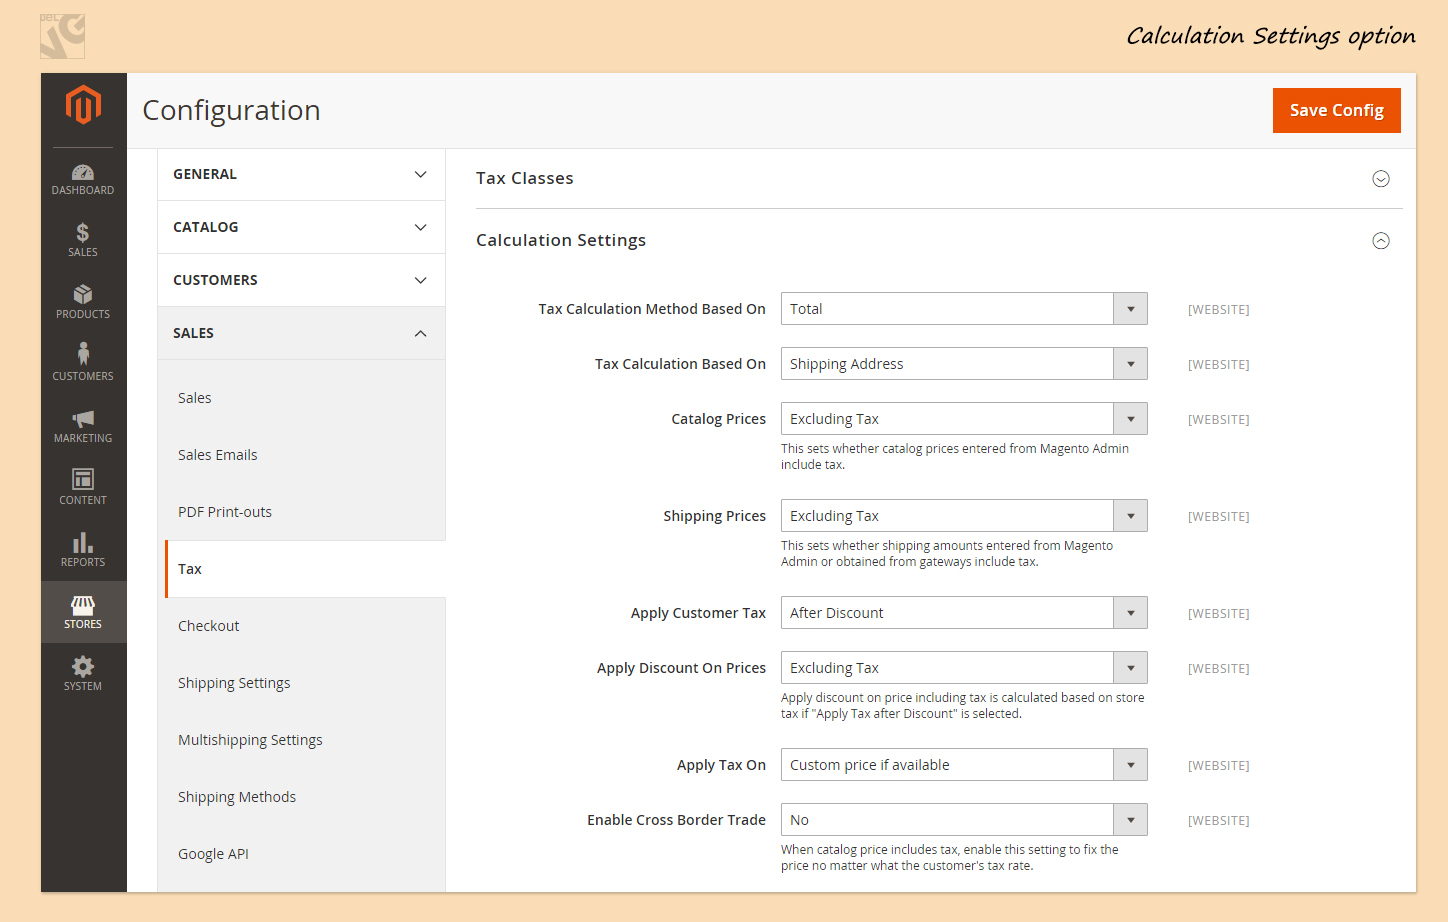
Now click to expand Calculation Settings. This is what you will see:
Tax Calculation Method Based On:
If you select Row Total: the tax will be accounted for each item line individually.
If you select Unit Price: the tax will be accounted for each unit.
And if you select Total the Price will be accounted for the Total Sum in the Order.
Tax Calculation Based On:
Here you can select which Tax rules will be applicable for orders that customers make on your e-store: shipping address, billing address, or your store’s shipping origin.
Select whether Catalog Prices and Shipping Prices will include or exclude Tax.
Define whether you would like to Apply Customer Tax before or after Discount.
Define if you would like to Apply Discount on Prices including of excluding Tax.
Select if you would like to Apply Tax On Custom or Original Prices.
If you sell your products across the border, then select “Yes” to Enable Cross Border Trade.
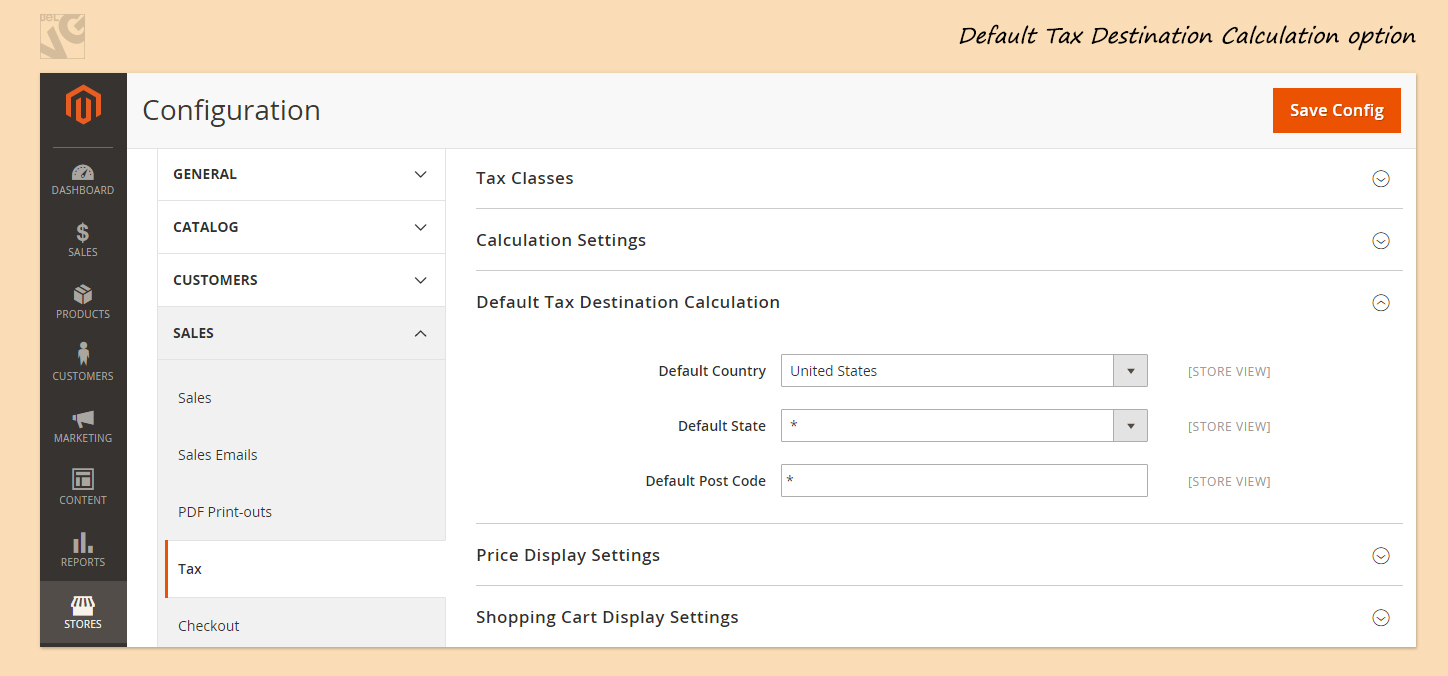
Here you can select Default country for Tax calculation.
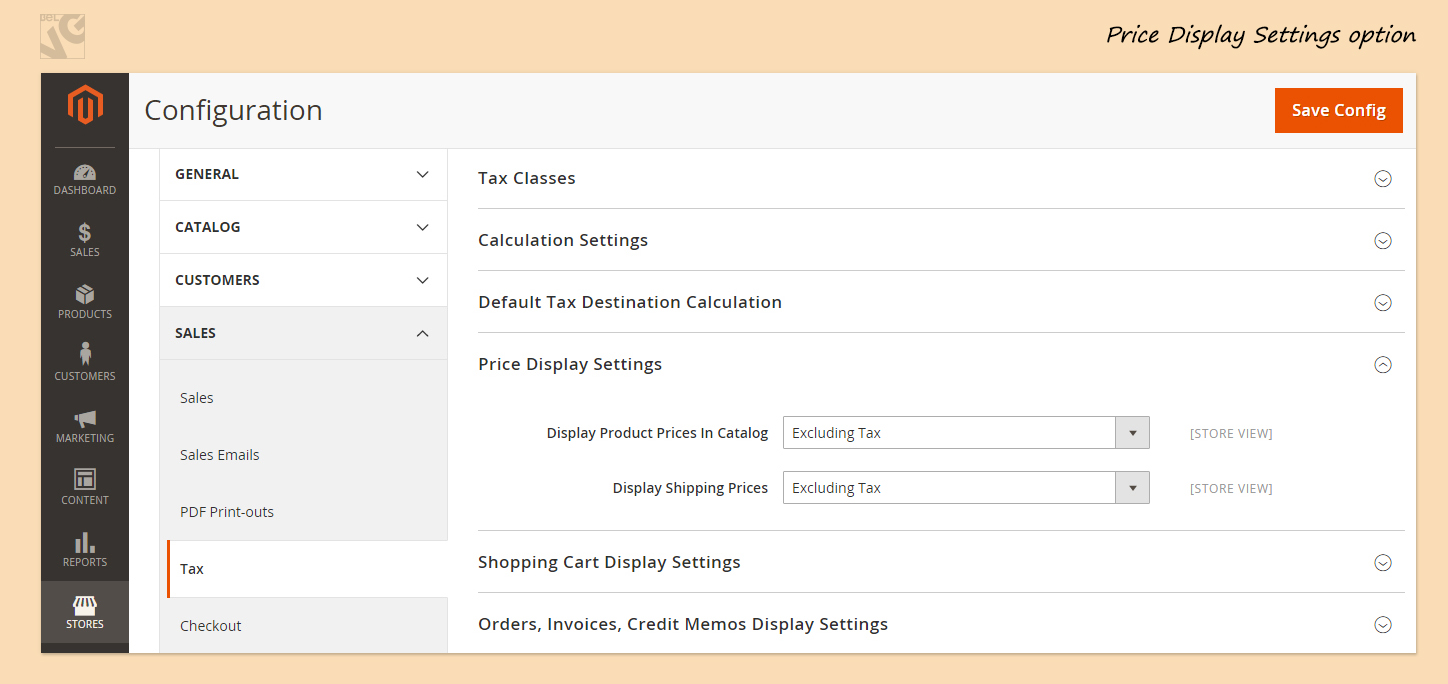
Here you can select How you want to display your Product and Shipping Prices: including or excluding or both including and excluding Tax.
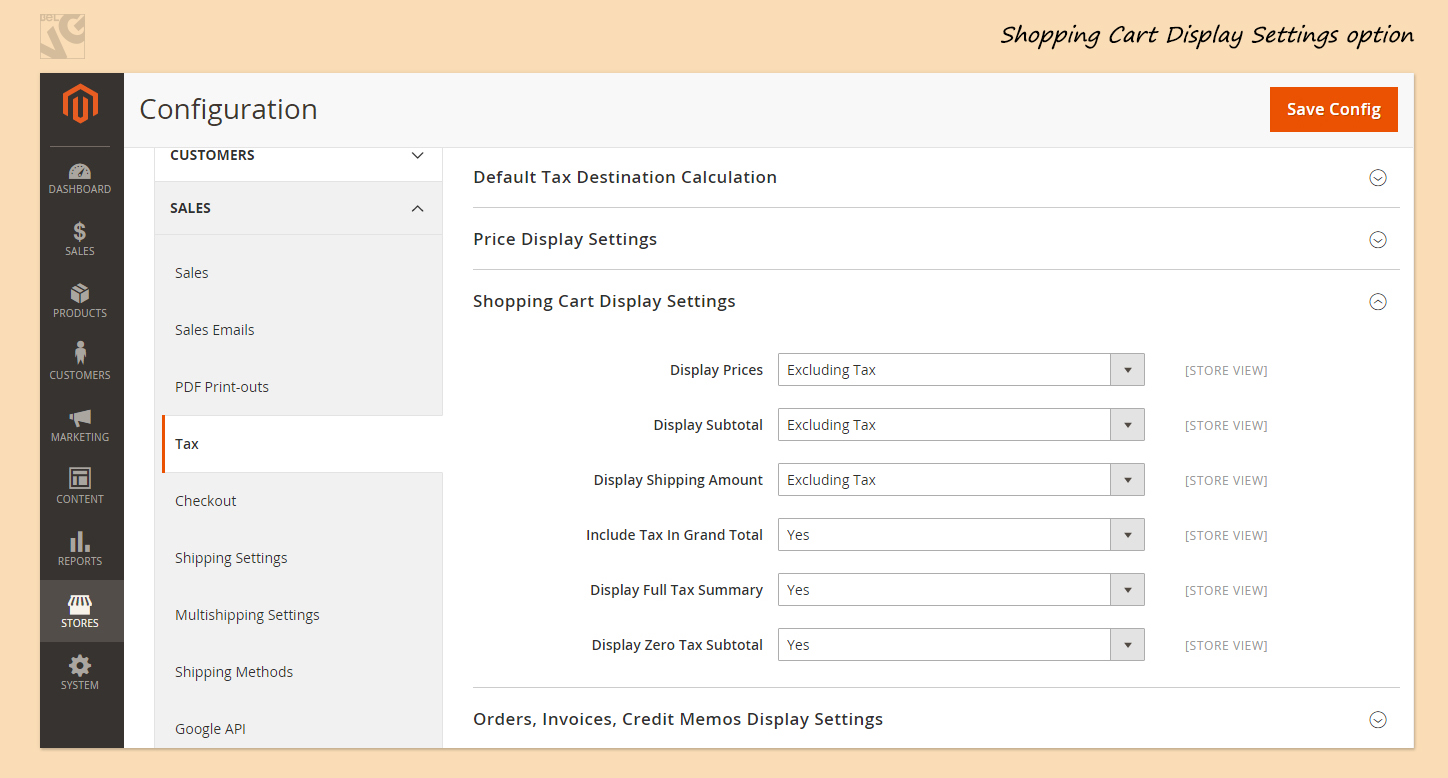
Now let’s configure how Taxes will be displayed in Shopping Cart.
I prefer all Prices to be displayed including Tax, but also want to know the amount of Taxes I pay while purchasing a product.
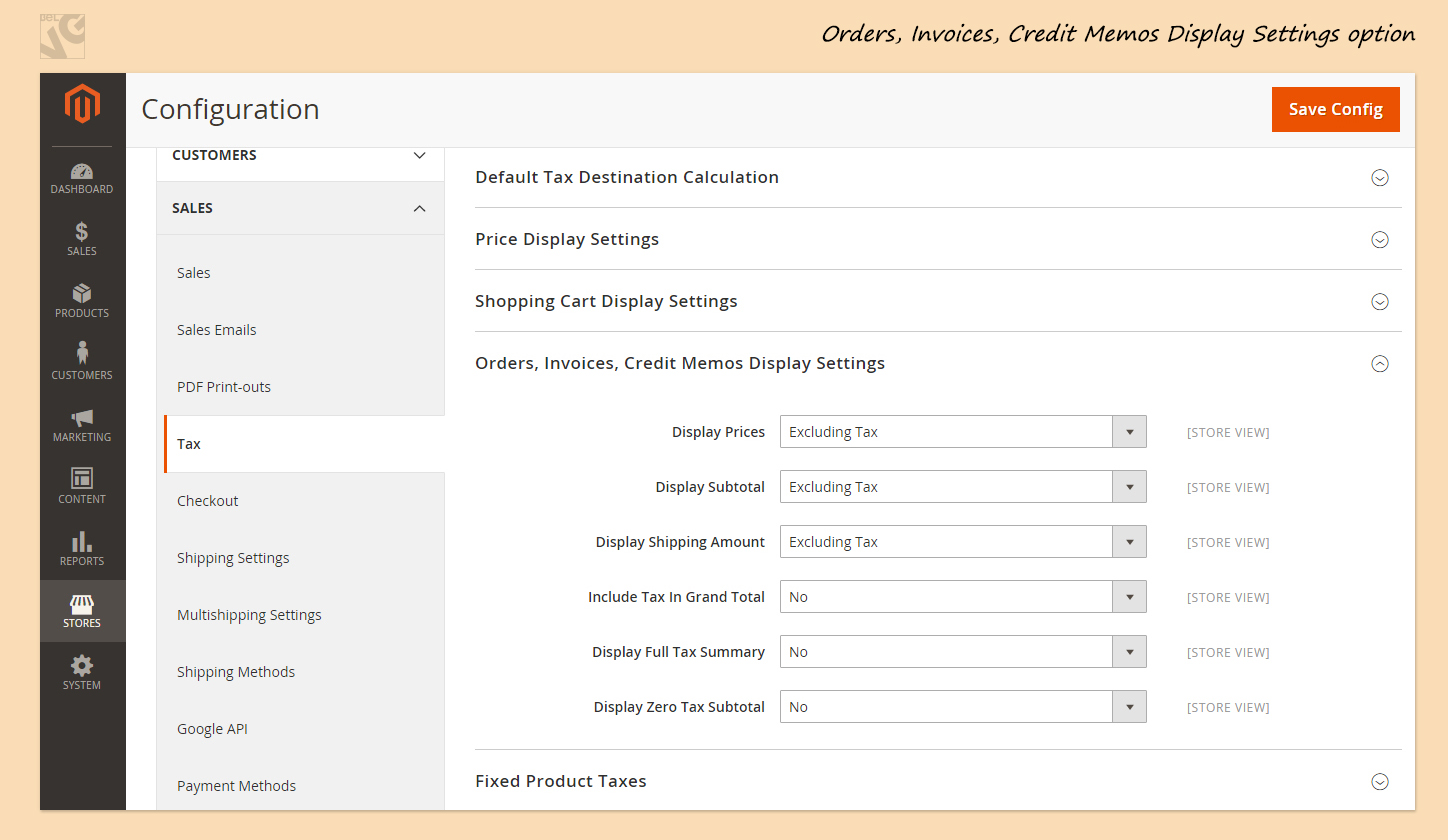
The same settings for Orders, Invoices and Credit Memos:
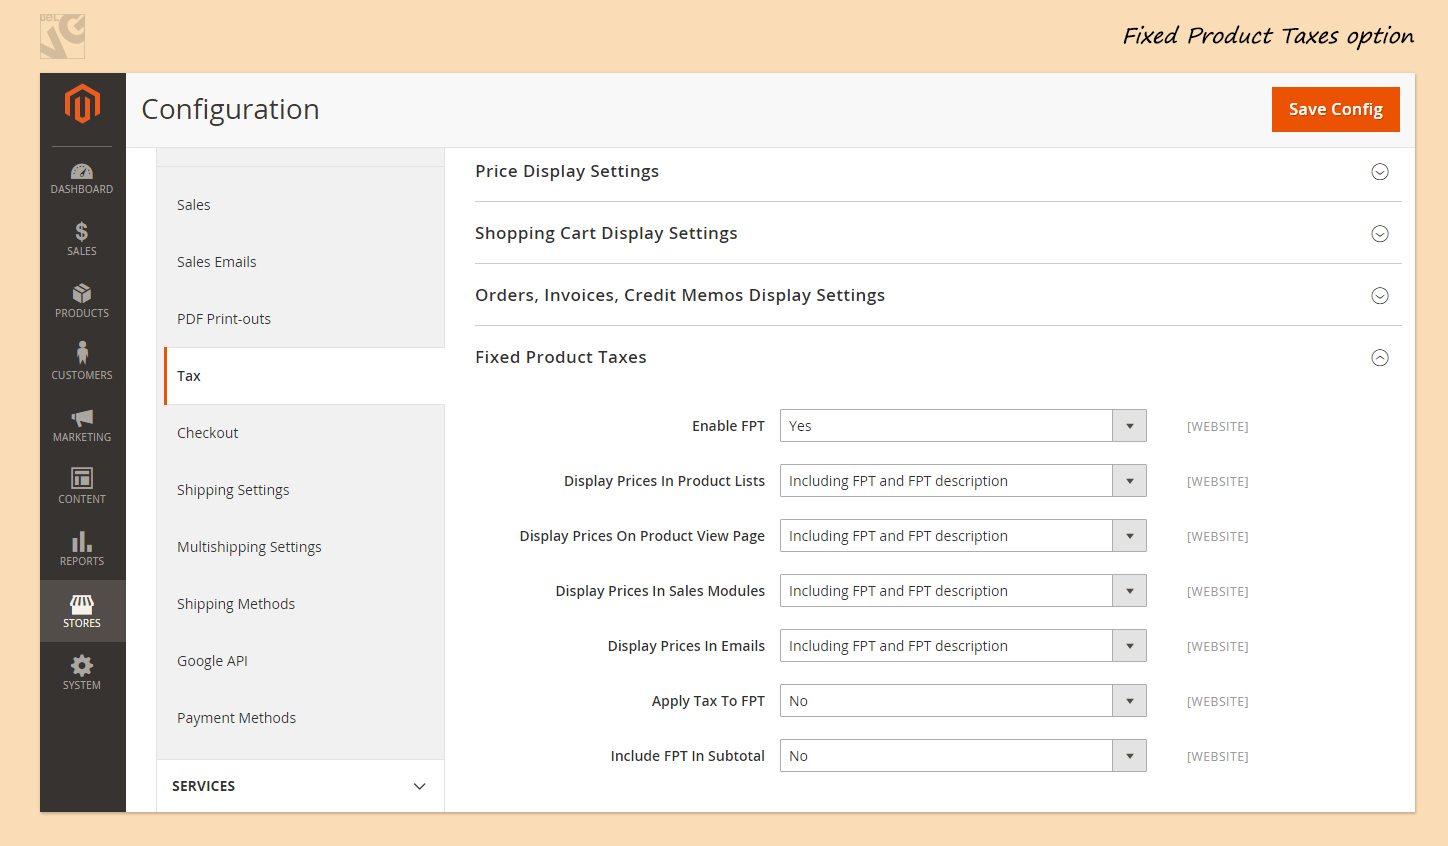
Now about Fixed Product Taxes (FPT):
If you sell products taxes for which are fixed, enable this option.
Manage display settings: select if you would like to include FPT and FPT description. If there is a tax applicable to FPR, select “Yes” to Apply Tax to FPT.
Select if you would like to Include FPT in Subtotal.
Now we are done with General Tax Settings. Don’t forget to press Save button.
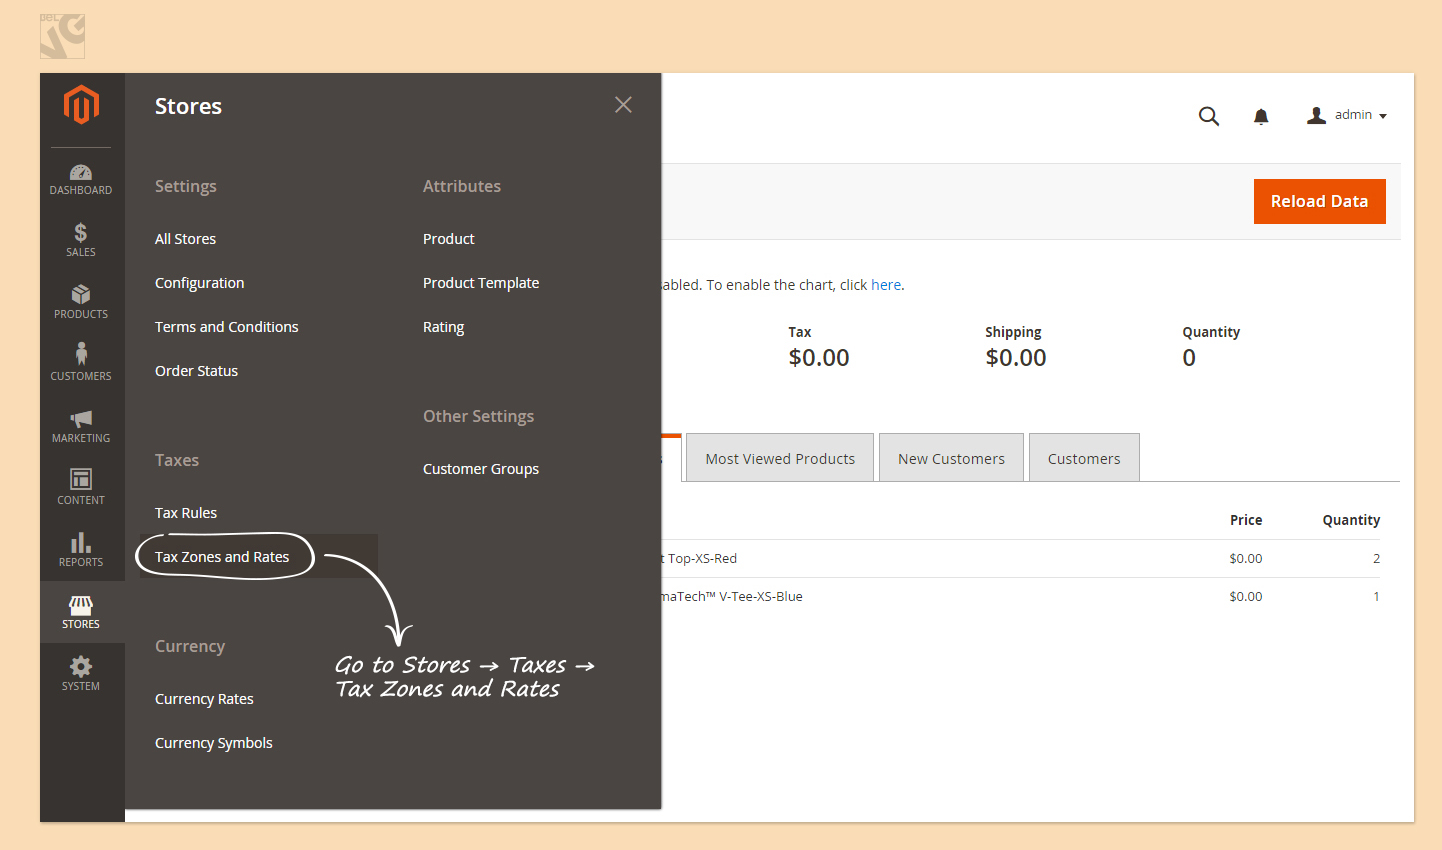
Now let’s configure Tax Rules, Tax zones and Tax Rates.
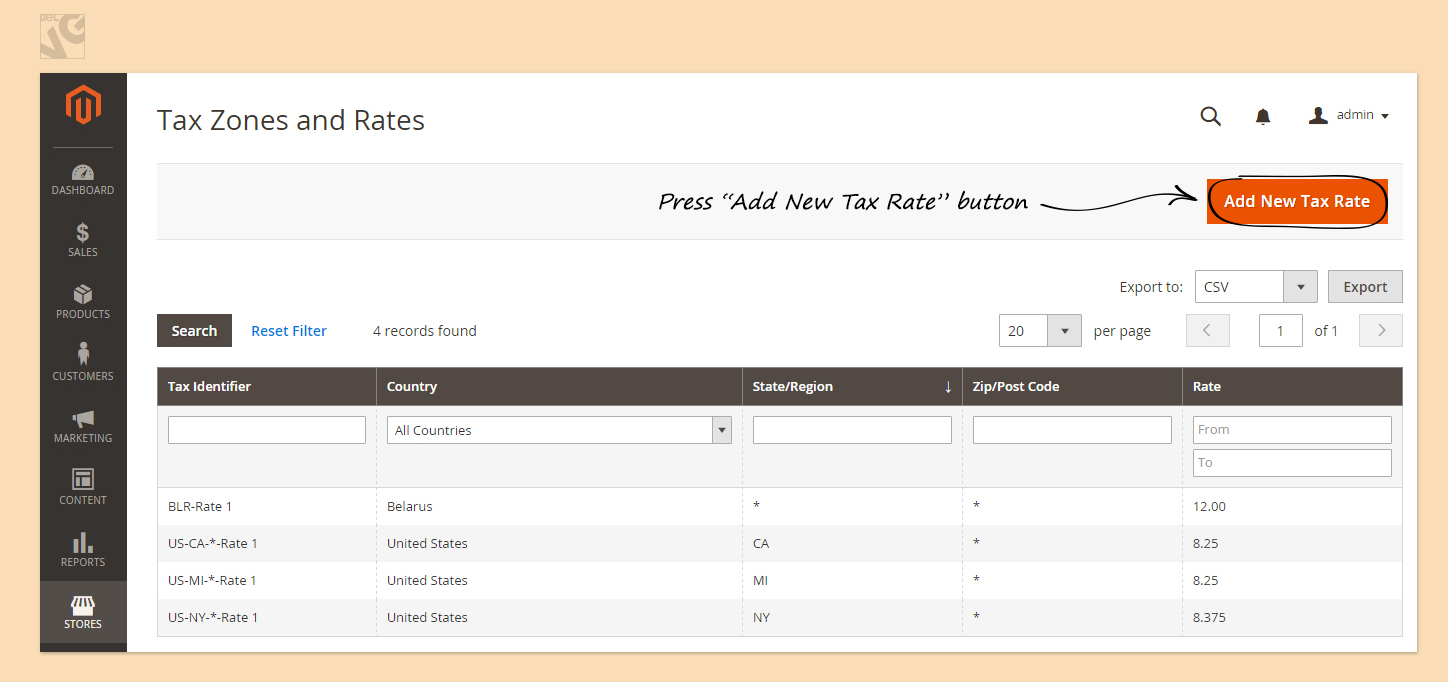
Stores -> Tax Zones and Rates
Let’s add new Tax Zone.
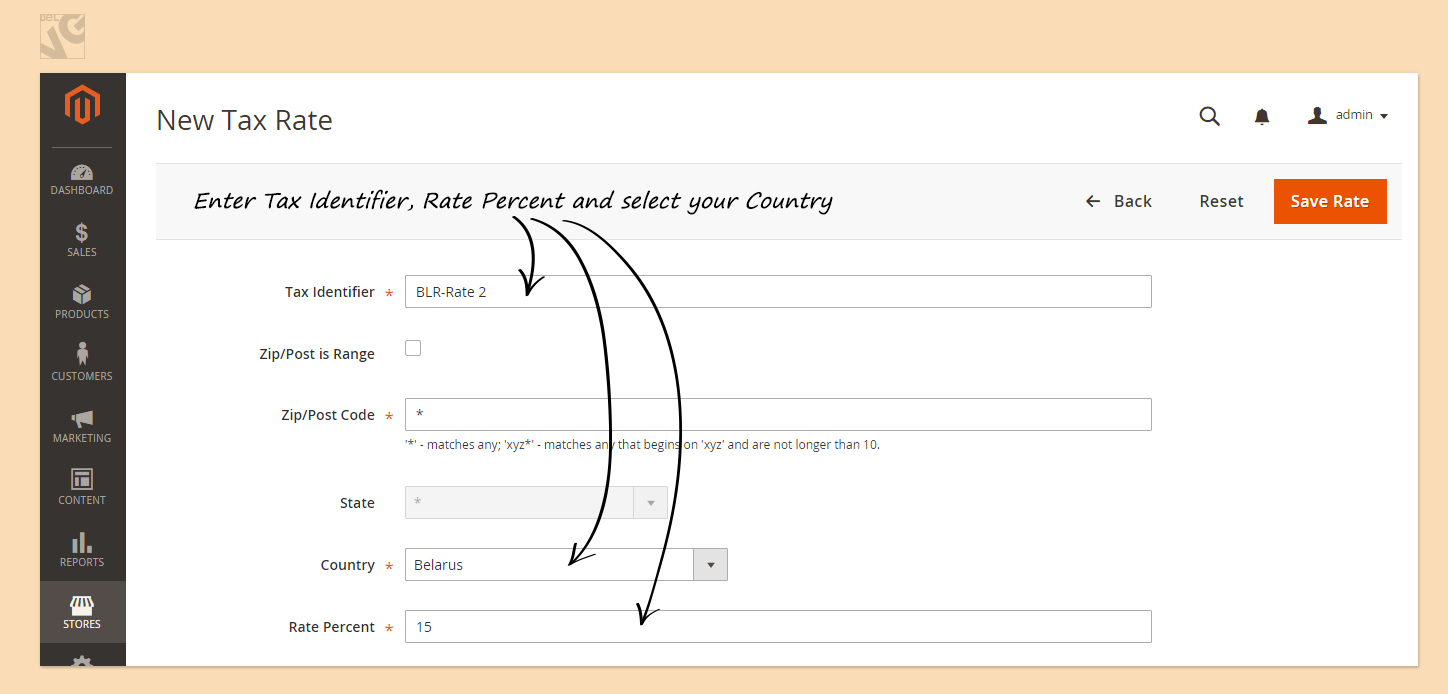
Enter Tax Identifier.
If there are different Tax Rates applicable to different regions in your country, select Zip/Post is Range and enter Zip Codes of those regions to which this particular rate is applicable.
If there is a unique Tax Rate in all regions, leave this box unselected.
Now if you don’t require Zip/Post Code to be entered, leave an asterisk in this field. If required, then write as many letters as there are figures in Zip/Post code in your country.
If there is Federal system in your country, then select the State. If there are no States in your country, this field will be grey and you won’t be able to select a State.
Now select your country and enter Rate Percent.
Now press the Save Rate button.
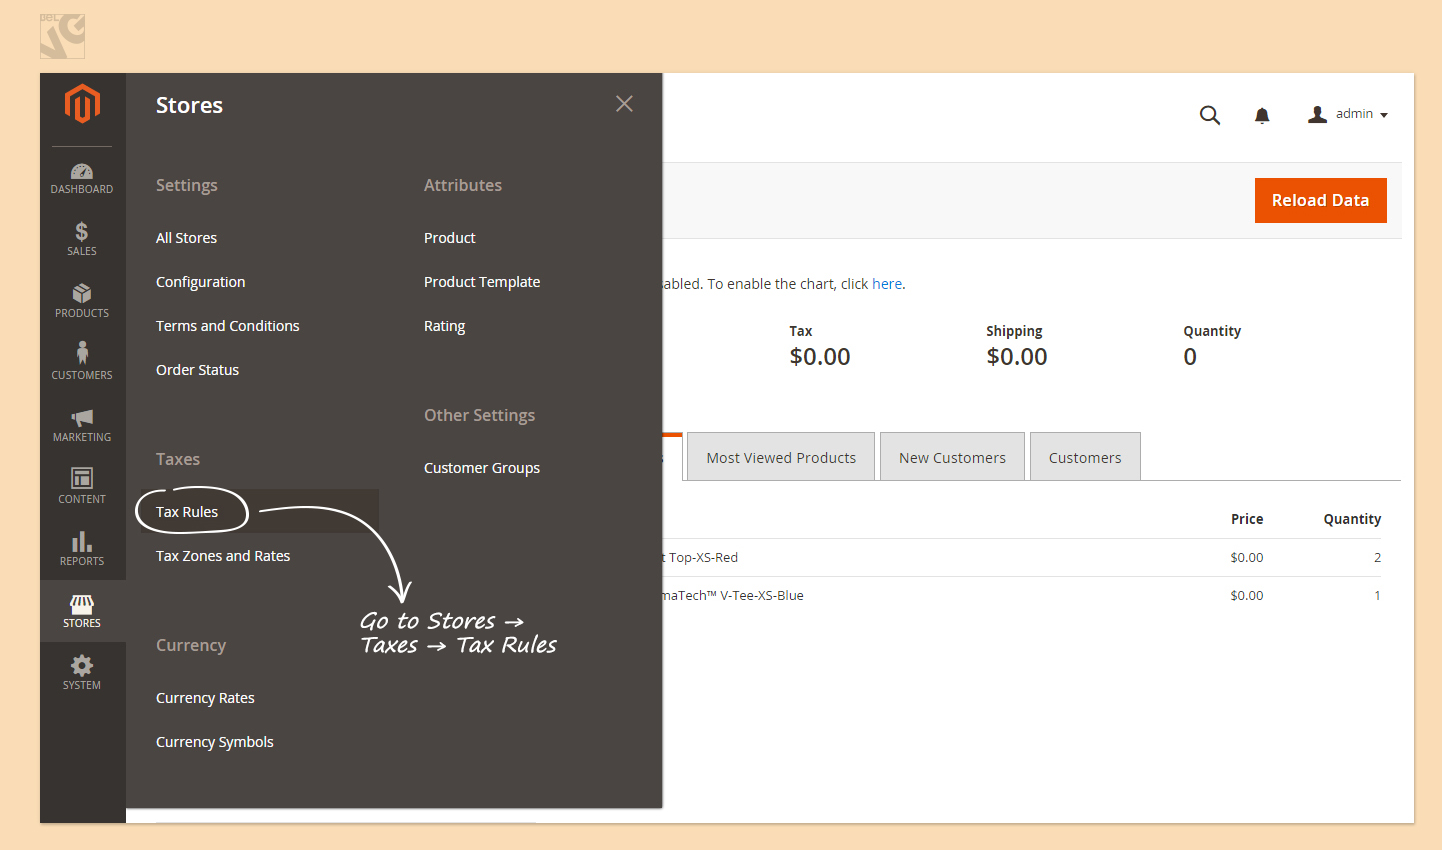
Stores -> Tax Rules
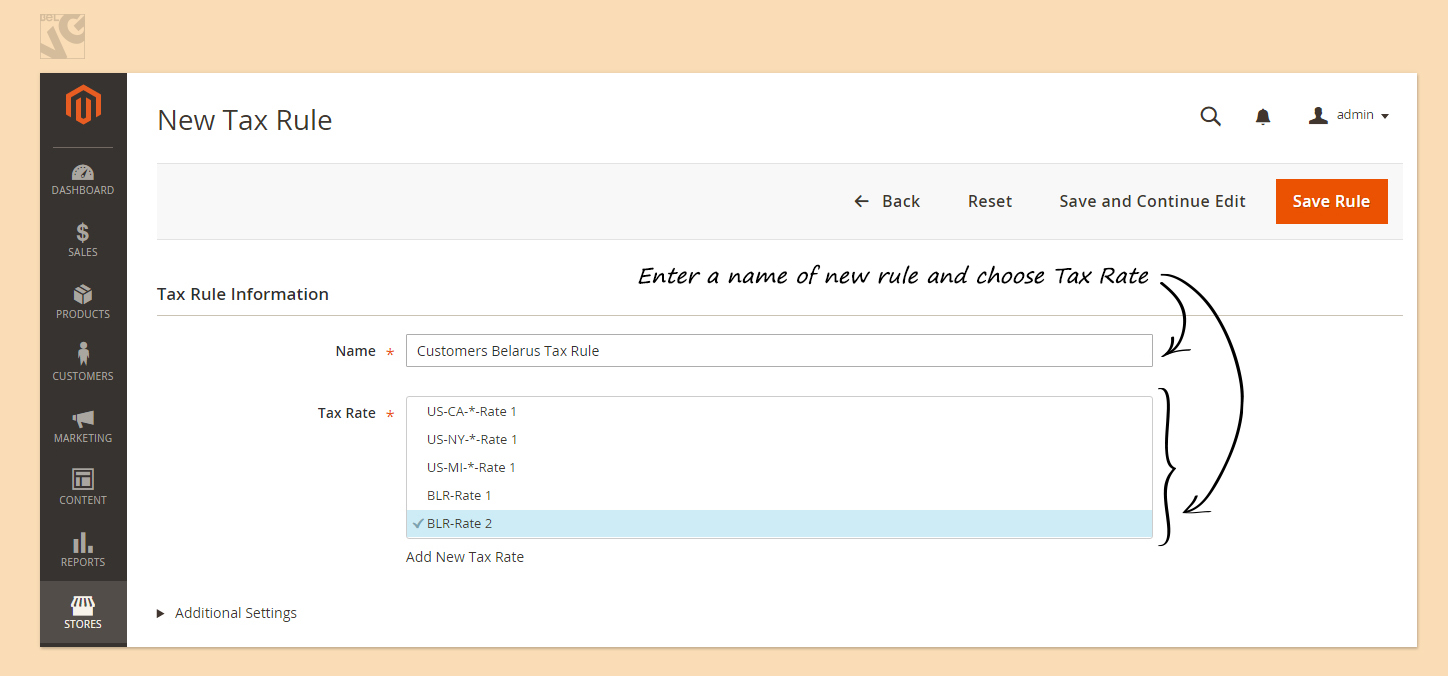
Here you can manage tax rules and add new ones.
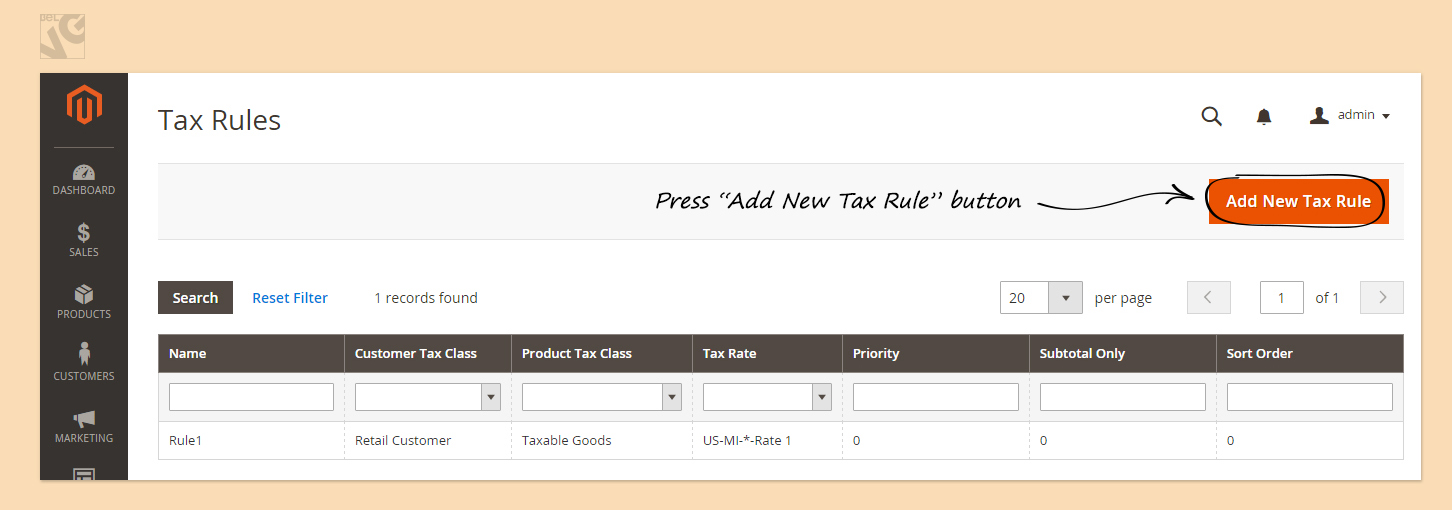
Enter a name of your new rule.
Now enter Additional Settings.
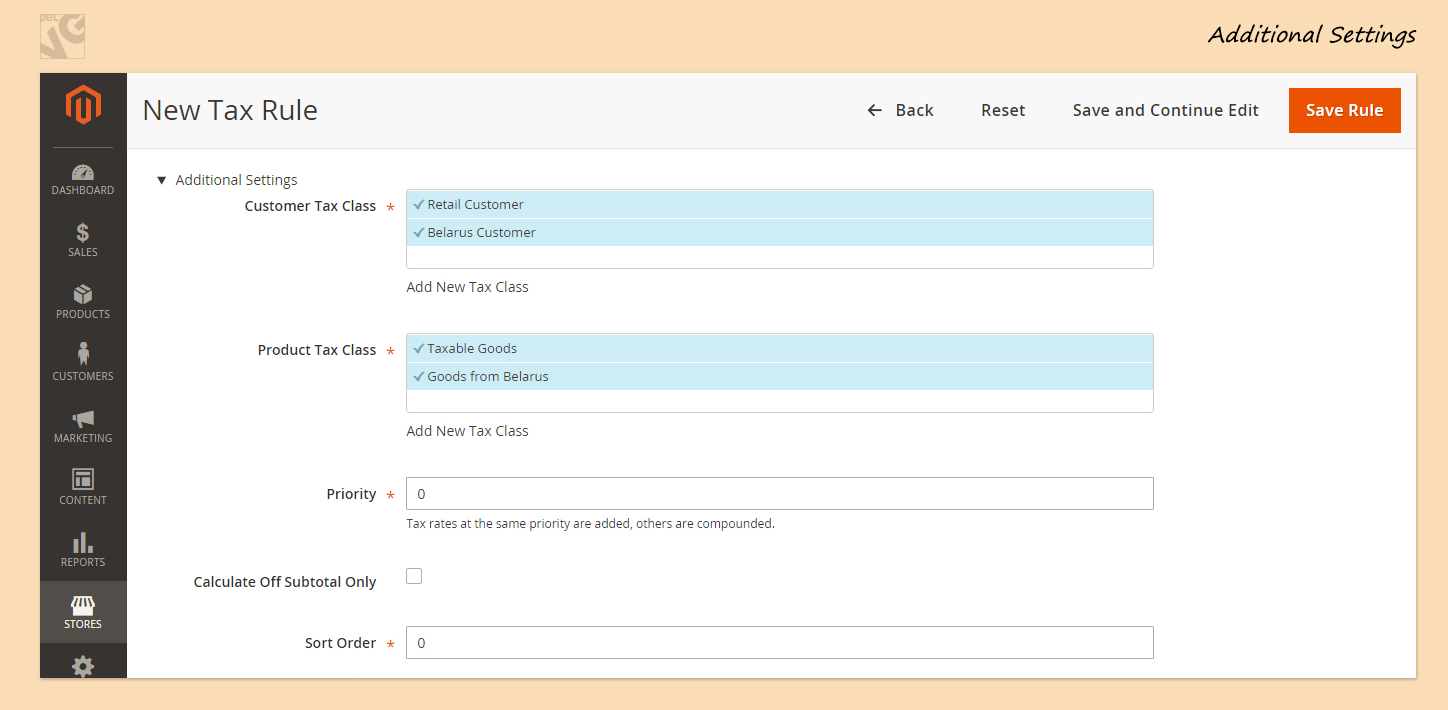
Here you can add new Customer Tax Class and new Tax Class.
In Priority select a number to indicate priority of this tax. If there are 2 Taxes applicable, the one with higher priority will be chosen. If there are 2 Taxes with the same priority, they will be added together.
Don’t mix up this field with Sort Order. Sort Order will only change the order in which Tax Rules will be displayed.
When complete, press Save Rule button.
If you have many Taxes to add, you can import Tax Rates.
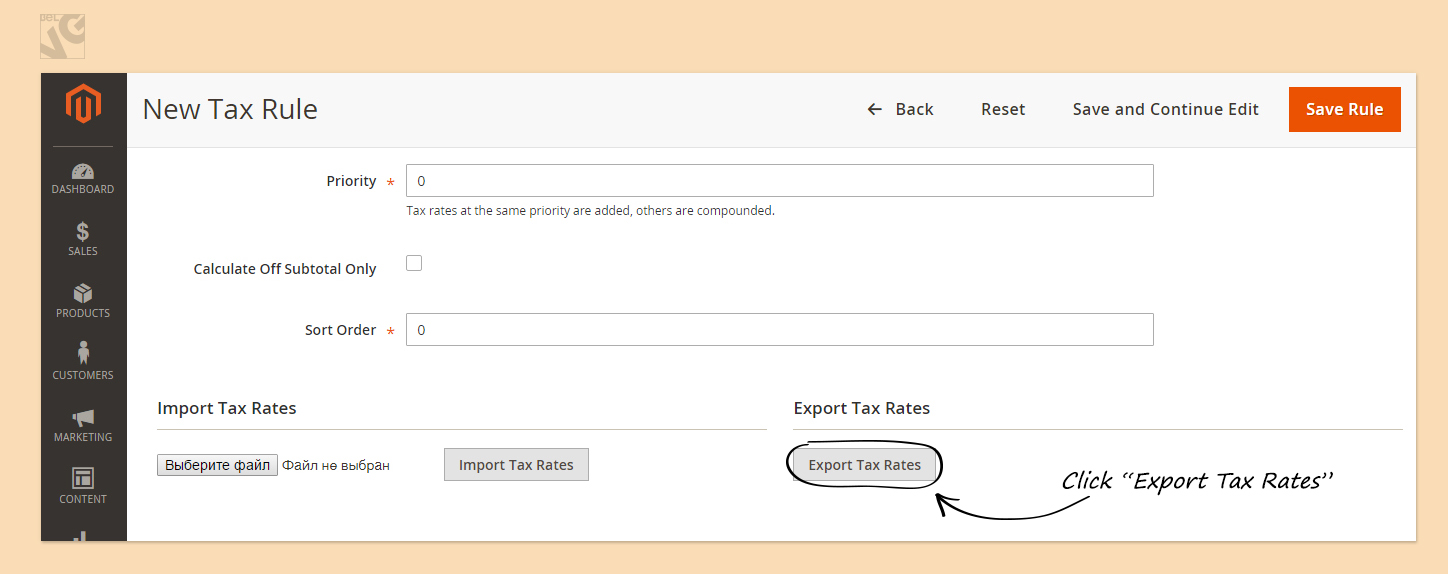
To get a template of the file, click “Export Tax Rates”.
Your file for import should look as following:

Now you have clue of how to manage Taxes in Magento 2.0. If there is something wrong, please leave a comment. Cheers!


Dear Satyendra,
the only way to do it is customization, as there is no ready-made solution.
In case you need help with the issue feel free to contact our support department: [email protected]. We’ll be happy to assist.
Regards,
Iryna
Sir
I have requirement tax calculation based on shipping methods , I have fedex, first flight shipping method.
1)For First Flight Shipping
Tax is 18%
2)For Fedex Tax is region based.
What is the way to do that?