After you have finished working on your theme, it’s time to release it. But what exactly needs to be done? Briefly, you should test your theme, create a valid archive with it and upload it to the official site with Prestashop themes. Let’s take a closer look at these steps.
Testing a theme
There are several ways to test your theme in Prestashop. The first one is to choose your theme on the Admin panel in the list of themes (this works both in Prestashop 1.6 and in 1.7). When we choose our theme, the system tests it for workability and if everything is good, it installs this theme. If there are errors or any missing files, then we will see the corresponding message.
Speaking of files. A valid theme should contain a list of required files and configuration keys.
In order not to know which files should be included and which can be omitted, use the pre-installed default theme as an example (“default-bootstrap” for PrestaShop 1.6 and “classic” for 1.7). This applies to both: theme files (templates, styles and scripts) and configuration files. In Prestashop 1.6 this file is “config.xml” and in Prestashop 1.7 it is “config/theme.yml“.

PrestaShop Modules
Take your online store to the next level with BelVG PrestaShop Modules
Visit the pageDo not forget to add the index.php file to all the directories of your theme. This file is located in the root of the “themes” folder.
You can also check the ready theme in the official validator. To do this, you need to upload an archive with a theme (I’ll speak about creating an archive later), then it will be checked and the errors, if any, will be specified.
Prestashop 1.7 already has a set of automated tests that were used to develop the pre-installed “Classic” theme. I recommend using them to make sure that your theme is fully compatible with Prestashop functions.
Read more about these automated tests on developers.prestashop.com and github.com.
Warning. Websites in production should never be tested using this test since it will edit the products without your permission.
Creating a valid zip file
After you have tested your theme, checked the availability of all the necessary files and prepared the theme for the release, it’s time to archive it. It’s super easy to do both in Prestashop 1.6 and 1.7.
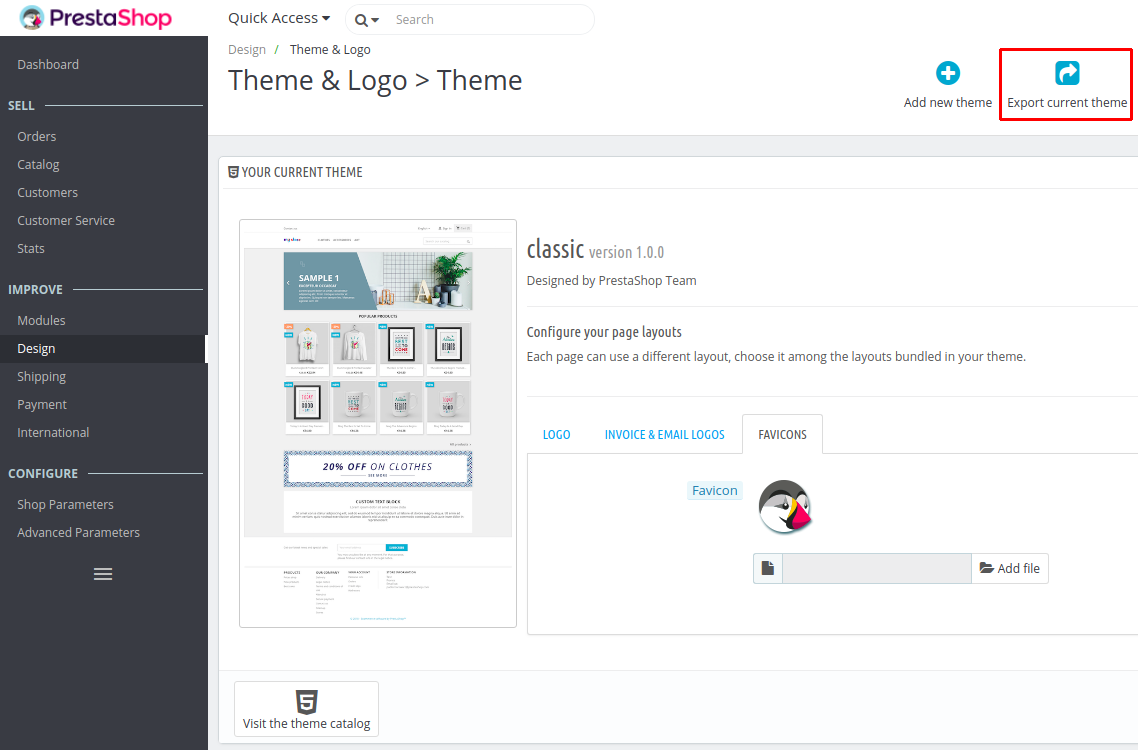
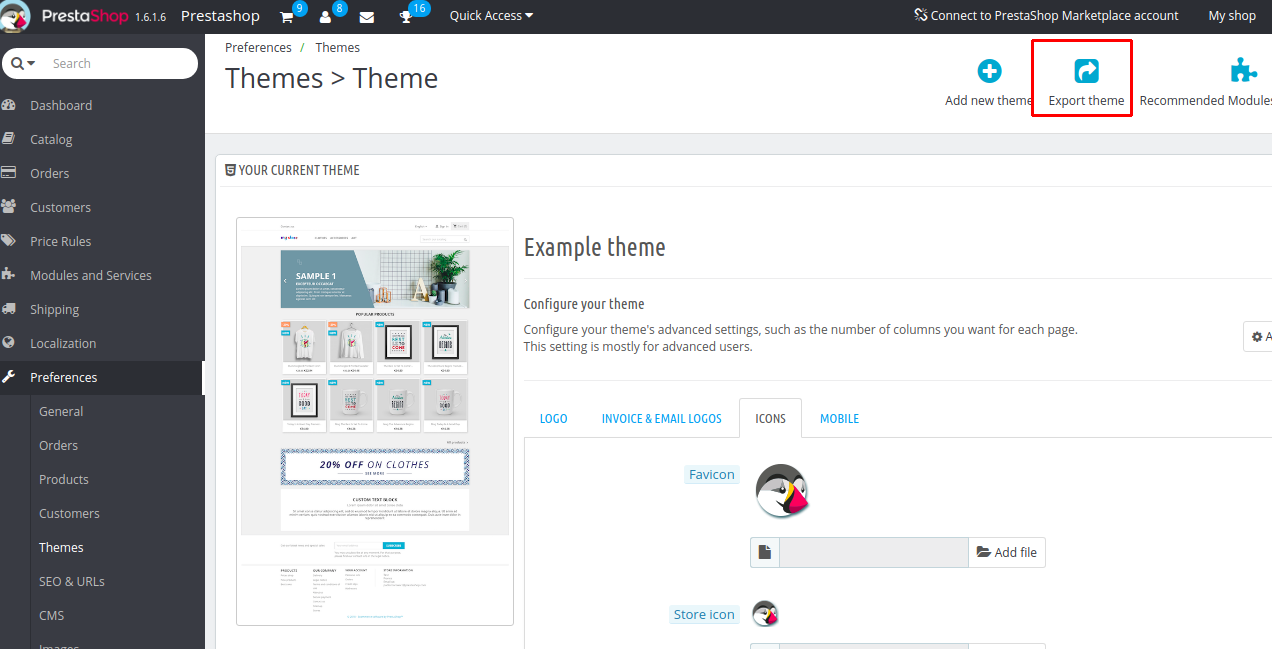
Make sure your theme is a made current on the site. Then open the list of themes on the Admin panel and click “Export current theme”. Here is the location of this button in Prestashop 1.7:
and in Prestashop 1.6:
As a result, you get a valid zip file, which you can upload on the site with Prestashop addons. More on addons coming up.
Distribution on Addons
Now we have reached the final stage of our theme implementation. At the moment we have a valid zip file with our working tested theme. Time to make the final preparations.
First, do not forget to add your key (from the seller’s account on this site) to the configuration file (“config.xml” in Prestashop 1.6 and “config/theme.yml” in 1.7).
It’s also a good idea to write a user guide and make some screenshots of the theme to demonstrate its key features to future buyers.
Now you are ready to go. Upload your theme on the site, add a description, screenshots, and a user guide.
I wish you good luck and successful sales.

PrestaShop Support & Maintenance
Take your online store to the next level with BelVG PrestaShop Support & Maintenance
Visit the page


