
In an online store, the menu is one of the core navigation elements, therefore its creation should be approached with a great deal of care and consideration. In this article, I will go over the best ways to create a menu in Magento 2, as well as how to edit and add new categories to it.
Table of contents:
How to create a menu via an additional block
How to create a menu via a CMS block
How to edit menu in Magento 2
How to add categories to the menu
How to create a menu via an additional block in Magento 2
The first method requires minimal knowledge of working with remote access.
In your theme, override default.xml
YourTheme / Magento_Theme / layaut /default.xml. Now you need to create in YourTheme / Magento_Theme / Magento_Theme / templates your Your_name.phtml (I named mine test) file, where you specify your link.
Example:
|
1 |
<li ><a href="#">Test link</a></li><!-- custom link --> |
Then you should create a Block and connect our file; this is how looks.
|
1 2 3 4 5 6 7 |
<page xmlns:xsi="http://www.w3.org/2001/XMLSchema-instance" xsi:noNamespaceSchemaLocation="urn:magento:framework:View/Layout/etc/page_configuration.xsd"> <body> <referenceBlock name="catalog.topnav"> <block class="Magento\Framework\View\Element\Template" name="custom-link" template="Magento_Theme::test.phtml" after="-" /> </referenceBlock> </body> </page> |
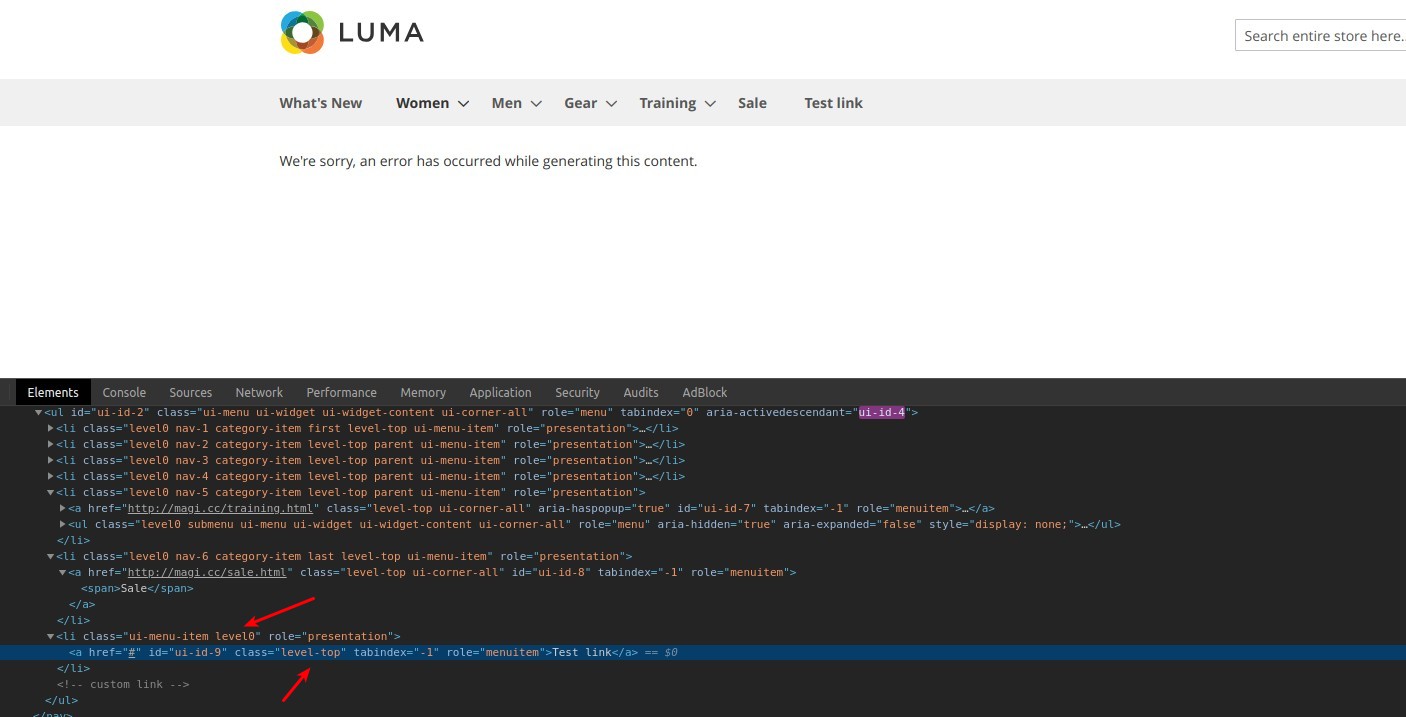
In order to unify its style with the rest, add a level0 class to align it in one line and a level-top link class to change the link color.
How to create a menu via a CMS block in Magento 2
The second method requires more knowledge, because you will need to work with the admin panel of the site.
First, you need to override YourTheme /Magento_Theme /laoyaut /default.xml.
|
1 2 3 4 5 6 7 |
<referenceContainer name="catalog.topnav"> <block class="Magento\Cms\Block\Block" name="header.top.menu” before="-"> <!--Where header.top.menu - block name (optional)--> <arguments> <argument name="block_id" xsi:type="string">header_menu</argument> <!--Where header_menu - CMS block identifier, that you will create in the admin panel --> </arguments> </block> </referenceContainer> |
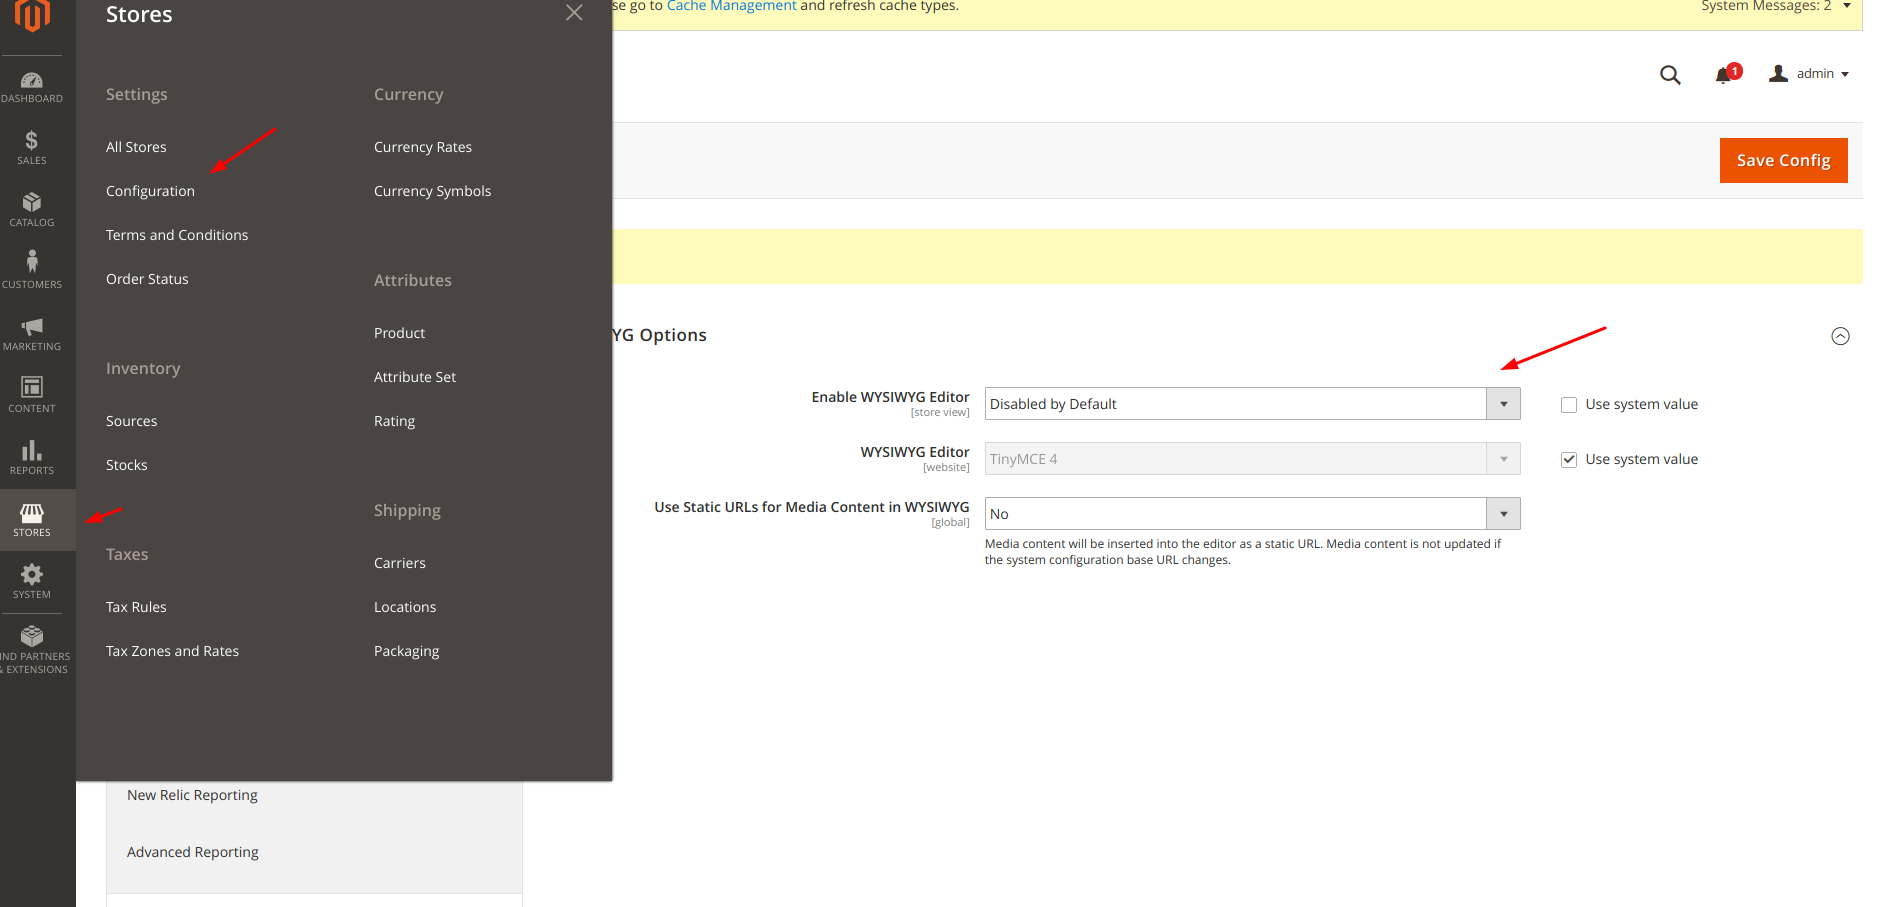
NB! It is better to disable the standard editor in the beginning so that it would be easier to work with HTML.
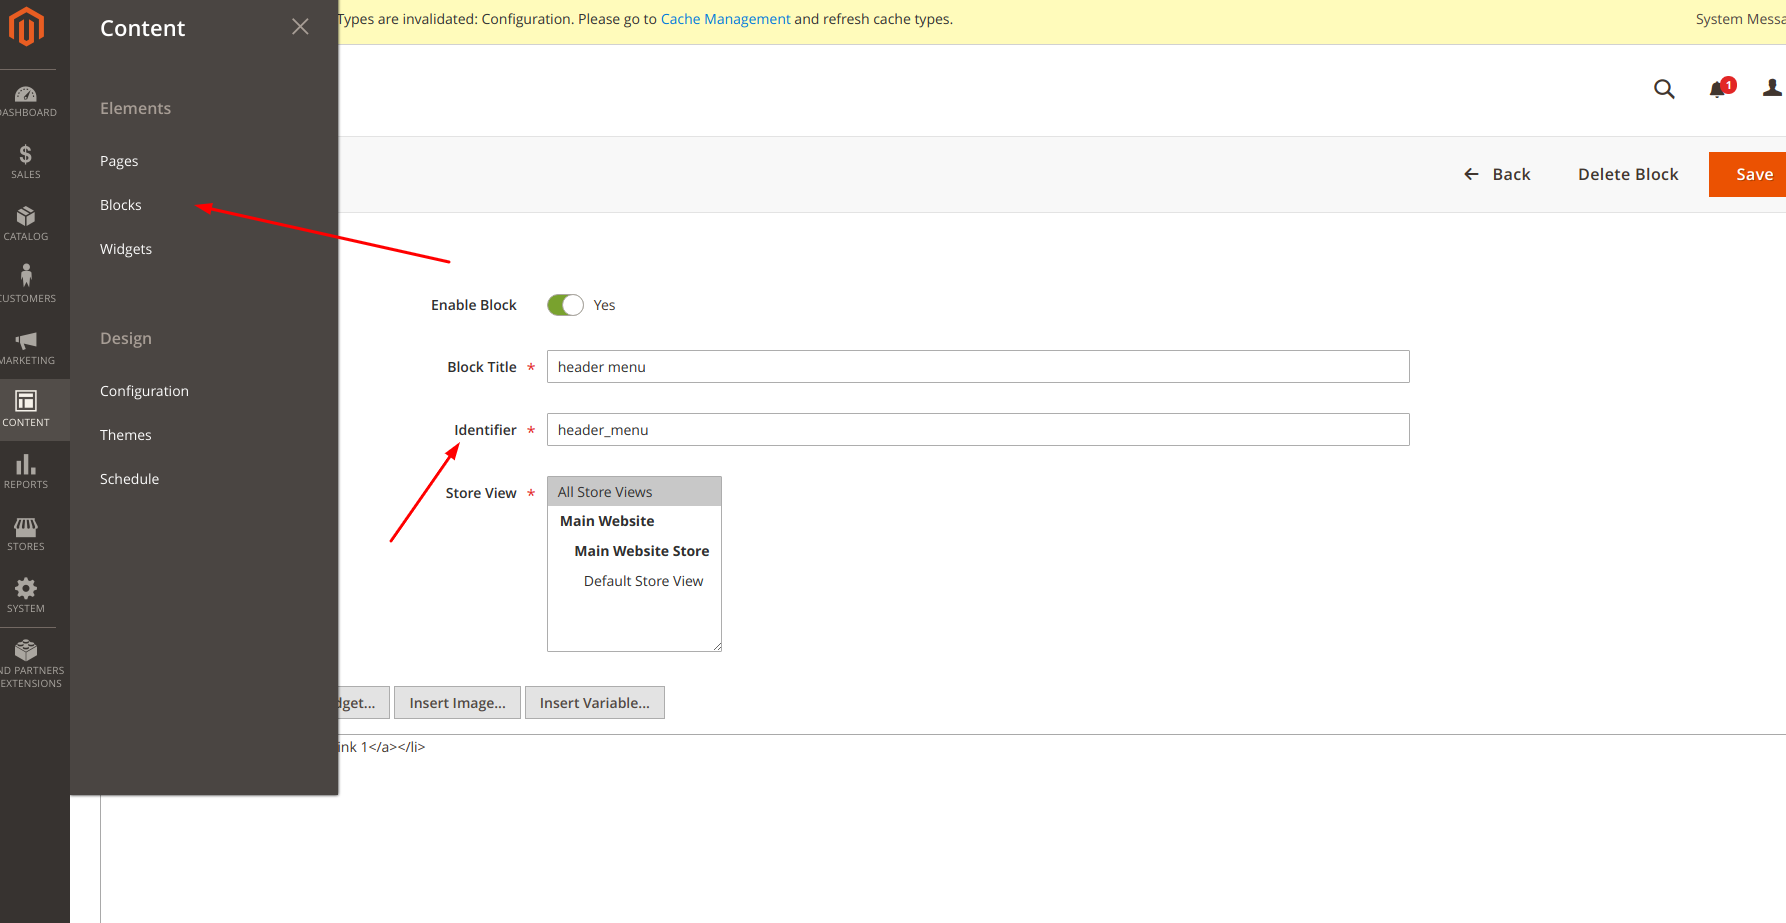
Create our CMS block in our admin panel,
where you can specify your HTML structure
|
1 2 3 |
<li class="level0 level-top category-item"><a class="level-top" href="#">Test Link 1</a></li> <li class="level0 level-top category-item"><a class="level-top" href="#">Test Link 2</a></li> <li class="level0 level-top category-item"><a class="level-top" href="#">Test Link 3</a></li> |
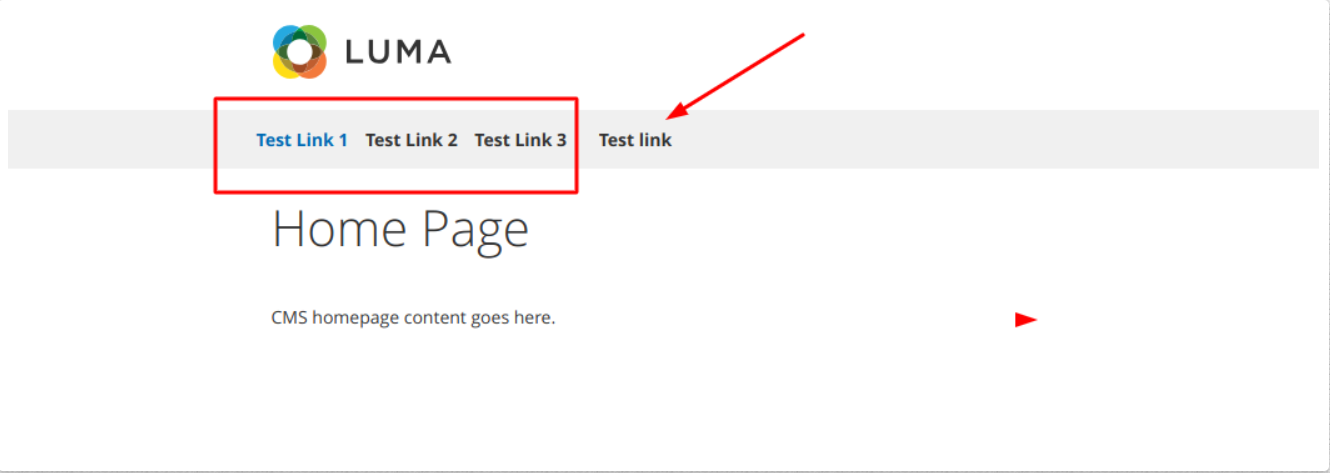
You get the following result.
On the screenshot, you can see that our menu was derived from the CMS block and the link we earlier added.
There can also occur a situation when you suddenly need a link banner. You will need to:
1) create a CMS block as we did earlier;
2) create an selectable HTML structure;
a) create a banner block structure. The banner usually consists of a text and a picture
|
1 2 3 4 5 6 |
<div class="subcat-box ds-flex"> <div class="image-box"><img src="{{media url="wallhaven-611257.jpg"}}" alt="" /></div> <div class="content-box"> <p>Lorem ipsum dolor sit amet, consectetur adipisicing elit. Facere natus aliquam deleniti ipsa iste delectus nesciunt sint cumque repellat quasi?</p> </div> </div> |
Load the picture pressing the Insert Image button.
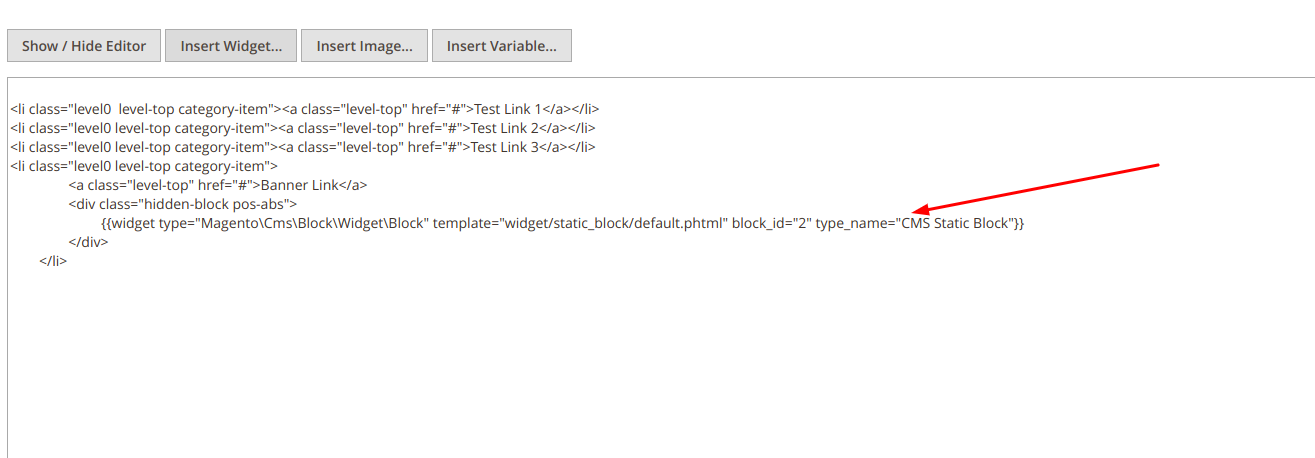
Now we insert our new CMS block in the menu. First, select the place where we want to insert it. Create a block that hides our banner and serves as a wrapper for it
|
1 |
<div class="hidden-block pos-abs"></div> |
and press Insert Widget button that you can see at the screenshot above.
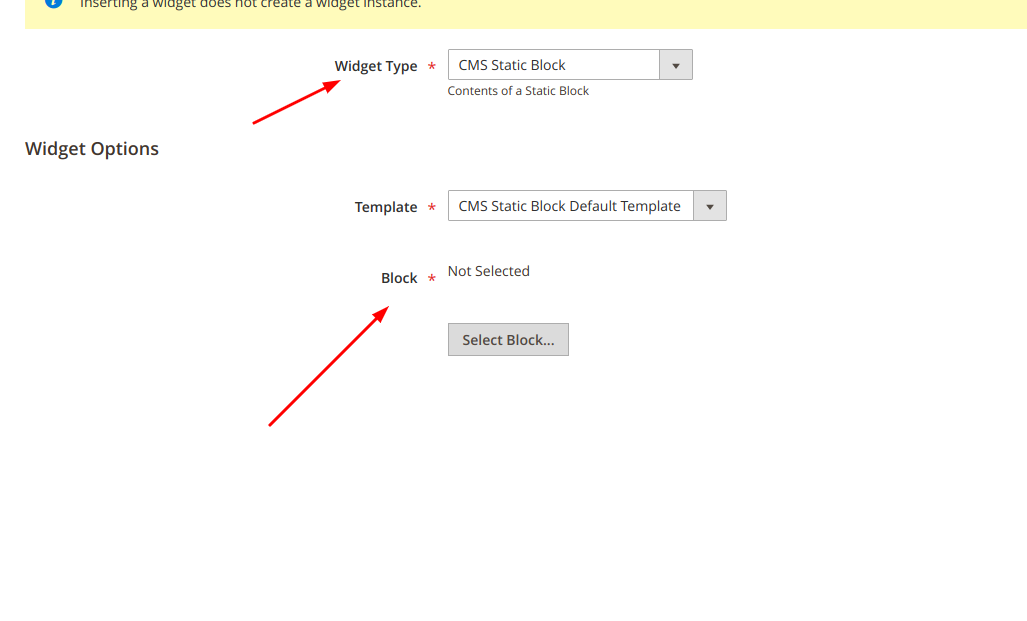
Widget Type – choose a type from the list that we want to display in the widget and select our block.
Block – click on the Select block button and in the list there will be the name of all available CMS blocks, select the one you created (in our case, we called it Banner).
Press the Insert widget button
This is what you should get as a result:
Now, all we have to do is to specify the styles for our structure (to learn more about the creation of a theme in Magento 2, explore our manual How to Create New Magento 2 Themes. Go to the file for the styles in our theme. Below are the styles from my example.
|
1 2 3 4 5 6 7 8 9 10 11 12 13 14 15 16 17 18 19 20 21 22 23 24 25 26 27 28 29 30 31 32 33 34 35 36 37 38 39 40 41 42 43 |
.hidden-block{ opacity: 0; visibility: hidden; } .pos-abs{ position: absolute; } .ds-flex{ display: flex; } .subcat-box{ align-items: center; -webkit-box-shadow: 0px 2px 15px -2px rgba(0,0,0,0.75); -moz-box-shadow: 0px 2px 15px -2px rgba(0,0,0,0.75); box-shadow: 0px 2px 15px -2px rgba(0,0,0,0.75); background-color: #fff; flex-wrap: wrap; left: 0; top: 0; min-width: 400px; z-index: 2; .image-box{ max-width: 45%; } .content-box{ max-width: 55%; p{ padding: 0 10px; font-style: italic; margin: 0; } } } .navigation{ .level0{ &:hover{ .hidden-block{ opacity: 1; visibility: visible; } } } } |
You will get the following result
How to edit menu in Magento 2
We looked at two ways to create a menu; they can as well be applied to edit menu. For editing, the second one is more convenient, because it enables the developer with more flexibility; you can set any structure using HTML, you do not need to enter and edit the site files.
How to add categories to the menu in Magento 2
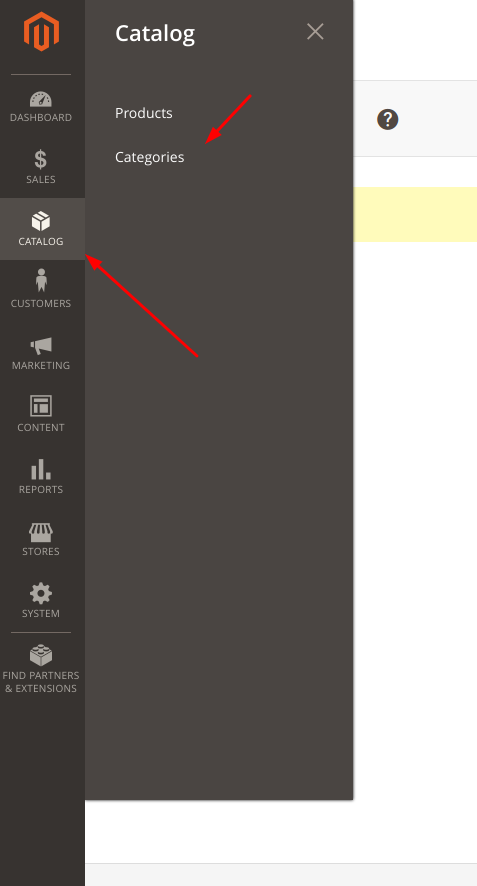
Log in to the admin panel and navigate Catalog->Categories.
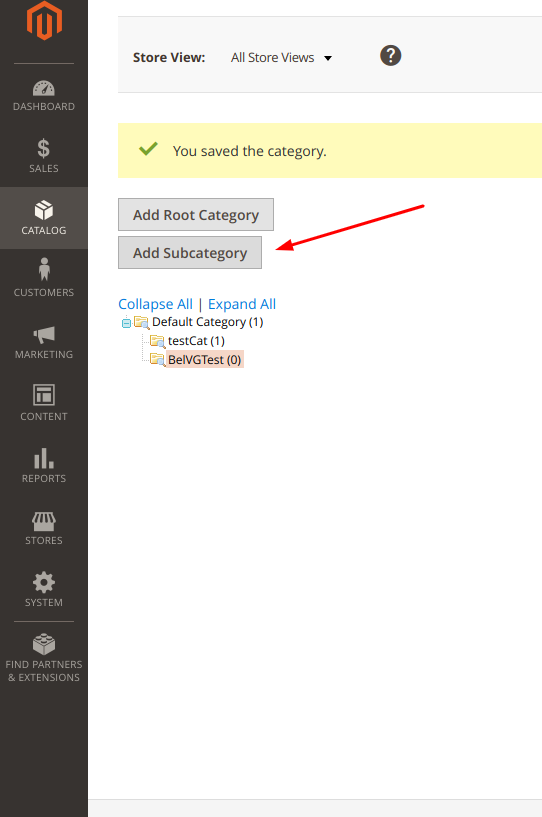
Press the Add Subcategory button to create another subcategory in Default Category.
Specify the name of a new category in the Category Name field.
Make sure that Include in Menu is enabled. As a result, the following category will appear in the menu.
Summary
These were the most functional methods of creating a menu in Magento 2 as well as step-by-step instruction on how to work with them. If you have a question or a comment, feel free to leave it down below.













Hi Jim
Did you disable the standard editor in the beginning so that it would be easier to work with HTML?
This does not work in 2.2.6, the editor adds around the items, every time I remove them they come right back