
While trying to make the process of purchasing faster, you still need to gather information about customers. When this is the case, use Magento checkout fields to add additional fields to the checkout in your online store. You can easily manage fields for your clients to fill in. Magento checkout fields module is very flexible and easy to install.
Key features:
- Unlimited number of fields;
- All types of fields available;
- Different types of field validation to add to the fields;
- Add fields to any of the checkout steps, even to several of them;
- Track statistics of the customer answers;
- Quickly edit and manage the fields (drag&drop);
- Unique fields for different store languages available;
- Answers are saved on the order page;
- Set dates for the fields to appear and disappear on frontend automatically.
You can now easily add custom fields to any checkout steps with Magento Checkout Fields extension. Any type of field – selects, text, radio buttons, etc. Make them required or not, add validation, add different fields for different languages or stores. It is really easy to edit fields and gather statistics. A perfect choice both for specific cases where you require some information from the customers and when you just allow them to answer a couple of questions for you.
How to Configure
Log in to the admin panel, and we will show you how to configure the extension step by step. First go to System ─> Configuration ─> Checkout Fields. Here you will see module settings:
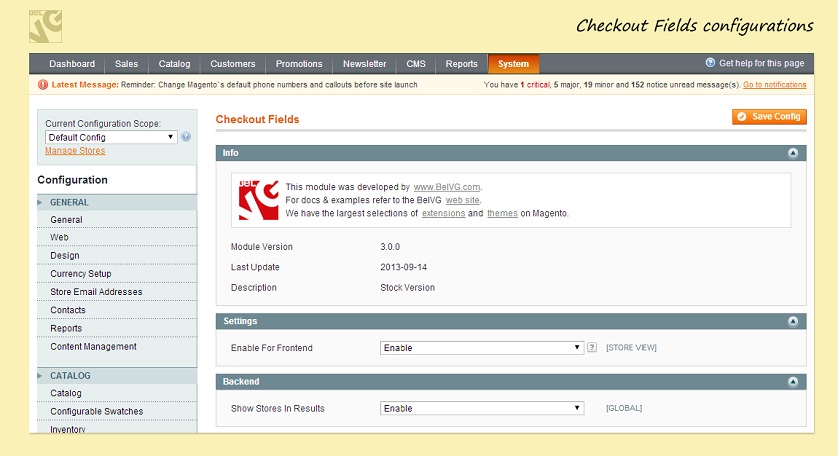
- Enable for Frontend – enable or disable extension on the frontend.
- Show stores in result – choose whether to show stores in the statistics results.
How to create a new field
To create a new checkout field go to Sales ─> Checkout Fields. Here you will see the list of all fields. Press “add new” button to create a new field.
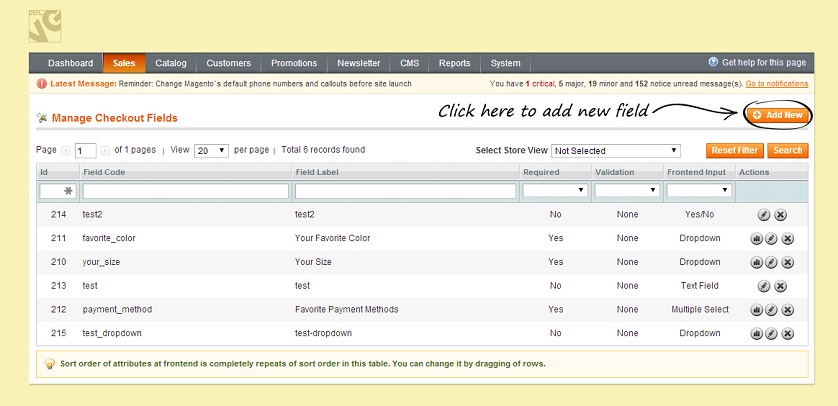
First you will see the Properties Tab where you have to choose the field name and its type.
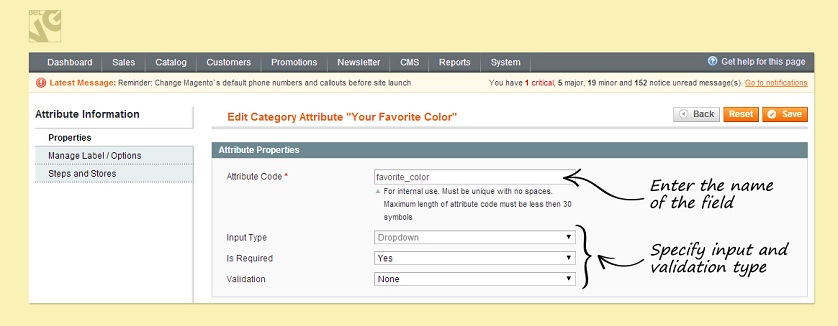
- Attribute Code – enter the attribute code for the field;
- Input type – select the type of the field. Different field types are available such as text area, date, yes/no, multiple select, dropdown;
- Is Required – select whether this field is required or not;
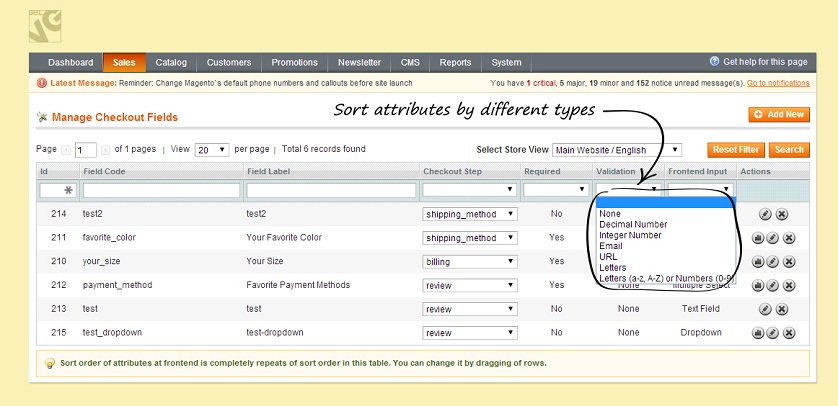
- Validation – choose the validation type for this field. It can be decimal number, integer number, email, url, letters (a-z, A-Z) or numbers (0-9);
- Default value – enter the default value for this field.
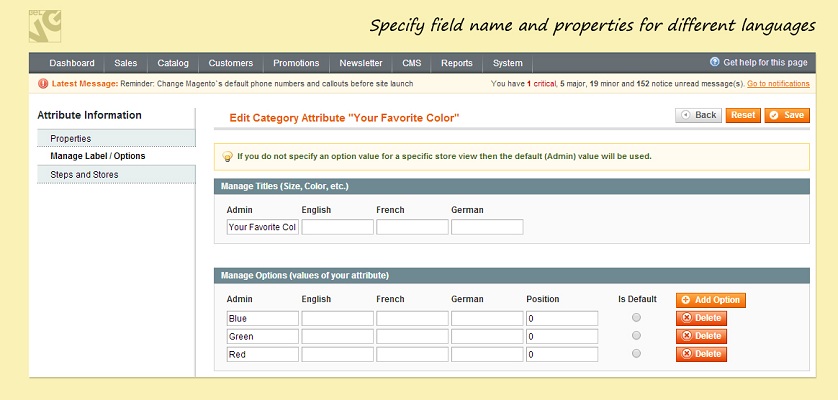
If your store operates different languages, choose Manage Label Tab and insert field name in the forms provided. On this page you can also add and manage Options (values of your field) if it is necessary.
Then go to Steps and stores tab. Here you can choose the checkout step for every store where the field will be displayed.
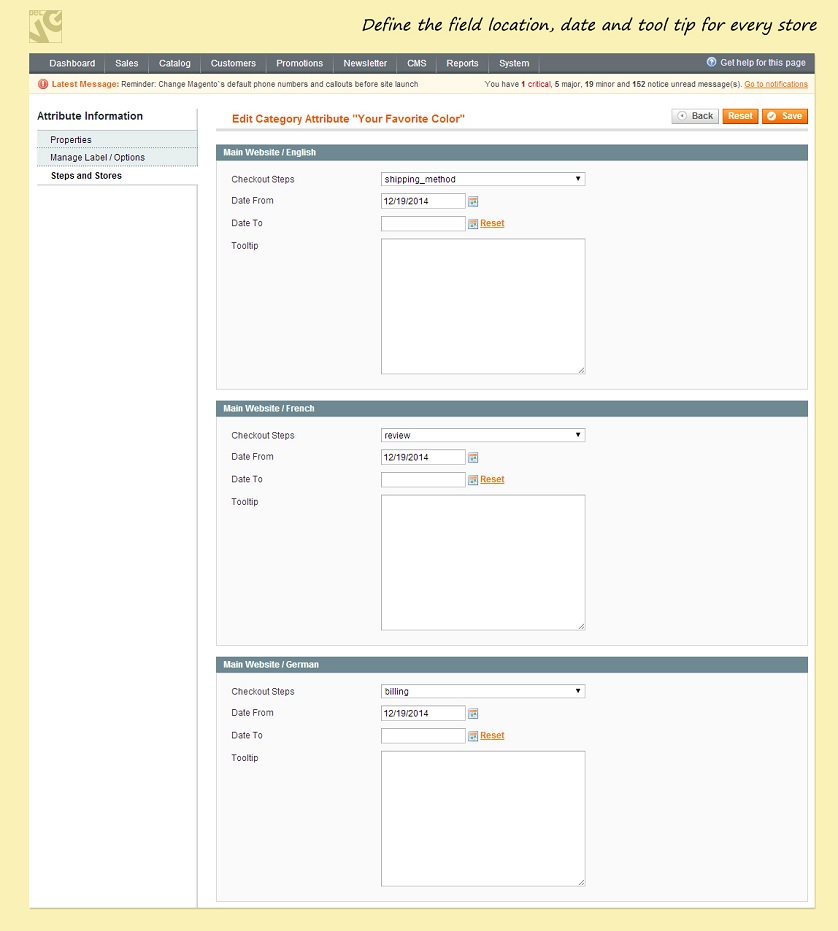
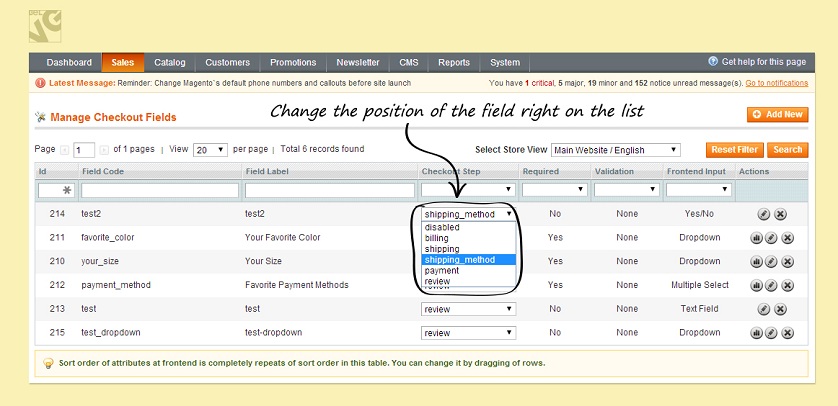
- Checkout Steps – choose one of the five checkout steps (billing, shipping, shipping_method, payment review) where the field will be displayed. You can also disable this field for particular stores;
- Date from – choose the date you want to start displaying the field;
- Date to – choose the date you want to stop displaying the field;
- Tooltip – enter the tooltip that will be displayed near the field to help customers to fill in the field.
Press save button to create the new checkout field.
How to manage checkout fields
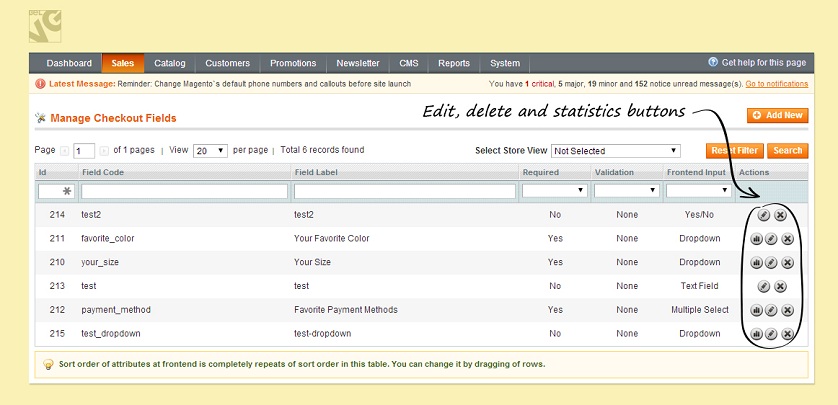
In the list of all checkout fields you will see the action buttons to view statistics, edit or delete field.
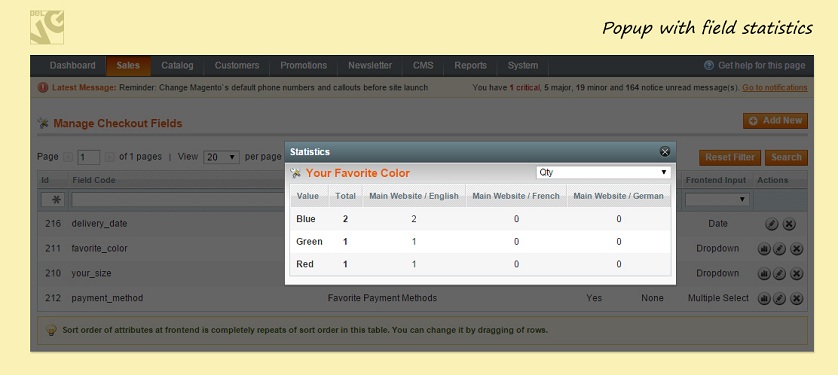
If you press the statistics button you see the popup with the field statistics for all stores (if configured). You can switch the statistics between quantity and percent.
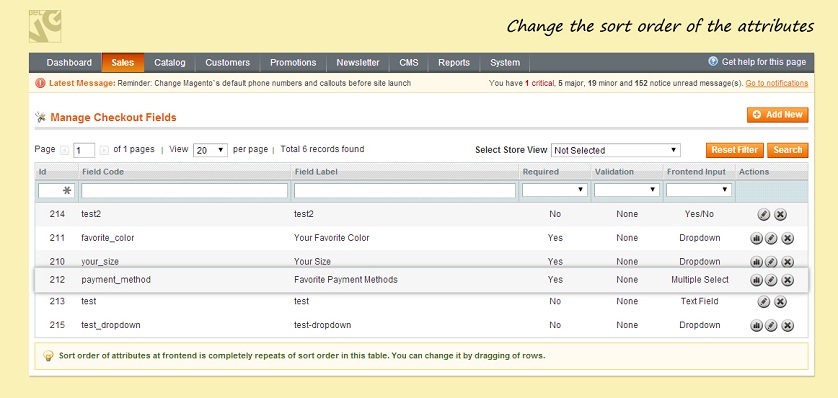
Sort order of the attributes at the frontend is completely repeats of sort order in the list. You can change it by dragging the rows. Note that the custom checkout fields are placed after the standard fields on the frontend.
You can easily select store view and see fields only for a particular store.
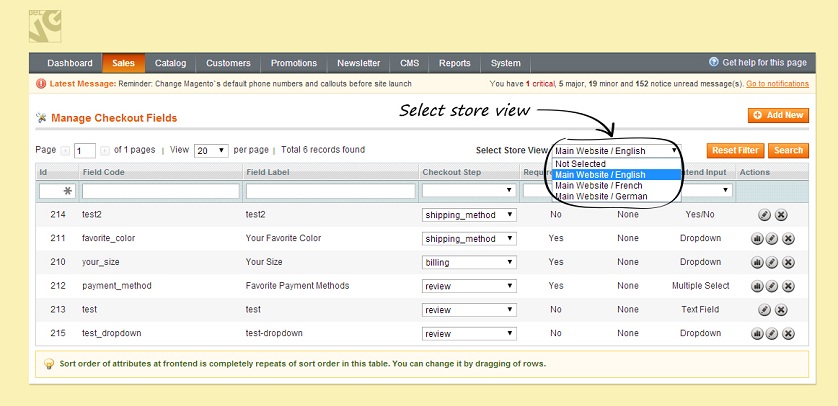
After you choose the store you will see the fields for this particular store and can easily and quickly manage them right in the list. Here you can change the checkout step.
You can also sort fields using the filters at the top of the list.
How to Use
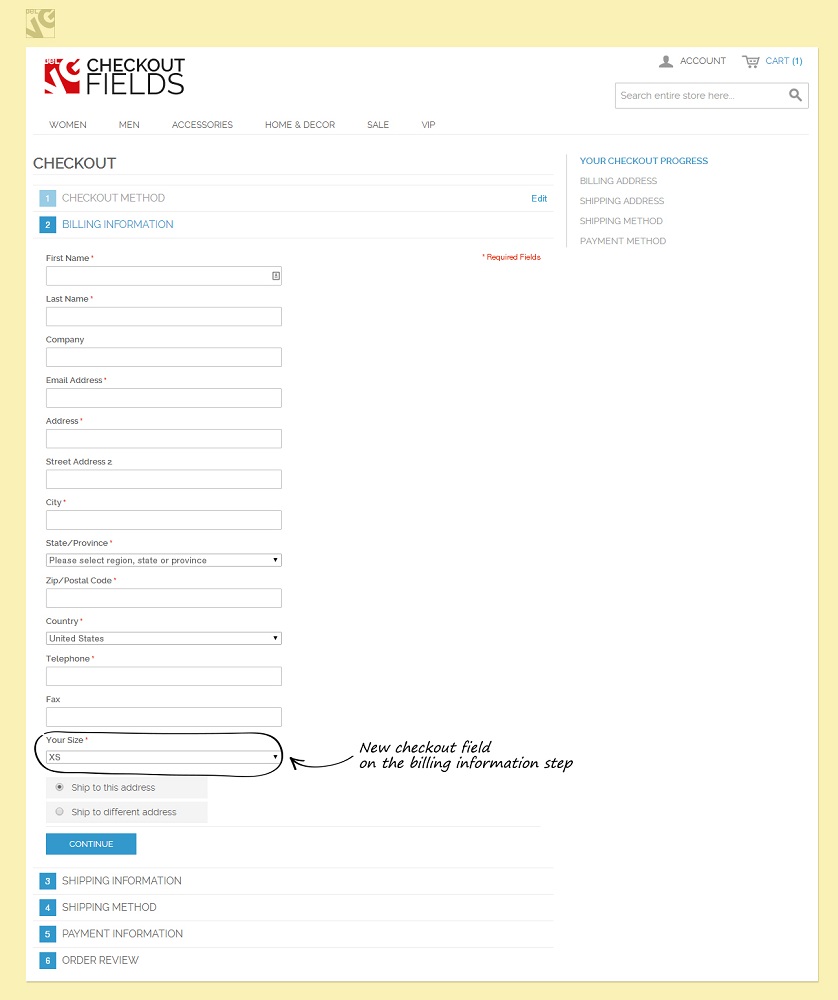
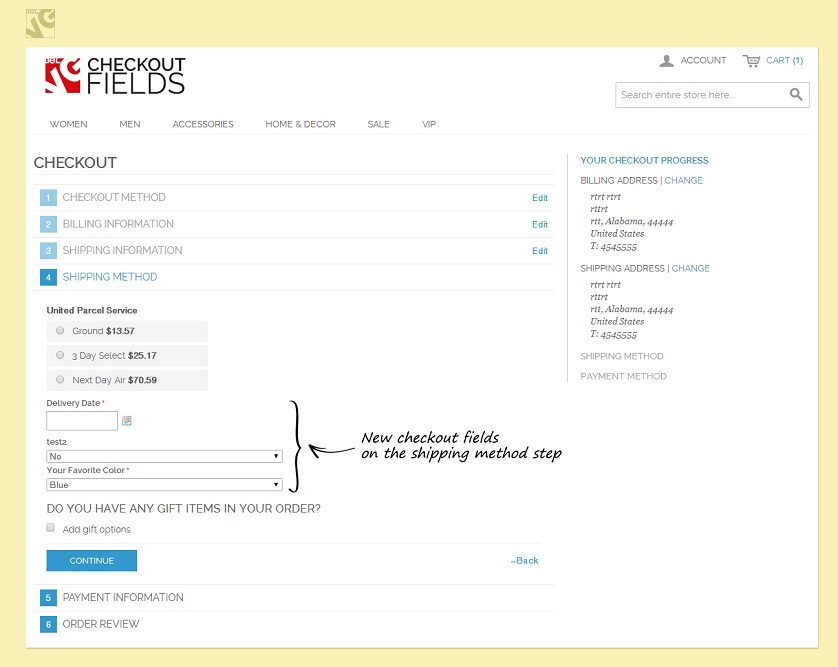
Checkout fields will be placed at the checkout steps that configured in the module settings.
Admin can also view all the information on the order page in the checkout fields tab.


