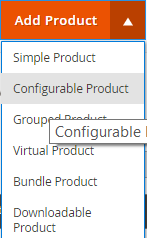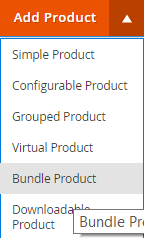
Creation of your online shop catalog in Magento 2 begins with filling it with products. Magento ecommerce platform offers a wide range of product types, each with its own properties and configuration possibilities, to suit online stores dealing with all sorts of goods, tangible and intangible. In Magento 2 admin panel you can choose from 6 product types:
Simple Product
Configurable Product
Grouped Product
Bundle Product
Virtual Product
Downloadable Product
Now let’s get into details of creating and configuring each of them.
How to create Simple Product in Magento 2
A simple, standalone product has its own individual number – SKU (stock keeping unit). Simple products can be either sold individually or as part of a group or bundle (this will be explained later).
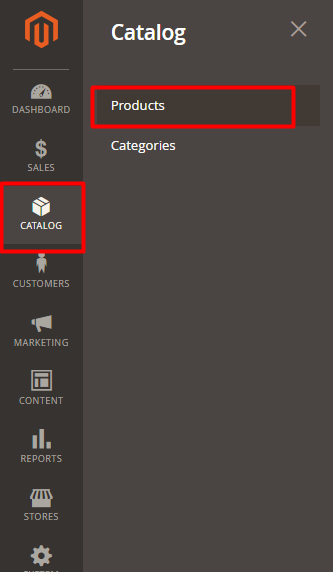
To create a simple product, go to Catalog tab -> Products.
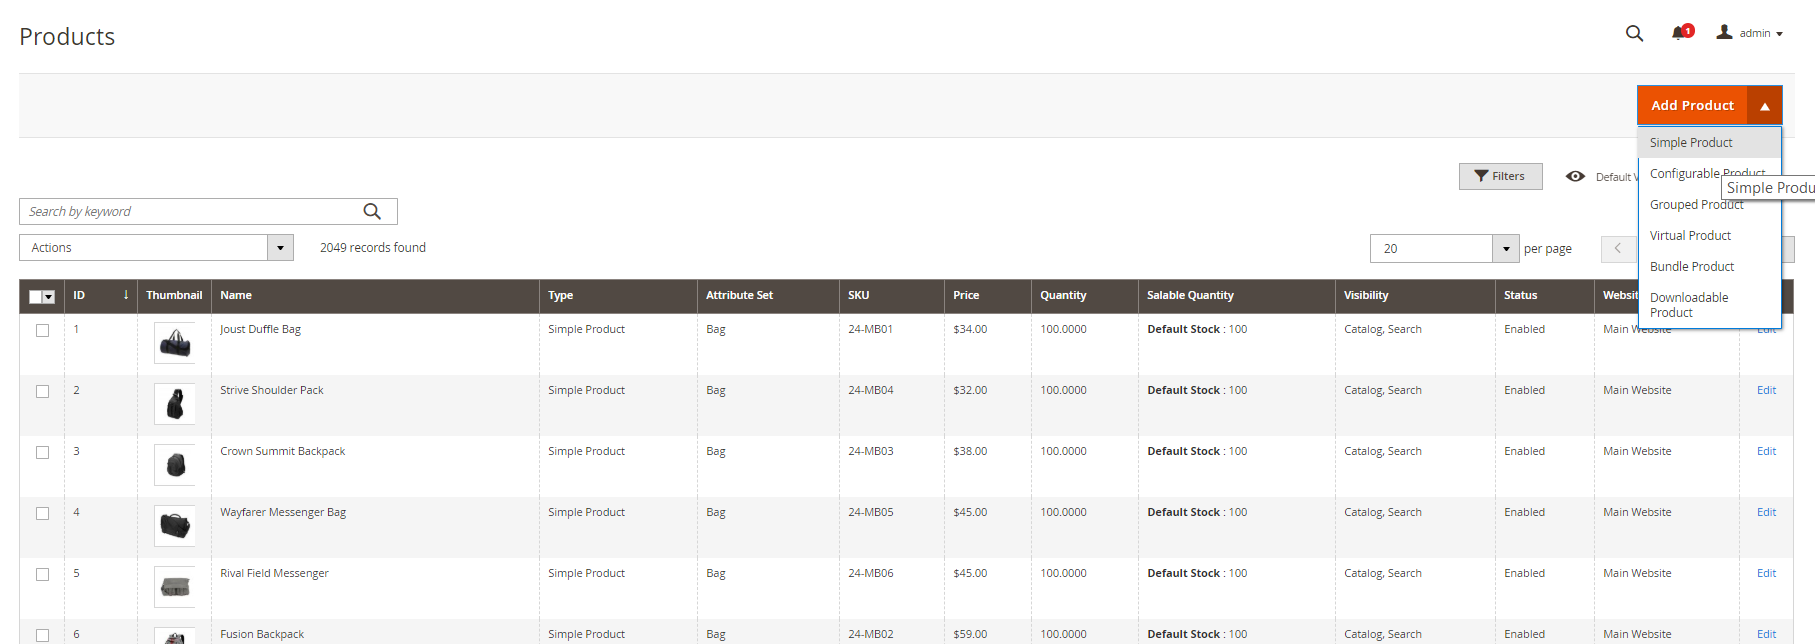
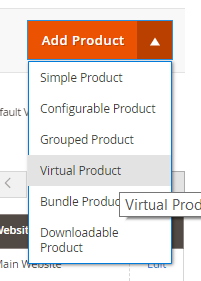
You’ll get to the following page. In the upper right corner you’ll see a large Add Product button with a drop-down menu. Choose Simple Product and click it.
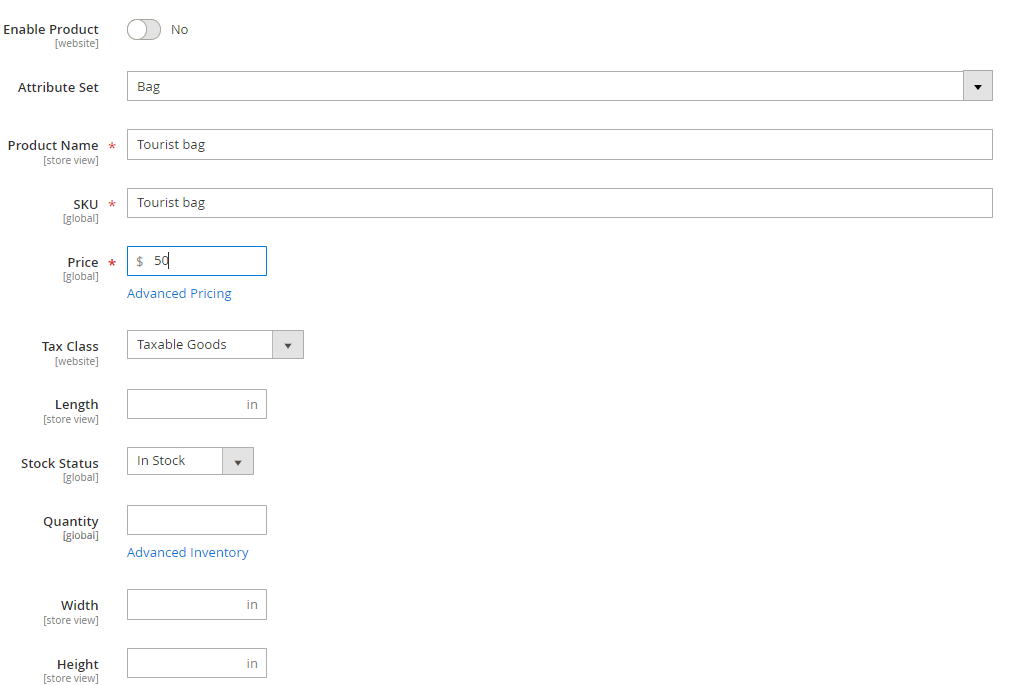
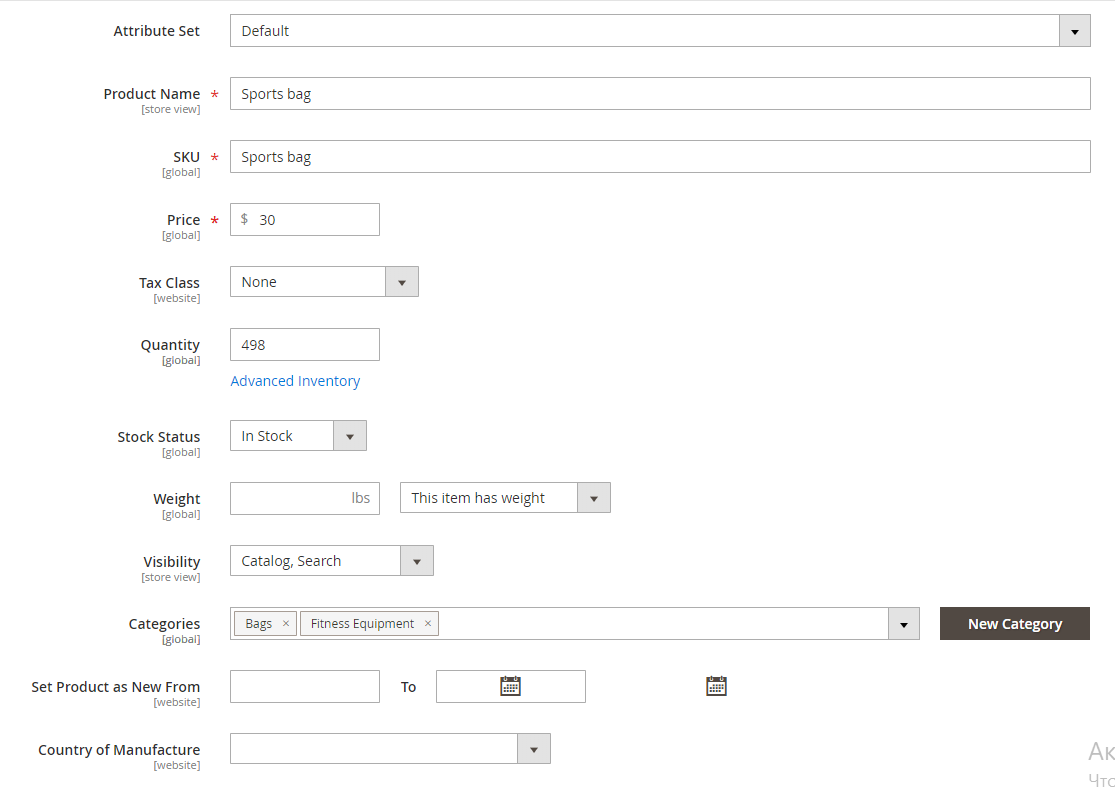
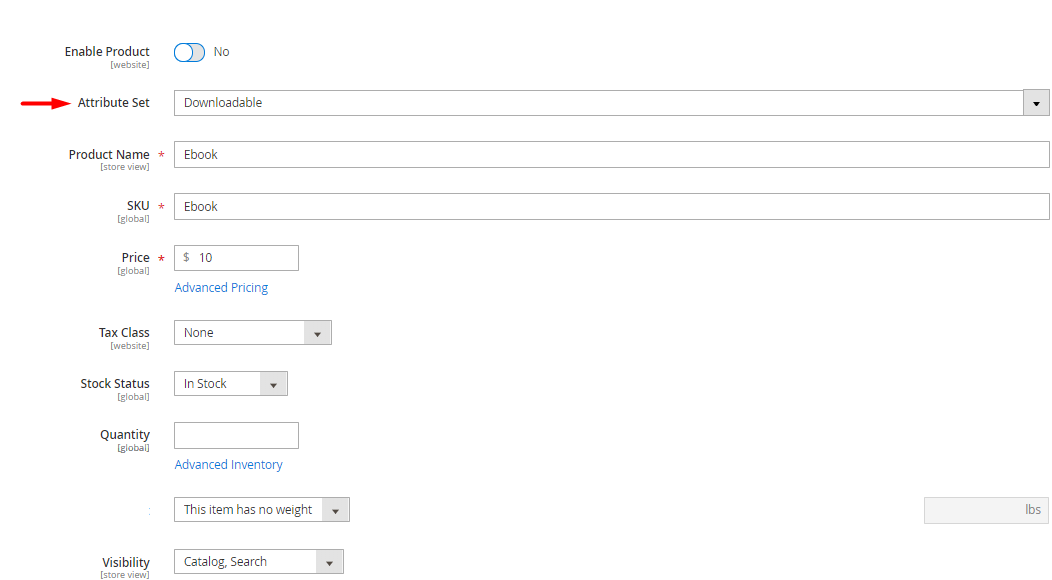
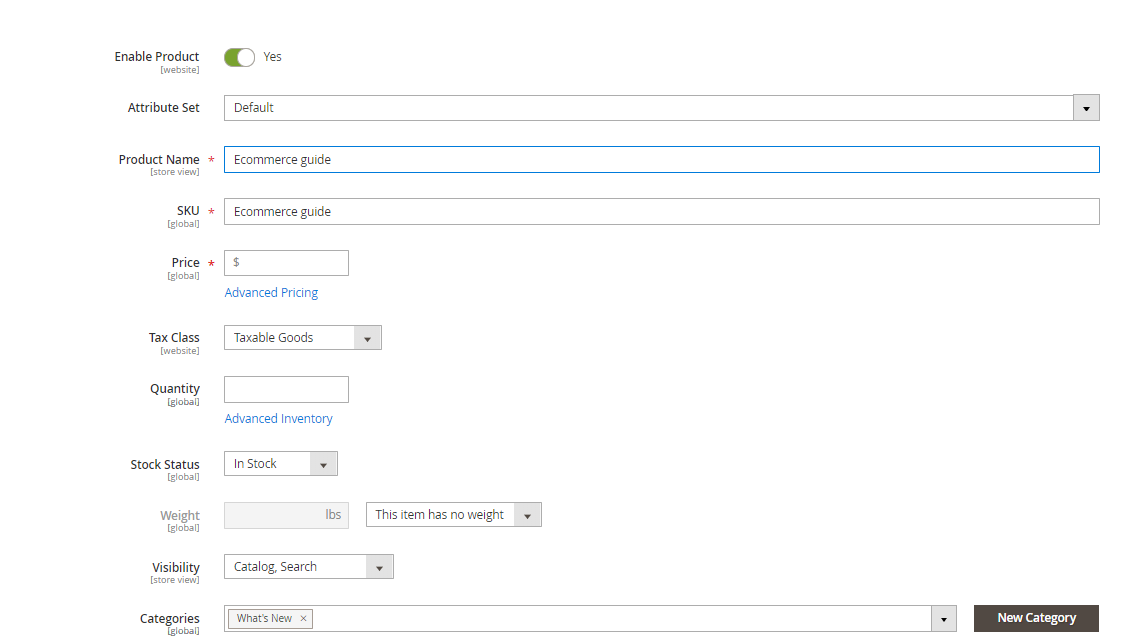
You’ll get to the general configurations menu page, which is nearly the same for each type of pages.
Set the Enable Product button at No and fill in:
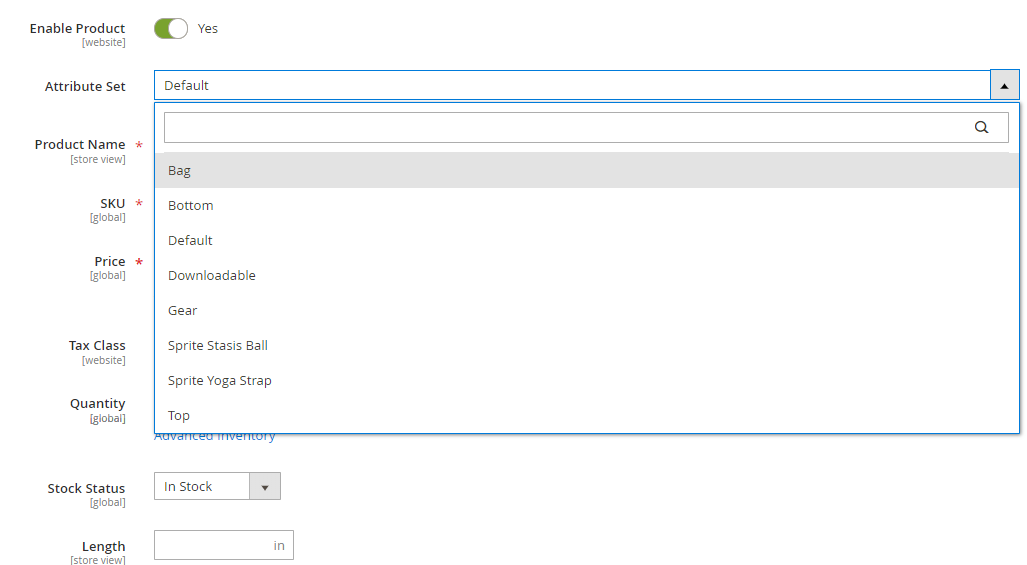
- Attribute Set – choose the product type from a drop down menu,
- Product name,
- SKU – stock keeping unit, is generated automatically as you fill in product name, yet you can edit it the way you like,
- Price – you can set one price or choose Advanced settings to set up Special price, Customer group price, Manufacturer’s Suggested Retail Price, etc.,
- Tax Class – determine the tax class for product taxation,
- Quantity – of this product in stock. You can also choose to fill in Advanced inventory,
- Stock status – in or out of stock,
- Length,
- Width,
- Height,
- Weight – if the item has it,
- Visibility – whether the product is visible in the catalog, through search, or both,
- Categories – choose to which category on your website it will belong,
- Set Product as New From,
- Country of Manufacture.
When you choose a category, below appear a number of drop down menus with the attributes associated with the category you chose.
As you entered all the information you wanted, click Save in the upper right corner.
Now as you scroll down, you will see the variety of fields you can fill in as well:
Content – add a Description that will be located on the page itself and a Short Description for store view.
Images and Videos – add the visual content to your product page.
Search Engine Optimization – improve your product page rankings by setting up URL key, Meta Title, Meta Keywords and Meta Description.

Related Products, Up-Sells, and Cross-Sells – set up a selection of additional goods that may attract customer’s attention.
Customizable Options – additional product configurations you offer that usually increase the sum of the order.
Product in Websites – if you have several websites in one admin panel, you can assign the product to any of them.
Design – select a layout, product options display and layout update xml.
Gift Options – enable to allow gift message.
After the configuration and if you are sure that the product page is ready, you can click Yes at Enable Product and press Save. After that the product will get visible for customers.
How to create Configurable Product in Magento 2
At the first glance, configurable product is the same as a simple product – it also has with a variety of options presented in drop-down lists. The difference is that each of configurations is a separate simple product with its own SKU, tracked in the inventory. A simple product, on the other hand, even with custom options doesn’t have track inventory.
To create a configurable product, choose the corresponding option in the Add product drop down menu.
Fill in the general and additional settings the way I showed you in the previous paragraph about simple products.
When you are finished, save changes and proceed to add configurations.
Click Create Configurations in Configurations section.
You’ll get to the following menu. On top you’ll see the number of steps you need to complete.
Choose the attributes set for your product and click Next.
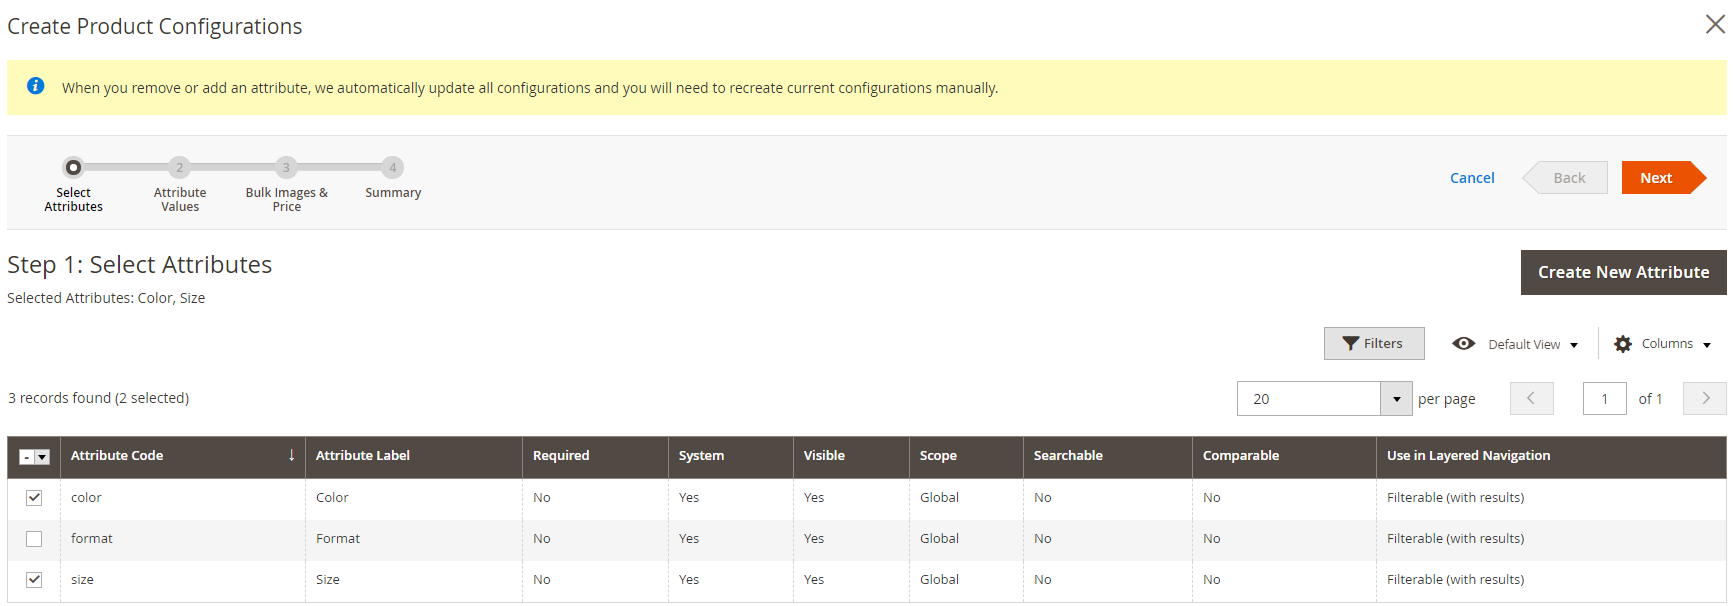
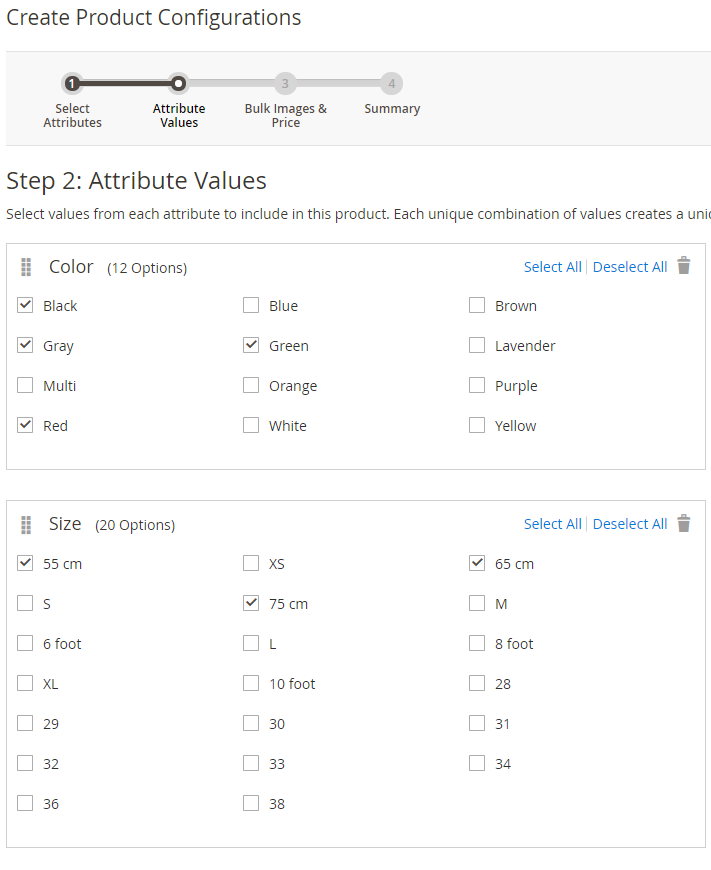
Then set attribute values by ticking the ones you wish to have.
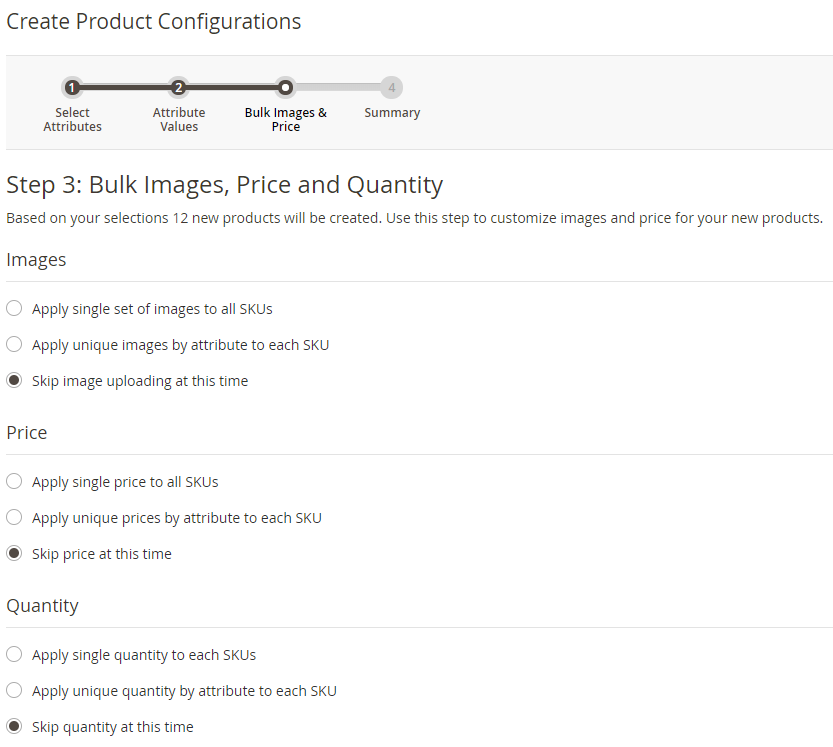
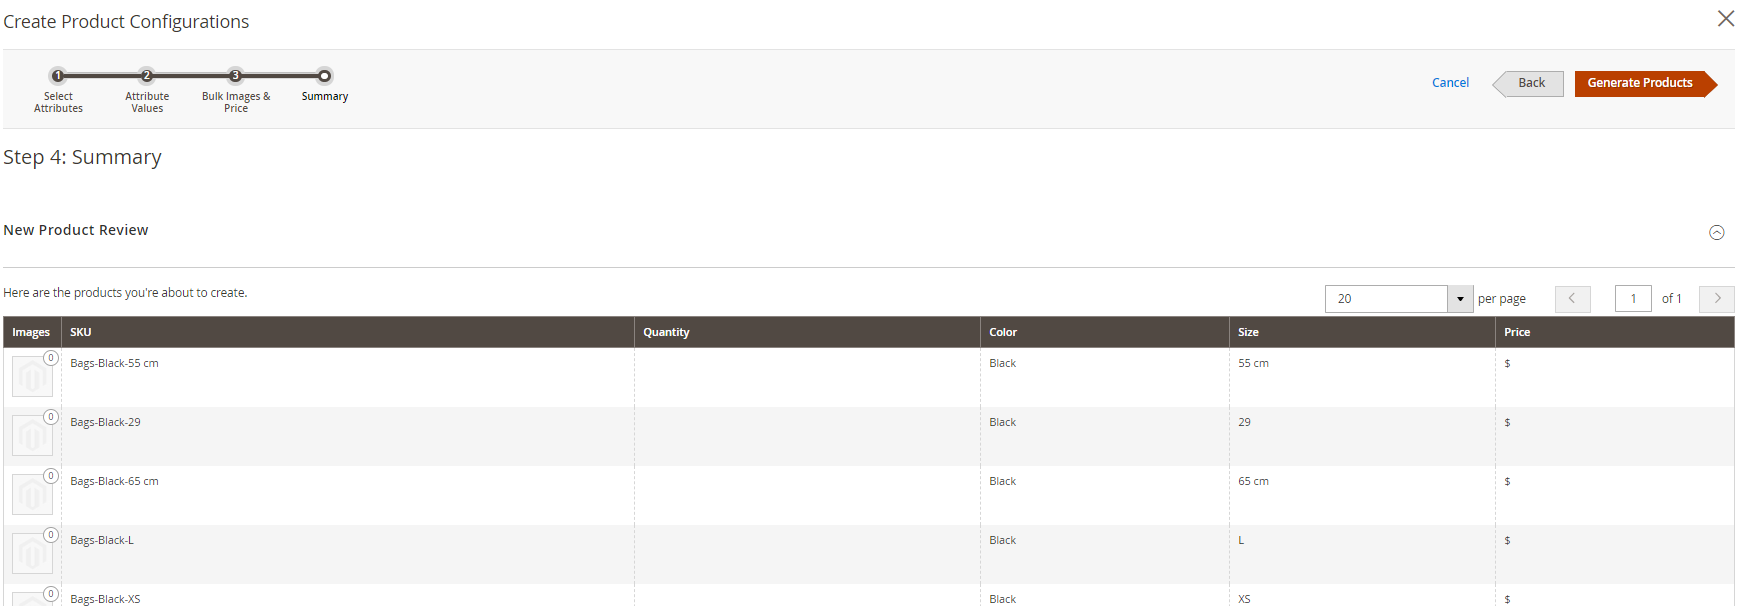
Next step is setting new product configurations images, prices, and quantities.
As you’ve set all the described above parameters, finish by clicking Generate Products.
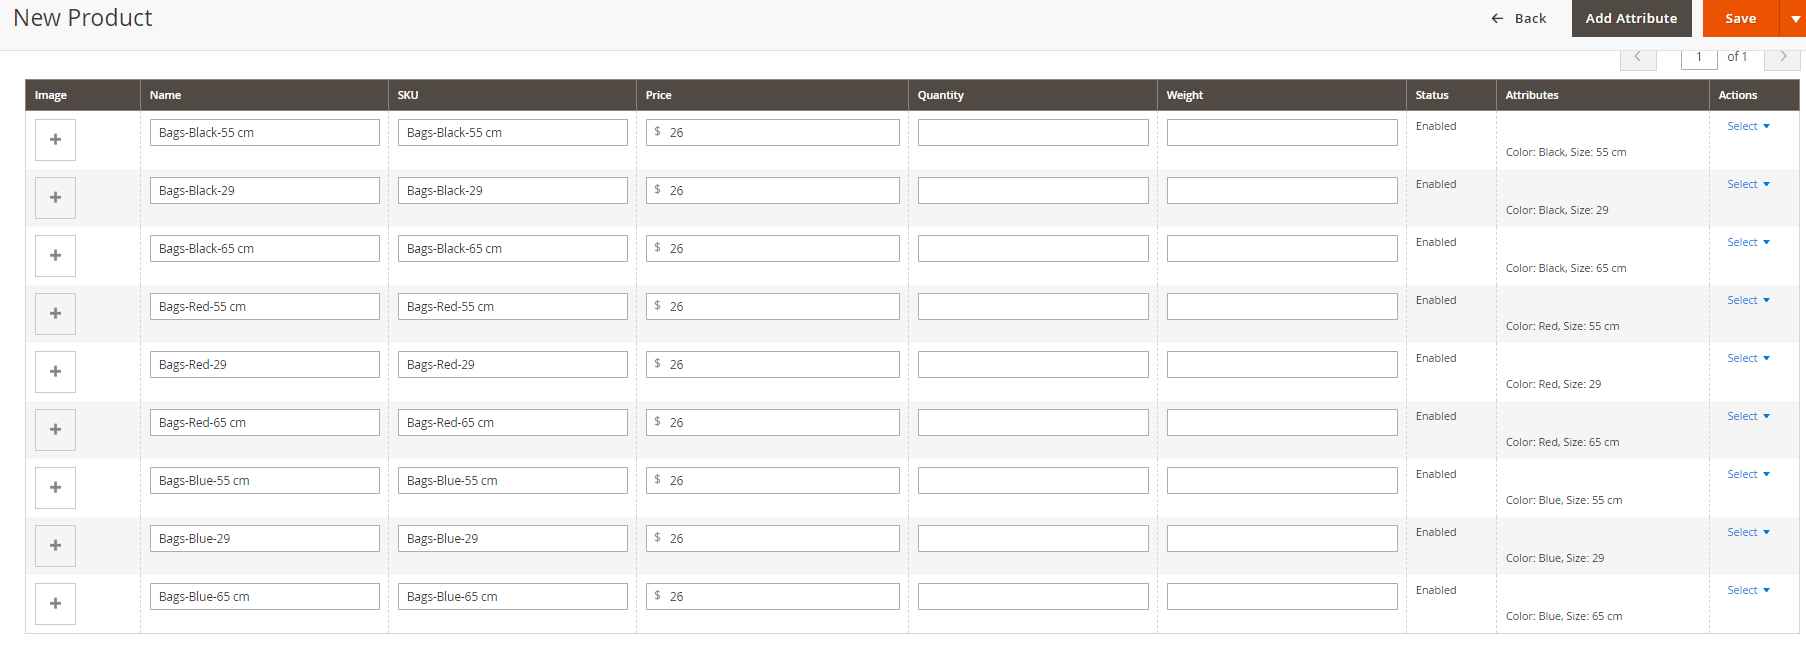
All new products will appear in the main settings menu of the New Products Review tab.
Finish settings by specifying quantity and weight, enable the store view and press Save.
How to create Grouped Product in Magento 2
A grouped product is a set of simple products united together. It can be either variation of one item or a number of thematically united goods that are commonly used together. Despite being grouped, each product remains separate and is purchased separately. Here’s how to create grouped products in Magento 2:
Go to Catalog -> Products and select Grouped Product in the Add Product drop down menu.

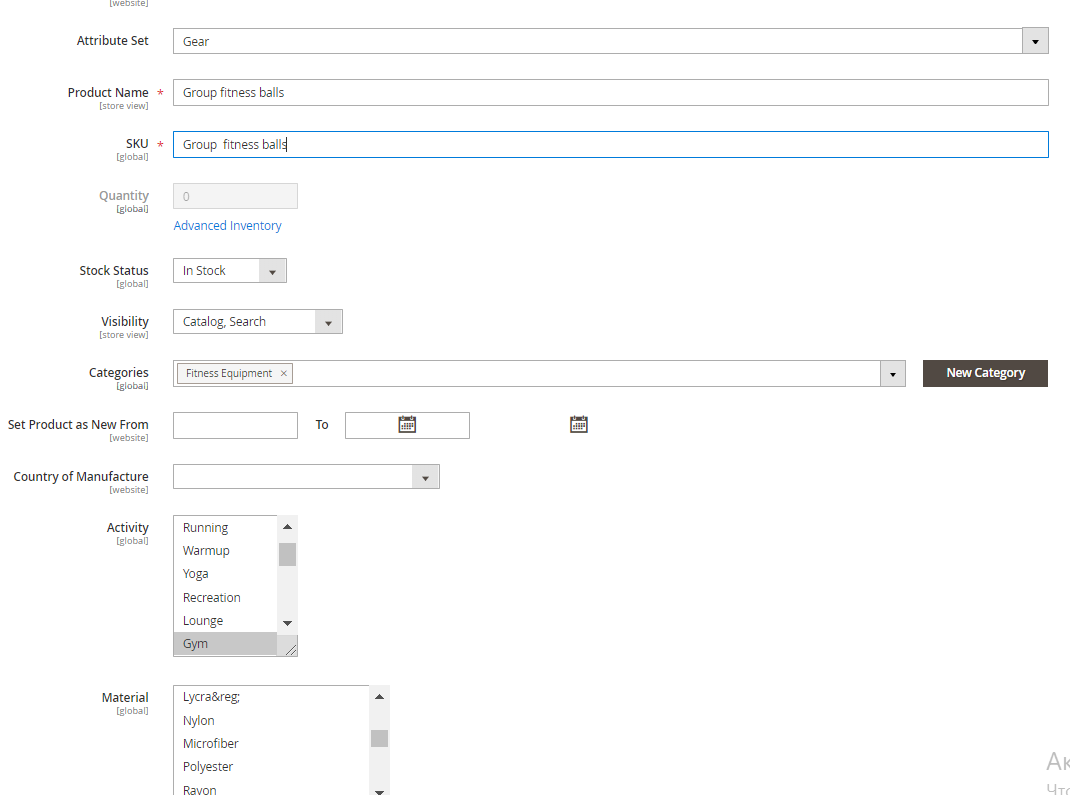
Fill in general attributes and click Save without enabling for customer view.
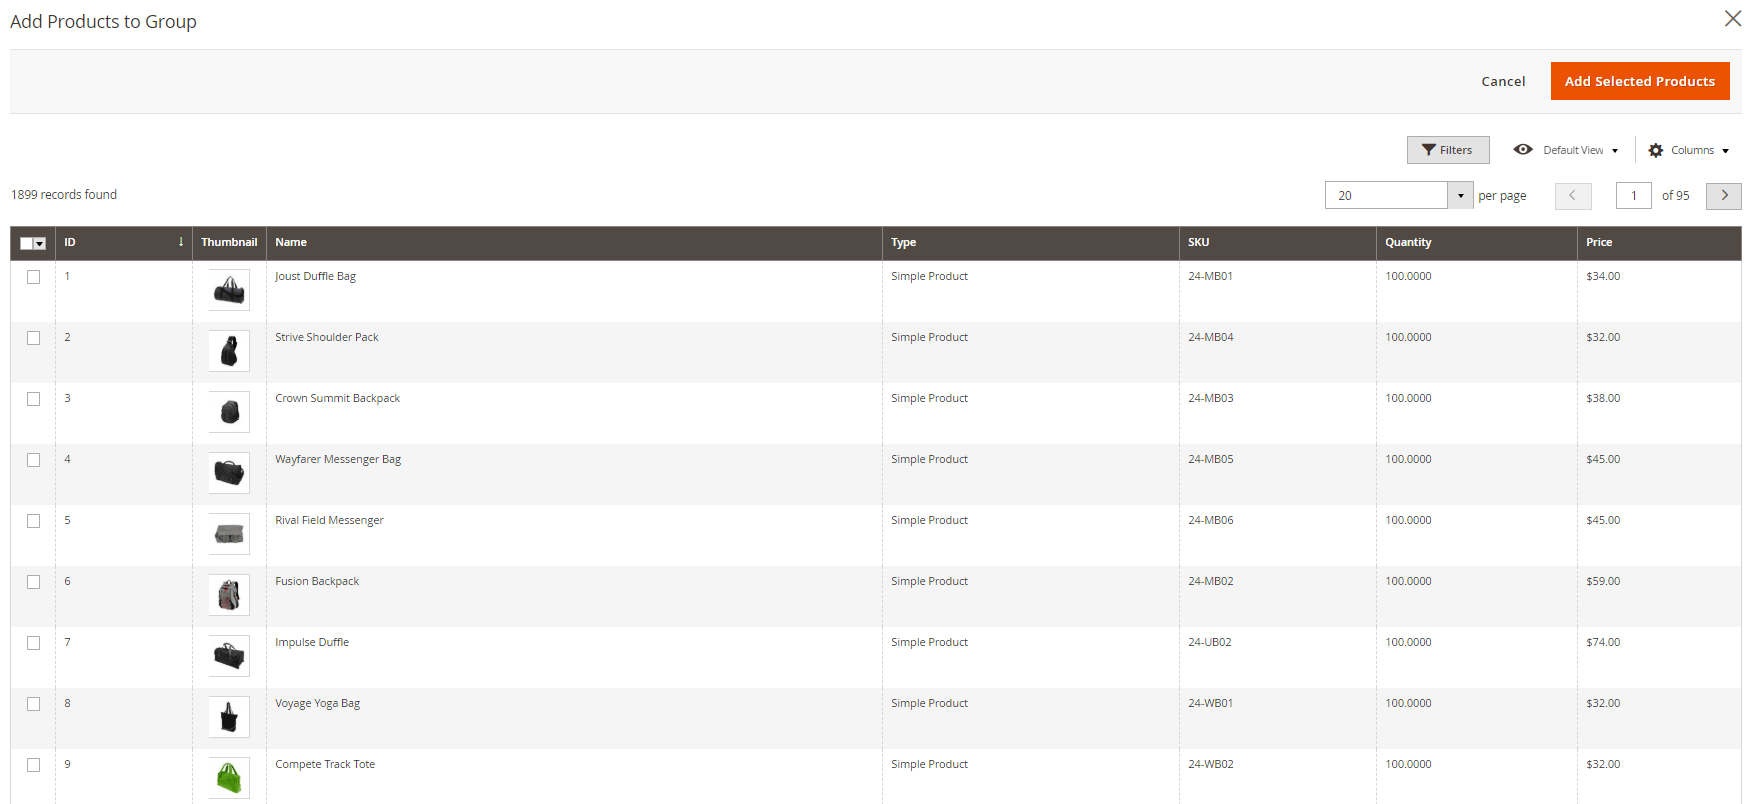
Then scroll down and find Grouped Products tab. Click the Add Products to Group button.
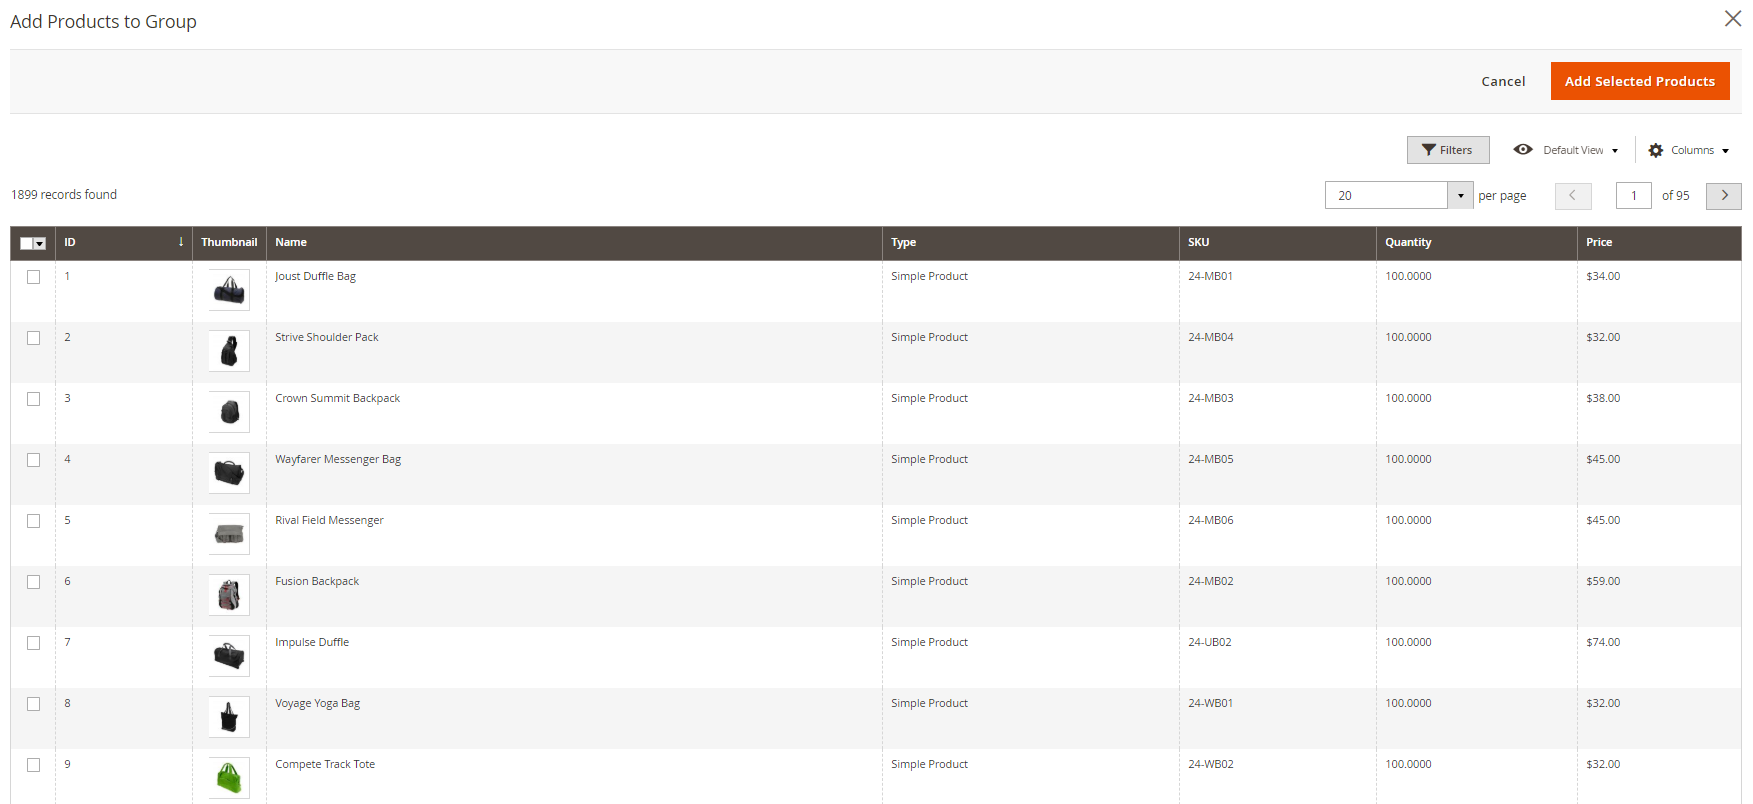
You’ll get to the list of all products existing in your online shop. Choose the ones you want to group and press Add Selected Products.
You’ll get to the following menu where you need to indicate Quantity of each product and change their position in the group by pressing the small sign on the right of each product and dragging.
After you’ve selected the products for the group, fill in the rest of the information, Enable Product and press Save.
How to create Bundle Product in Magento 2
A bundle product is the one the customer configures and customizes himself. Customization options appear in Magento 2 when the customer clicks on Customize or Add to Cart.
Select Bundle Product in the drop-down menu under Add New Product and click on it.
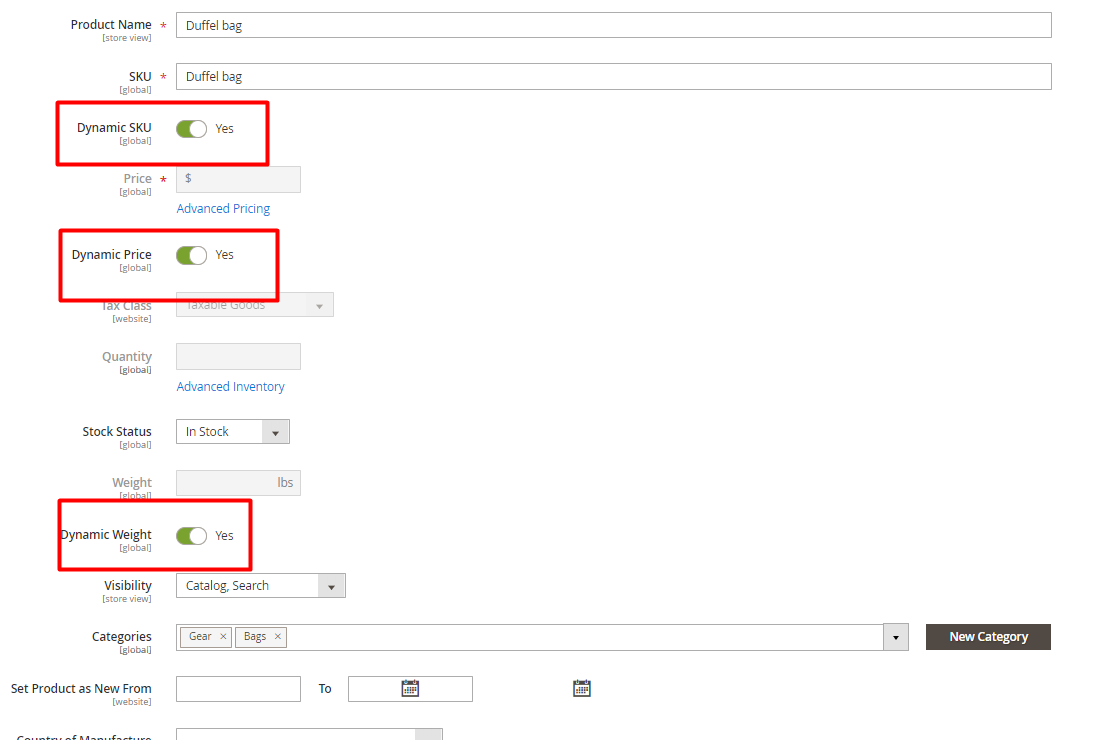
Fill in general configurations like Product Name, SKU, Stock Status and click Save (without enabling). As you can see, the Bundle Product menu is a little bit different. In particular, there’s a Dynamic SKU button; as you enable it, the system automatically adds a suffix to each bundle product to indicate they are in the bundle. If you don’t want that, disable Dynamic SKU.
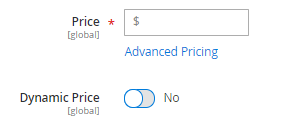
Another difference is Dynamic Price button. If you wish to charge one price for the bundle, disable the button, if, on the other hand, you want to show the customer price of each product separately, enable it.
Now it’s time to add items to the bundle. Scroll down to find the Bundle Items tab and click Add Option.
Fill in the Option title, choose the Input style and shipment method (together or separately) and click Add Products to Option button.
Select the goods you wish to see in a bundle and press Add Selected Products.
Fill in the number of goods and tick User Defined if necessary. Then fill in the rest of the information from the tabs (Content, Design, etc.) and press Save.
How to create Virtual Product in Magento 2
Virtual products define the intangible goods that your shop may trade, for example, all kinds of services, warranties, ebooks, guides, music, video, etc. Virtual products can be sold separately or be united in groups and bundles.
To create a virtual product, first choose the Virtual Product option in Add Product and press it.
Fill in the general information on the item in the standard menu, which is extremely similar to the Simple Product’s one.
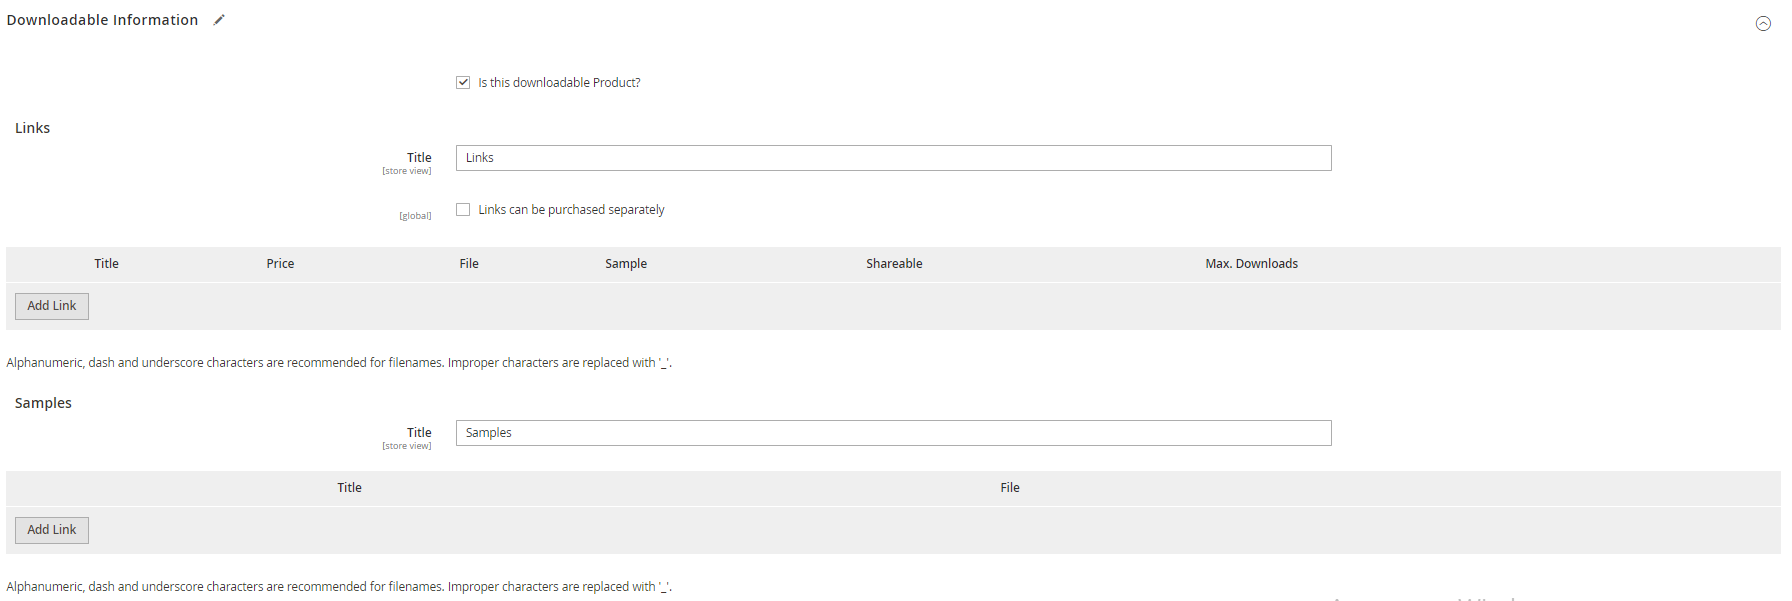
There is one additional tab down below – Downloadable Information. If the item isn’t downloadable, leave the box unticked.
Otherwise, you’ll need to fill in the following menu. There are 2 types of products – Links and Samples.
Fill in the title and the price of your virtual item, choose whether it’s Upload File or URL, sharable or not and the number of the maximum downloads.
In the Samples section simply upload the file you wish to present as a sample for your customers.
After all the configurations are done, click Save.
How to create Downloadable Product in Magento 2
The difference between virtual and downloadable products in Magento 2 is quite obvious – virtual include the completely intangible products like services that can not be obtained in any form. Downloadable, on the other hand, exist in the electronic form, like an e-book or a piece of music. Therefore, it’s wiser to apply Magento 2 product types correspondingly.
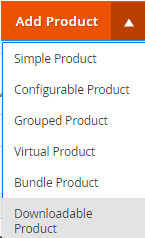
First, select Downloadable product in Add product menu.
Fill in the general settings and the additional ones.
You will also need to fill in the Downloadable information tab, like in Visual Products menu.
After all configurations are done, click Save.
This is all about the Magento 2 admin product types and how to create and customize them. I hope the information was useful, and if you have any questions – feel free to leave them in the comments down below.

