Today we will talk about Magento 2 and answer the following Frontend certification questions:
Which design areas exist?
What is the difference between them, and what do design areas have in common?
What are design areas used for?
How can design areas be utilized for custom themes or customizations?
In terms of frontend, the Magento 2 areas are components that determine which modules and resources will be shown in particular area.
There are 3 types of areas in Magento 2:
- Magento Admin (adminhtml) is used in the admin panel for displaying modules and resources that are used in the admin panel. The files are usually stored in /app/design/adminhtml, and the module is stored in <module_dir>/view/adminhtml.
- Basic (base) is used for the basic files in modules, <module_dir>/view/base.
- Storefront (frontend) is used for the external part of your store, particularly for displaying modules and resources that are used directly in the external part of the store and are visible to the user.
If we address the differences between these areas, we can identify some files from Basic (base) that can be used in adminhtml and frontend. However, the adminhtml files cannot be used in the frontend. What is more, UI components can be used in adminhml, but not in the frontend. One thing that they have in common is their structure. I have already addressed the folder structure in Magento 2 on our blog.
Areas most commonly used in adminhtml and frontend:
- in adminhtml – for creating admin panel themes;
- in frontend – for designing the exterior of your store using different modules, as well as for store customization.
Design areas can be used for:
- creating design for the admin panel;
- creating design for Storefront;
- separating letter templates from the admin panel and Storefront.
In addition to that, let’s look into how to create a theme for admin panel.
To begin with, create a folder for the theme itself. I use the command line, but you can use your file manager for that purpose. Enter the following code in the command line:
|
1 |
mkdir -p ./app/design/adminhtml/BelVG/theme |
Now we go to our folder and create the files with the following content:
registration.php, theme.xml.
registration.php:
|
1 2 3 4 5 6 |
<?php \Magento\Framework\Component\ComponentRegistrar::register( \Magento\Framework\Component\ComponentRegistrar::THEME, 'adminhtml/BelVG/theme', __DIR__ ); |
theme.xml:
|
1 2 3 4 |
<theme xmlns:xsi="http://www.w3.org/2001/XMLSchema-instance" xsi:noNamespaceSchemaLocation="urn:magento:framework:Config/etc/theme.xsd"> <title>BelVG Backend</title> <parent>Magento/backend</parent> </theme> |
Let’s also create a module for the application of our theme. Write the following in the command line (make sure you do it in the root directory of Magento 2):
|
1 |
mkdir -p ./app/code/BelVG/Theme |
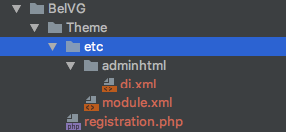
Create the following structure:
Now let’s consider each file individually:
- registration.php (register our module):
|
1 2 3 4 5 6 |
<?php \Magento\Framework\Component\ComponentRegistrar::register( \Magento\Framework\Component\ComponentRegistrar::MODULE, 'BelVG_Theme', __DIR__ ); |
- module.xml (specify what we inherit our module from):
|
1 2 3 4 5 6 7 8 |
<?xml version="1.0"?> <config xmlns:xsi="http://www.w3.org/2001/XMLSchema-instance" xsi:noNamespaceSchemaLocation="urn:magento:framework:Module/etc/module.xsd"> <module name="BelVG_Theme" setup_version="1.0"> <sequence> <module name="Magento_Theme"/> </sequence> </module> </config> |
- etc/di.xml (now we apply our theme):
|
1 2 3 4 5 6 7 8 9 |
<config xmlns:xsi="http://www.w3.org/2001/XMLSchema-instance" xsi:noNamespaceSchemaLocation="urn:magento:framework:ObjectManager/etc/config.xsd"> <type name="Magento\Theme\Model\View\Design"> <arguments> <argument name="themes" xsi:type="array"> <item name="adminhtml" xsi:type="string">BelVG/theme</item> </argument> </arguments> </type> </config> |
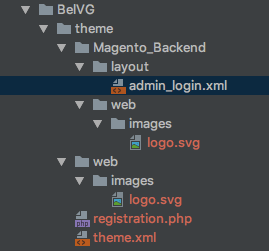
Now we can customize our theme a little, particularly change the logo. Create the following structure:
As you can see from the structure, the logo is located in the web/logo.svg folder. You can read more on folder structure in Magento 2 (link) in my previous article. For now we are interested in the admin_login.xml file.
Let’s redefine the logo using <referenceBlock> (take a look at the article called Layout XML Directives and Their Arguments in Magento 2 to learn more about directives):
|
1 2 3 4 5 |
<referenceBlock name="logo"> <arguments> <argument name="logo_image_src" xsi:type="string">images/logo.svg</argument> </arguments> </referenceBlock> |
It is clear from the code where we indicated the logo:
|
1 2 |
<argument name="logo_image_src" xsi:type="string">images/logo.svg</argument> |
This is what the whole admin_login.xml file will look like:
|
1 2 3 4 5 6 7 8 9 10 |
<page xmlns:xsi="http://www.w3.org/2001/XMLSchema-instance" layout="admin-login" xsi:noNamespaceSchemaLocation="urn:magento:framework:View/Layout/etc/page_configuration.xsd"> <update handle="styles" /> <body> <referenceBlock name="logo"> <arguments> <argument name="logo_image_src" xsi:type="string">images/logo.svg</argument> </arguments> </referenceBlock> </body> </page> |
After you performed everything described above, you need to update the configuration. To do this, write the following code in the command line:
|
1 |
php bin/magento setup:upgrade |
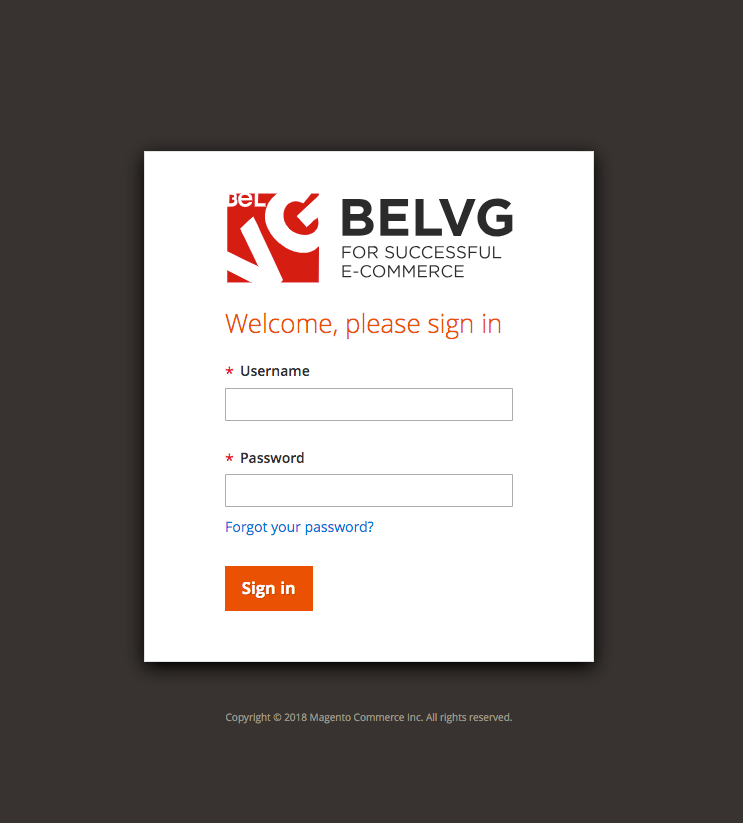
After the upgrade, you will see your logo displayed in the admin panel:
I hope this blog post answered all of your questions for this topic. Feel free to leave us a comment down below!






Yanuar, thanks for the question. In most cases, a standard theme is used for the admin panel. Therefore, without creating a new theme / module, this cannot be done.
Nice article,
I wonder is there a way to change / override a layout without creating a module or themes in backend/adminhtml ?
Hi! Glad you liked my article!
I personally believe you don’t need to run this command, because there’s autocompilation in Magento 2. But if you want to make sure that everything was compiled and make admin panel and frontend work faster, you can run this command.
Hello,
Thanks for creating this awesome tutorial.
Well, I think that there is one more command that needs to be run: php bin/magento setup:static-content:deploy -f