What are Layout files in Magento?
As you might already know, the View in Magento (stands for the View from MVC pattern) is more difficult than in most PHP applications and it contains not only Templates – html/css/js code with PHP or any other template engine (such as Smarty, Twig etc.), but also Blocks which are basically PHP objects. In classical MVC a controller sends commands to its associated view to change the view’s presentation of the model. Instead, the View component, Block calls Models to get the necessary information to provide it to the Template file. But how Magento defines which Blocks objects should be instantiated in the specific page ($this)? All this is defined in Layouts.
By using Magento layout files you can quickly enable, disable or move almost all of Magento’s content and functional blocks. The Layout files are XML files that defines which Blocks are included on a page, and which Block(s) should start the rendering process. It can be very frustrating and confusing at first, but when you get used to it, you can handle your themes in a very upgrade-compatible way, because Layout is the tool which helps to assign content blocks to each structural block you create easily.
Here we need to define what these things are – content and structural blocks.
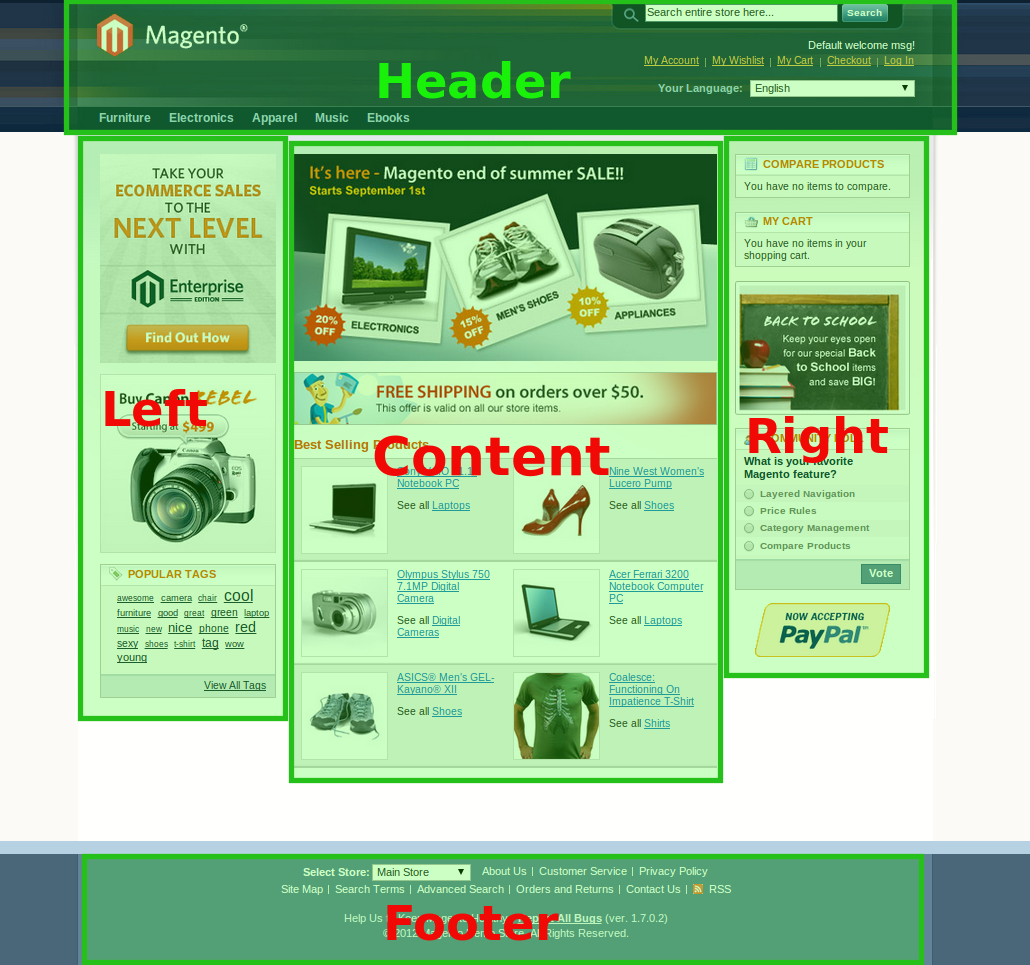
Let’s take a look at Home page of an official Magento Demo Store.

The structural blocks are the parent blocks of content blocks and they are used to specify the position of its content blocks within the store page. So on our homepage they are header area, left column area, right column, content area, footer area which serve to create the visual structure for a store page. Structural blocks are handled by app/code/core/Mage/Page module and are defined in app/design/frontend/base/default/layout/page.xml file and the default page templates defined in the app/design/frontend/base/default/template/page/ directory. You should check these files and folders.

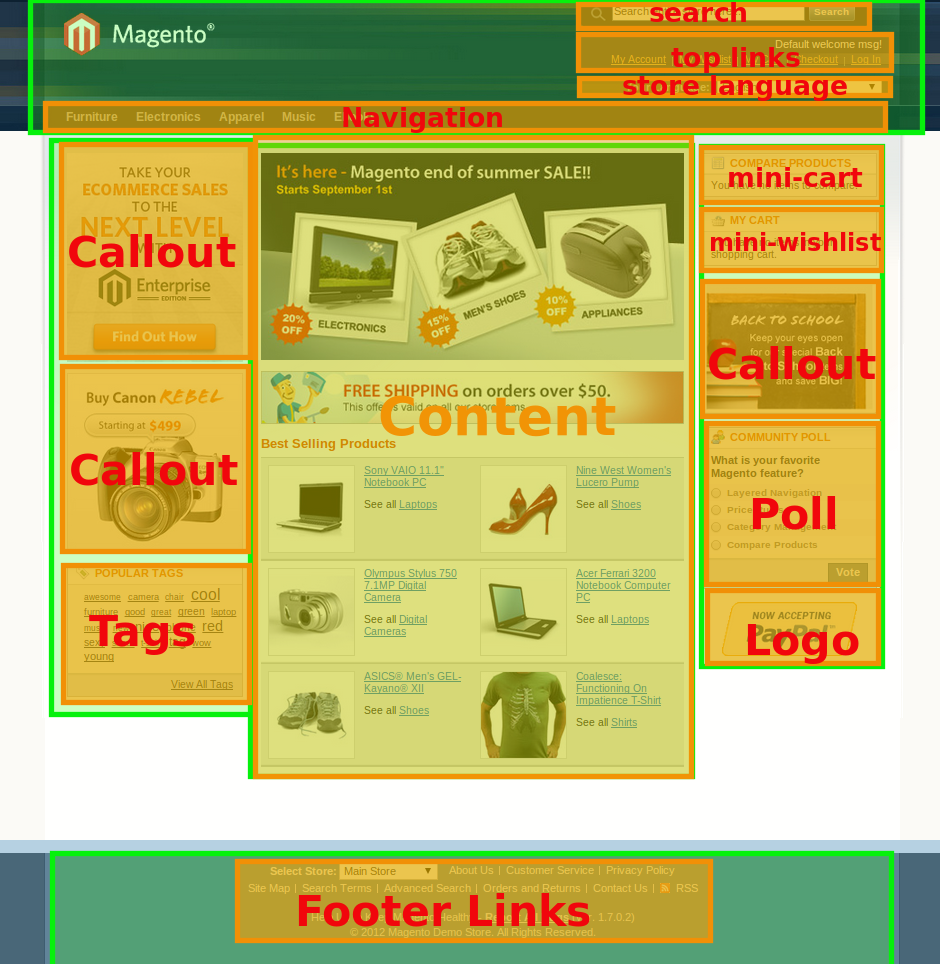
The content blocks are set of blocks that make up a structural block. They define the content of your store. They are a display of each functional element of a page (such as search field, store switcher, product list, etc.), and usually each content block is a separate template file with help of which Magento generates the page.

Layout directory
The base layout files can be found in the directory – app/design/frontend/base/default/layout
Layout files for your custom theme should be stored in app/design/frontend/<your_package>/<your_theme>/layout
The Magento Layout system is built to allow you easily add and hide extensions’ content with minimal possible effect on other modules and pages. Each Magento module has its own layout file, for example app/design/frontend/base/default/layout/customer.xml is a file of Mage_Customer module.
Layout handles
Let’s open app/design/frontend/base/default/layout/catalog.xml
The root element of all theme XML files is <layout>. Its child elements called layout handles.
Each handle is an element by which Magento defines updates to your store’s page layout. Then there is a default layout handle can be found below
Default handle is presented in almost all layout files that come with Magento base theme. Everything from default handle is loaded on almost all the pages of the store before loading page-specific layout.
There are also other update handles than <default>, like <catalog_category_default> from the code above or <catalog_product_view> from the same file, these update handles will assign the updates nested inside to the according page specified by the handle itself. For example, <catalog_product_view> assigns layout updates for the Product View page. The logic behind the handles name is usually as follows:
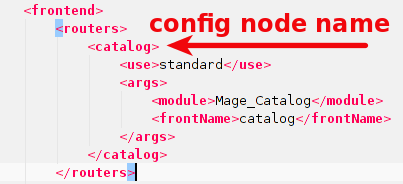
[router_config_node_name]_[controller_name]_[action_name]

Elements of layout handles
There are a lot of elements that can be found inside handles:
label is used as a description of the handle, for example
reference is used to make reference to another block by it’s name. The updates
inside will apply to the with the same name. For example means that it will be applied to the block with the name “left” which can be found in app/design/frontend/base/default/layout/page.xml
block is used to determine a block which is responsible for the behavior and visual representation of each building block. Both structural blocks and content blocks can be defined by element. More information about blocks will be presented in our next blog post.
action is used to control store-front functionalities, i.e. method of the Blocks that should be executed. The method attribute defines the method name in the block instance and all child elements of the action element are treated as parameters to the method. This element can be placed inside reference or block elements.
For example, from the code above we can see the following line:
It basically tells Magento system to excecute the addPagerLimit method from class Mage_Catalog_Block_Product_List_Toolbar
With $mode = list; $value = all; $label = All;
update is used to for merging existing layout handles to your current layout. Check this SO thread for more explanation.
remove is used to remove a block from the page using name. For example if you want to delete Poll from you need to use The block to be removed is specified with the name attribute.


how to call below code template in controller
defaultcheckout/cart_item_renderercheckout/cart/minicart/default.phtml
Thank you
[router_config_node_name]_[controller_name]_[action_name]
you did mention it slightly can you give us a path file name with your example?I do know controller file but what do you mean by action? I thought it is View.php file but it seems I’m wrong
Awesome description Really enjoy the read and Great knowledge.
Thanks