
In this article I will explain you how to set up multiple stores using the same back-end and codebase in Magento 2.0.
How to add stores in Magento 2.0?
– Add root Category
In admin panel, go to Products -> Categories
Press “Add root category”
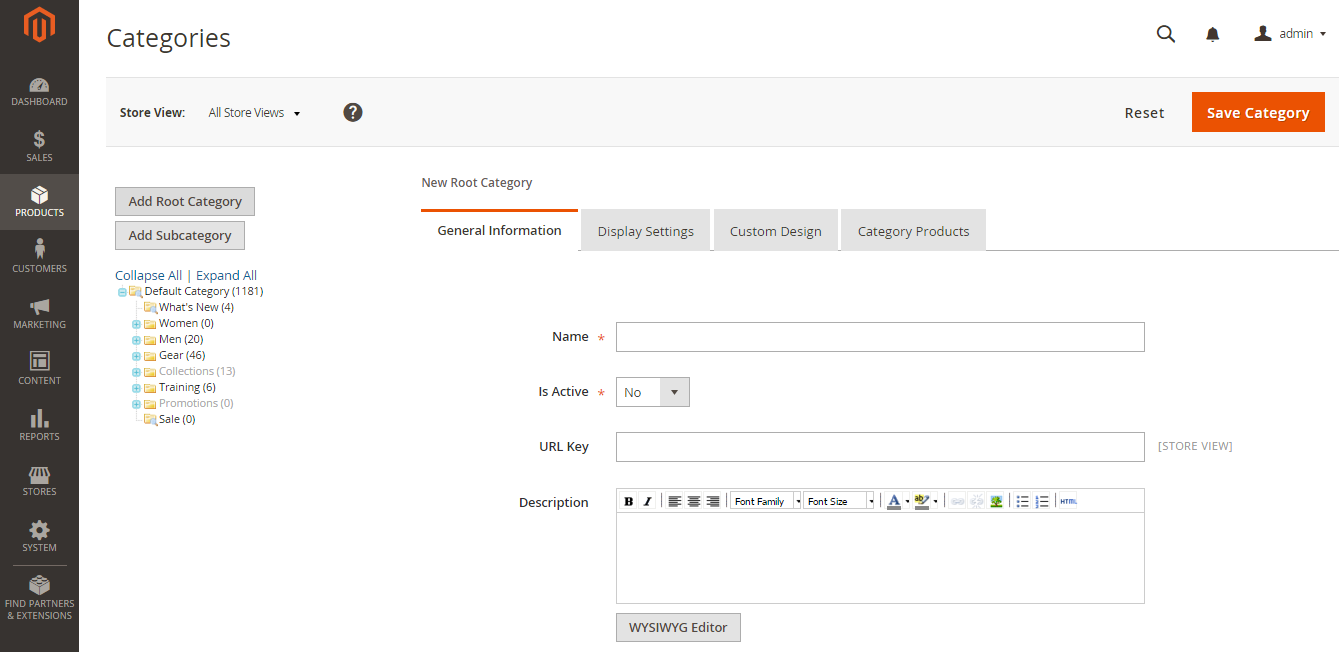
Name: store1.com
Switch “Is Active” to “Yes”.
Then move to second tab and switch “Is Anchor” to “Yes”.
Now go to Stores -> All Stores
– Create Web Site
Websites. In a single Magento installation you can have multiple websites. For example you sell hockey equipment and your friend sells dental supply. Probably, you will not sell them on the same website. You can create 2 separate websites.
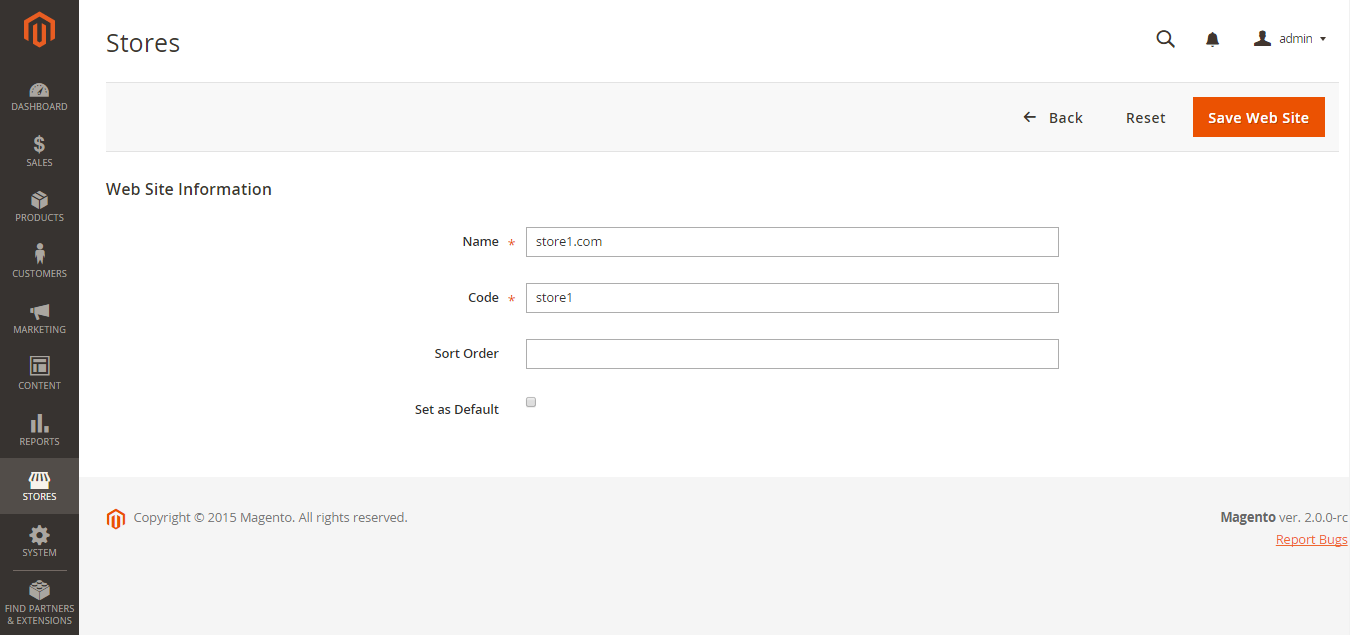
Now press “Create Website” button.
For the Name we enter: store1.com.
For the code we enter store1.
– Create Store
Stores. On the same website, you can have 2 separate stores. For example, one for Meat and another for Vegetables. You can set up 2 root categories. But every meat product that you sell should be related to your Meat store and vegetables should be related to Vegetables store.
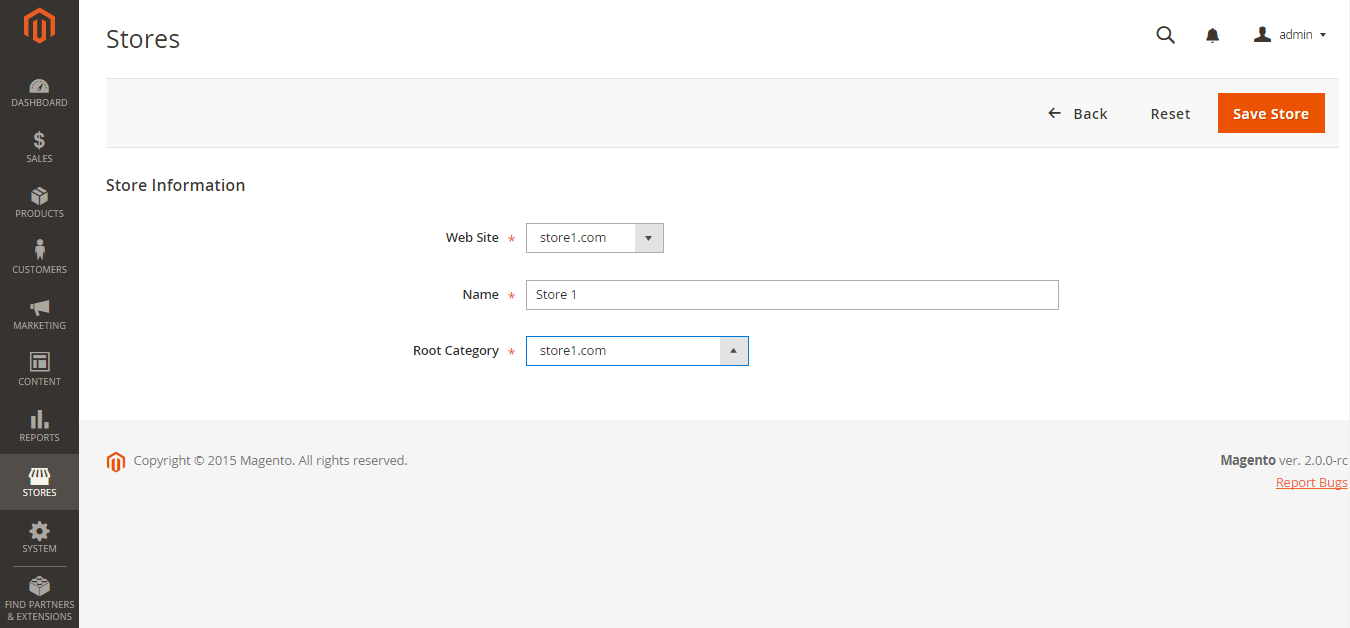
Now press “Create Store”.
Select “store1.com” from the dropdown list.
For the name enter “Store 1”.
And select Root Category from the dropdown list.
– Create Store View
Store Views. You can create separate Store view for different languages. For example, in Belarus we speak Belarusian and Russian and usually have 2 different store views for each store: one for Belarusian and one for Russian language.
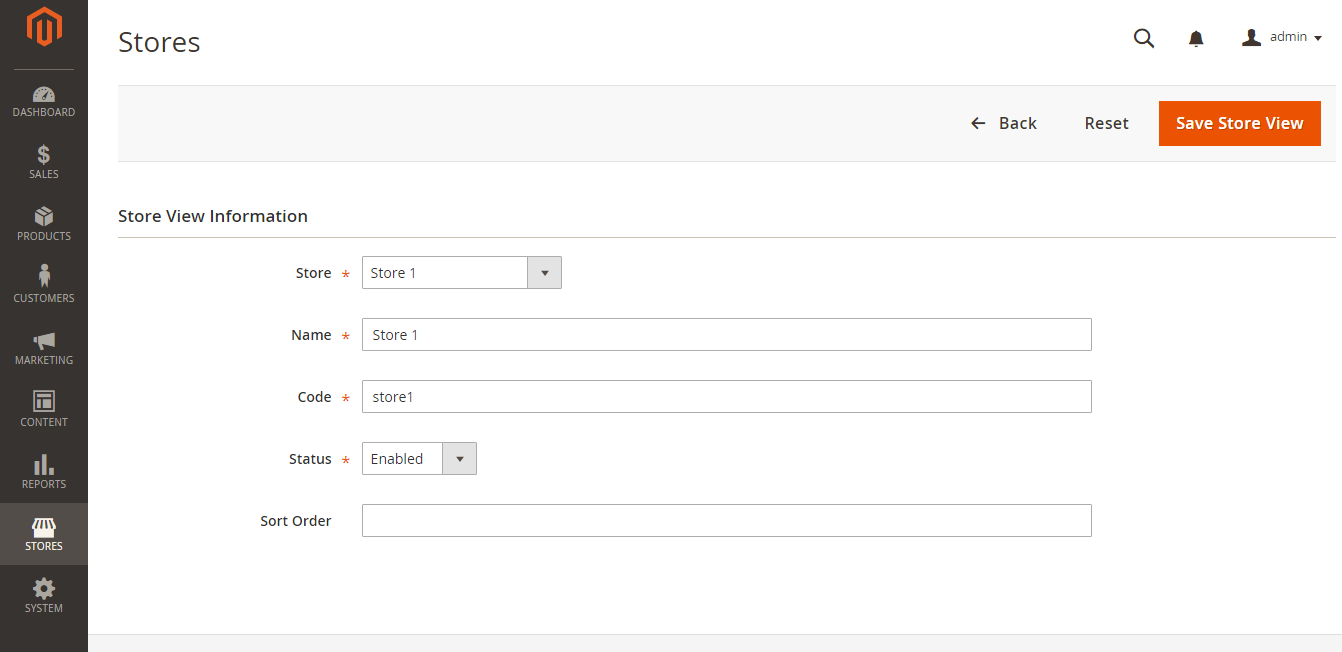
Select Store 1 from the dropdown list.
Enter View’s name.
Enter the code. It should be “store1”.
And Enable it.
If you want a different configuration for your new store, you can enter Stores -> Configuration as usual. And on the top-left select “Store 1”.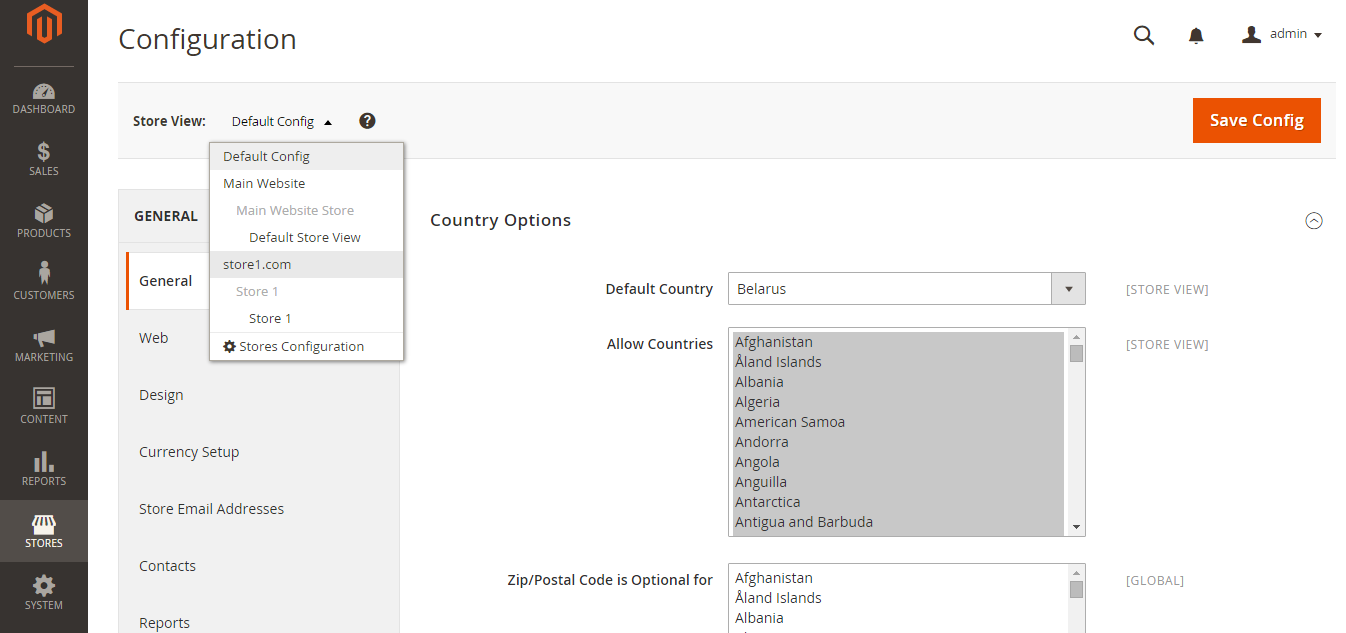
Now you need to be careful not to mix up your stores when you configure them.


