
Each step in Order Workflow is associated with an Order Status.
In this article, I will explain to you how to configure existing Order Statuses in Magento 2.0 and how to create a new one.
Default Order Status
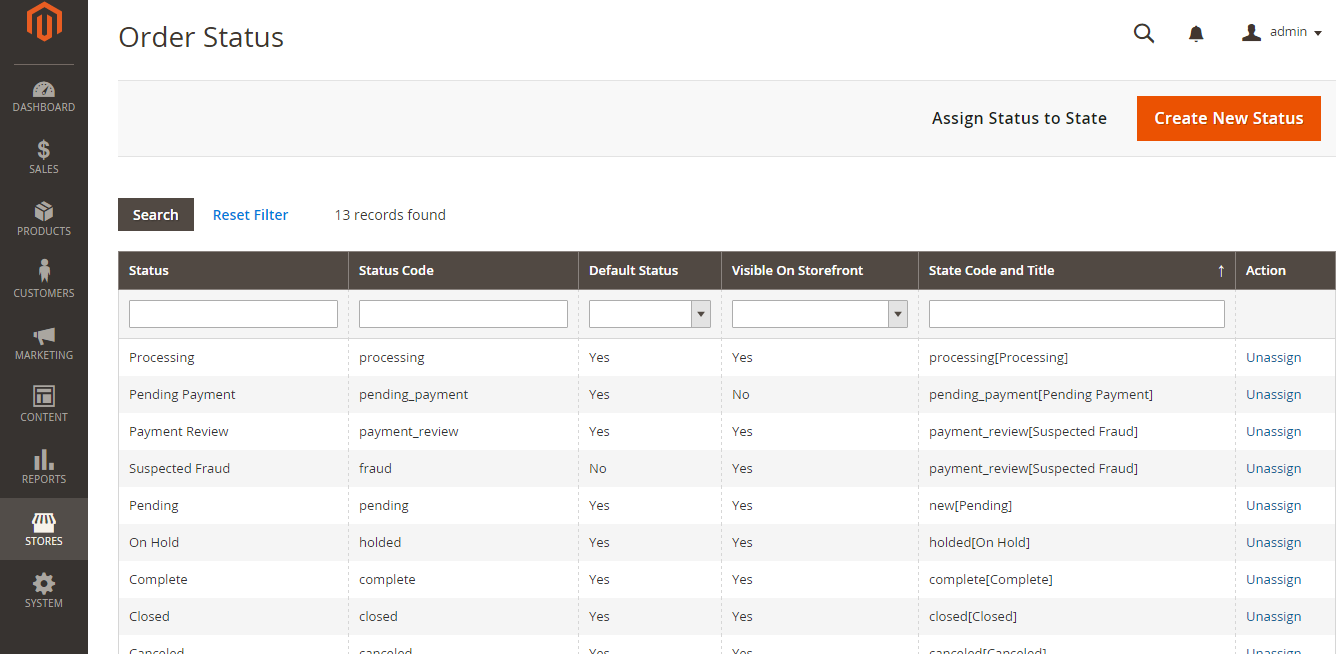
First of all, let’s check the list of Order Statuses available in Magento 2.0 by Default.
Go to Stores –> Order Status
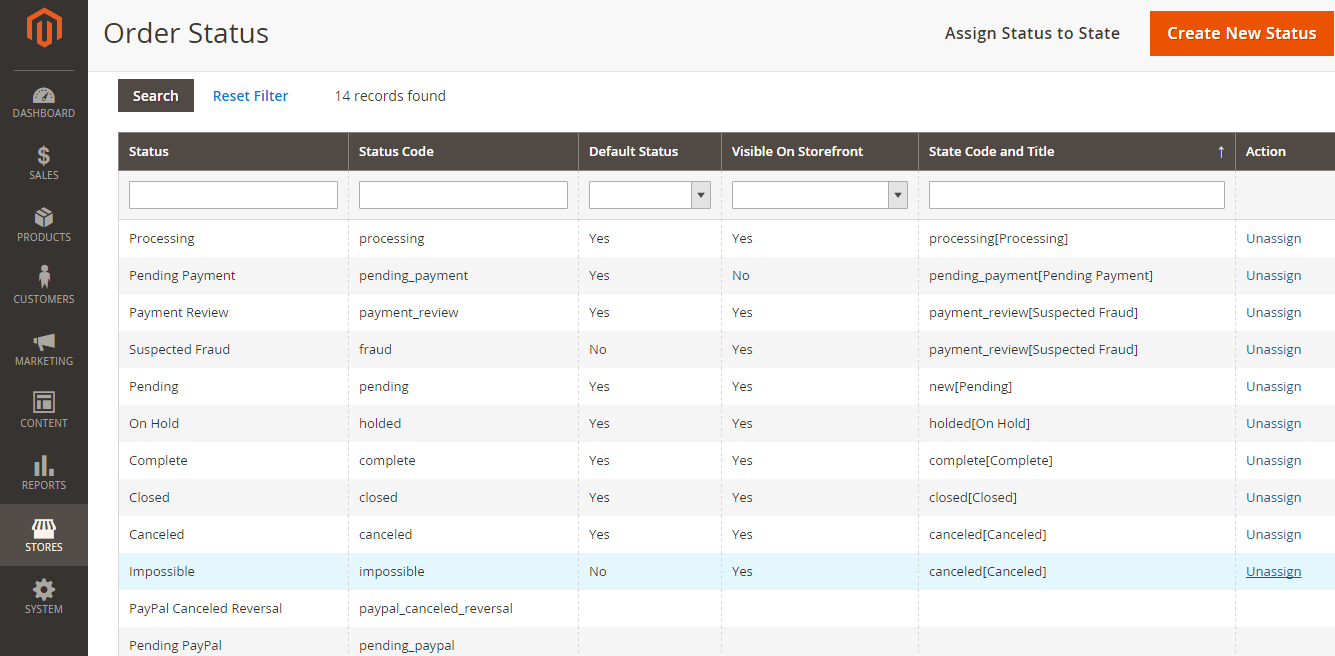
Then in Default Status section select “Yes” and press “Reset Filter”. And you will see this list. These are Default Order Statuses.
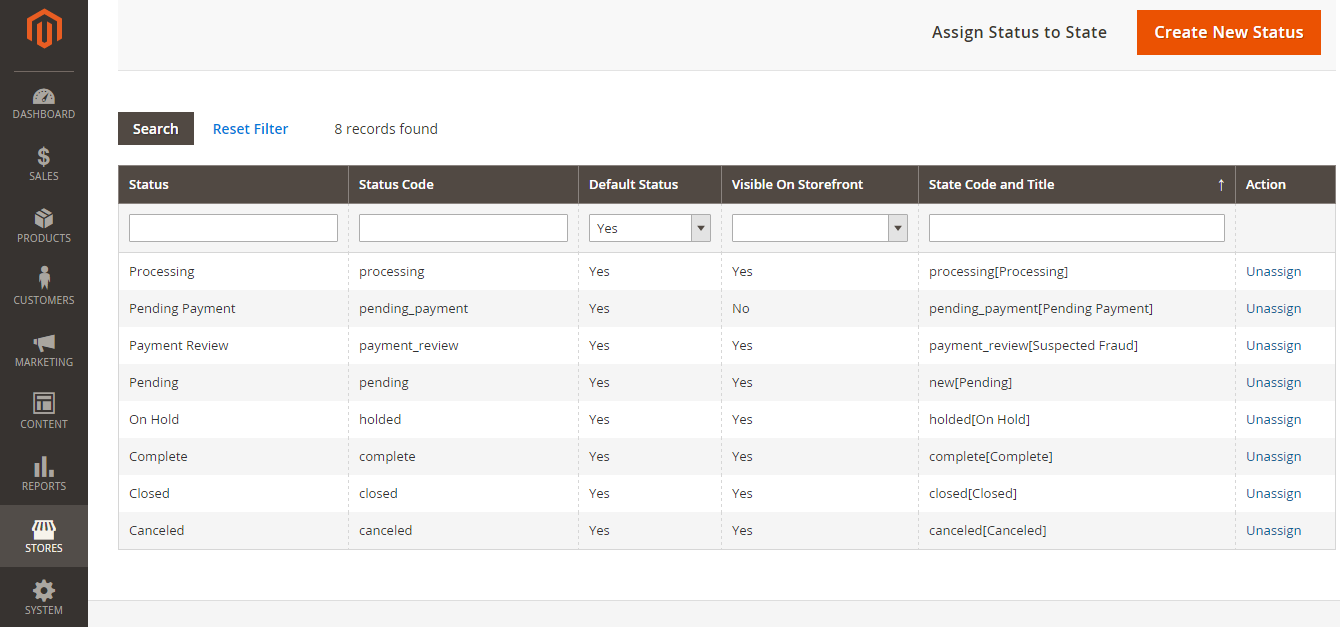
 Default Order Statuses in Magento 2
You can see their Names, Codes, whether they are visible on StoreFront, State Codes assigned to them.
This list doesn’t differ much from the one that you could have seen in previous versions of Magento.
You might be wondering: how to modify them or create new ones? Especially when these Order Statuses cannot cover the needs of your store. Go to the next step of the post.
How to create a new order status
Stores –> Order Status
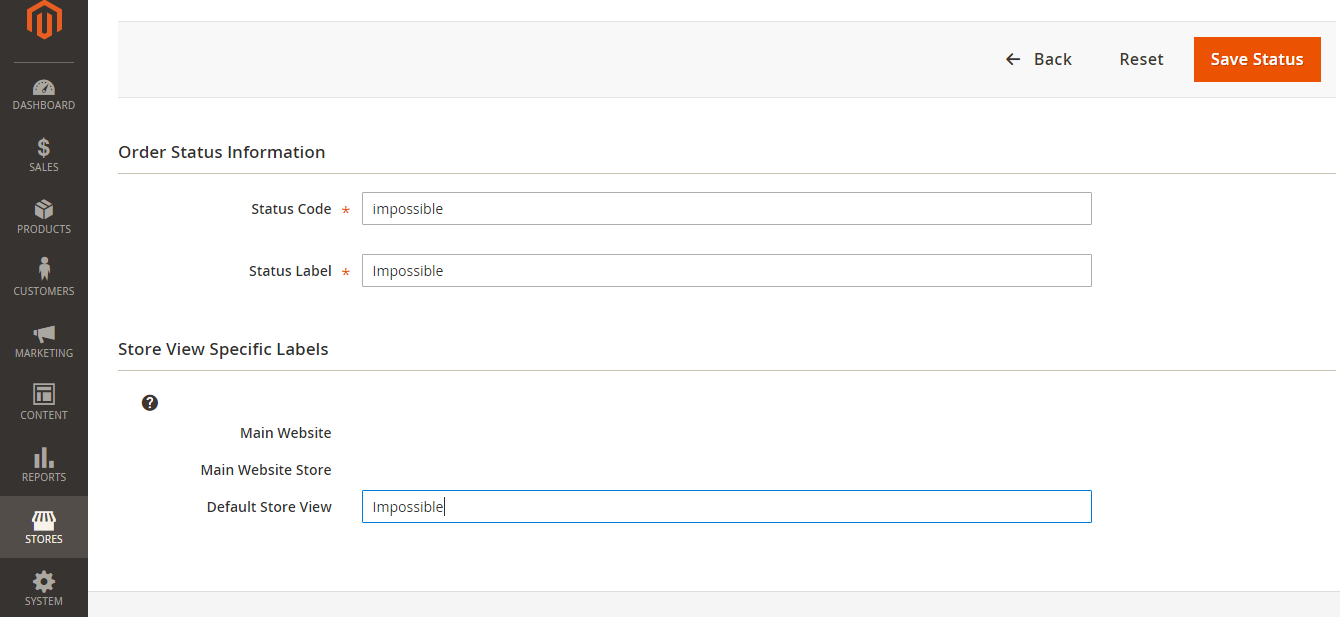
Press “Create New Status”.
Here you enter:
- Status Code (this is for internal use only, without spaces and special symbols);
- Status Label (the name of the status in the Admin panel and Store);
- Default Store view (default name of the status).
How to assign an Order Status to a State
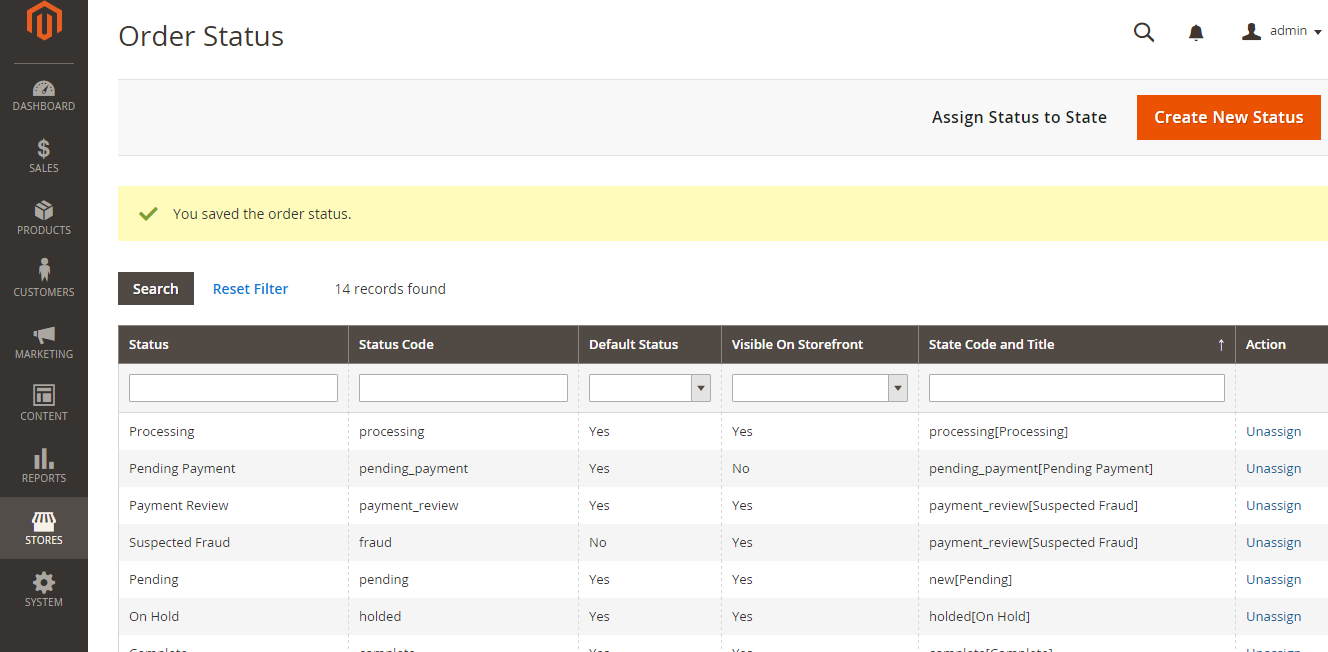
You’ve successfully created a custom Status. Now you need to assign it to a state.
! Note that you can create a custom Order Status, but it’s impossible to change Order States.
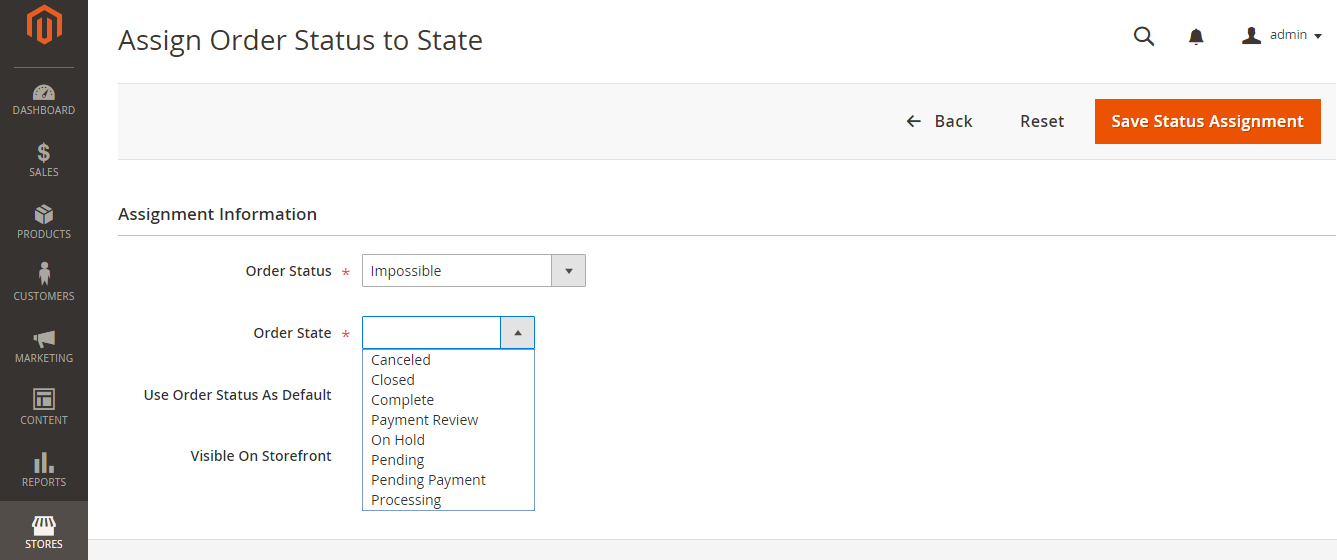
Press the “Assign Status to State” button.
Select Order Status from the first dropdown list.
In the second dropdown list you need to select a State to which you want to assign your Status.
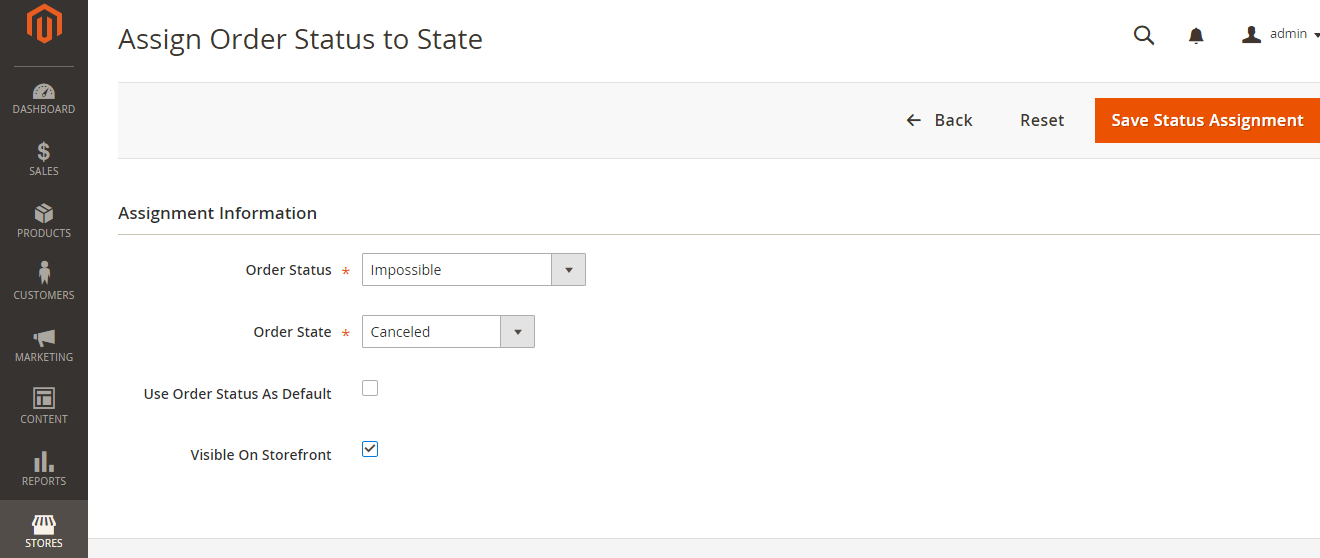
Here I select “Canceled”.
I make my Status visible on Storefront.
I press the “Save Status Assignment” button.
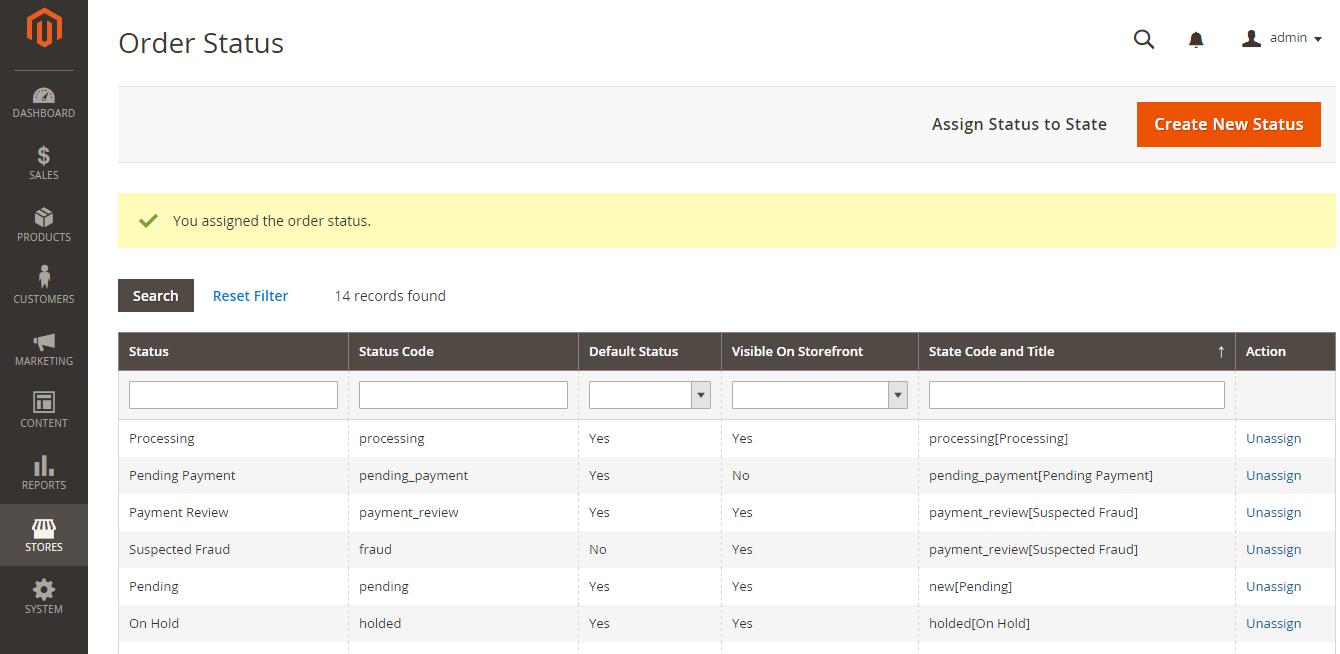
We’ve assigned a Status to a State.
If you don’t like the assignment you’ve just made, you can unassign a status from a state. To do so, you need to press a corresponding button on the right.
That’s it. Enjoy your perfectly working store!




Hi, Ritu!
Yes, for each store it’s possible to save its own label.
Nice article.
However, I have one question, can you please confirm, that for multiple stores, you can save different order status labels?
@Tejas, please check if your store is receiving PayPal IPN response
Hi Andrey,
just read your blog. it give nice guide on order status.
i have one issue.
i have created a virtual product and payment method is paypal. when i place the order it shows processing instead complete.
in magento 1 order status converted to complete if product is virtual.
you have any idea on this?
Hi Max,
Thanks for reading my articles. I really appreciate that.
I am sure that the admins have more detailed information about order processing.
If payment gateway integrators keep up with the tradition, default messages will be used only as flags of system notification and custom statuses will describe the actual situation.
Hi Andrey,
Thank you for sharing Order Status for Merchant.
What is your thought about adding information for existing order statuses? So merchants can better understand what should they expect when status says: Pending Payment.
As far as I remember there is no way to remove existing status since these statuses are hard-codes and used in Magento 2 code implementation.
Thank you