In this article, I will explore the process of Magento installation. It will cover such preparatory aspects as how to choose a Magento version and where to download it, as well as what hardware and software server requirements should be met in order for Magento to be installed. Moreover, I will go over installation options for Magento. After we look into these matters, I will provide you a step-by-step guide on how to install Magento.
Table of contents:
How to download Magento
Check your server
Configure local server
Install Magento 2
Install SSL
Install Sample Data
How to download Magento
First, let us look into what Magento is and what versions does it have. Magento is an open source ecommerce platform and CMS with advanced product, order and inventory management capabilities. Due to its architecture, Magento is very configurable and allows a retailer to customize this solution to suit their business needs and personal preferences. All these features make Magento an excellent solution for modern businesses who want a reliable and cutting-edge ecommerce solution.
Throughout its history, Magento has offered various versions of its product, oriented at different customers. The recent rebranding happened in 2017, and since that Magento offers two distinct versions – Magento Open Source and Magento Commerce.
Magento Open Source is a free version with a decent range of online retail functionalities, while Magento Commerce is a paid solution that offers more advanced capabilities to business owners. I will not dwell on peculiarities and advantages of each version – you can find it all in our article What is Magento?, and this choice of the Magento version is up for you to make.
You can download Magento Open Source at the official Magento Tech Resources page. Here, you can select the version of the platform and the format of the archive to download – .zip, .tar.gz or .tar.bz2. Moreover, there is the same Magento version with sample data available on this page, as well as Magento Open Source Patches for 2.x versions.
Downloading Magento Commerce is more complicated, since it is a paid version and naturally is not publicly available. To get Magento Commerce, go to http://magento.com/ and log in to My Account (register, if you do not have one). At the menu bar on the left, find the Downloads section and select from Magento Enterprise Edition 2.X > Full Release or Magento Enterprise Edition 2.X > Full Release + Sample Data.
Now, as we have downloaded the Magento version of your choice, it is high time to begin the installation.
Step #1: Check your server
To install Magento, you should have a server that corresponds with the following official requirements.
- Operating systems -Linux x86-64. Magento IS NOT supported on Windows OS or Mac OS.
- Memory requirement – 2GB of RAM.
- Composer – no specific requirements, it should be a recent stable version.
- Web servers – Apache 2.2 or 2.4, or nginx 1.x.
- Database – MySQL 5.6, 5.7. Apart from these, Magento is compatible with binary-compatible MySQL technologies like NDB Cluster 7.4.*, MariaDB 10.0, 10.1, 10.2, Percona 5.7, and so on.
- PHP – ~7.1.3 or ~7.2.0.
- PHP extensions: ext-bcmath, ext-ctype, ext-curl, ext-dom, ext-gd, ext-hash, ext-iconv, ext-intl, ext-mbstring, ext-openssl, ext-pdo_mysql, ext-simplexml, ext-soap, ext-spl, ext-xsl, ext-zip, lib-libxml.
- SSL – a valid security certificate for HTTPS; self-signed SSL certificate is not allowed.
- Mail server – Mail Transfer Agent (MTA) or an SMTP server.
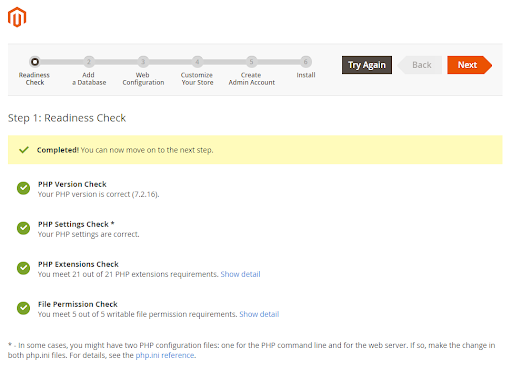
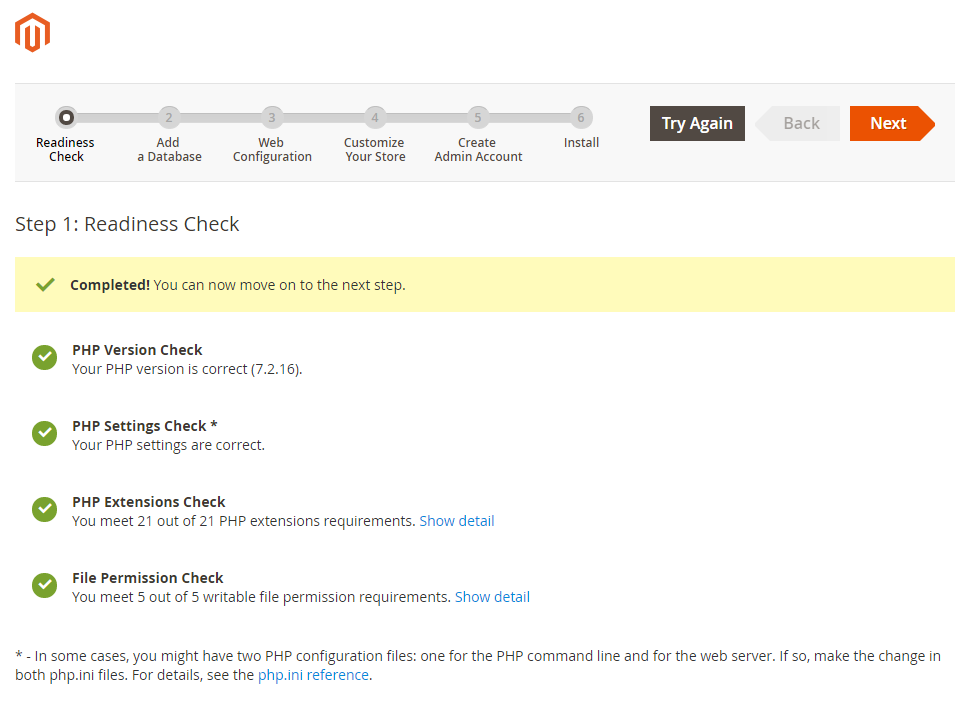
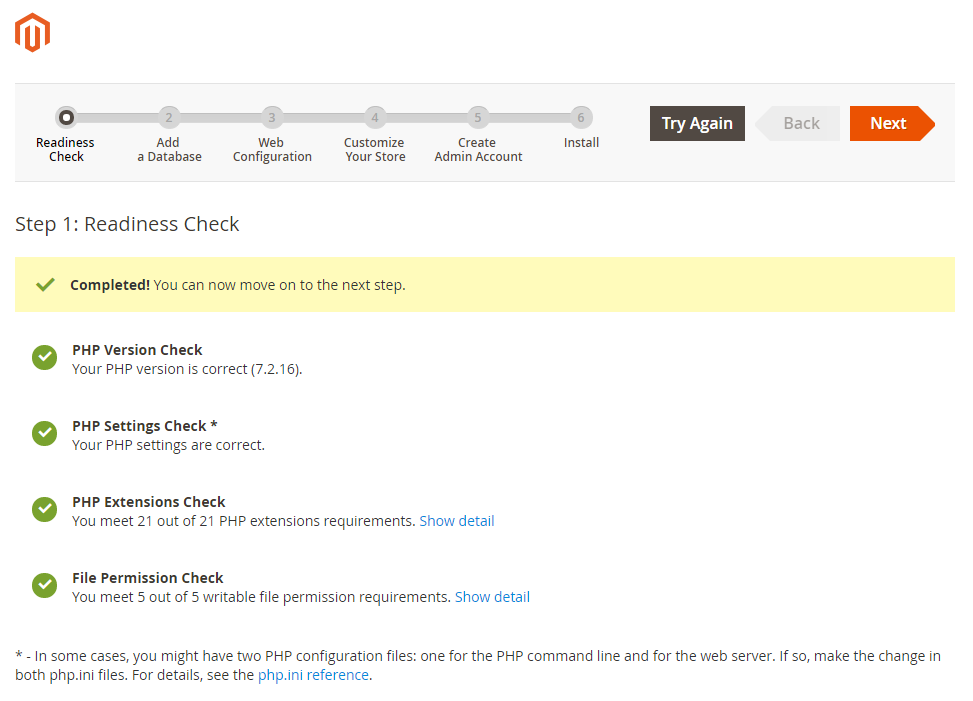
If you are not able to detect what is your server missing, you can begin installing Magento – it will notify you of what is missing.
Step #2: Configure local server
There is a number of virtual servers for Windows and Linux. I will go over the configuration for two of them for the first operational system – XAMPP and WampServer, and two – for the second. Moreover, I will go over another alternative – configuration via Docker.
How to configure XAMPP
Step #1: Download the distribution package at https://www.apachefriends.org/index.html
Important! The XAMPP version you download should contain the supported PHP version. I would strongly recommend downloading the archive here https://sourceforge.net/projects/xampp/files/XAMPP%20Windows/. Find PHP compatible with the Magento version you are installing (for example, Magento 2.3.1 is compatible with PHP 7.2.11).
Step #2: Install the server distribution package.
You can install several XAMPP servers to different folders with different PHP versions.
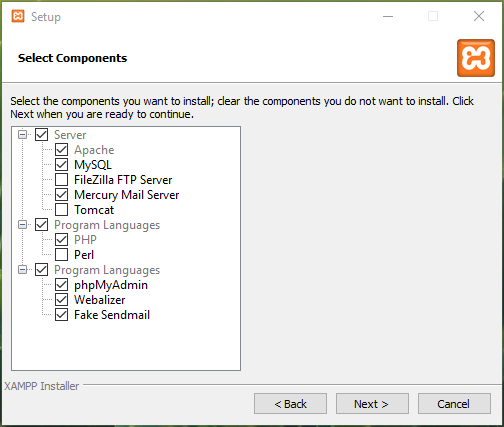
You will be offered a choice of components; tick the ones you want to be installed.
The combination Apache + MariaDB + PHP is the basic one and it is necessary to be installed. Let us explore other additional options offered to us:
Program Languages
- phpMyAdmin – is a software tool for handling the administration of MySQL over the Web. It supports numerous operations on MySQL and MariaDB.
- The Webalizer – is an analysis program for web server log files that produces detailed and configurable usage reports in HTML format.
- Fake Sendmail – a Windows console application that simplifies running Unix code.
Server
- Tomcat – is a Java Servlet Engine and a very powerful J2EE Server. It can run JSP dynamic web pages.
- Mercury Mail Server – a mail processing environment.
- FileZilla Server – is a free FTP Manager that provides a secure connection to the server.
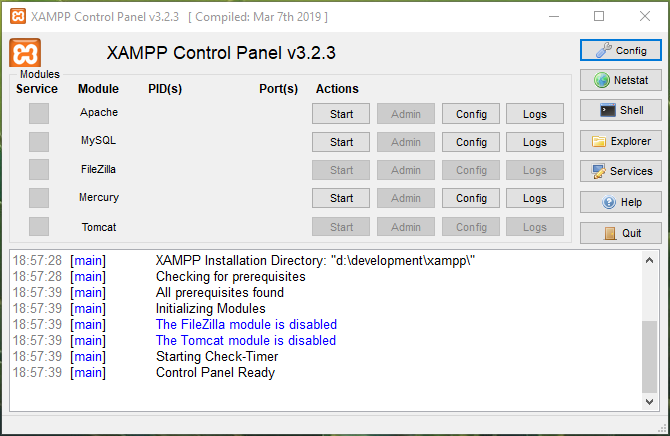
Step#4: Select the server in the following window.
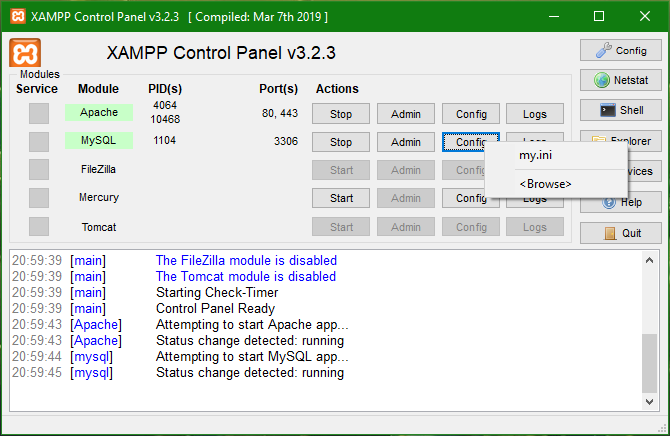
If you start Apache сервер, you will get the following URL http://localhost/. It is associated with xampp/htdocs folder at your PC. In case you start MySQL server, you will get a connection to databases via http://localhost/phpmyadmin/.
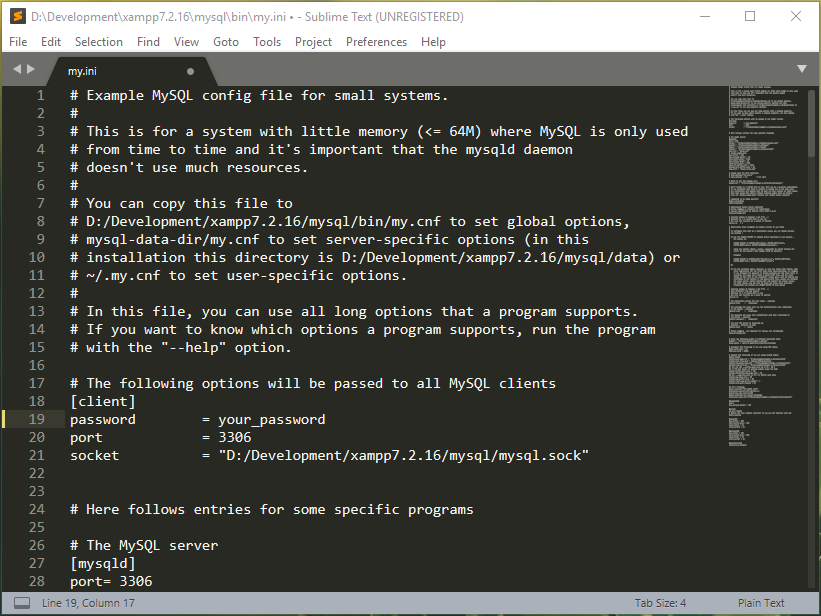
In MySQL configuration you can set a password for a root user, who will have access for the database.
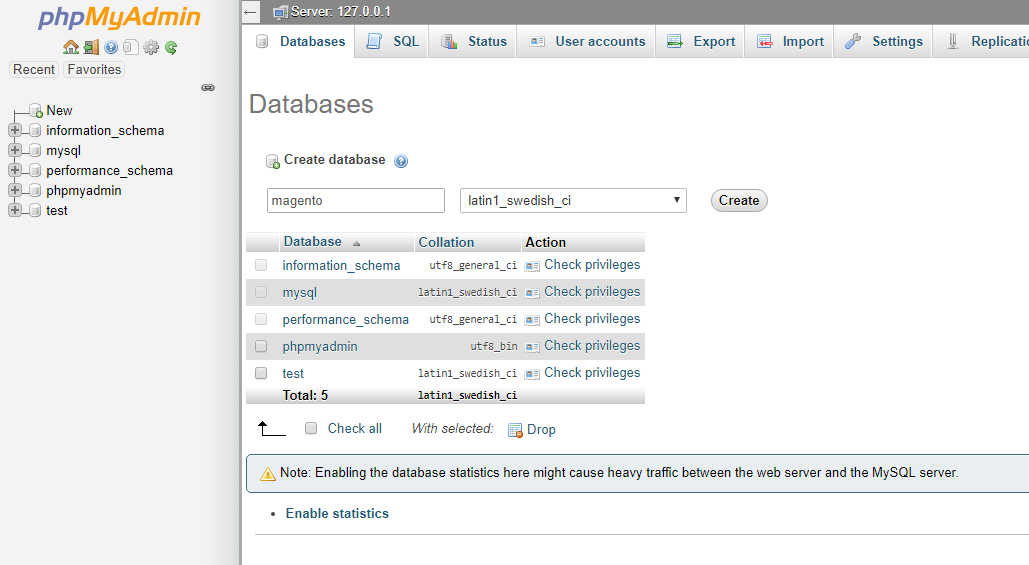
Step #5: Create a database for your Magento store in phpMyAdmin.
Step #6: Download Magento archive and unpack it to the xampp/htdocs folder.
Step #7: Run the http://localhost/.
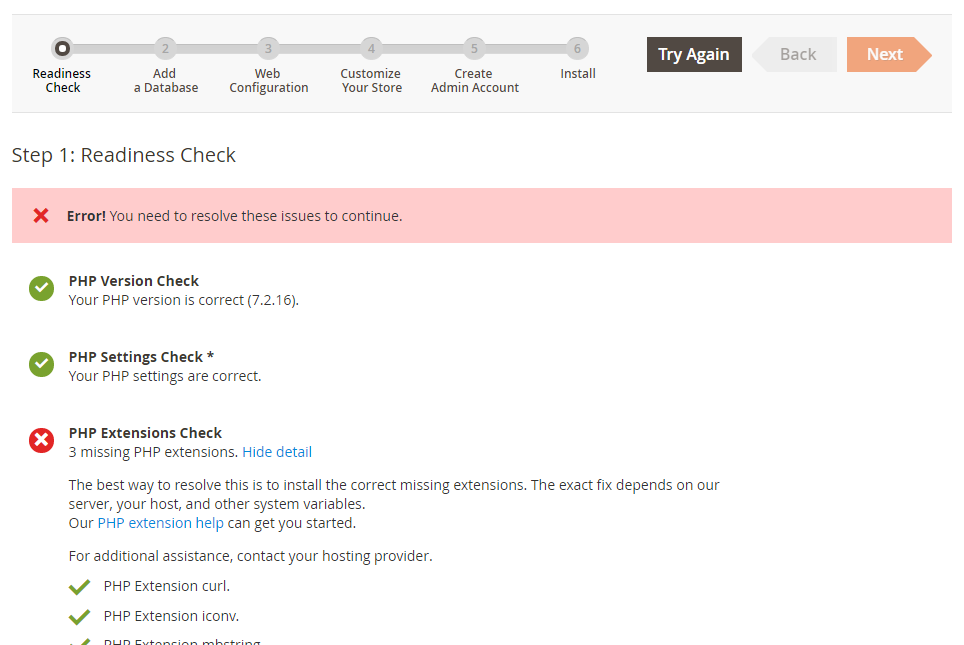
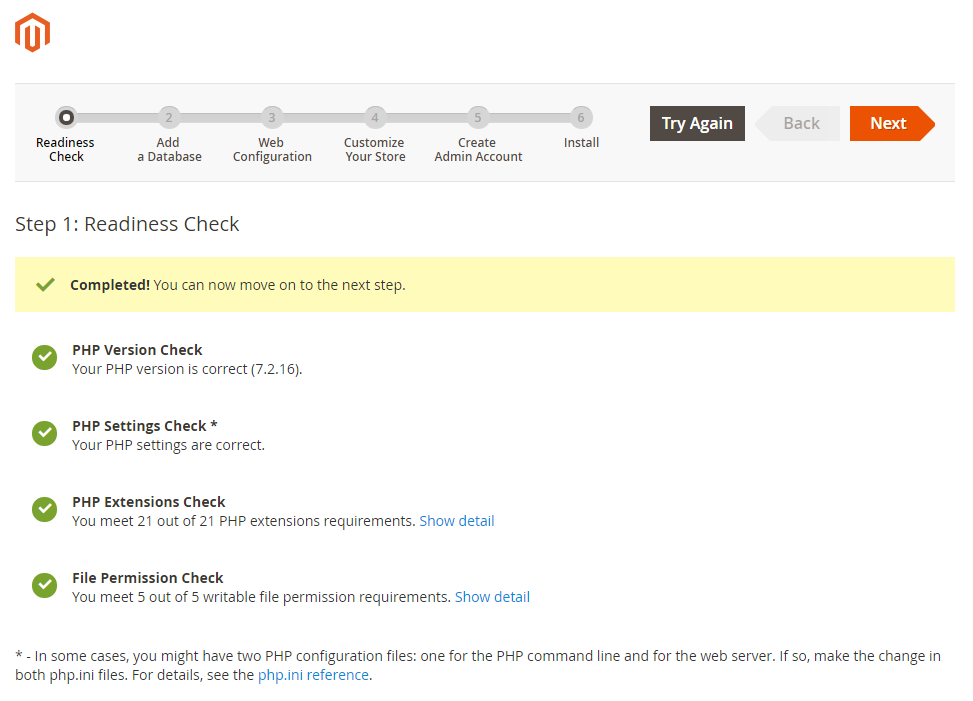
The latest Magento versions archives (Full Release) contain all the necessary libraries, so you can run the http://localhost/ at once and Magento will notify you in case there are some issues.
In my case, I am missing three php modules.
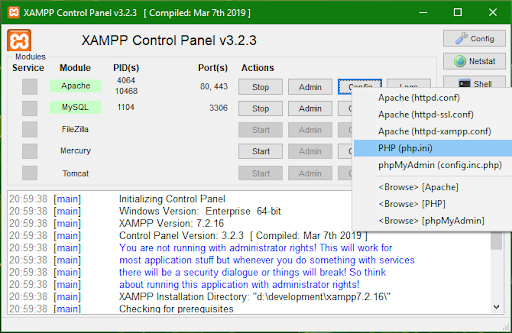
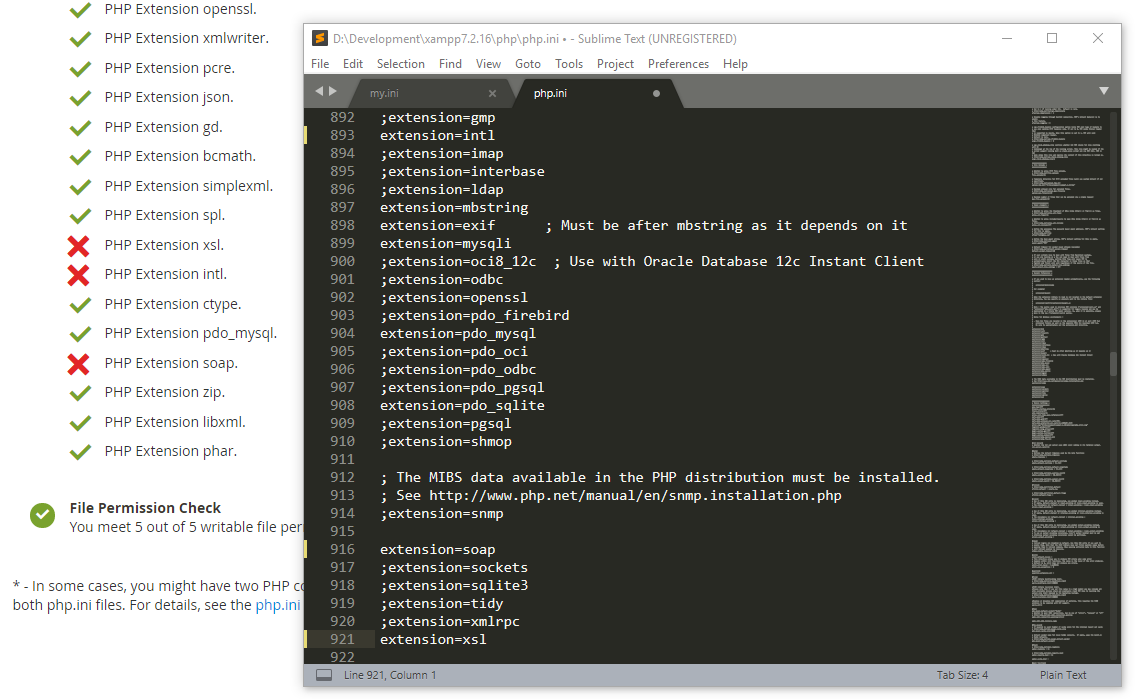
To fix that, I will include the missing php modules to the configuration.
Delete this symbol “ ; ” in the lines of the modules you include.
As you fixed all your issues, restart the servers and complete Magento installation.
How to install WampServer
Step #1: Download the server distributive package from http://www.wampserver.com/en/.
Step #2: Perform the installation.
Remember the folder you performed the installation into.
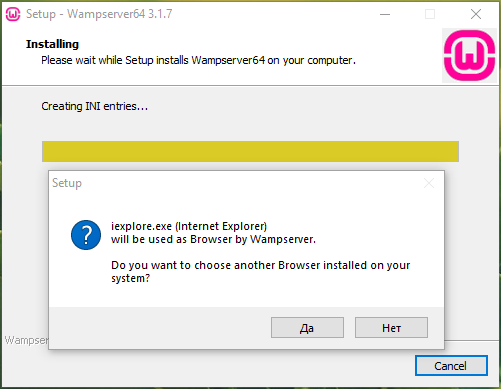
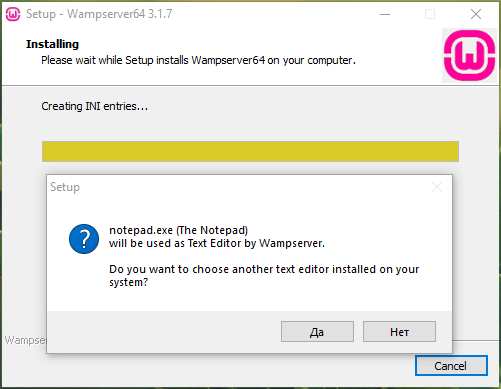
Step #3: Specify the browser and text editor you want to use.
Step #4: Run the server.
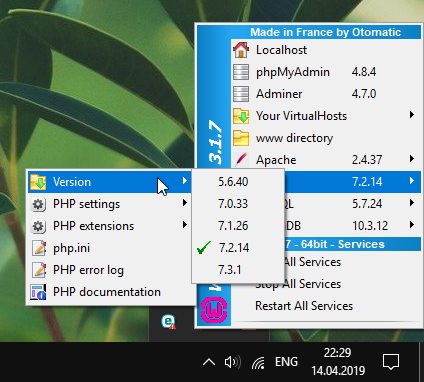
Wamp supports several PHP versions, so you do not need any additional configurations.
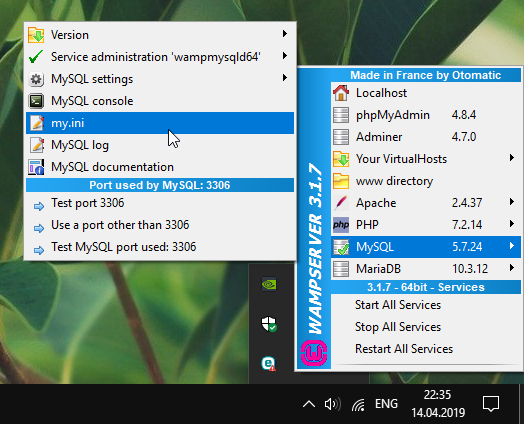
Select the version compatible with your Magento.
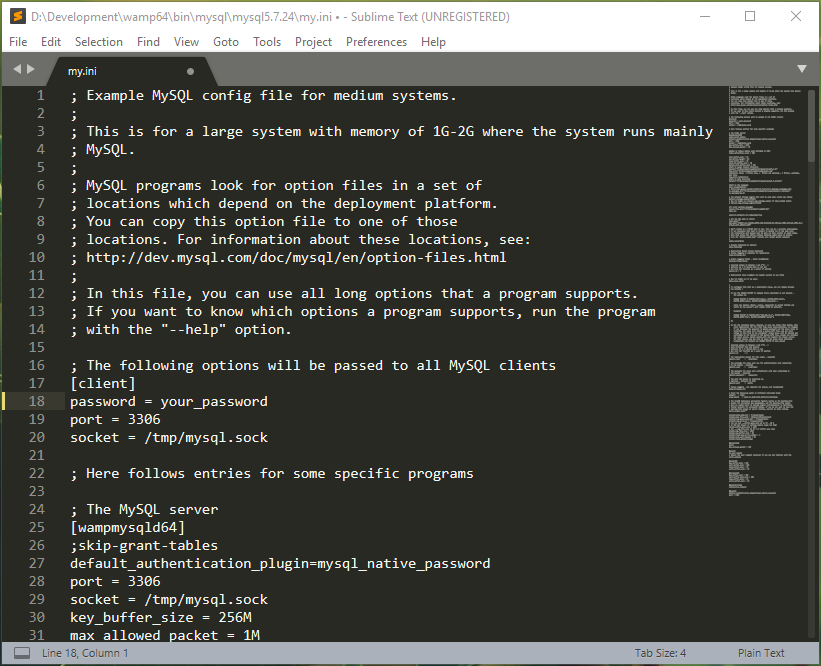
Step #5: Set the password for root access to MySQL.
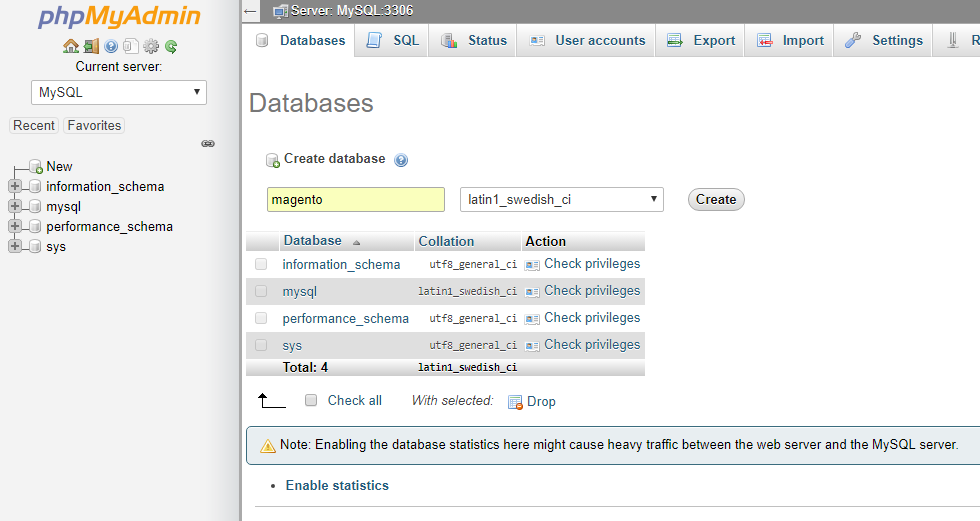
Step #6: Create a database for your store in phpMyAdmin http://localhost/phpmyadmin/.
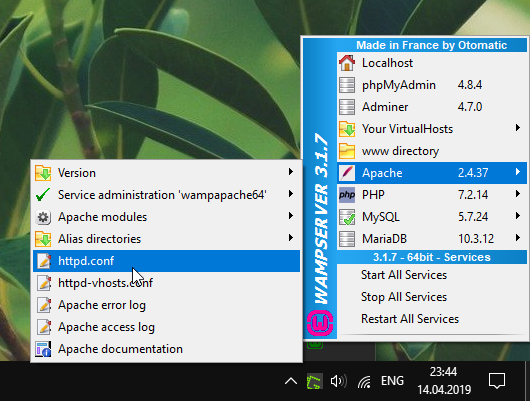
Step #7: Stop the server and edit the Apache configuration.
One of the Apache modules used in Magento is by default disabled at this server. The log file that will notify you what module is absent, is situated at wamp64/logs/apache_error.log.
Delete the commentary symbol “ # ” from the lines with our module “mod_version”.
Step #8: Set up the following parameters for php.ini
memory_limit = 1024M
max_execution_time = 360
Step #9: Start the server
Step #10: Download the Magento archive and unpack it to wamp64/www folder.
The latest Magento versions archive contains all the necessary libraries; therefore, after the archive has been unpacked, run the http://localhost/. Magento will notify you in case anything is missing.
In our case, everything is fine, and the server is ready for work.
How to install Ubuntu Nginx
Step #1: Install the Ubuntu Nginx using the console
sudo apt update
NGINX
sudo apt install nginx
PHP + modules
sudo apt install php7.2-fpm php7.2-cli php7.2-xml php7.2-gd php-imagick php7.2-recode php7.2-tidy php7.2-xmlrpc php7.2-curl php7.2-mbstring php7.2-zip php7.2-soap php7.2-bcmath php7.2-intl php7.2-xsl php7.2-json php7.2-mcrypt php7.2-mysql
MySQL
sudo apt-get install mariadb-server mariadb-client
Create basic settings:
sudo mysql_secure_installation
Create new user:
CREATE USER ‘admin’@’localhost’ IDENTIFIED BY ‘password’;
GRANT ALL PRIVILEGES ON *.* TO ‘admin’@’localhost’ WITH GRANT OPTION;
Step #2: Configure the Ubuntu Nginx
sudo nano /etc/php/7.2/fpm/php.ini
Step #3: Find the “memory_limit” line and add more memory for php.
memory_limit = 1024M
max_execution_time = 360
Step #4: Create the separate local domen “mymage.com” for magento project
sudo nano /etc/hosts
This is how we specify that the domain connects to our local server.
Step #5: Create the folder for our website
sudo mkdir /var/www/magento/
Step #6: Create a separate nginx file to configure this domain.
|
1 2 3 4 5 6 7 8 9 10 11 12 13 14 15 16 17 18 19 20 21 22 23 |
sudo nano /etc/nginx/sites-available/mymage.com upstream fastcgi_backend { server unix:/var/run/php/php7.2-fpm.sock; } server { listen 80; listen [::]:80; server_name mymage.com; #root /var/www/magento; access_log /var/www/magento/var/log/access.log; error_log /var/www/magento/var/log/error.log; set $MAGE_ROOT /var/www/magento; set $MAGE_MODE developer; set $MAGE_DEBUG_SHOW_ARGS 1; include /var/www/magento/nginx.conf.sample; } |
Configuration should contain the “root” parameters to connect our local domain to the Magento folder. However, Magento has a file with the main “nginx.conf.sample” folder that you need to connect.
This is where we expect the fastcgi_backend parameter, which the handler we installed will indicate. This is where the correct root parameter will be created.
We connect it in the end with the “include” command.
Step #7: Install the magento folder in the / var / www / magento / folder.
Step #8: Run the following command to reload
sudo systemctl restart nginx.service
sudo systemctl restart php7.2-fpm.service
How to install Ubuntu Apache
Step #1: Install via console
Run the following commands:
sudo apt update
APACHE
sudo apt install apache2
PHP + modules
sudo apt install php7.2 libapache2-mod-php7.2 php7.2-cli php7.2-xml php7.2-mysql php7.2-gd php-imagick php7.2-recode php7.2-tidy php7.2-xmlrpc php7.2-curl php7.2-mbstring php7.2-zip php7.2-soap php7.2-bcmath php7.2-intl php7.2-xsl php7.2-json php7.2-mcrypt
MySQL
sudo apt install -y mysql-server mysql-client
Step #2: Configure Ubuntu Apache
sudo nano /etc/php/7.2/apache2/php.ini
Step #3: Find the “memory_limit” line and add more memory for php
memory_limit = 1024M
max_execution_time = 360
Step #4: Create a separate local domain mymage.com for Magento project.
sudo nano /etc/hosts
This is how we demonstrate that this domain will connect to our local server.
Step #5: Create a folder for our website
sudo mkdir /var/www/magento/
Step #6: Create a separate file
sudo nano /etc/apache2/sites-available/mage.conf
|
1 2 3 4 5 6 7 8 9 10 11 12 13 14 15 16 |
<VirtualHost *:80> ServerAdmin admin@mymage.com DocumentRoot /var/www/magento/ ServerName mymage.com ServerAlias www.mymage.com <Directory /var/www/magento/> Options Indexes FollowSymLinks MultiViews AllowOverride All Order allow,deny allow from all </Directory> ErrorLog /var/www/magento/var/log/error.log CustomLog /var/www/magento/var/log/access.log combined </VirtualHost> |
Step #7: Install Magento to the /var/www/magento/ folder.
Step #8: Run the following command to reload
sudo systemctl restart apache2.service
Server configuration is completed.
How to configure the local server with Docker
Docker is a computer program that will automatically run the local server configuration process that will require minimum involvement on your part.
All you need to do is to run the following command in the console sudo apt install docker-compose.
Here you can find the list of installation scripts for Magento: https://github.com/magento/magento-cloud-docker.
Step #3: Install Magento 2
Step #1: Create authentification keys in your Magento account.
Step #2: Make sure the server has console access.
Step #3: Detect the working project folder at the server and move files there.
In our case, the folder is located at the path var\www\magento.
There are three ways to do this:
1.Console – Composer
|
1 2 |
cd \var\www\magento composer create-project --repository-url=https://repo.magento.com/ magento/project-community-edition magento2 |
2. Console – Github
|
1 2 3 |
cd \var\www\magento git clone git@github.com:magento/magento2.git. composer install |
3. FTP Manager
Download the suitable version here: https://www.magentocommerce.com/download
It can be an archive of any format. Connect to your server via FTP Manager and transfer the downloaded archive into the var \ www \ magento working folder.
Next, we go to the console and unzip the archive.
Step #4: Setup Config
Define the access rights for the security folders
sudo chmod -R 0777 app/etc/
sudo chmod -R 0777 pub/static/
sudo chmod -R 0777 pub/media/
sudo chmod -R 0777 generated/
sudo chmod -R 0777 var/
Once all the Magento files have been deployed in the working folder, connect the database and create the initial admin user. This can be done two ways:
1. Console commands
Write the following line in any word processor:
php -f bin/magento setup:install –base-url=http://mymage.com/ –backend-frontname=admin –db-host=localhost –db-name=magento –db-user=magento –db-password=magento –admin-firstname=admin –admin-lastname=admin –[email protected] –admin-user=admin –admin-password=admin123 –language=en_US –currency=USD –timezone=America/Chicago –use-rewrites=1
After each equal mark, change the parameters. As you can see, you can set the entire initial configuration of the store.
Next, we insert this line into the console.
2. Web Wizard
For the initial installation of the basic configuration, a browser will be enough. Go to mymage.com, which is already connected to our working folder var \ www \ magento.
Step #4: Install SSL
SSL is the security certificate that we create for our domain or IP-address.You can select from two kinds of SSL – either a self-signed certificate or a certificate signed by third-party service.
How to install a self-signed SSL certificate in Magento 2
sudo openssl req -x509 -nodes -days 999 -newkey rsa:2048 -sha256 -subj ‘/CN=mymage.com/subjectAltName=DNS.1=mymage.com/’ -keyout /etc/ssl/private/mage.key -out /etc/ssl/certs/mage.crt
sudo openssl dhparam -out /etc/ssl/certs/dhparam.pem 2048
How to install a self-signed SSL certificate in Magento 2 for Nginx
|
1 2 3 4 5 6 7 8 9 10 11 12 13 14 15 16 |
sudo nano /etc/nginx/snippets/ssl-params.conf ssl_protocols TLSv1 TLSv1.1 TLSv1.2; ssl_prefer_server_ciphers on; ssl_ciphers "EECDH+AESGCM:EDH+AESGCM:AES256+EECDH:AES256+EDH"; ssl_ecdh_curve secp384r1; ssl_session_cache shared:SSL:10m; ssl_session_tickets off; ssl_stapling on; ssl_stapling_verify on; resolver 8.8.8.8 8.8.4.4 valid=300s; resolver_timeout 5s; add_header Strict-Transport-Security "max-age=63072000; includeSubdomains; preload"; add_header X-Frame-Options DENY; add_header X-Content-Type-Options nosniff; ssl_dhparam /etc/ssl/certs/dhparam.pem; |
Edit the Ubuntu Nginx configuration file we created.
sudo nano /etc/nginx/sites-available/mymage.com
Add new lines to the configuration file
|
1 2 3 4 5 6 7 8 9 |
server { listen 80; listen 443 ssl; listen [::]:80; ssl_certificate /etc/ssl/certs/nginx-selfsigned.crt; ssl_certificate_key /etc/ssl/private/nginx-selfsigned.key; . . . . . } |
Reload the server
sudo systemctl restart nginx
How to install a self-signed SSL certificate in Magento 2 for Apache
Run the command:
sudo nano /etc/apache2/conf-available/ssl-params.conf
|
1 2 3 4 5 6 7 8 9 10 11 12 |
SSLCipherSuite EECDH+AESGCM:EDH+AESGCM:AES256+EECDH:AES256+EDH SSLProtocol All -SSLv2 -SSLv3 SSLHonorCipherOrder On Header always set Strict-Transport-Security "max-age=63072000; includeSubdomains; preload" Header always set X-Frame-Options DENY Header always set X-Content-Type-Options nosniff # Requires Apache >= 2.4 SSLCompression off SSLSessionTickets Off SSLUseStapling on SSLStaplingCache "shmcb:logs/stapling-cache(150000)" SSLOpenSSLConfCmd DHParameters "/etc/ssl/certs/dhparam.pem |
Edit the Apache configuration file we created.
sudo nano /etc/apache2/sites-available/mage.conf
Add the fonfiguration text for SSL
|
1 2 3 4 5 6 7 8 9 10 11 12 13 14 15 16 17 18 19 20 21 |
<IfModule mod_ssl.c> <VirtualHost *:443> ServerAdmin webmaster@localhost DocumentRoot /var/www/magento SSLEngine on SSLCertificateFile /etc/ssl/certs/mage.crt SSLCertificateKeyFile /etc/ssl/private/mage.key <FilesMatch "\.(cgi|shtml|phtml|php)$"> SSLOptions +StdEnvVars </FilesMatch> <Directory /usr/lib/cgi-bin> SSLOptions +StdEnvVars </Directory> ErrorLog /var/www/magento/var/log/error.log CustomLog /var/www/magento/var/log/access.log combined </VirtualHost> </IfModule> |
Reload the server
sudo a2enmod ssl
sudo a2enmod headers
sudo a2ensite mage.conf
sudo systemctl restart apache2
How to install a SSL certificate with https://letsencrypt.org/
Run the command
sudo apt-get install letsencrypt
(if the command does not execute, run another command – sudo apt-get install certbot)
The command for Nginx:
sudo letsencrypt –nginx -d mymage.com
The command for Apache:
sudo letsencrypt –apache -d mymage.com
At the end of the generation, you will see the path to the generated keys.
Certificates Let’s Encrypt are valid for 90 days, so you just need to update them periodically with the command.
sudo letsencrypt renew
Step #5: Install sample data
As you have installed Magento, it is a complete tabula rasa, which can be rather complicated to work with. Run the following commands to install sample data into Magento.
php bin/magento sampledata:deploy
php bin/magento setup:upgrade
The following commands will uninstall sample data:
php bin/magento sampledata:remove
The following commands will reinstall sample data
bin/magento sampledata:reset
Wrapping it up
We hope you found this article useful and will successfully install Magento using our guide. If you have any questions or comments, feel free to leave them down below.

