While working on online store or extension every Magento developer needs debug information about errors in the code. Also the information about the exception that is generated by Magento can be very useful for developers. There are some powerful tools in Magento to obtain this information: exception log and error messages (you should enable error reporting). In this article I will tell you how to activate these features in Magento.
Before enabling error messages (or exceptions log) it is necessary to disable caching and compilation in the Magento administrative panel.
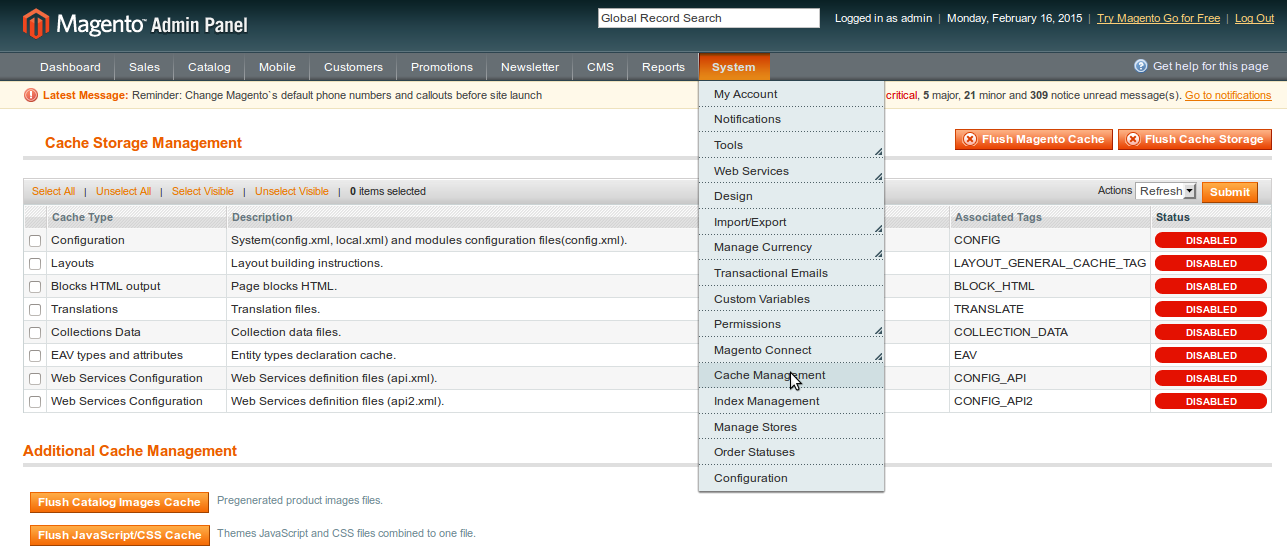
To disable the cache you need to go to Cache Management and run the following steps:
System > Cache Management > Select All [check-boxes] > Actions = Disable > Submit

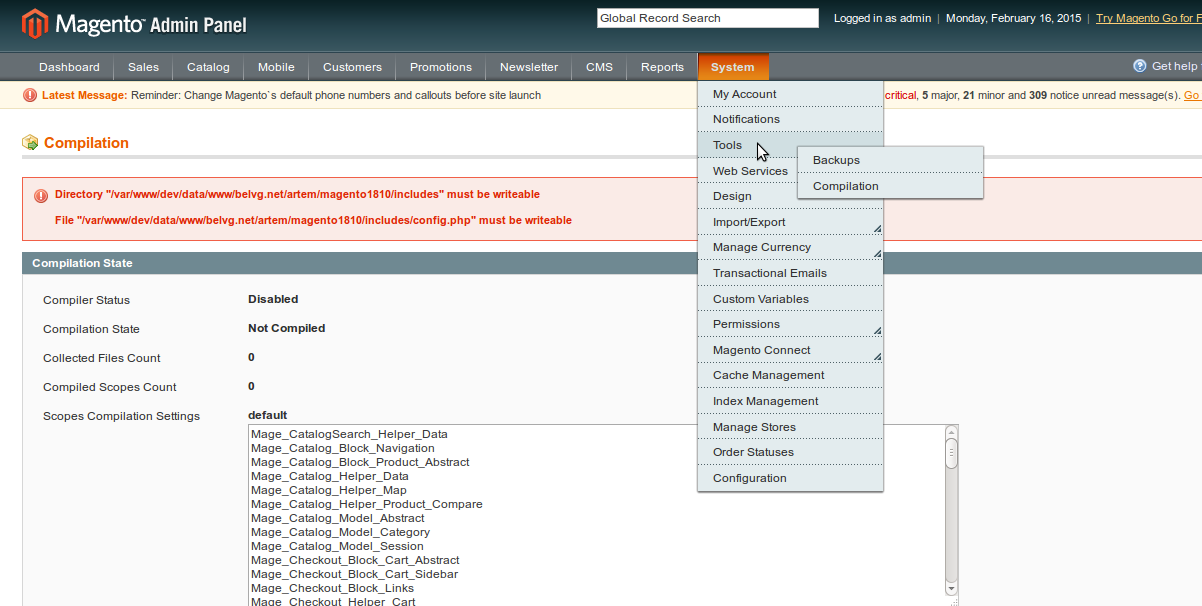
To disable the compilation you need to go to the compilation settings and run the following steps:
System > Tools > Compilation > Disable

To enable the error messages (error logs) in Magento you need to complete the following steps:
- Go to the Magento root developer directory
- Open the index.php file
- In the index.php file, uncomment the following lines:
|
1 |
error_reporting(E_ALL | E_STRICT); |
|
1 |
ini_set('display_errors', 1); |
- Enable or set the Developer Mode in Magento. This can be done in two ways:
– Add the following command at the beginning of the index.php file:
|
1 |
$_SERVER['MAGE_IS_DEVELOPER_MODE'] = true |
– Add the following line to the .htaccess file
|
1 |
SetEnv MAGE_IS_DEVELOPER_MODE "true" |
Note: The default error message is written to a text file which you can find in the directory: [magento root folder]/var/report. The file name looks like this 1184355013245.txt, where filename is the error code. It is possible not to write the error message into the file, but to display errors on screen. To do this, go to the directory [magento root folder]/errors and rename the file from local.xml.sample to local.xml. You can also send an error message via email. In order to do this you need to specify the email address in the file [magento root folder]/errors/local.xml, section email_address.
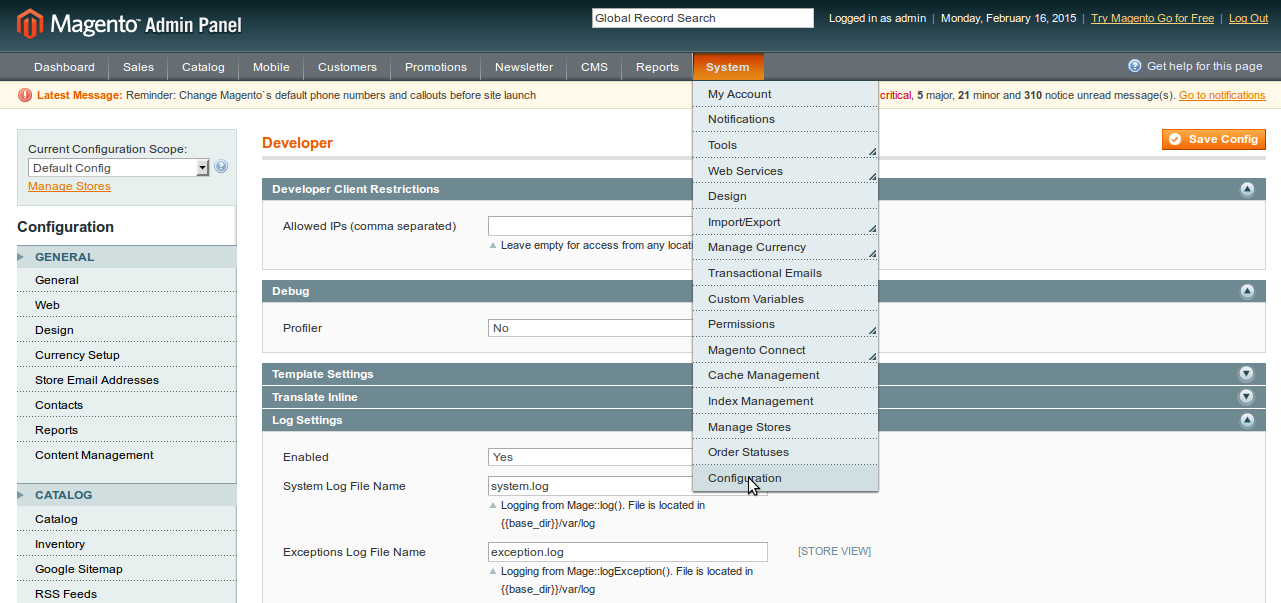
To enable the log in Magento you need to go to the system configuration:
System > Configuration > Advanced > Developer > Log Settings > Enabled => Yes

And there you have it. All is ready for the intense debugging process!
Magento 2
As for Magento 2, you’ll have to set deployment mode of your Magento 2 installation to a developer. To do this login into your server terminal and enter this command under Magento file system owner:
php bin/magento deploy:mode:set developer
Then go to pub/errors folder and rename local.xml.sample file into local.xml. If the errors are still not shown on screen then uncomment #11 line in app/bootstrap.php


Dear Kevin,
unfortunately, it’s not possible to provide a qualitative answer without getting into details.
Please contact our support department in case you need an individual consideration of the matter: [email protected]
We’ll be happy to assist!
How can I enable developer mode in magento 2.2?
I follow your manual but still face the codes error.
Hi Adams,
have a look at /var/log within your root Magento installation.
Where is magento error logs location? I use 2.2
Please add columns at end of $_SERVER[‘MAGE_IS_DEVELOPER_MODE’] = true;
Thanks, that was helpful…