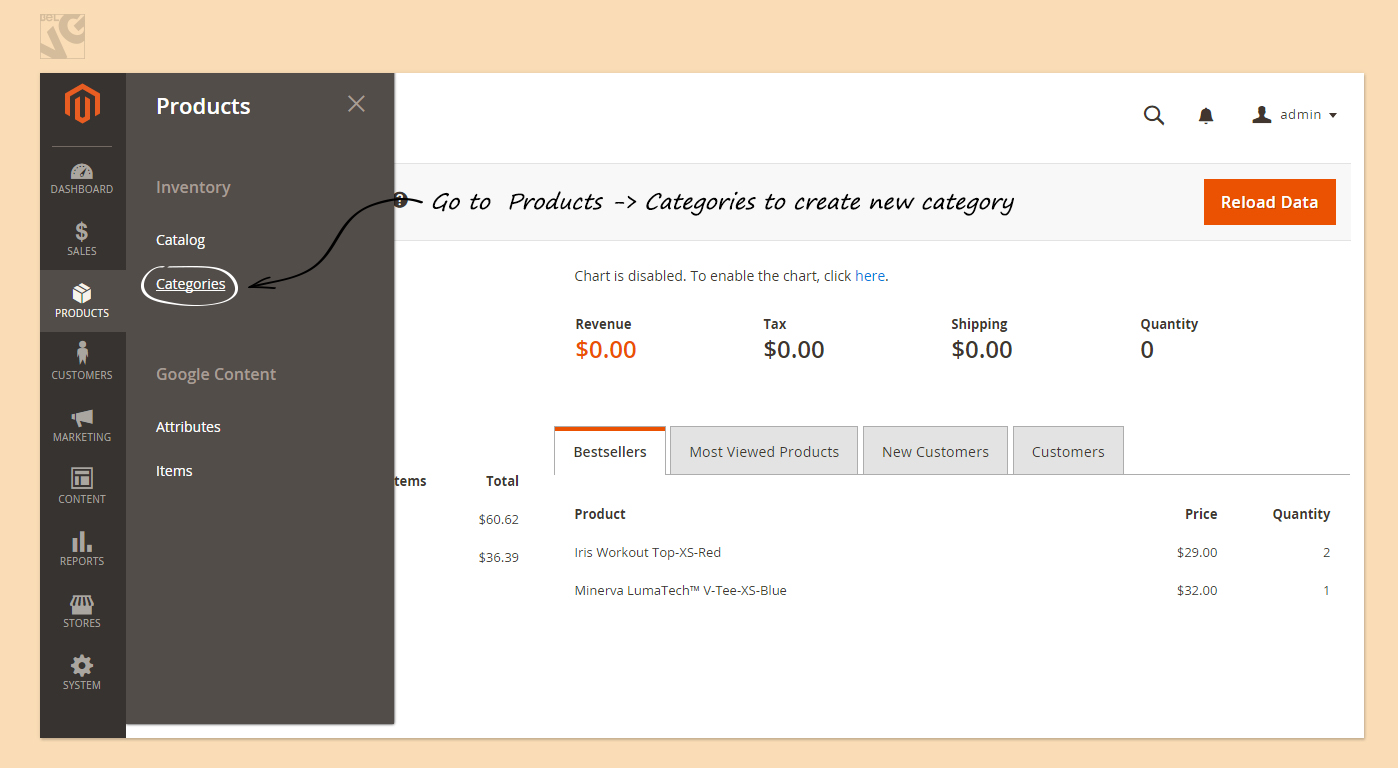
Let’s look on how to create a New Category in Magento 2.0. First of all in the Admin Panel you should choose Products -> Categories
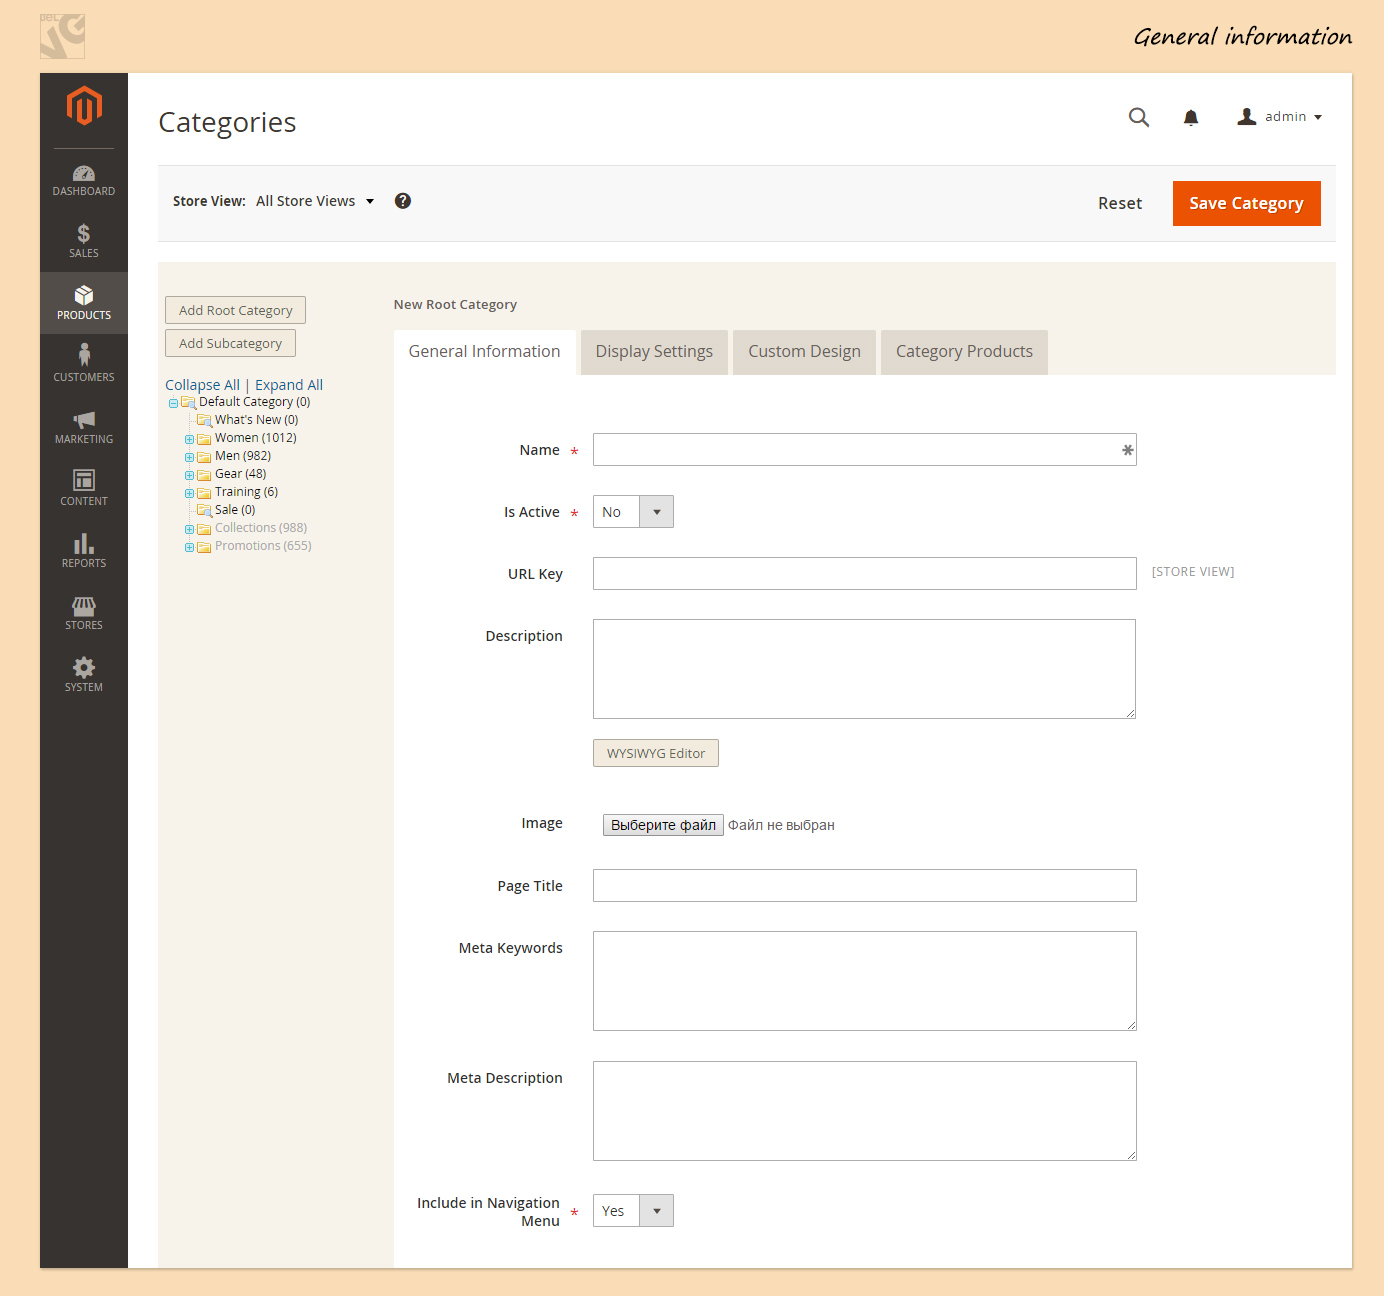
There are four sections in Categories. First section is General information, then goes Display Setting, Custom Design and the last one is Category products were you can find all your products according to the ID, Name, SKU, Price or Position.
General Information
- In the first field you will need to enter a Name for the category which will be referenced in the navigation menu bar on your front-end;
- Then choose Is Active (Yes or No). Select whether the category is active on the site. Selecting No will hide the category on the site;
- Fill in the URL Key field which is designed to improve your search engine optimization (SEO) ranking. By default, an URL Key is automatically generated based on the category name. You can overwrite this field for better SEO;
- Write a short Description which is also a field for improvement of SEO;
- Than you can upload a default image for this category to be displayed on your store’s front-end when a customer clicks the category menu. This image will be displayed on top of the product list of this category;
- Enter a descriptive Page Title;
- Complete the Meta Keywords;
- Complete the Meta Description;
- If you want to include the subcategory in the main menu of your store, set Include in Navigational Menu to “Yes”.
Press the SAVE button.
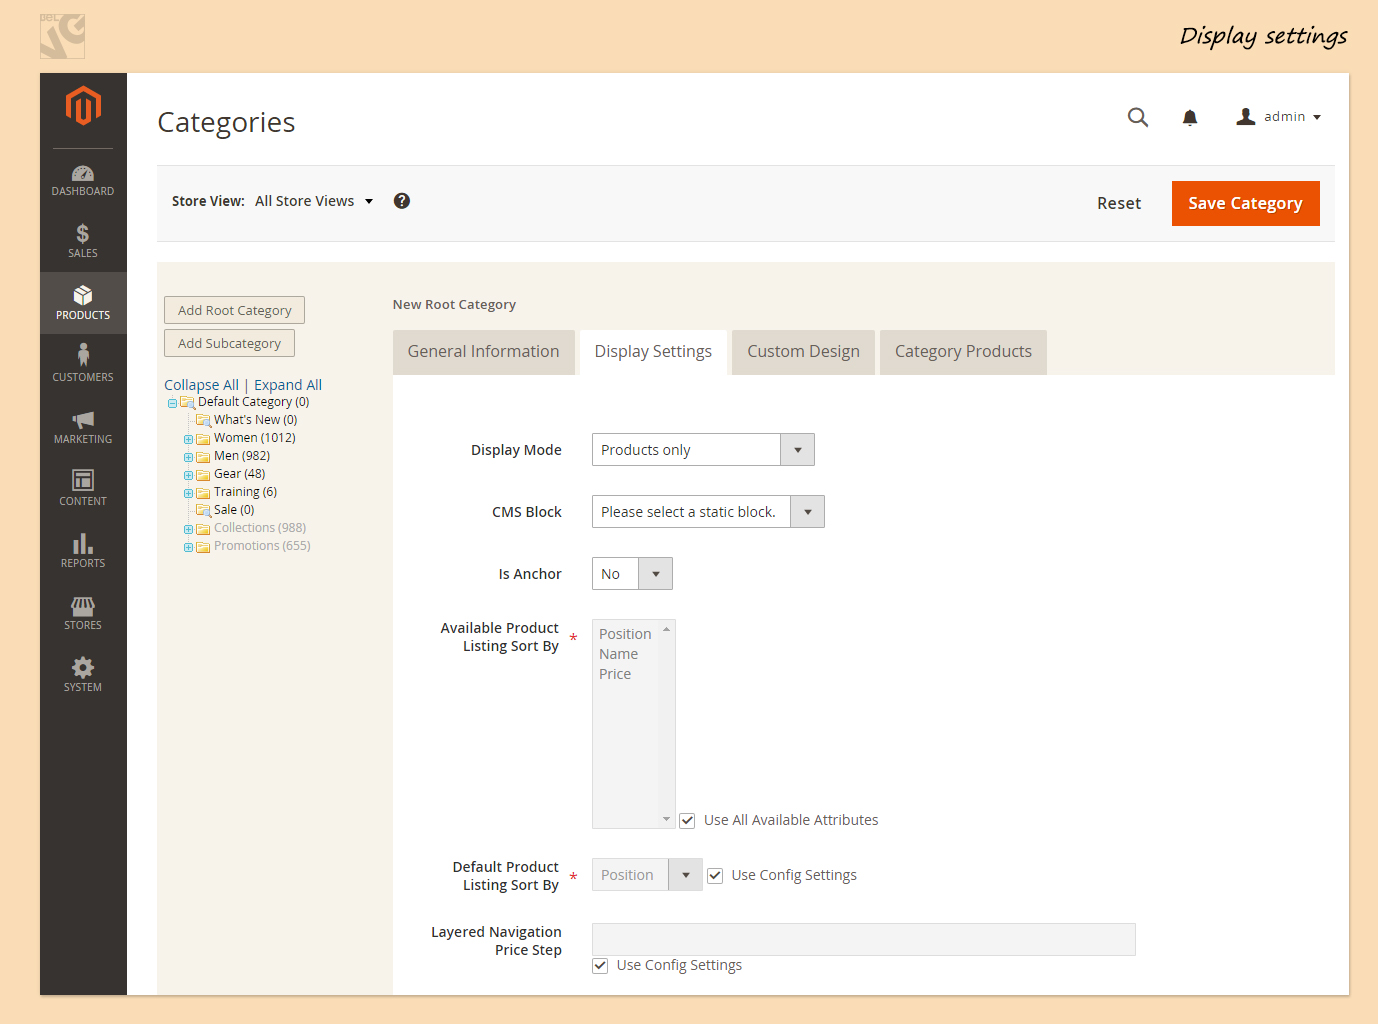
Display Setting
- Here you should first of all set Display Mode to one of the following:
-
- Products Only;
- Static Block Only;
- Static Block and Products.
- Choose CMS Block from the list given;
- Set Is Anchor to Yes or No (anchors are used for the Layered Navigation in Magento);
- Clear the checkbox under Available Product Listing Sort By, then select the suitable one (position, name, price);
- Once again you should clear the checkbox under Default Product Listing Sort By. Then select one of the available values to sort the list. By default, all available attributes are listed. The default values typically include: position, name, price;
- The last thing to do in Display Settings is to enter Layered Navigation Price Step (if Price Navigation Step Calculation is set to Manual, enter a numeric value to determine how price ranges are grouped in the layered navigation).
When complete, click the Save Category button.
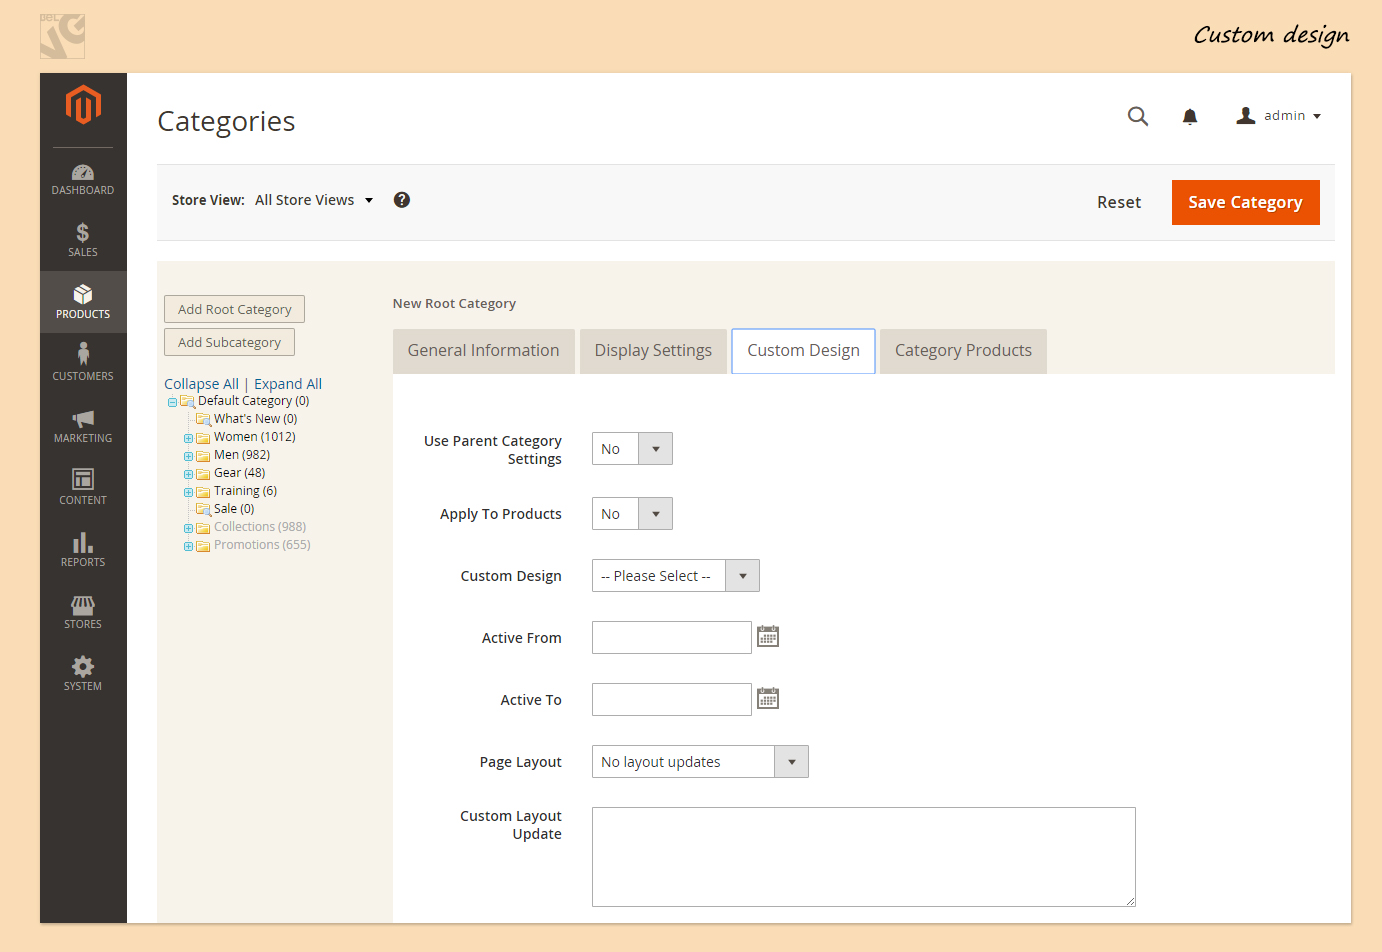
Custom Design
- The first box here is Use Parent Category Settings (if the parent category of this category has already been customized and you want to use same settings, select Yes);
- Choose Yes or No in the box Apply to Products, but if you want the custom settings applied to all the products assigned to this category you should set YES;
- Then goes Custom Design where you have an option to decide whether to select from Magento Blank or Magento Luma;
- Next two fields are Active From and Active To (if you want to apply the changes at specific time, specify the dates for by clicking the calendar icon. If you do not fill in the start and end dates, your changes will be live after saving);
- You can further change the layout of the category page by selecting one of the default layouts in Page Layout
- No Layout Update (this option is preselected by default and will not apply any layout changes);
- Empty (you can define your own design template (for example, a 4-column layout) by choosing this field);
- 1 column (the content area will extend to the full width of your store as one column);
- 2 column with left bar (the content area will be divided into two columns with the left column set at a smaller width for displaying content blocks);
- 2 column with right bar (the content area will be divided into two columns with the right column set at a smaller width for displaying content blocks);
- 3 columns (left and right columns will be set at same small width for displaying content blocks. The middle section is for main content);
- If you did not select one of the Page Layout options, you can skip the Custom Layout Update.
In Category Products section choose products you want to include to this category.
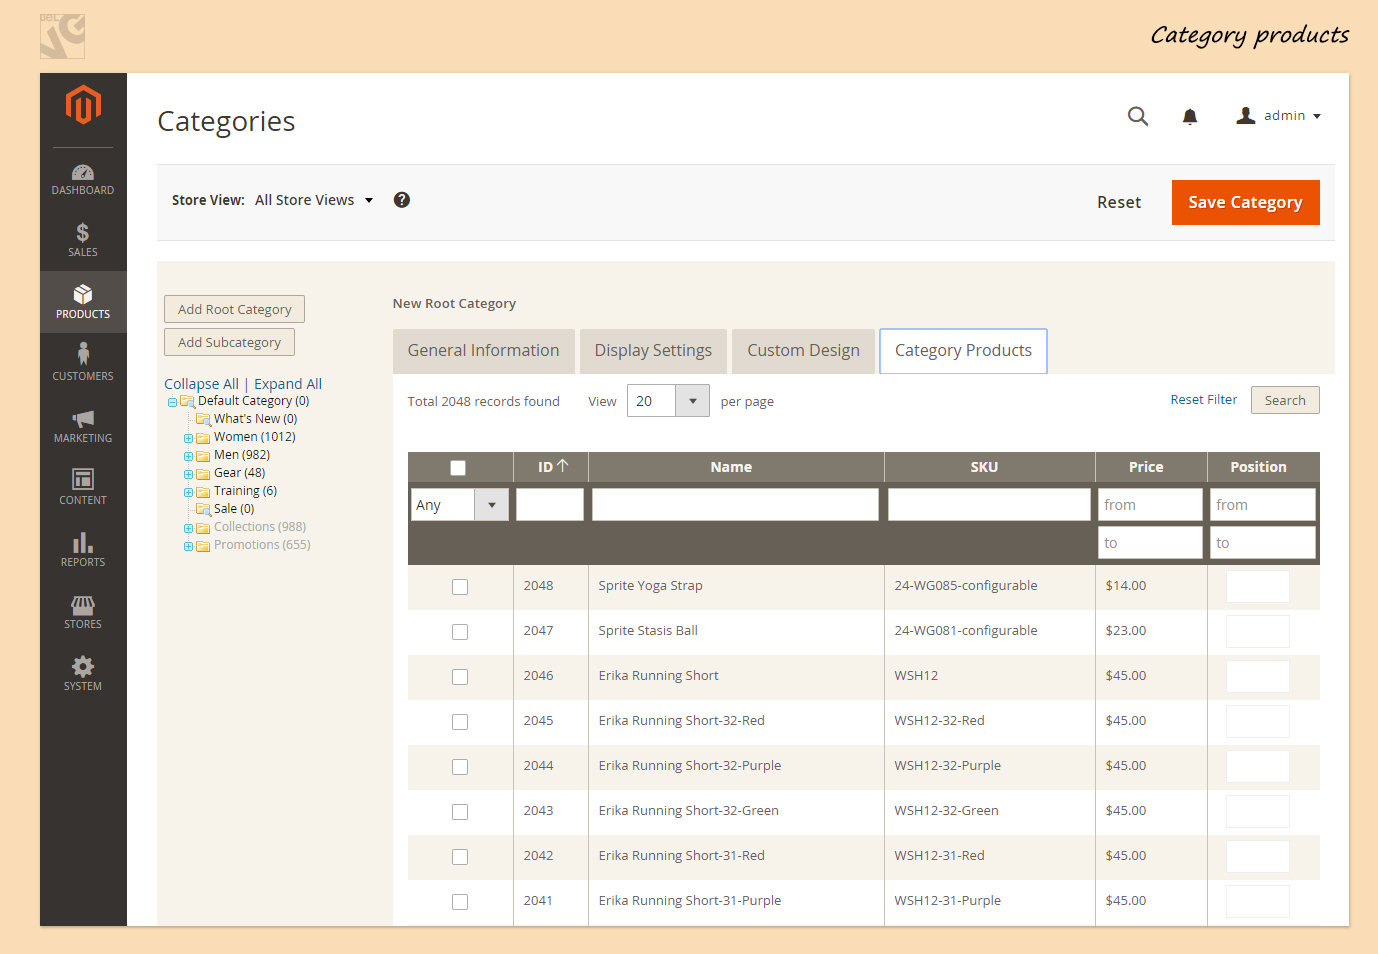
After the completion, click the Save Category button in order to Save you New Category.
Video guide on how to Create New Category in Magento 2.0

Magento Webdesign
Take your online store to the next level with BelVG Magento Webdesign
Visit the page


