
When a new customer registers at your Magento 2 online shop, he is required to fill in certain fields, such as first name, last name, email. He or she may want to provide some additional information. For that purpose, we need to create our own fields which will be used in a registration form. If you have Magento 2 Commerce version, new fields can be created by adding new customer attributes in the backoffice.
I will look into the following aspects:
Add new customer attribute in Magento 2 Commerce
Appearance in Customer Grid
Manage Labels/Options
Customer Address Attribute
Add new customer attribute in Magento 2 Commerce
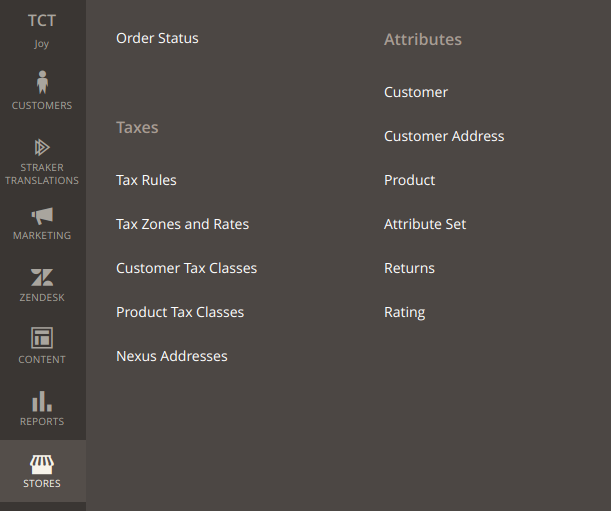
In the backoffice menu click Stores and choose Customer under Attributes subcategory.
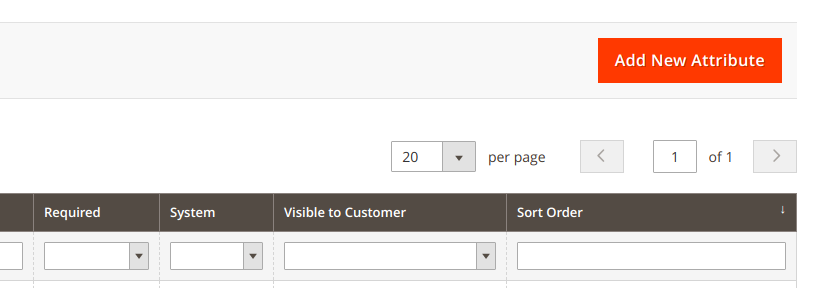
You’ll see a list of customer attributes. Perhaps the attribute you want to create already exists, but is currently disabled. So all you need to do is to switch it on.
If you haven’t found the attribute you need, click the Add new attribute button.
Let’s suppose we have an online shop selling travelling equipment and we need to create a field asking if a customer ready to travel.
Enter the name of the field in Default Label and an Attribute code that must be unique.
Then, choose from different types of input:
- Text Field,
- Text Area,
- Multiple Line,
- Date,
- Dropdown,
- Multiple Select,
- Yes/No,
- File (attachment),
- Image File.
I will choose Yes/No input type.
You will need to complete other settings as well:
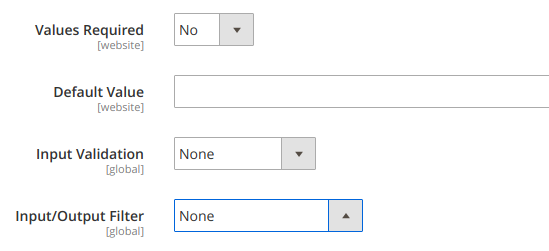
- Values Required;
- Default Value;
- Input Validation. You can choose whether the field must be validated (if not – leave “None”), and if yes – then by which parameter: Alphanumeric (should contain letters, numbers, punctuation marks), Numeric Only, Alpha Only (only letters), URL, Email, Length Only;
- Input/Output Filter: None, Strip HTML tags, Escape HTML entities (e.g. < will be replaced with < and so on).
In our case the field won’t contain any input text, that’s why we don’t fill in both Input Validation and Input/Output Filter.
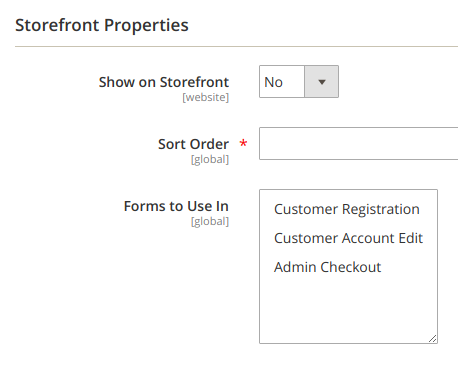
Storefront properties block of settings is necessary to fill in, if your attribute will become a field in forms for your customers on the site. If yes, you can choose the forms where it must appear. You should also set up the position of the field in the form (I set it at 5).
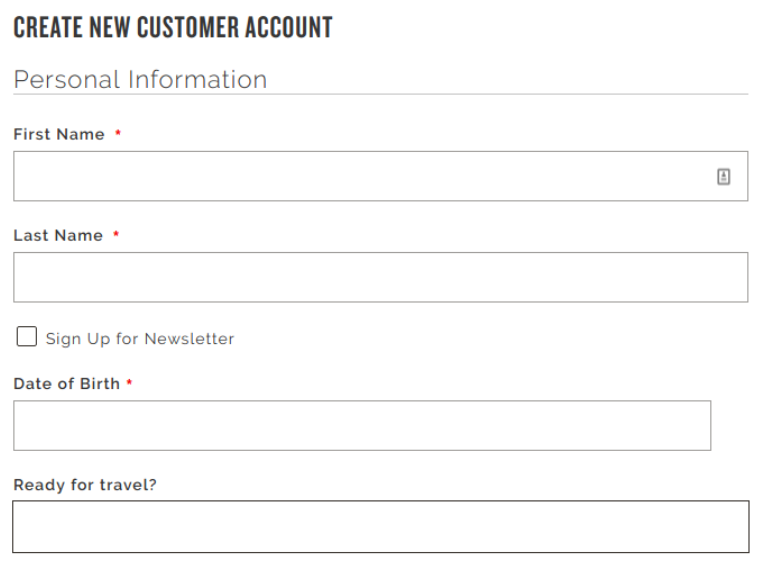
So let’s check out what we get after adding our attribute. Save it and open registration form.
Here’s our field, it’s 5th in the list. It looks the way we wanted to, with “yes/no” dropdown.
Appearance in Customer Grid
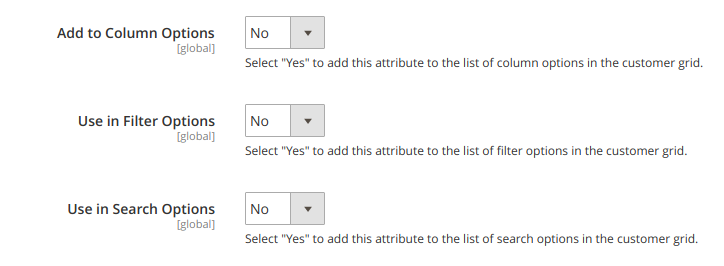
There’s another block of settings concerning customer grid.
Let’s go to attribute settings, enable Add to Column Options and save.
Go to Customers -> All Customers, and you will see the Customer Grid, an indexed version of it. To see the changes we made, update the index first. In console use command bin/magento indexer:reindex customer_grid.

"Apply To" Attribute Option for Magento 2
Take your online store to the next level with BelVG module
Download hereAfter rebuilding the index you’d expect to see the new customer attribute in the columns, but it’s still not there.
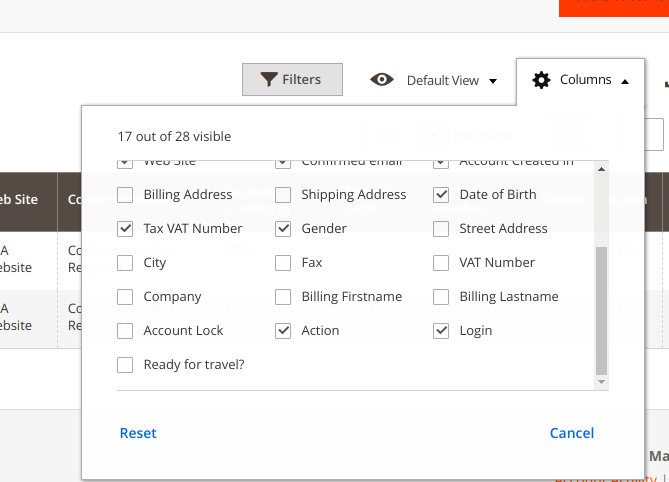
In the Customer Grid you can add a column from existing attributes. Press Columns button and tick our new attribute “Ready for travel?”.
Afterward you’ll be able to see the new attribute as a column.
Manage Labels/Options
You can create a label name in different languages and set up its reflection depending on the country of each customer. Go to Manage Label / Options tab.
Customer Address Attribute
Bear in mind that if you wish to add an attribute concerning customer’s address, you should create a Customer Address Attribute. In backoffice menu click Stores and choose Customer Address under Attributes heading. From then on the mechanism of working with an attribute in the same as has been already described above.
FAQ
Question: Can’t export csv and xml with a custom attribute
Answer: Magento 2 export creates a file only with those columns that are visible in customer grid. So add the column to the customer grid as it was described in this article.
Diversify your customer management with BelVG’s Customer Attributes module for Magento.

Magento Custom Development
Take your online store to the next level with BelVG Magento Custom Development
Visit the page






Hi, Alexander! I suppose that you are using a version of Magento that is different from the one featured in the article.
Hi, Javaria! Perhaps you are using a different version of Magento. In this article, we used Magento Commerce for demonstration purposes.
I am unable to find stores -> customer menu
We are using Magento 2.2.6 but I can’t find the “Customer” under Attributes… Where is it?