Customizing Magento involves many various things, but when it comes to email templates, the area usually gets neglected. That’s why today’s article is about email templates, the ways to create them, use variables and add the images as well as links.
Customization of transactional email templates
Create and assign custom transactional email templates
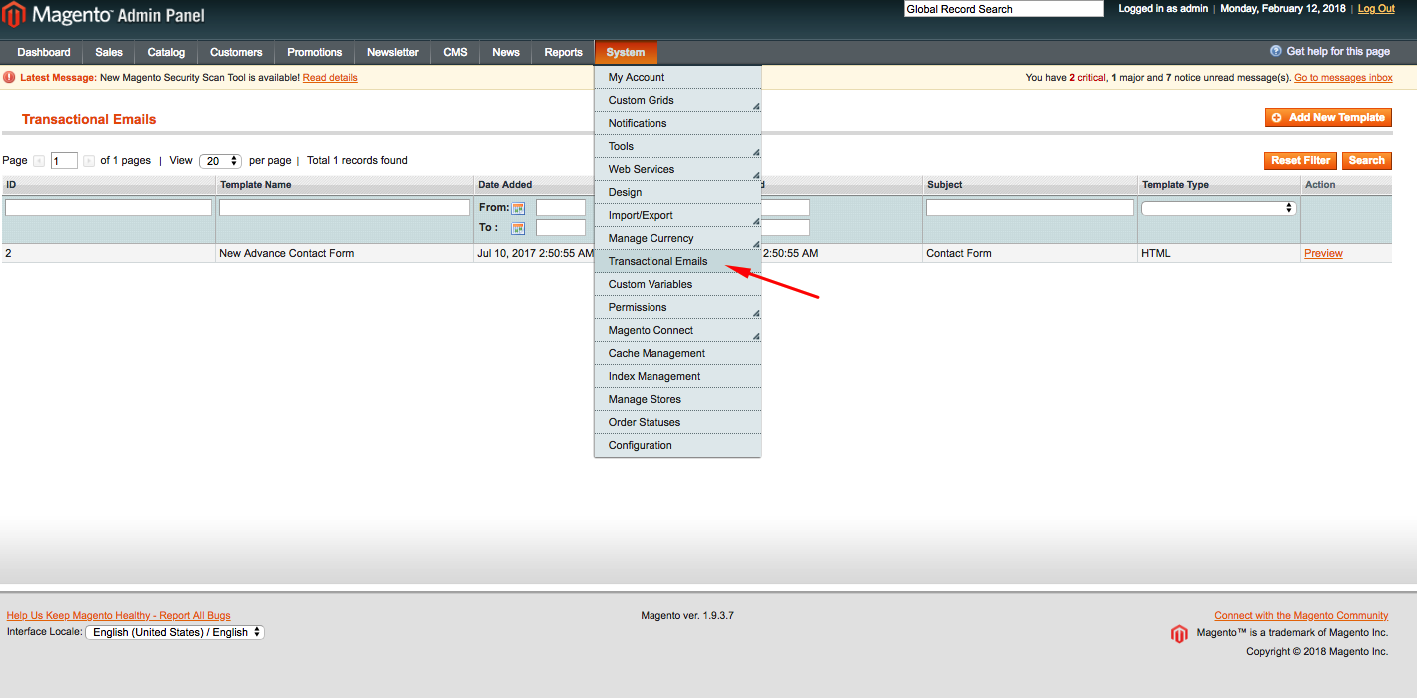
In order to create an email template, you need to go to the System->Transactional Emails.
Then you need to add a new template by clicking the ‘Add New Template’ button

Magento 2 Migration
Take your online store to the next level with BelVG Magento 2 Migration
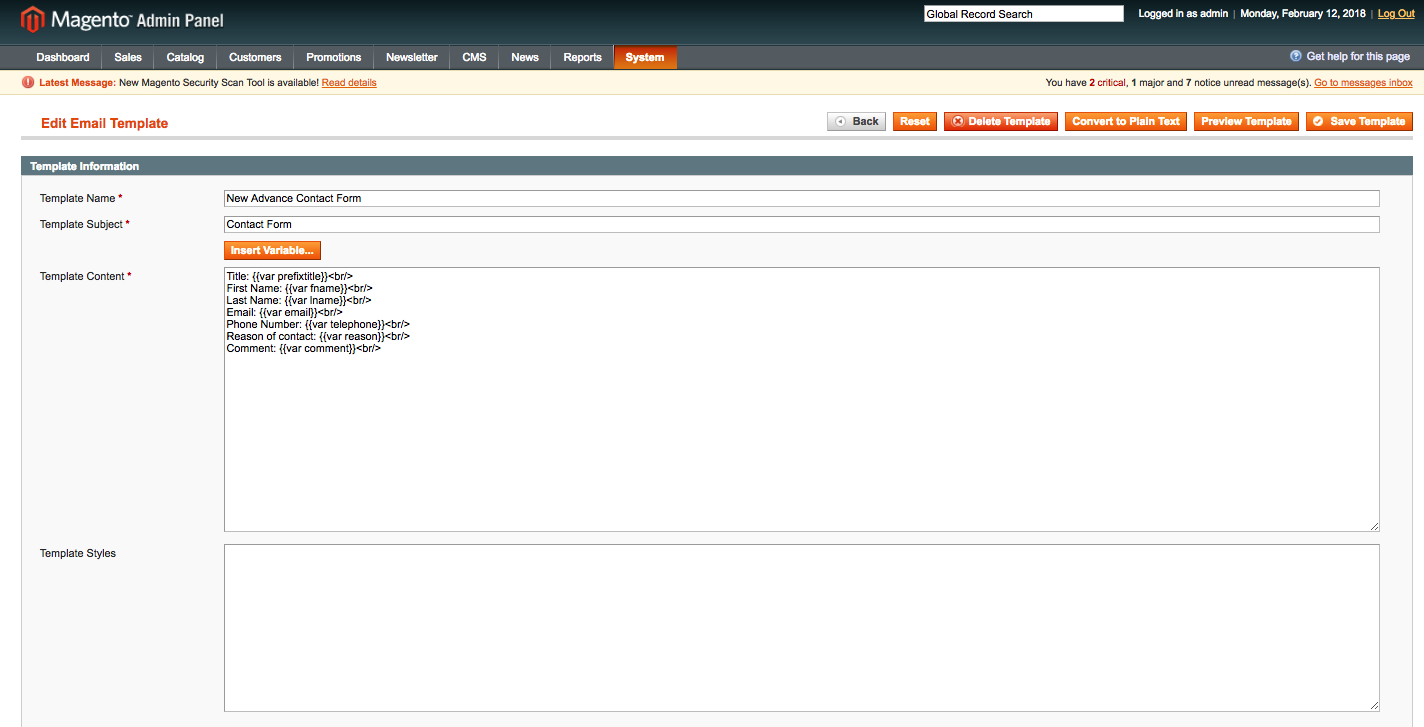
Visit the pageFill in the forms (for example, as it is in the contact form).
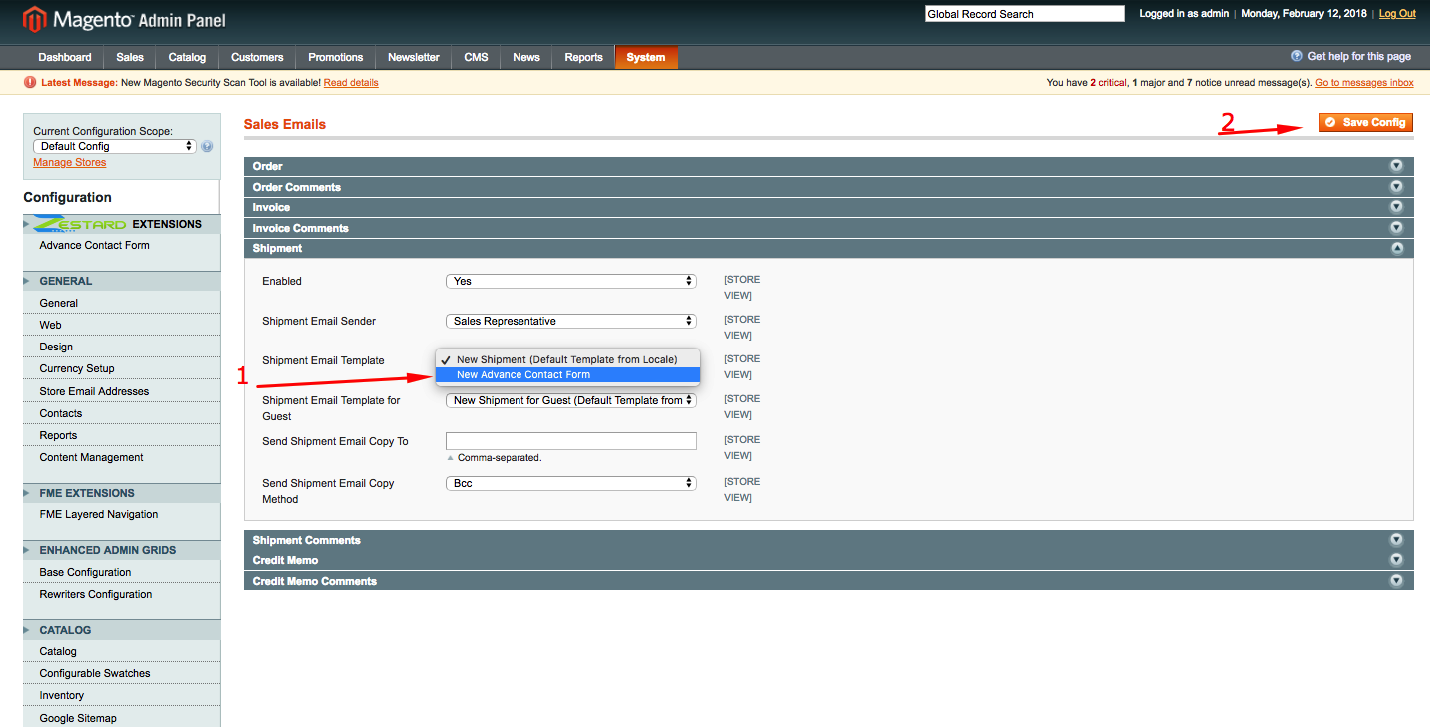
Assign it in the System/Configuration, and then Sales/Sales Emails as it’s shown in the picture.
Use of template variables available in each email {store, var, …} and how to access properties of variable objects (for example var order.getCustomer.getName)
Actually, there are many variables that can be used in the email templates. The essentials are considered to be var, store, inlinecss, template.
Besides, there’re conditions as in PHP: {if} … {/if}
For example, as it’s used in the template (/app/locale/en_US/template/email/password_or_email_changed.html):
|
1 |
{{template config_path="design/email/header"}} |
Here we also can see how inlinecss is added to the email template:
|
1 2 3 4 5 6 7 8 9 10 11 12 13 14 15 16 17 18 19 |
{{inlinecss file="email-inline.css"}} <table cellpadding="0" cellspacing="0" border="0"> <tr> <td class="action-content"> <h1>Hello {{htmlescape var=$customer.name}},</h1> {{if customer.is_change_password}} <p>We have received a request to change password associated with your account at {{var store.getFrontendName()}}.</p> {{/if}} {{if customer.is_change_email}} <br>We have received a request to change email associated with your account at {{var store.getFrontendName()}}.<br /> <strong>Your new email is:</strong> {{var customer.email}}</p> {{/if}} <p>If you have not authorized this action, please contact us immediately {{depend store_phone}} at <a href="tel:{{var store_phone}}">{{var store_phone}}</a>{{/depend}}.</p> </td> </tr> </table> {{template config_path="design/email/footer"}} |
NOTE: I marked the condition with bold type and showed the way how to add inline style in the email template.
In order to use variables in email templates, you need to use the ‘get’ PHP method:
|
1 |
{{var store.getFrontendName()}} |
For example, as it’s used in the template (/app/locale/en_US/template/email/html/footer.html):
|
1 2 3 4 5 6 7 8 9 10 11 |
<!--@subject Email - Footer @--> <!-- End Content --> </td> </tr> </table> <h5 class="closing-text">Thank you, <strong>{{var store.getFrontendName()}}!</strong></h5> </td> </tr> </table> <!-- End wrapper table --> </body> |

Magento Custom Development
Take your online store to the next level with BelVG Magento Custom Development
Visit the pageLink to custom images from transactional email templates
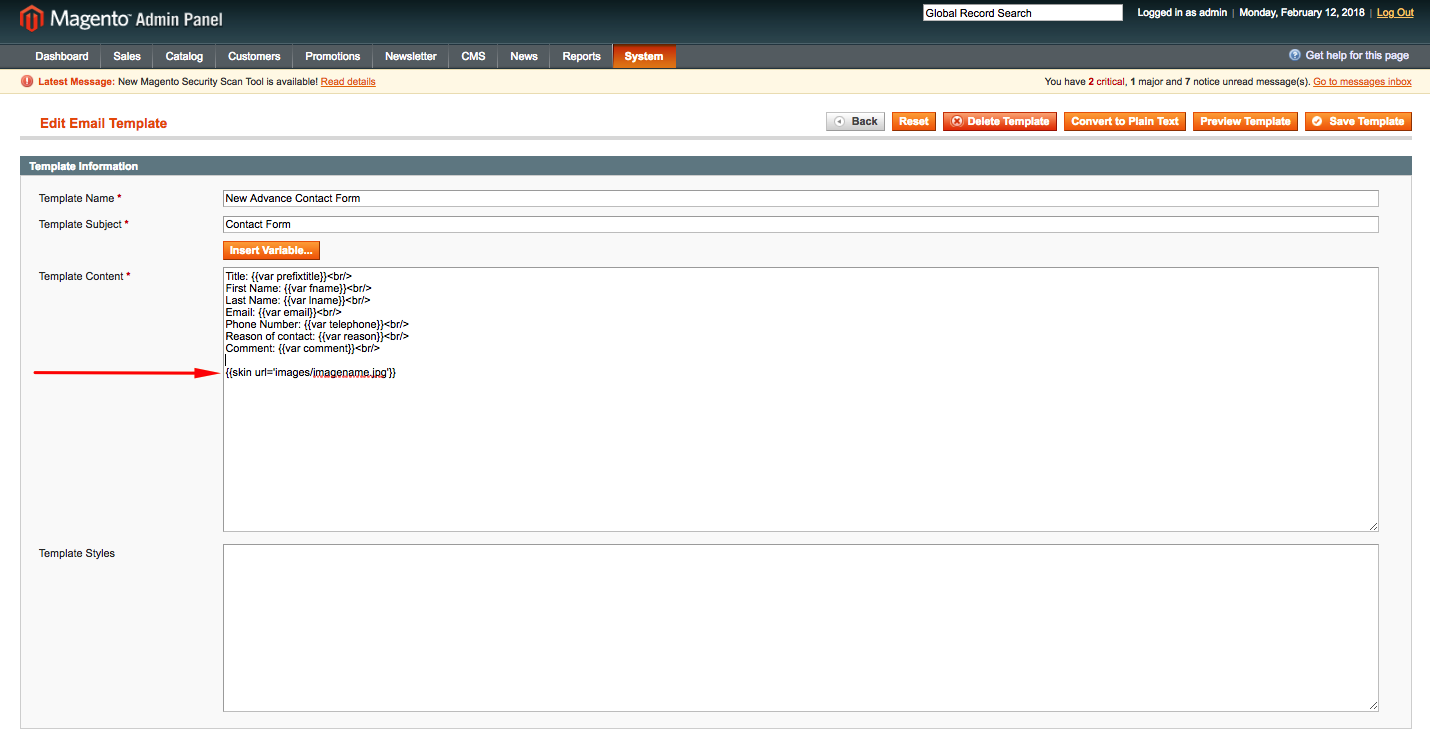
In order to include a custom image in the email template, you need to put the following tags:
- When adding an image from template:
{{skin url='images/imagename.jpg'}}

- When adding an image from media: {{media url='images/imagename.jpg'}}
Create links to store pages in transactional email templates
In order to create a link to store pages in email templates, you need to use the following construction: {{store url=""}}
For example, like that
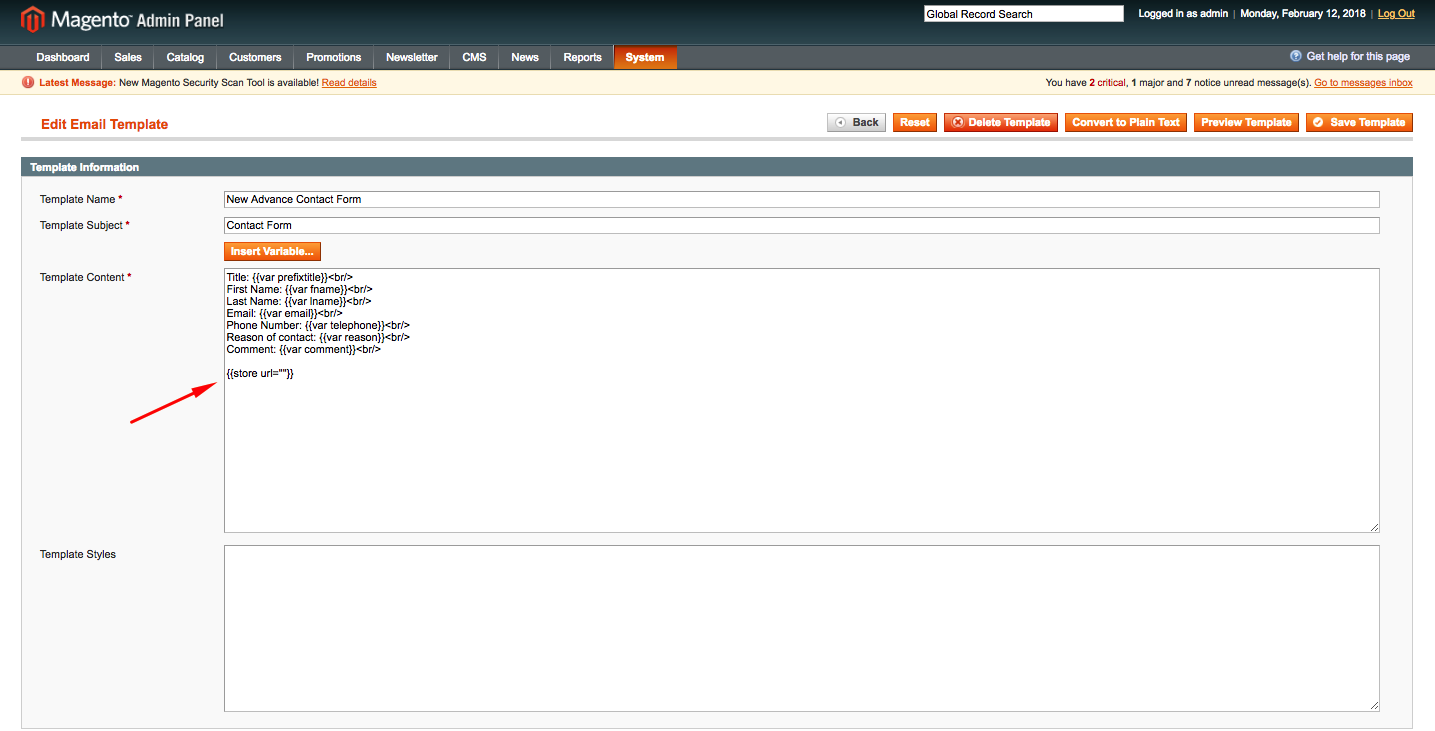
or like in the template (app/locale/en_US/template/email/html/header.html):
|
1 2 3 4 5 6 7 8 9 10 11 12 13 14 15 16 17 18 19 20 21 22 23 24 25 26 27 28 29 30 31 32 33 34 35 36 37 38 39 40 41 42 43 |
<!--@subject Email - Header @--> <!DOCTYPE html PUBLIC "-//W3C//DTD XHTML 1.0 Strict//EN" "http://www.w3.org/TR/xhtml1/DTD/xhtml1-strict.dtd"> <html xmlns="http://www.w3.org/1999/xhtml"> <head> <meta http-equiv="Content-Type" content="text/html; charset=utf-8" /> <meta name="viewport" content="initial-scale=1.0, width=device-width" /> </head> <body> {{var non_inline_styles}} <!-- Begin wrapper table --> <table width="100%" cellpadding="0" cellspacing="0" border="0" id="background-table"> <tr> <td valign="top" class="container-td" align="center"> <table cellpadding="0" cellspacing="0" border="0" align="center" class="container-table"> <tr> <td> <table cellpadding="0" cellspacing="0" border="0" class="logo-container"> <tr> <td class="logo"> <a href="{{store url=""}}"> <img {{if logo_width}} width="{{var logo_width}}" {{else}} width="165" {{/if}} {{if logo_height}} height="{{var logo_height}}" {{else}} height="48" {{/if}} src="{{var logo_url}}" alt="{{var logo_alt}}" border="0"/> </a> </td> </tr> </table> </td> </tr> <tr> <td valign="top" class="top-content"> <!-- Begin Content --> |
In case you need to create a link to the category page or other pages, use this construction:
|
1 |
{{store url="Here you need to specify the pathname of the necessary page. For example http://example.com/catalogsearch/term/popular/"}} |

Magento Webdesign
Take your online store to the next level with BelVG Magento Webdesign
Visit the page
