Simple things can be slightly different when you work with a new version of the platform you are used to work with.
Let’s check together how to create customers and customer groups in Prestashop 1.7 and whether it will be difficult for people who are used to work with previous versions of Prestashop to work with the new version.
How to create a customer in PrestaShop 1.7
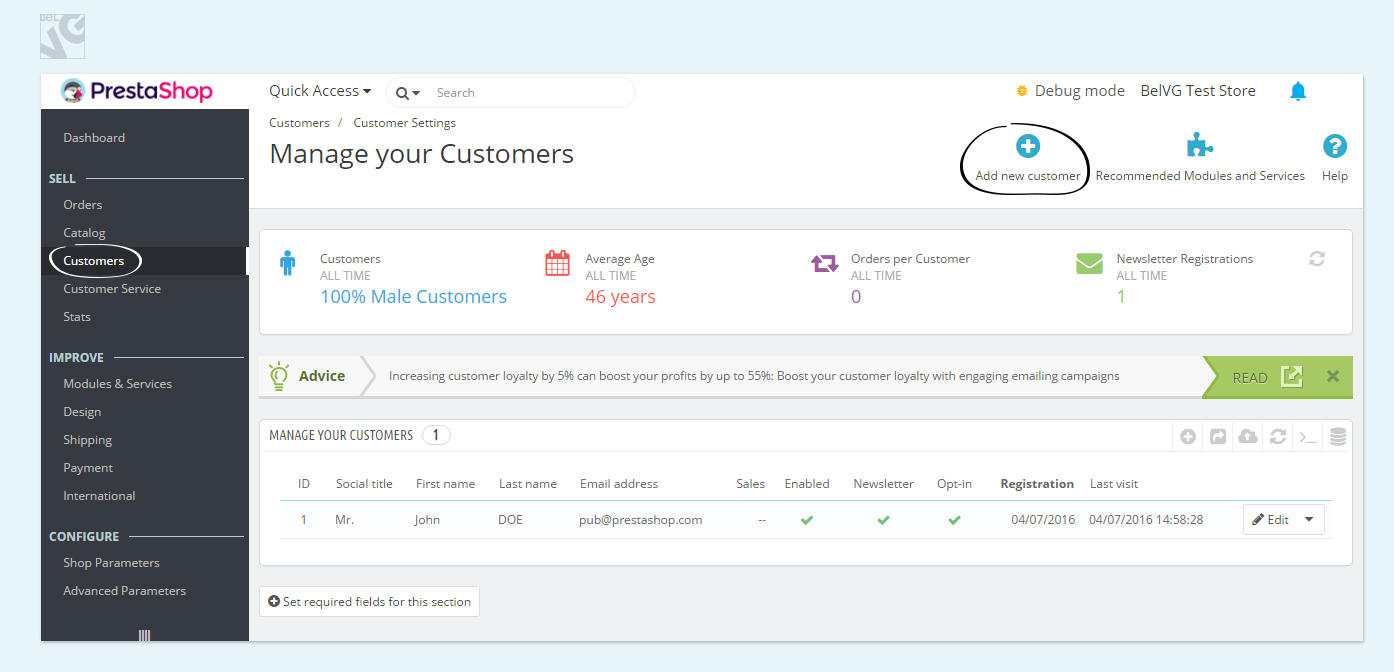
Navigate to SELL => Customers in the admin panel. You will see the list of customers. Click to add a new customer:
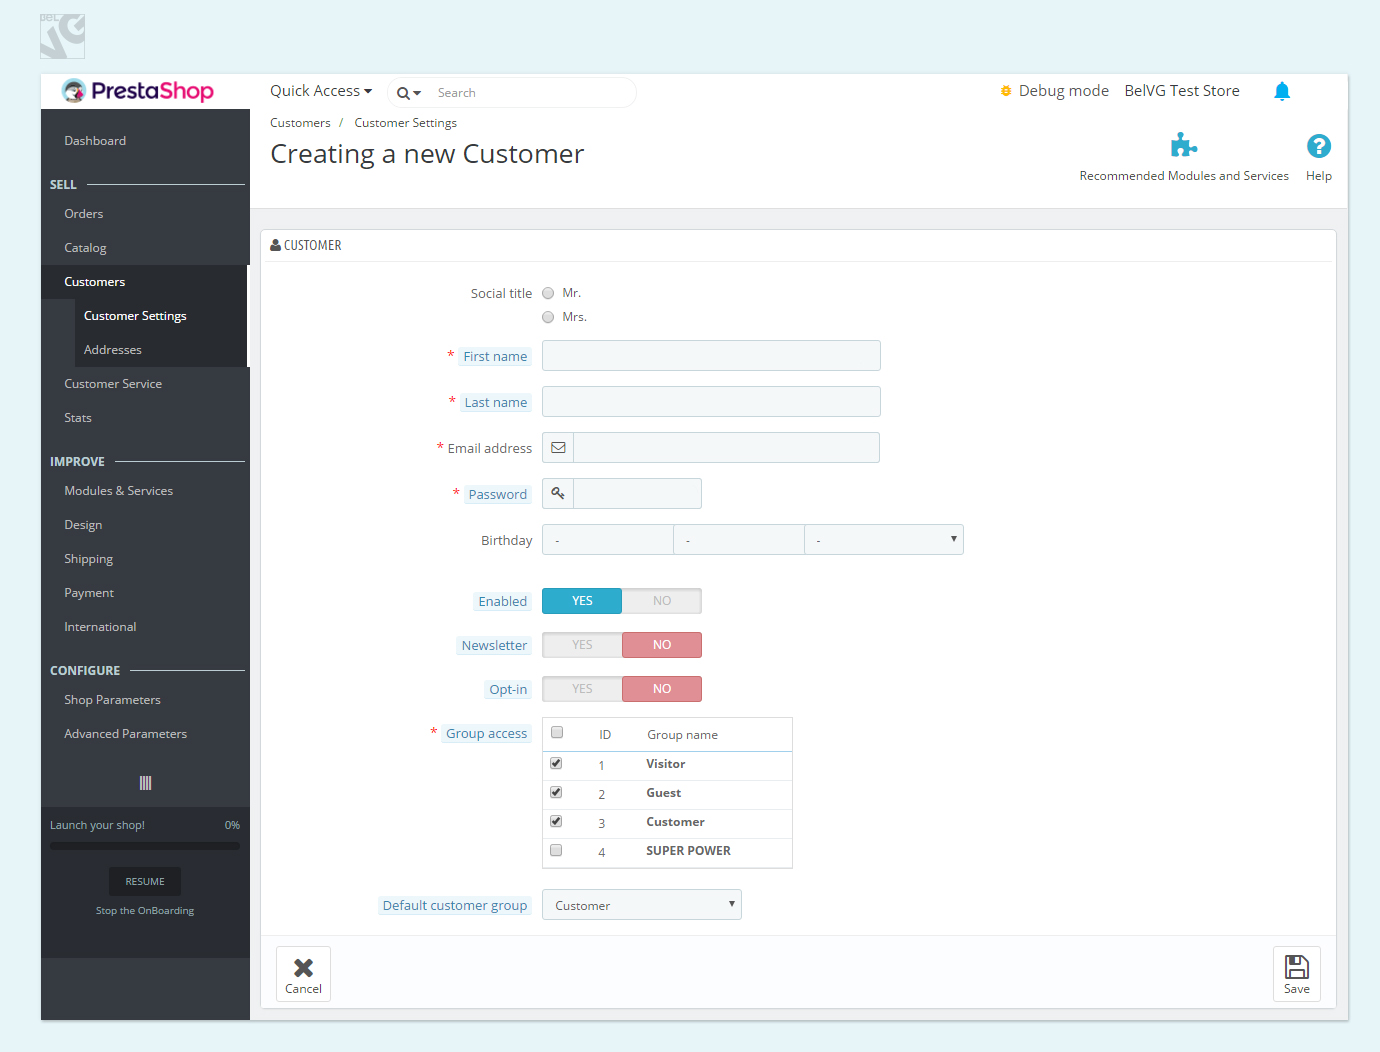
Here you need to enter the following information:
- Select Social title : Mr or Mrs;
- Enter First name, Last name;
- Email address;
- Password;
- Birthday;
- Enable the user;
- Newsletter : select “Yes” if you would like the customer to be subscribed for your newsletter;
- Opt-in : if you select “Yes”, the user will receive adds that you send;
- Group access : select to which groups the customer has access. It may be useful, for example, when setting up discounts;
- Default customer group : if you selected more than 1 customer group in previous section, only the dafault group’s discount will be applied.
Creating a customer group
In order to sort your customers, you can use customer groups. To create a customer group or edit an existing one, navigate to CONFIGURE => Shop Parameters => Customer settings
- Open Groups tab
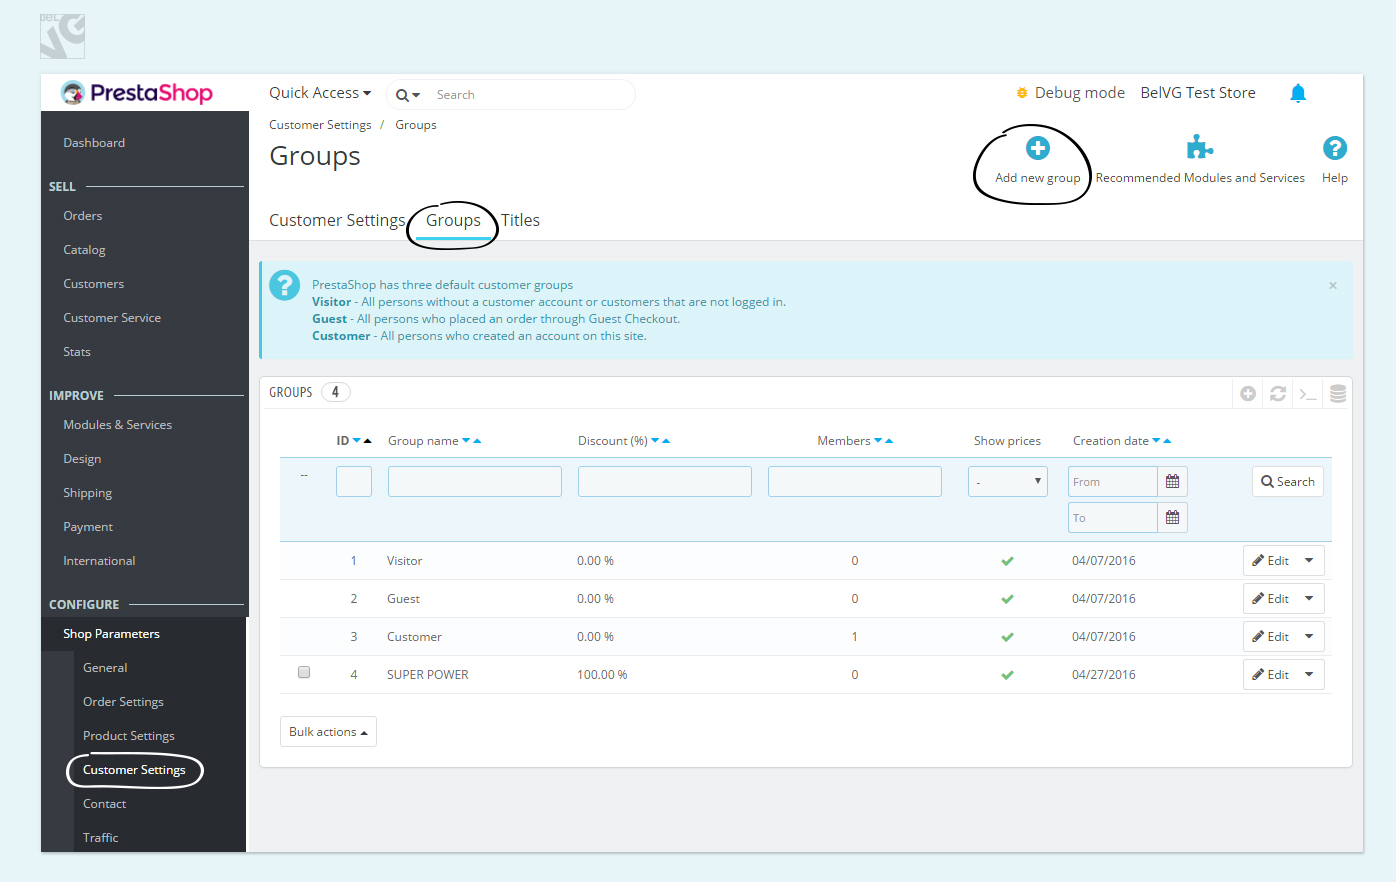
If after the installation you didn’t make any changes, you can see 3 default customer groups:
- Visitor – All persons without a customer account or customers that are not logged in;
- Guest – All persons who placed an order through Guest Checkout;
- Customer – All persons who created an account on this site.
Press Add new group to create a brand new group:
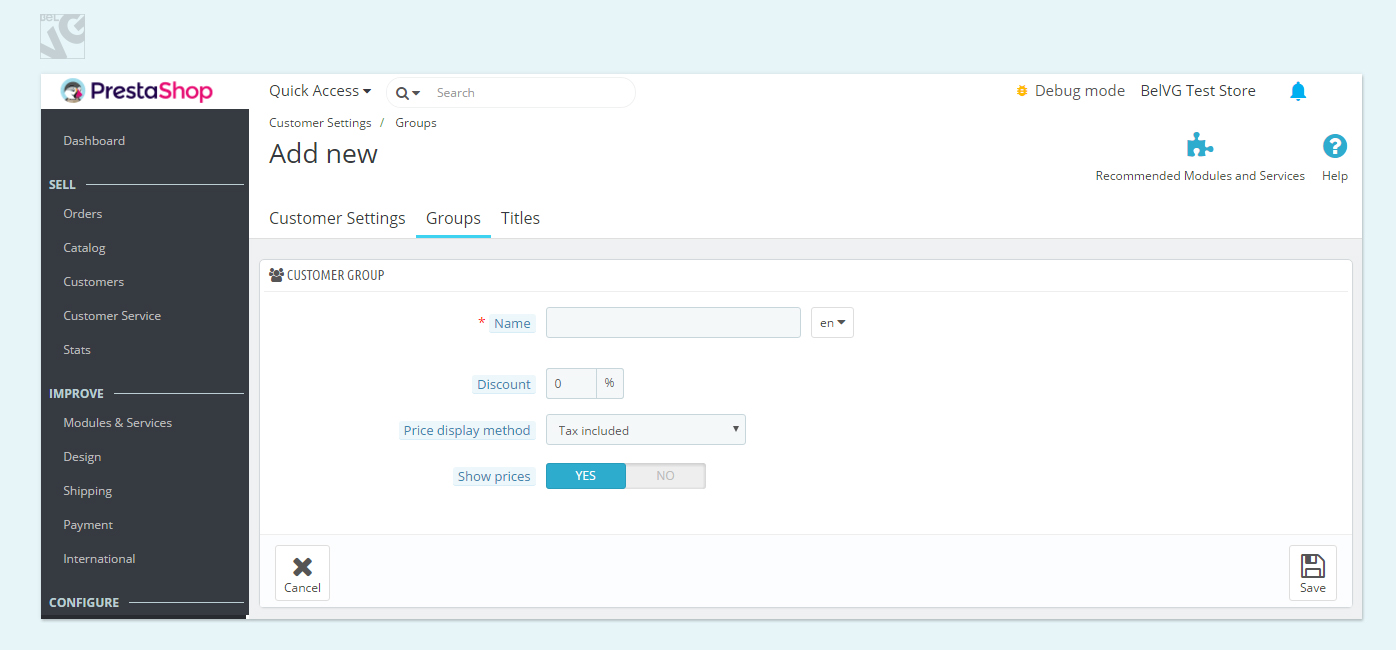
- Enter the name of the group
You can apply a discount for all members of the group right away if you enter the amoung of discount in a corresponding field.

PrestaShop Development
Take your online store to the next level with BelVG PrestaShop Development
Visit the pageDefine whether the tax will be included or not included in the displayed price
You can also hide prices from this group if you select “No” in the fourth line.
How to assign a customer group to an existing customer in PrestaShop 1.7
Navigate to SELL => Customers again.
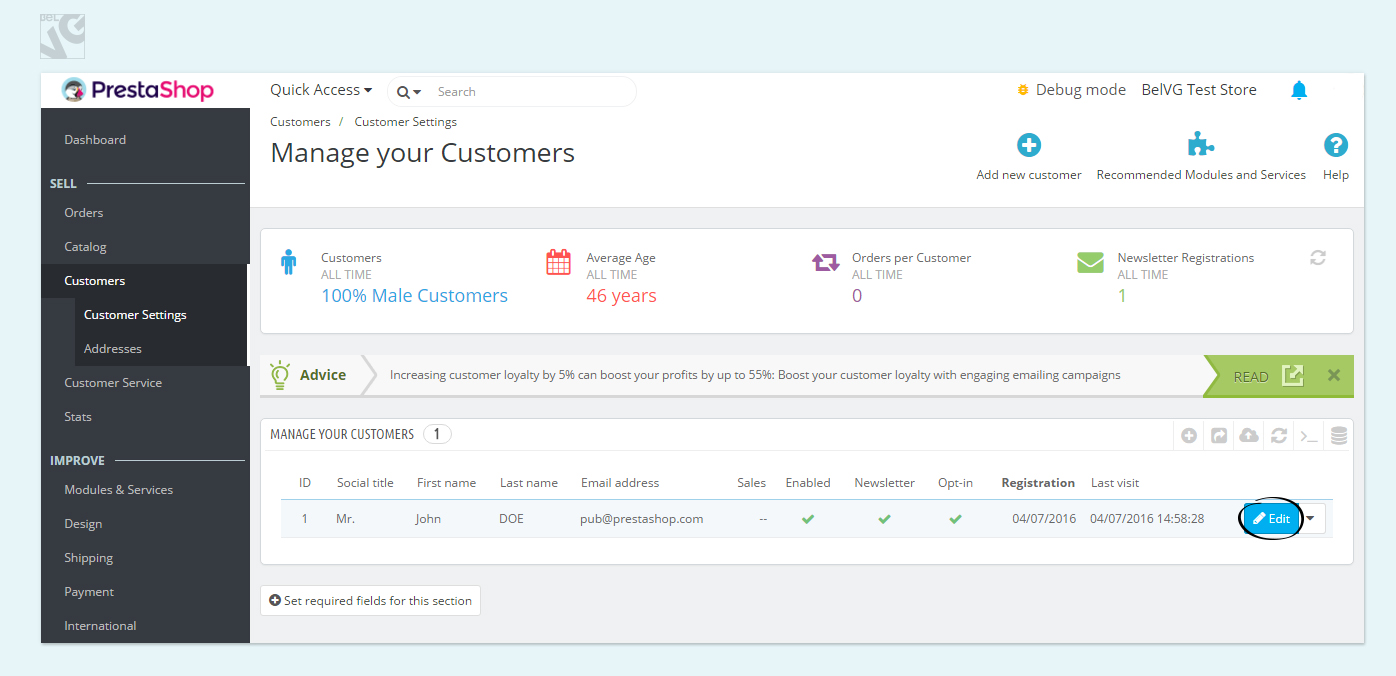
Find a newly created group and assign it to a customer. You can also make the new group default for a customer if you select the group in the Default customer group option.
As you can see, working with customers and customer groups in Prestashop 1.7 isn’t much different from previous versions.
Allow your customers to upload their own product photos with Customer Images Uploader and receive more diverse feedback to your work.

