Magento Store Locator v.2.0 will be extraordinary helpful for owners with several offline stores. The extension grants the customers an ability to search for the stores – by products in the database and by user locations automatic detection. The search results will redirect clients to your regular stores, resellers’ or affiliate companies’ location, shown on Google Maps.
Key features:
- Store search by products in the database and by user location;
- User location is detected automatically;
- Displaying store preview and description in search results;
- All links and map markers transfer to Google Maps;
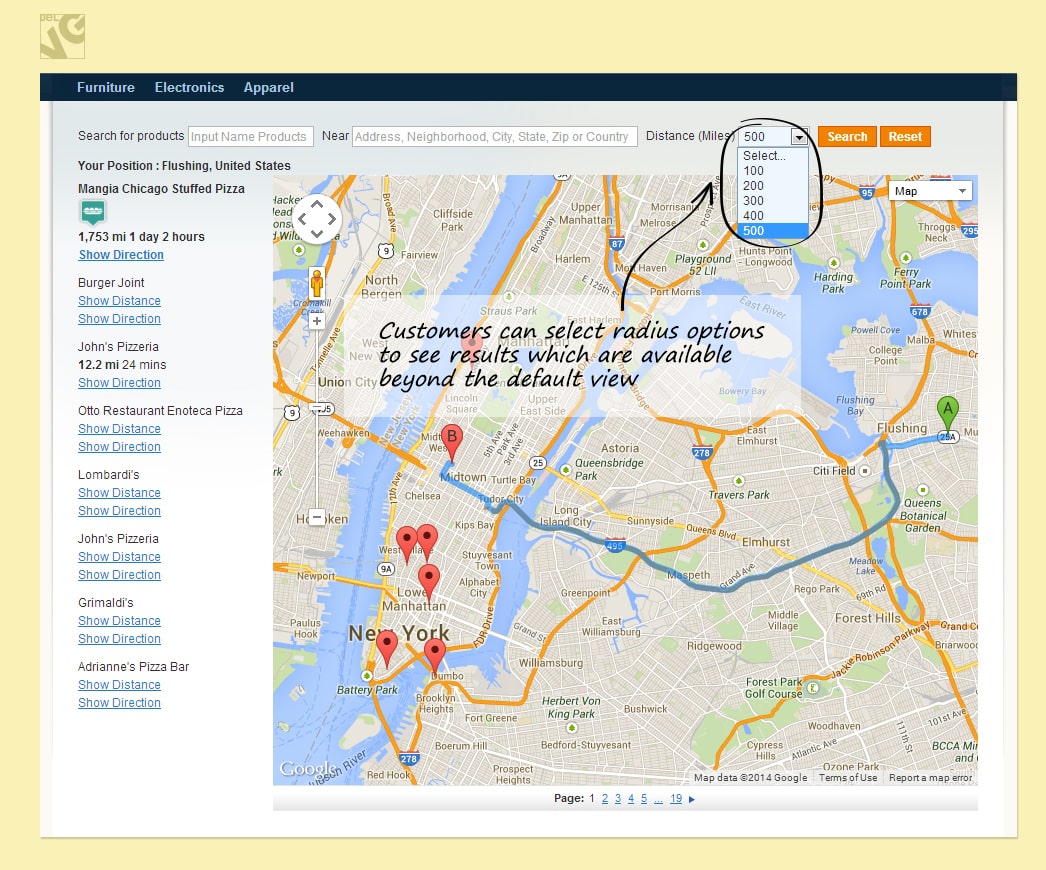
- Set various radius options for customers to select from when looking for the nearest shops in their neighborhood;
- Show exact distance and provide route directions to the selected stores;
- Import all your shops into the module from a CSV file or add them manually;
If you want clients to buy your stuff in offline stores, Magento Store Locator 2.0 extension will assist you very well. When a customer searches your store for a desired product the module will not only provide him with a list of products which match their search criteria, the search results will also be supplied with exact addresses of offline stores where those particular products could be bought and their location would be clearly indicated on Google maps.
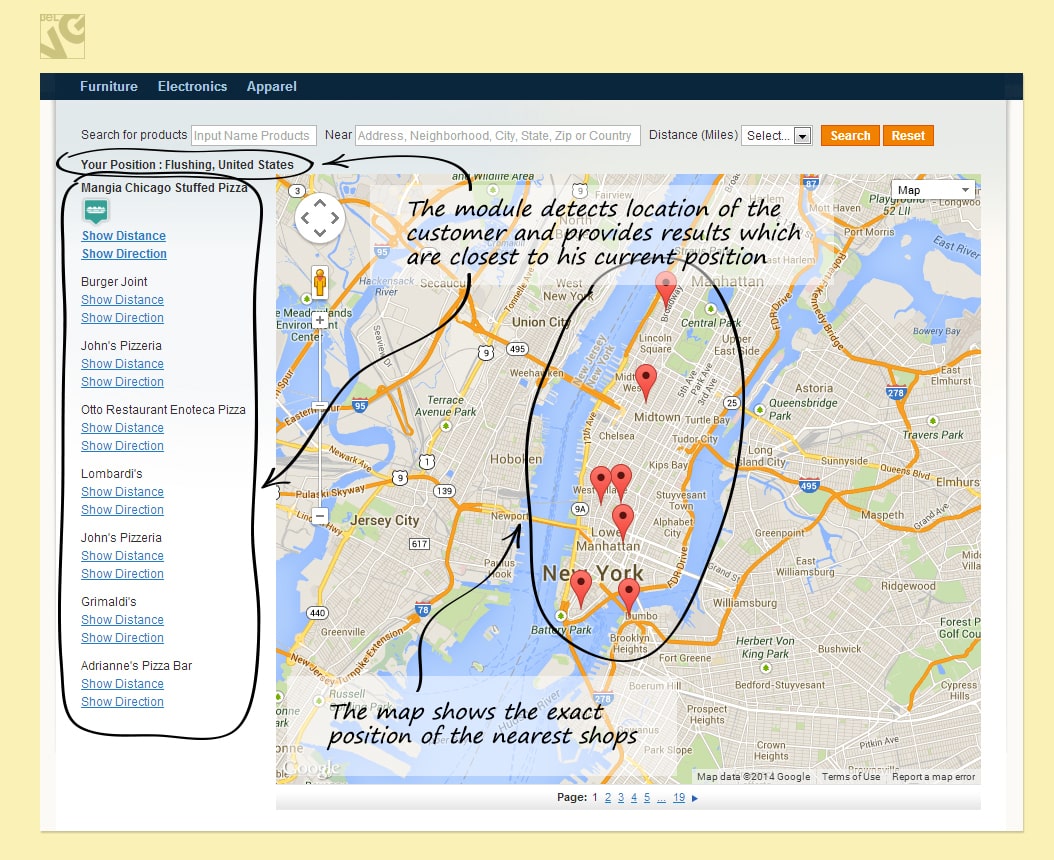
Moreover, the module will automatically detect customer location and in the results will show the stores closest to the customer.
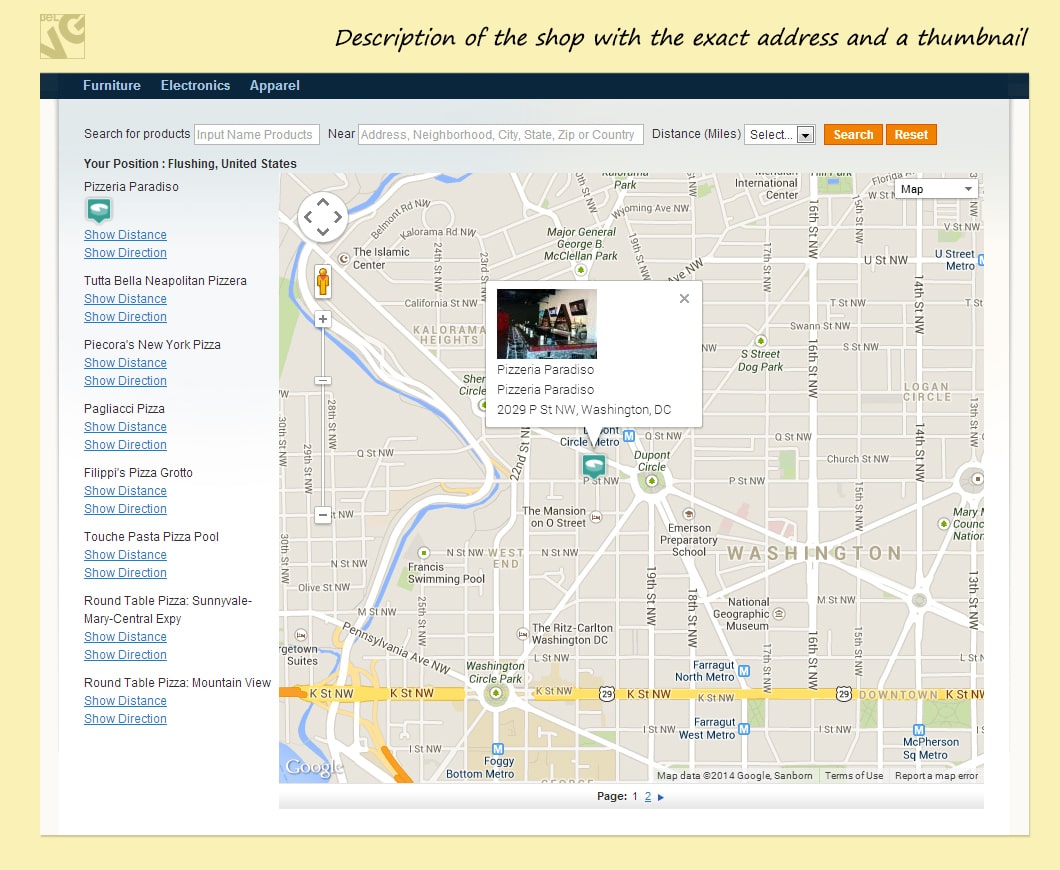
By clicking on location markers on Google maps a customer will be able to see a short description of each store, its exact address and images.
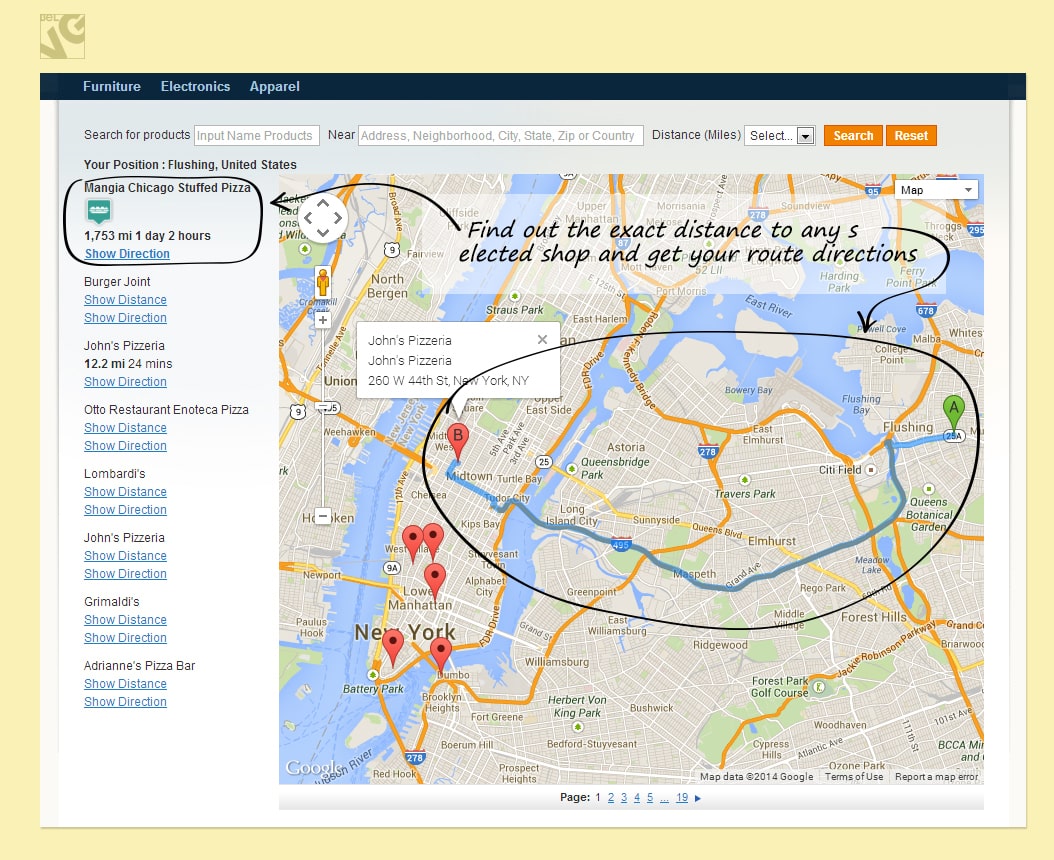
When a customer is ready with his choice, the module will provide him with exact route directions, so he will be able to get to the store in the shortest way.
How to Configure
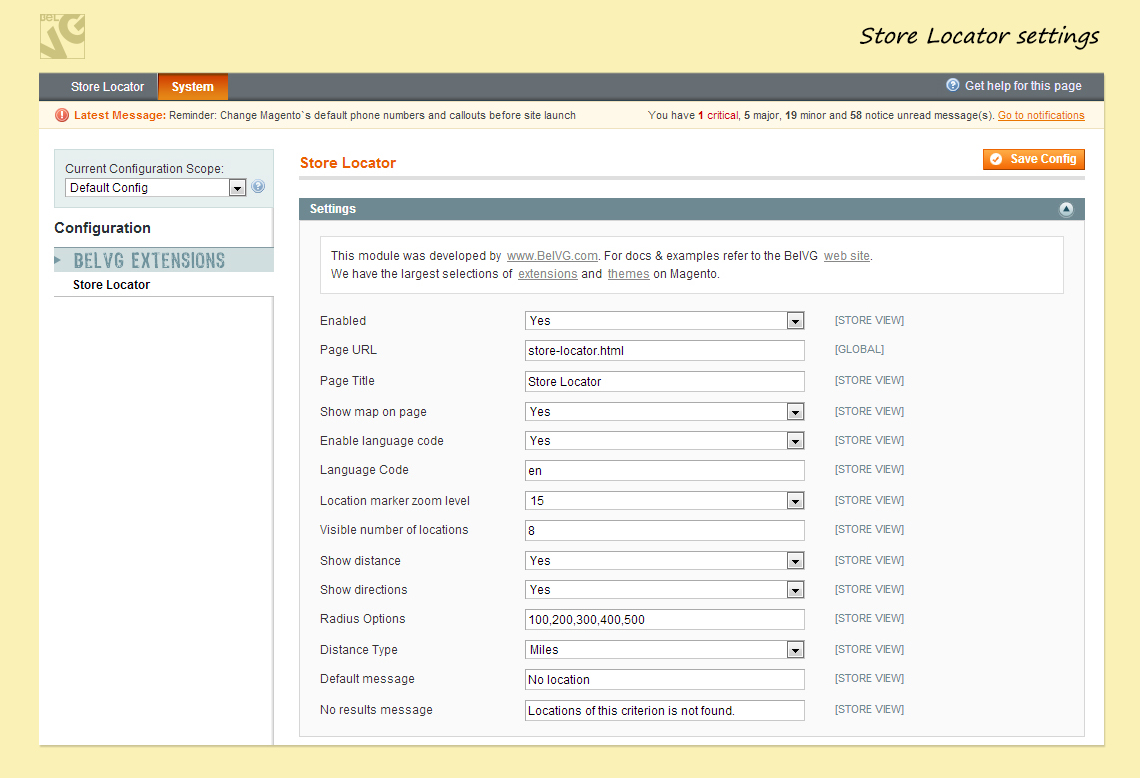
To enable and configure the module log into your Magento administration panel and go to System -> Configuration -> Store Locator.
The default settings include the following configurations:
- Enable – select to enable the module on your web-store;
- Page URL – define URL name for the new map page;
- Page title – specify title for the new map page;
- Show map on page – enable this option if you want map to show up once the results page is loaded. Otherwise the map will be displayed only if you observe a specific product;
- Enable language code – enable this option if you want to assign a specific language for your map. In this case the map will be displayed in this language. Otherwise the results will be provided in English;
- Language code – assign a specific language for your map;
- Google Maps zoom level – define the zoom level which will be applied to all maps by default;
- Location marker zoom level – define the zoom level which will be applied once a customer clicks on a location marker on the map;
- Visible number of locations – specify the number of stores which will be displayed on the map;
- Show directions – this feature allows to provide route directions to any store selected by a customer on the map;
- Show distance – this option allows showing exact distance to the selected store;
- Radius options – provide distance options which your customers will be able to select to search for nearest shops;
- Distance type – specify which measurement units will be applied for showing the distance;
- No results message – enter the message which customers will see if no results are found.
Once you are ready with your configurations click the Save button to apply the settings and make the changes visible on frontend.
How to add new stores into the module?
There are two ways you can use to new add stores into the module:
- Add manually;
- Import from a CSV file.
Adding a new shop manually
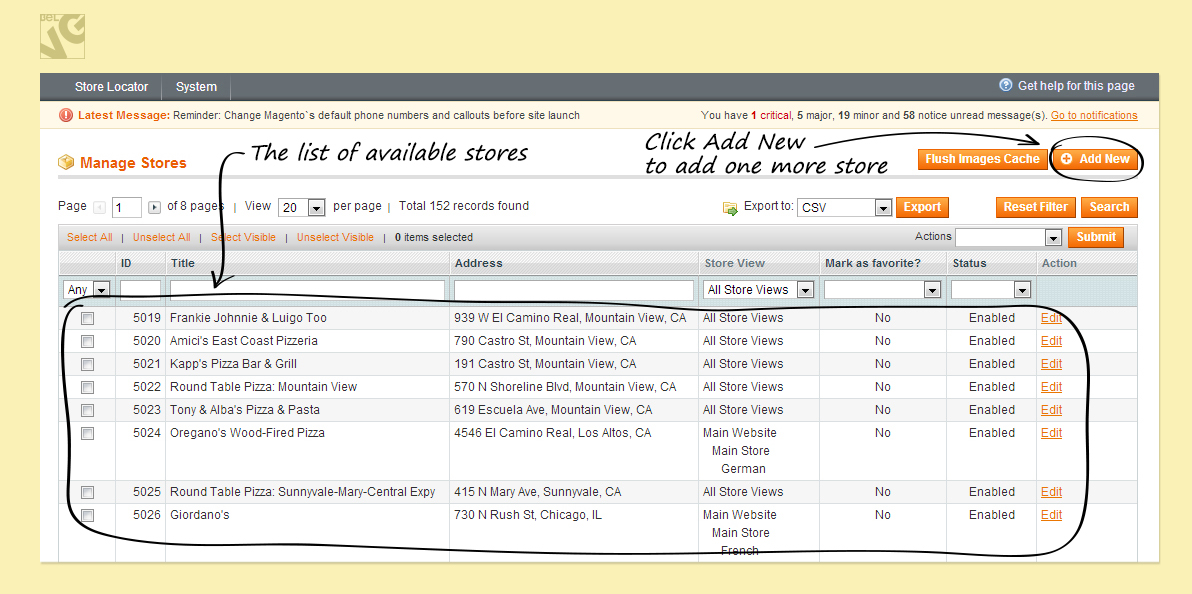
To add a shop manually go to the admin panel and choose Store Locator -> Manage Stores.
There you will see the list of available shops which will show up on your map.
The Flush Images Cache button allows updating your store images. Once you change any image for any store in the list you need to click this button to update images cache and make the new picture visible online.
To add a new store click the Add New button.
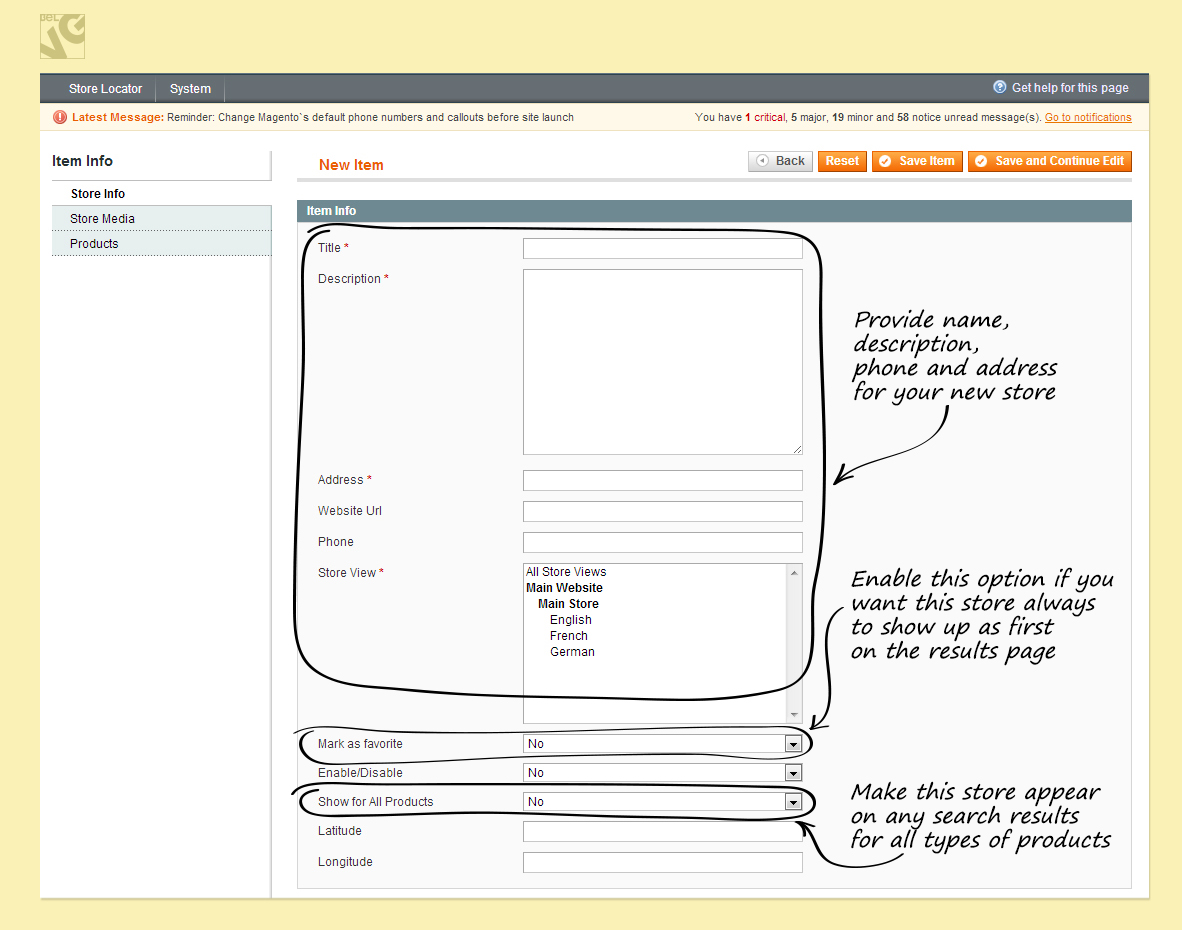
This will open the settings window where you will be able to create a new store and configure its parameters.
The Store Info section offers the following parameters:
- Title – give name for your new shop;
- Description – provide description for your new shop;
- Address – enter shop address;
- Website URL – enter shop web-address;
- Phone – provide shop phone number;
- Store view – select the store view which customers will see when clicking the location marker;
- Product of favorites – if you mark this store as favorite it will always show up as first on the results. Otherwise it will be sorted by distance;
- Enable/disable – switch on/off this store from the map;
- Show for all products – this feature allows including this particular shop into all search results for all types of products;
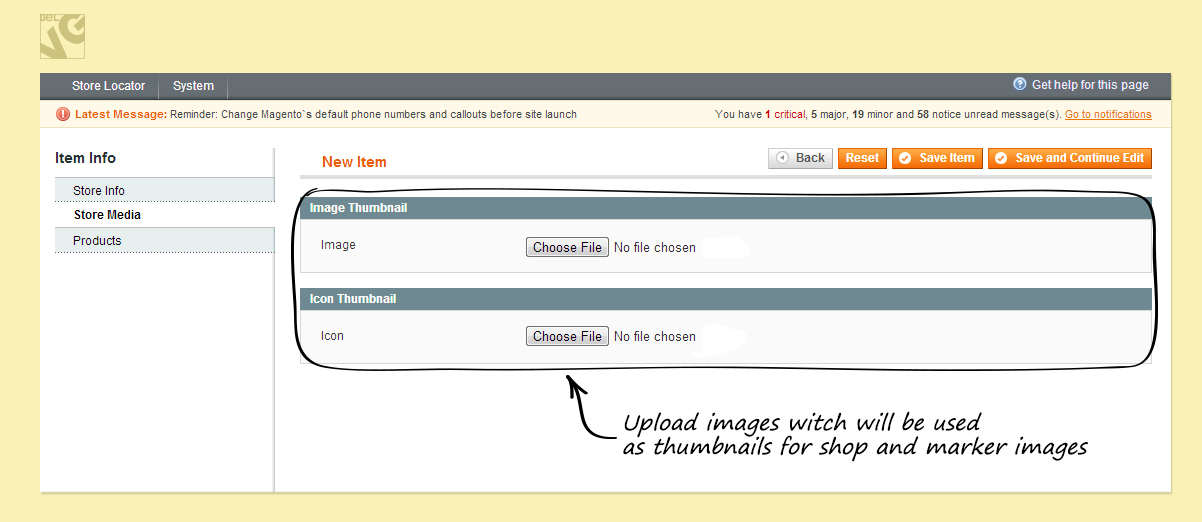
The Store media section:
In this section you can upload images to serve as shop and marker thumbnails.
The Products section:
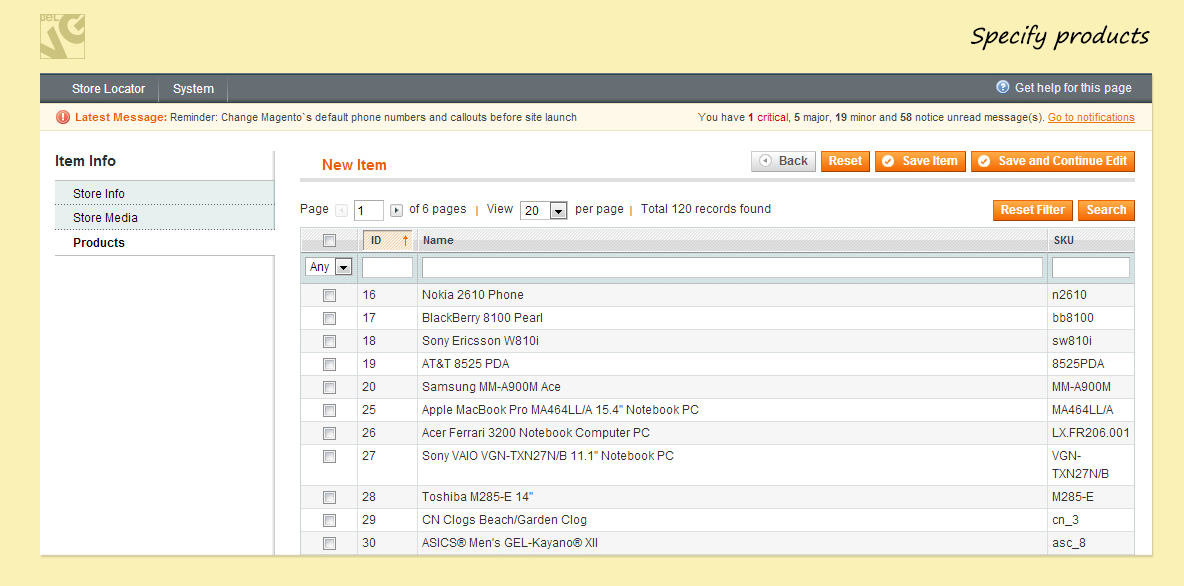
Specify products which will be associated with this particular shop.
Importing shops from a CSV
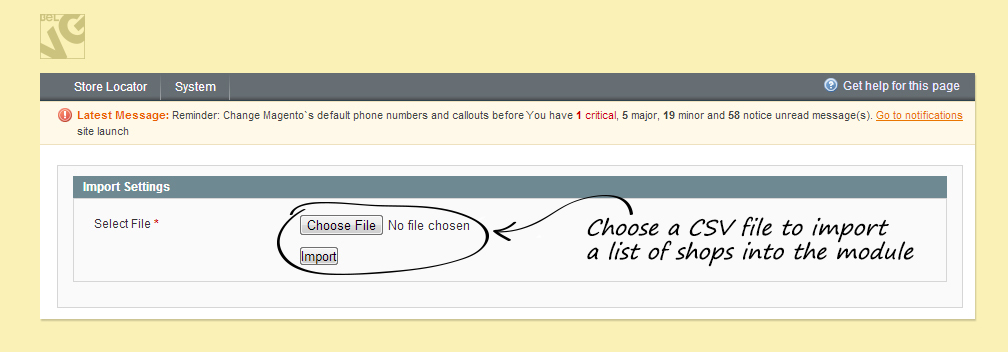
To import shops from a CSV file go to Store Locator -> Import Stores -> select a CSV file and click Import to add a list of shops into the module.
How to Use
Now let’s see how the module works and what features it offers to your customers.
Once a customer makes a search his location is automatically detected and the module provides him with a list of shops in the closest neighborhood with their exact position indicated on Google maps.
Available module features allow customers not only see the exact distance to any shop but even get exact route directions.
If customers are not satisfied with the provided choices they can select a different radius option to see results which are available beyond the default offered view.
Once a customer clicks any location marker he will see a brief description of the shop with the exact address and a thumbnail which you have entered in the module settings.

