 Table of content
Magento 2 Certified Professional Front End Developer Guide
Section 3: Layout XML in Themes
3.1. Demonstrate knowledge of all layout XML directives and their arguments
What layout XML elements exist and what is their purpose?
To connect different components and manage their interactions, Magento 2 uses XML templates and XML configurations for the page.XML template serves to position the containers on the page, as well as set the view and structure options.XML configuration distributes each block separately among the containers and assigns its configurations to each.Below is the example of XML file:1 2 3 4 5 6 7 8 9 10 11 12 13 14 15 16 17 18 19 20 21 22 23 24 25 26 27 28 29 30 31 32 33 34 35 36 37 38 39 40 41 42 43 44 45 46 | <page xmlns:xsi="http://www.w3.org/2001/XMLSchema-instance" layout="2columns-left" xsi:noNamespaceSchemaLocation="urn:magento:framework:View/Layout/etc/page_configuration.xsd"> <body> <referenceContainer name="columns.top"> <container name="category.view.container" htmlTag="div" htmlClass="category-view" after="-"> <block class="Magento\Catalog\Block\Category\View" name="category.image" template="Magento_Catalog::category/image.phtml"/> <block class="Magento\Catalog\Block\Category\View" name="category.description" template="Magento_Catalog::category/description.phtml"/> <block class="Magento\Catalog\Block\Category\View" name="category.cms" template="Magento_Catalog::category/cms.phtml"/> </container> </referenceContainer> <referenceContainer name="content"> <block class="Magento\Catalog\Block\Category\View" name="category.products" template="Magento_Catalog::category/products.phtml"> <block class="Magento\Catalog\Block\Product\ListProduct" name="category.products.list" as="product_list" template="Magento_Catalog::product/list.phtml"> <container name="category.product.list.additional" as="additional" /> <block class="Magento\Framework\View\Element\RendererList" name="category.product.type.details.renderers" as="details.renderers"> <block class="Magento\Framework\View\Element\Template" name="category.product.type.details.renderers.default" as="default"/> </block> <block class="Magento\Catalog\Block\Product\ProductList\Item\Container" name="category.product.addto" as="addto"> <block class="Magento\Catalog\Block\Product\ProductList\Item\AddTo\Compare" name="category.product.addto.compare" as="compare" template="Magento_Catalog::product/list/addto/compare.phtml"/> </block> <block class="Magento\Catalog\Block\Product\ProductList\Toolbar" name="product_list_toolbar" template="Magento_Catalog::product/list/toolbar.phtml"> <block class="Magento\Theme\Block\Html\Pager" name="product_list_toolbar_pager"/> </block> <action method="setToolbarBlockName"> <argument name="name" xsi:type="string">product_list_toolbar</argument> </action> </block> </block> <block class="Magento\Cookie\Block\RequireCookie" name="require-cookie" template="Magento_Cookie::require_cookie.phtml"> <arguments> <argument name="triggers" xsi:type="array"> <item name="compareProductLink" xsi:type="string">.action.tocompare</item> </argument> </arguments> </block> </referenceContainer> <referenceBlock name="page.main.title"> <arguments> <argument name="id" xsi:type="string">page-title-heading</argument> <argument name="add_base_attribute_aria" xsi:type="string">page-title-heading toolbar-amount</argument> </arguments> <block class="Magento\Catalog\Block\Category\Rss\Link" name="rss.link" template="Magento_Catalog::category/rss.phtml"/> </referenceBlock> </body> </page> |
- head;
- header;
- main;
- aside (left or right).
- empty (page without containers);
- 1 column (one container for content);
- 2 column with left bar (container for content and a left sidebar);
- 2 column with right bar (container for content and a right sidebar);
- 3 column (3 containers optionally).
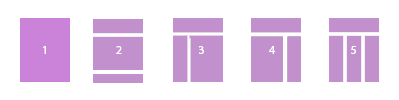 The highlighted elements at the picture above are the containers in which we can insert any blocks we wish. The placement of blocks within itself is the main distinguishing feature of the
 1 2 3 4 5 6 7 8 9 10 11 | <page xmlns:xsi="http://www.w3.org/2001/XMLSchema-instance" layout="2columns-left" xsi:noNamespaceSchemaLocation="urn:magento:framework:View/Layout/etc/page_configuration.xsd"> <body> <referenceBlock name="page.main.title"> <arguments> <argument name="id" xsi:type="string">page-title-heading</argument> <argument name="add_base_attribute_aria" xsi:type="string">page-title-heading toolbar-amount</argument> </arguments> <block class="Magento\Catalog\Block\Category\Rss\Link" name="rss.link" template="Magento_Catalog::category/rss.phtml"/> </referenceBlock> </body> </page> |
| Attribute | Value | Description |
| name | 0-9, A-Z, a-z и (-)(_)(.)*Should begin with a lettername=”current_name” | A unique name for addressing is recorded. |
| before | (-) displays the element before all in the current block or container(element name) element display before the element with the specified name() when the parameter is absent, the element is considered not positioned and is displayed in the order set by the current templatebefore=”-” | Applied to position elements inside the page template or inside the container itself. |
| after | (-) element display after all in the current block or container(element name) element display after the element with the specified name() when the parameter is absent, the element is considered not positioned and is displayed in the order set by the current templateafter=”target_elemement” | Applied to position elements inside the page template or inside the container itself.Has priority over before. |
| as | 0-9, A-Z, a-z и (-)(_)(.)*Should begin with a letter\name=”current_allias” | The set name serves to identify the current element in the parent. |
| cacheable | true, falsecacheable=”false” | Enables and disables the caching of the pages which contain elements with the current attribute; the attribute is necessary for creation of the dynamic elements, widgets and pages. |
| Attribute | Value | Description |
| output | 0 / 1 or true / falseoutput=”1” | Is set to determine whether it is necessary to render the parent container, which contains a false element by default. |
| HtmlTag | Html 5 tags (aside, main, div …)HtmlTag=”div” | Everything that is inside the container will be displayed to the user inside the specified tag. |
| htmlId | 0-9, A-Z, a-z и (-)(_)(.)*Functions only when the HtmlTag value is sethtmlId=”current_id_name” | html Id selector is set for the specified wrap. |
| htmlClass | 0-9, A-Z, a-z и (-)(_)(.)*Functions only when the HtmlTag value is sethtmlClass=”current_class_name” | html class selector is set for the specified wrap. |
| label | Any value | A voluntary container name is set for display in the browser. |
| layout | The name value of the page layout templatelayout=”grid_name” | It is written to indicate an explicit indication of the applicable template grid for the current layout. |
| Attribute | Value | Description |
| class | The path to the class and the class name:class=”Vendor\Folder_Name\Block\Class_Folder\Class_Name” | The path to the class that is responsible for processing information for the current block of the template is indicated. It is applied to indicate its handler for a new element or to overwrite the current handler for a program block with a user one. |
| template | The path to the template and the template name:template=”Vendor_Name::folder_template/name_template.phtml” | Specified the path to the template, which is responsible for rendering the information for the current layout block. It is applied to specify a template for the new element or override the default template for the user one. |
What is the purpose of the attributes that are available on blocks and other elements?
An additional tool for working with layout XML files and page configurations in Magento 2 are the so-called instructions, which can be attributes of elements or new elements. These include the| Attribute | Value | Description |
| name | The name of the destination block or container | Specified the name of the block or container to which the instructions will be passed. |
| remove | true/false | Removes or cancels removal of the current block or container. When a container is removed, all child elements are deleted as well. |
| display | true/false | Turns on or off the rendering off on the page of the current container or block. When an element is disabled, the further possibility of configuring it and its child elements remains. |
1 2 3 | <layout xmlns:xsi="http://www.w3.org/2001/XMLSchema-instance" xsi:noNamespaceSchemaLocation="urn:magento:framework:View/Layout/etc/page_layout.xsd"> <move element="category.cms" destination="page.wrapper" after="category.view.container"/> </layout> |
1 2 3 4 5 | <page xmlns:xsi="http://www.w3.org/2001/XMLSchema-instance" layout="2columns-left" xsi:noNamespaceSchemaLocation="urn:magento:framework:View/Layout/etc/page_configuration.xsd" > <body> <move element="page.main.title" destination="main" before="-"/> </body> </page> |


- element – the name of the target element for passing the instruction;
- destination – the name of the parent element that will perform the moving;
- as – an alias name for the element; set after the element is moved;
- after/before – used for positioning inside the target parent element.
1 2 3 4 5 | <layout xmlns:xsi="http://www.w3.org/2001/XMLSchema-instance" xsi:noNamespaceSchemaLocation="urn:magento:framework:View/Layout/etc/page_layout.xsd"> <head> <remove src="css/style-m.css"/> </head> </layout> |
1 2 3 4 5 6 7 8 9 10 11 12 13 14 | <page xmlns:xsi="http://www.w3.org/2001/XMLSchema-instance" xsi:noNamespaceSchemaLocation="urn:magento:framework:View/Layout/etc/page_configuration.xsd"> <body> <referenceContainer name="page.wrapper"> <!--rev slider--> <container name="page.index.slider.container" htmlTag="div" htmlClass="page-slider-container" before="main.content"> <block class="Nwdthemes\Revslider\Block\Revslider"> <arguments> <argument name="alias" xsi:type="string">Midleton</argument> </arguments> </block> </container> </referenceContainer> </body> </page> |
1 2 3 4 5 6 7 | <page xmlns:xsi="http://www.w3.org/2001/XMLSchema-instance" xsi:noNamespaceSchemaLocation="urn:magento:framework:View/Layout/etc/page_configuration.xsd"> <body> <update handle="{name_of_handle_to_include}"/> <!-- CONTENT --> </body> </page> |
- string;
- boolean;
- object;
- number;
- null;
- array.
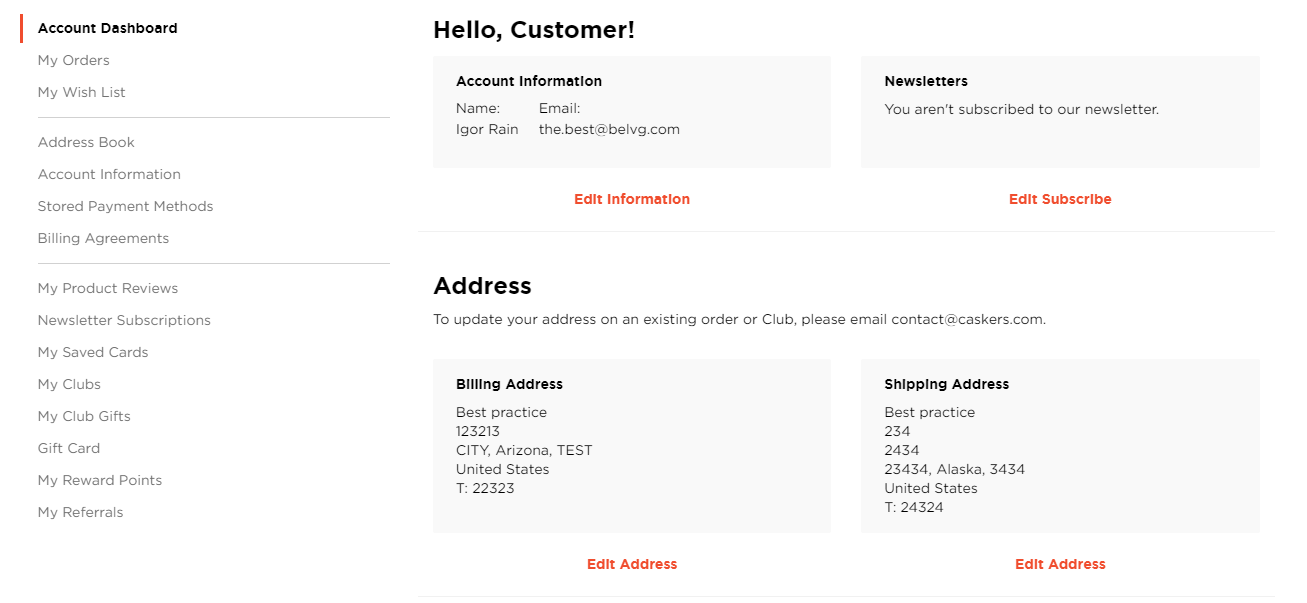
1 2 3 4 5 | <referenceBlock name="page.main.title"> <action method="setPageTitle"> <argument translate="true" name="title" xsi:type="string">Hello, Customer!</argument> </action> </referenceBlock> |
 Also, the passed values can be obtained from the current template file using get() method. This functionality perfectly corresponds to the modularity principle in Magento. Using it, you can create a universal but dynamic template and use it in several places in our store, just like with the example of a universal layout with connecting a slider on pages, using the update method inheritance.As an example, consider the creation of a template with a button rendering and any functionality on the client. The dynamism will lie in the fact that on different pages we will use the same template, but depending on the requirements, in the page template file, we can pass a css class to it, to which some style from the stylesheet can be attached or even a functional load implemented on js. In the markup, it will look the following way:
1 2 3 4 5 | <block class=”Magento\Framework\View\Element\Template" name="button" template="Magento_Theme::buttons/dynamic_button.phtml" > </arguments> </block> |
1 2 3 4 5 | $_className = $block->getCssClass(); <div class="actions-toolbar $_className ?>"> <button class="action primary">Button</button> </div> |
Example of the method for getting the argument, passed from the template
Then, depending on the logic we set, the button can take different modifications from page to page; in this example, it is white. In fact, this is the simplest example of using this functionality, which is necessary to familiarize yourself with the principle of its operation. If we limit ourselves only to our imagination, then applying the method of passing arguments, you can do many things, up to passing an argument that will determine the controller for processing our template.Arguments can be different and have different names, and you can pass not only a string, but, as previously stated, 6 basic data types. In order to get the attributes in the template, the function takes the following form:
getCssClass();The name parameter passed in xml in the form of “css_class” takes the form of CamelCase and looks like “СssClass”. This method is similar to the method of passing arguments using data attributes, applied in JavaScript.3.2. Describe page layouts and their inheritance
How can the page layout be specified?
To select a page layout for a certain page, log in to the admin panel and navigate at the following path for the settings:Content ⇒ Pages ⇒ Target_Page_Edit ⇒ Design ⇒ Layout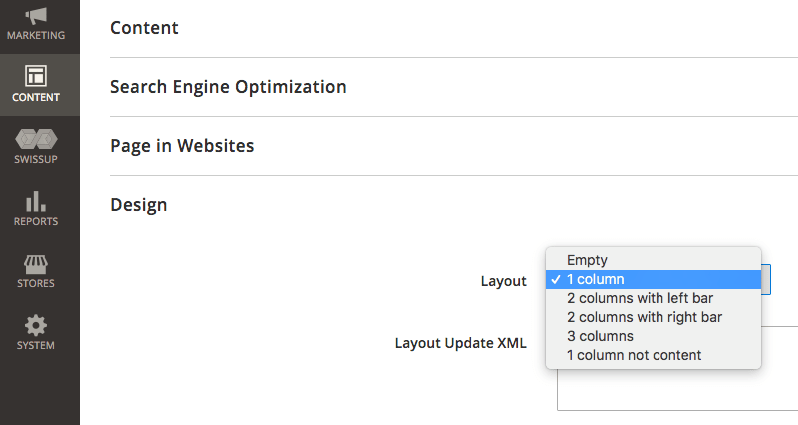 Another way to change the page layout is by applying an XML layout of the target page. For this, we can use a special layout attribute for
 1 2 3 4 5 6 | xml version="1.0"?> <page xmlns:xsi="http://www.w3.org/2001/XMLSchema-instance" layout="1column" xsi:noNamespaceSchemaLocation="urn:magento:framework:View/Layout/etc/page_configuration.xsd"> <body> // Page layout handles // </body> </page> |
What is the purpose of page layouts?
The main purpose of page layouts is to create a structured and united set of template layouts for the page display.If we apply any of the standard layouts to the main page of the default Luma theme, we get the following results:


1 2 3 4 5 6 7 8 9 10 | xml version="1.0"?> <layout xmlns:xsi="http://www.w3.org/2001/XMLSchema-instance" xsi:noNamespaceSchemaLocation="urn:magento:framework:View/Layout/etc/page_layout.xsd"> <update handle="empty"/> <referenceContainer name="page.wrapper"> <container name="checkout.header.container" as="checkout_header_container" label="Checkout Page Header Container" htmlTag="header" htmlClass="page-header" before="main.content"> <container name="checkout.header.wrapper" label="Checkout Page Header" as="checkout_header_wrapper" htmlTag="div" htmlClass="header content"/> </container> </referenceContainer> <move element="logo" destination="checkout.header.wrapper"/> </layout> |
How can a custom page layout be created?
By default, the standard layout files are located at the following path:vendor ⇒ magento ⇒ module-theme ⇒ view ⇒ frontend ⇒ page_layoutHere stored the layout files that we examined above:

1 2 3 4 5 6 7 8 9 10 | xml version="1.0"?> <layout xmlns:xsi="http://www.w3.org/2001/XMLSchema-instance" xsi:noNamespaceSchemaLocation="urn:magento:framework:View/Layout/etc/page_layout.xsd"> <update handle="2columns-left"/> <referenceContainer name="page.wrapper"> <referenceBlock name="breadcrumbs" remove="true"/> </referenceContainer> <referenceContainer name="columns"> <referenceContainer name="div.sidebar.main" remove="true"/> </referenceContainer> </layout> |
